
Indoor Cannabis Growing
Total environmental control, year-round harvests, and premium-quality buds — why indoor growing remains the gold standard for cannabis cultivation.
Key Takeaways
Total environmental control, year-round harvests, and premium-quality buds — why indoor growing remains the gold standard for cannabis cultivation.
- Why Grow Indoors?
- Choosing a Grow Space
- Lighting: LED vs. HPS vs. CMH
- Ventilation & Carbon Filters
1. Why Grow Indoors?
Indoor cannabis cultivation gives you something outdoor growing never can: complete environmental control. You dictate the temperature, humidity, light intensity, light schedule, CO2 levels, and nutrient delivery. This means you can grow any strain, any time of year, regardless of your climate or season.
Indoor buds consistently win cannabis cups and command premium prices because controlled environments produce denser buds, higher trichome coverage, and more pronounced terpene profiles. When you eliminate wind damage, rain, pests, and UV degradation, the plant can dedicate all its energy to flower production.
The tradeoff is cost. Indoor growing requires an upfront investment in lighting, ventilation, and growing supplies. Electricity costs add up over a 3–4 month grow cycle. However, for most home growers, the cost per gram of top-shelf indoor flower is still a fraction of dispensary prices — typically $1–3 per gram versus $8–15+ retail.
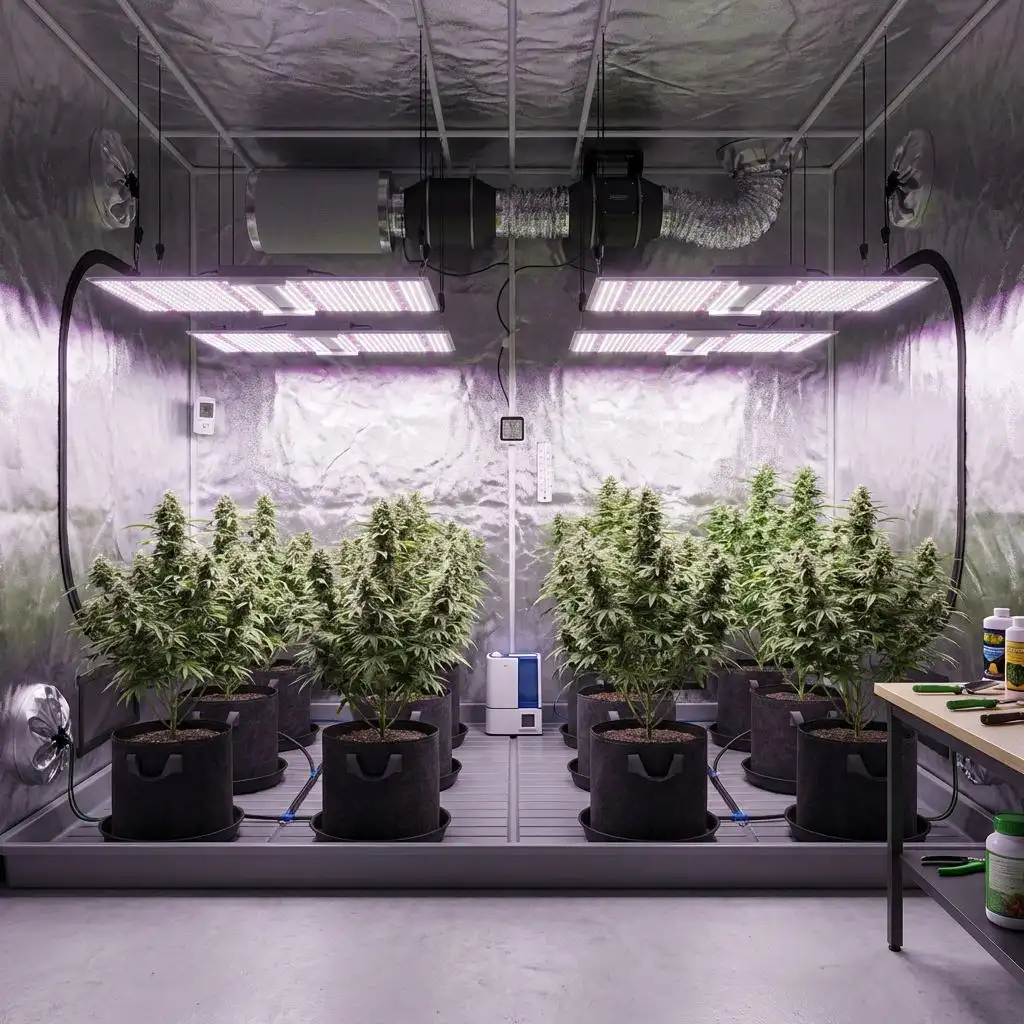
2. Choosing a Grow Space

Your grow space can be anything from a 2×2 ft closet to a dedicated room. The key requirements are: you can control light (make it completely dark during lights-off), maintain temperature, provide fresh air exchange, and access your plants for maintenance.
For beginners, a grow tent is the best option. Tents range from 2×2 ft (1 plant) to 5×5 ft (4–6 plants) and come with built-in reflective lining, ports for ducting and cables, and light-proof zippers. A quality 4×4 ft tent costs $80–150 and fits perfectly in a spare closet, garage corner, or basement. They're easy to set up, keep odor contained, and can be taken down if needed.
If you're converting a closet or room, line the walls with flat white paint (90–95% reflective) or Mylar sheeting. Avoid glossy surfaces or aluminum foil, which create hot spots. Ensure you have at minimum one electrical outlet capable of handling your lighting load, and plan your ducting route for exhaust before you start building out the space.
| Tent Size | Plant Count | Light Needed | Best For |
|---|---|---|---|
| 2×2 ft (60×60 cm) | 1–2 plants | 100–150W LED | Micro grows, single-plant learning |
| 3×3 ft (90×90 cm) | 2–4 plants | 200–300W LED | Personal use, great starter size |
| 4×4 ft (120×120 cm) | 4–6 plants | 400–500W LED | Most popular — balances yield and cost |
| 5×5 ft (150×150 cm) | 6–9 plants | 600–800W LED | Serious hobbyist, high yield |
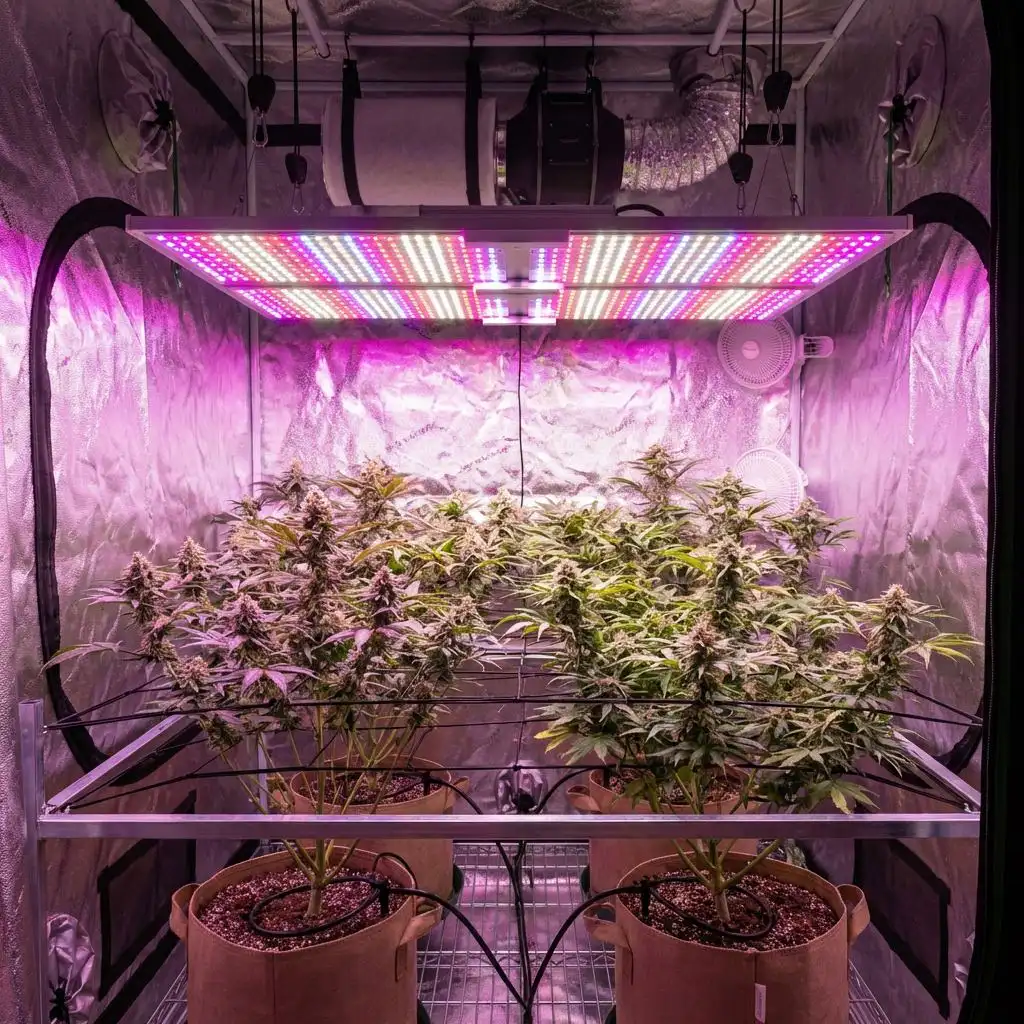
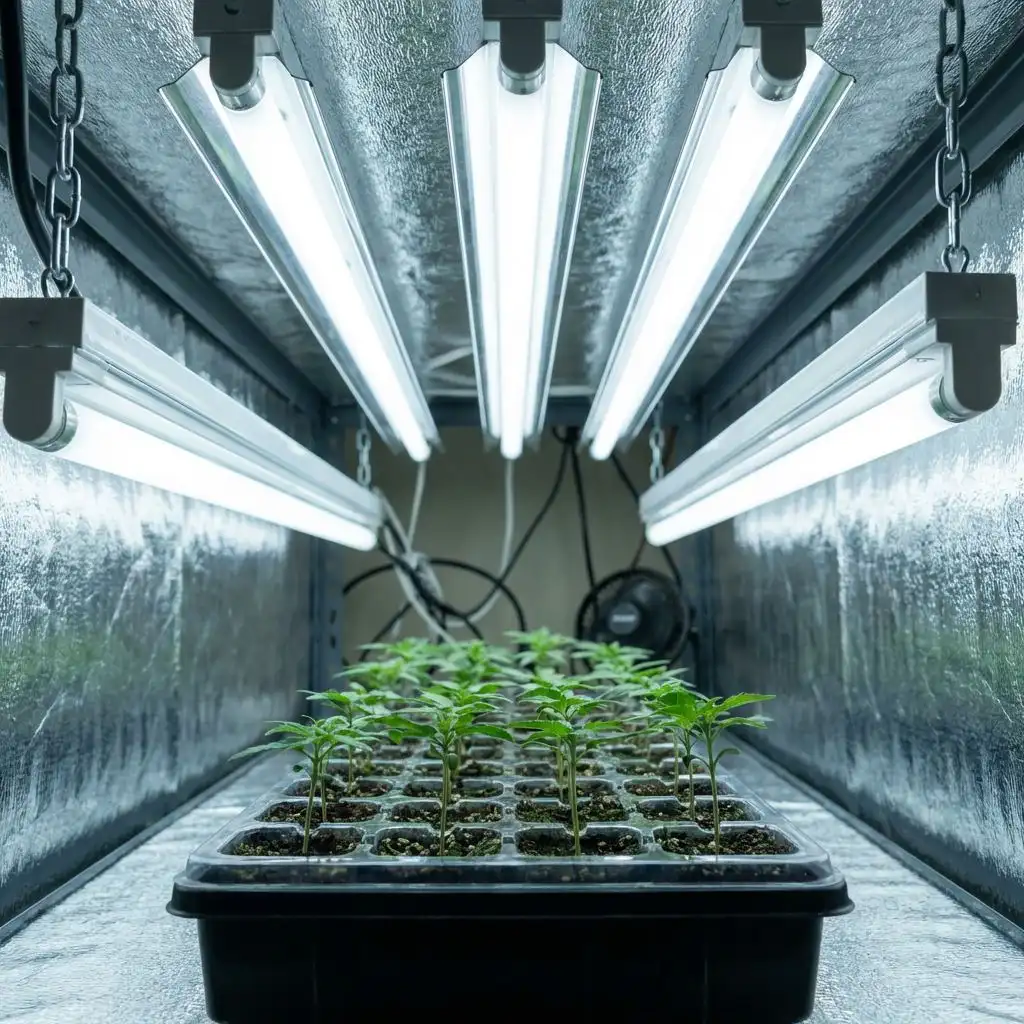
3. Lighting: LED vs. HPS vs. CMH
Lighting is the single most important piece of equipment in your grow room. Cannabis needs intense, full-spectrum light to produce dense, potent buds. The three main options are LED, HPS (High Pressure Sodium), and CMH (Ceramic Metal Halide).
LED (Light Emitting Diode) is now the dominant technology for good reason. Modern full-spectrum white LEDs (Samsung LM301B/H diodes are the gold standard) deliver 2.5–3.0 umol/J efficiency — meaning more light per watt of electricity. They run cooler than HID lights, reducing cooling costs and allowing you to place them closer to plants. A quality 400W LED replaces a 600W HPS while using 35% less electricity and generating far less heat. Top brands include HLG, Spider Farmer, and Mars Hydro.
HPS was the industry standard for decades and still produces excellent results. A 600W HPS covers a 4×4 ft space effectively and delivers a warm spectrum that plants love during flower. The downsides are heat output (requires more cooling), higher electricity consumption, and bulb replacement every 12–18 months. However, HPS fixtures are cheap ($100–150) and proven.
CMH (315W or 630W) offers a more natural, broad-spectrum light that many growers report enhances terpene production. CMH bulbs produce excellent color rendering, making it easier to spot plant health issues. They're a middle ground between LED efficiency and HPS proven performance, though the fixture cost is higher than HPS.
| Light Type | Efficiency | Heat | Cost (4×4 setup) | Lifespan |
|---|---|---|---|---|
| LED (full spectrum) | 2.5–3.0 umol/J | Low | $300–600 | 50,000+ hours |
| HPS 600W | 1.7 umol/J | High | $100–200 + ballast | 12–18 months/bulb |
| CMH 315W | 1.9 umol/J | Medium | $200–350 | 20,000 hours |
4. Ventilation & Carbon Filters
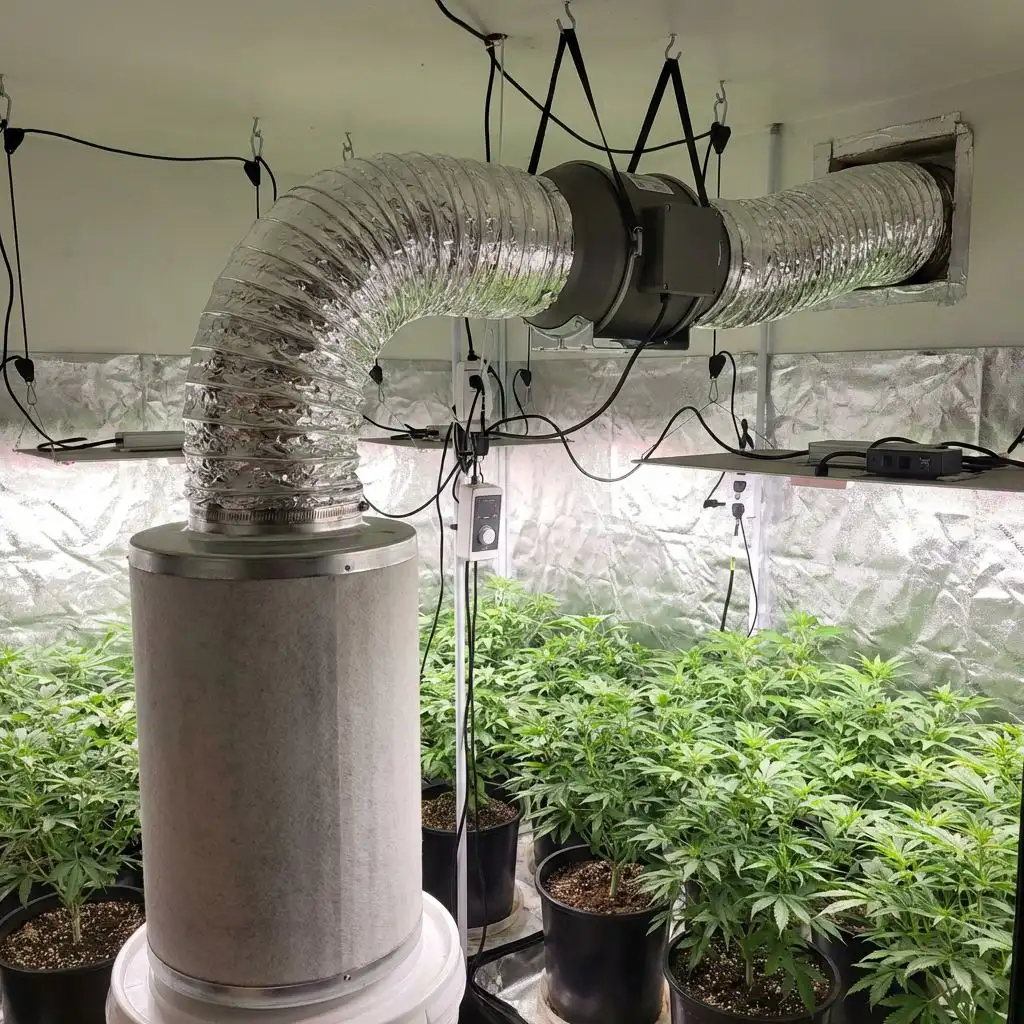
Proper airflow serves three critical functions: temperature control, humidity management, and odor elimination. Cannabis in full flower produces an intense smell that can permeate an entire house — a carbon filter is not optional if discretion matters.
The core ventilation system consists of an inline exhaust fan connected to a carbon filter inside the tent, ducted to exhaust outside the grow space. The fan pulls air through the carbon filter (scrubbing odor), through the ductwork, and out. This creates negative pressure inside the tent — when you unzip the door, air should rush in, not out. Negative pressure ensures all air exits through the filter.
Size your exhaust fan for your tent volume. Calculate cubic feet (L × W × H), then choose a fan rated to exchange that volume at least once per minute. For a 4×4×7 ft tent (112 cubic feet), a 4-inch inline fan rated at 200+ CFM is sufficient. Add a fan speed controller — you rarely need full power, and running the fan at lower speeds dramatically reduces noise. Pair the exhaust with oscillating fans inside the tent (one per plant minimum) to strengthen stems and prevent microclimates.
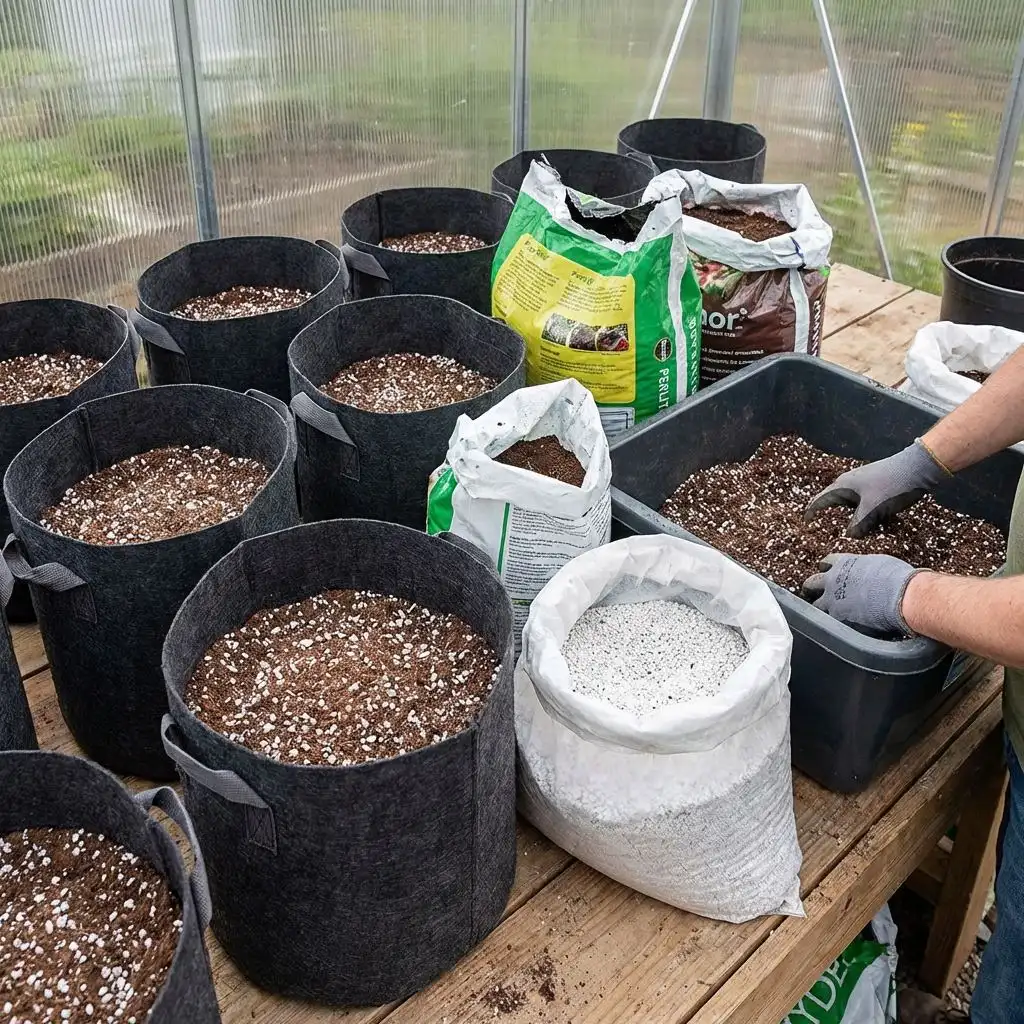
5. Growing Medium Options
What you grow in affects watering frequency, nutrient delivery, root oxygenation, and overall ease of growing. Each medium has a learning curve, but all can produce excellent results.
- Soil (potting mix): The most forgiving medium for beginners. Good soil buffers pH fluctuations and provides some base nutrition. Use a high-quality cannabis-specific soil or mix your own with peat moss, perlite (30%), and compost. Water every 2–4 days. Great flavor profiles in the final product.
- Coco coir: A hydroponic medium made from coconut husks. Provides excellent root aeration and faster growth than soil (10–15% faster in veg). Requires daily or twice-daily watering with nutrients at every feed. pH 5.5–6.5. Must add cal-mag as coco naturally binds calcium. The sweet spot between soil simplicity and hydro speed.
- Deep Water Culture (DWC): Plant roots suspended directly in oxygenated nutrient solution. Fastest vegetative growth of any method — plants can grow 1–2 inches per day. Requires diligent pH and EC monitoring. Water temperature must stay below 20°C to prevent root rot. High maintenance but maximum yield potential.
- Living soil/no-till: An organic approach where the soil ecosystem (bacteria, fungi, worms) feeds the plant. You water only — no bottled nutrients. Takes time to build the soil initially, but subsequent grows only need cover crop amendments. Exceptional terpene development and flavor.
| Medium | Difficulty | Growth Speed | Watering | Best For |
|---|---|---|---|---|
| Soil | Beginner | Moderate | Every 2–4 days | First-time growers, flavor chasers |
| Coco coir | Intermediate | Fast | Daily or 2x daily | Experienced growers wanting speed |
| DWC hydro | Advanced | Fastest | Continuous | Maximum yield seekers |
| Living soil | Intermediate | Moderate | Every 2–3 days | Organic enthusiasts, long-term grows |
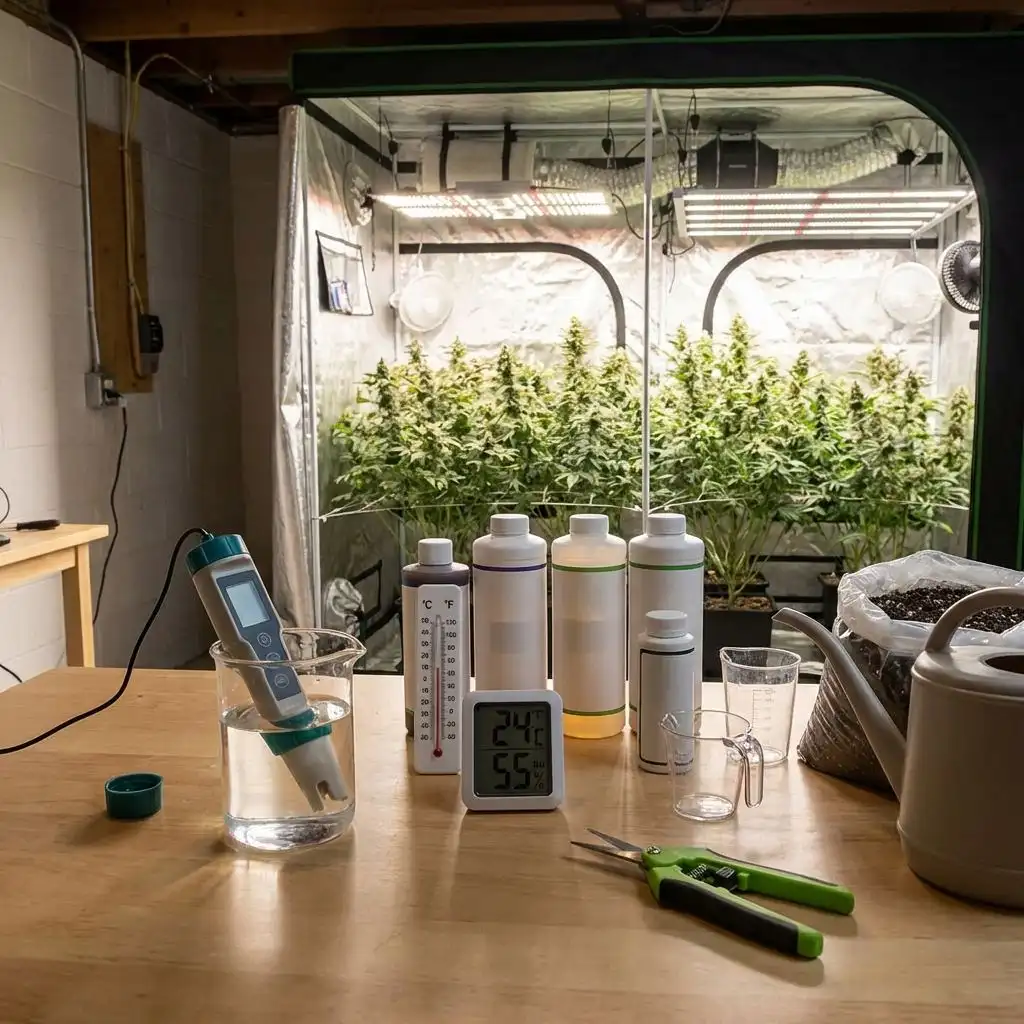
6. Environment Control
Dialing in your environment is what separates amateur indoor grows from professional-quality results. The two primary variables are temperature and humidity, and the relationship between them is captured by a metric called VPD (Vapor Pressure Deficit).
VPD measures the "drying power" of the air — how aggressively the atmosphere pulls moisture from your plant's leaves. Optimal VPD changes throughout the lifecycle: seedlings need low VPD (high humidity, moderate heat), while flowering plants need higher VPD (lower humidity) to drive transpiration and trichome production. Here are the targets:
- Seedling: 22–25°C, 65–75% RH, VPD 0.4–0.8 kPa
- Vegetative: 22–28°C, 50–65% RH, VPD 0.8–1.2 kPa
- Early flower: 20–26°C, 45–55% RH, VPD 1.0–1.4 kPa
- Late flower: 18–24°C, 35–45% RH, VPD 1.2–1.6 kPa
Use a humidifier in veg if your space is too dry, and a dehumidifier in late flower when plants transpire heavily and buds are dense enough to trap moisture. An environmental controller (like an Inkbird or TrolMaster) that automates fans, heaters, and humidifiers based on sensor readings is a worthwhile investment that pays for itself in prevention of mold and heat stress.
7. Indoor Growing Schedule
A typical indoor grow from seed to harvest takes 3–5 months depending on how long you veg and the strain's flowering time. Here's a realistic schedule for a photoperiod strain:
| Phase | Duration | Light Schedule | Key Tasks |
|---|---|---|---|
| Germination | 3–7 days | 18/6 or 24/0 | Paper towel method, plant in starter plug |
| Seedling | 1–2 weeks | 18/6 | Gentle watering, low light (200–400 PPFD) |
| Vegetative | 3–8 weeks | 18/6 | Training, topping, transplanting, full nutrients |
| Transition | 1–2 weeks | 12/12 | Flip lights, watch for pre-flowers, manage stretch |
| Flowering | 8–12 weeks | 12/12 | Bloom nutrients, defoliation, support branches |
| Flush | 1–2 weeks | 12/12 | Plain water only, watch trichomes |
| Harvest + dry | 7–14 days | Dark | Cut, trim, hang dry at 60°F / 60% RH |
| Cure | 2–8+ weeks | Dark | Jar, burp daily, then weekly |
🌱 Recommended Strains
Frequently Asked Questions
Why Grow Indoors?
Indoor cannabis cultivation gives you something outdoor growing never can: complete environmental control. You dictate the temperature, humidity, light intensity, light schedule, CO2 levels, and nutrient delivery. This means you can grow any strain, any time of year, regardless of your climate or se...
What is Choosing a Grow Space?
Your grow space can be anything from a 2×2 ft closet to a dedicated room. The key requirements are: you can control light (make it completely dark during lights-off), maintain temperature, provide fresh air exchange, and access your plants for maintenance. For beginners, a grow tent is the best opti...
What is Lighting: LED vs. HPS vs. CMH?
Lighting is the single most important piece of equipment in your grow room. Cannabis needs intense, full-spectrum light to produce dense, potent buds. The three main options are LED, HPS (High Pressure Sodium), and CMH (Ceramic Metal Halide). LED (Light Emitting Diode) is now the dominant technology...
What is Ventilation & Carbon Filters?
Proper airflow serves three critical functions: temperature control, humidity management, and odor elimination. Cannabis in full flower produces an intense smell that can permeate an entire house — a carbon filter is not optional if discretion matters. The core ventilation system consists of an inli...
What is Growing Medium Options?
What you grow in affects watering frequency, nutrient delivery, root oxygenation, and overall ease of growing. Each medium has a learning curve, but all can produce excellent results. Soil (potting mix): The most forgiving medium for beginners. Good soil buffers pH fluctuations and provides some ba...