1. What Is Living Soil and Why It Changes Everything
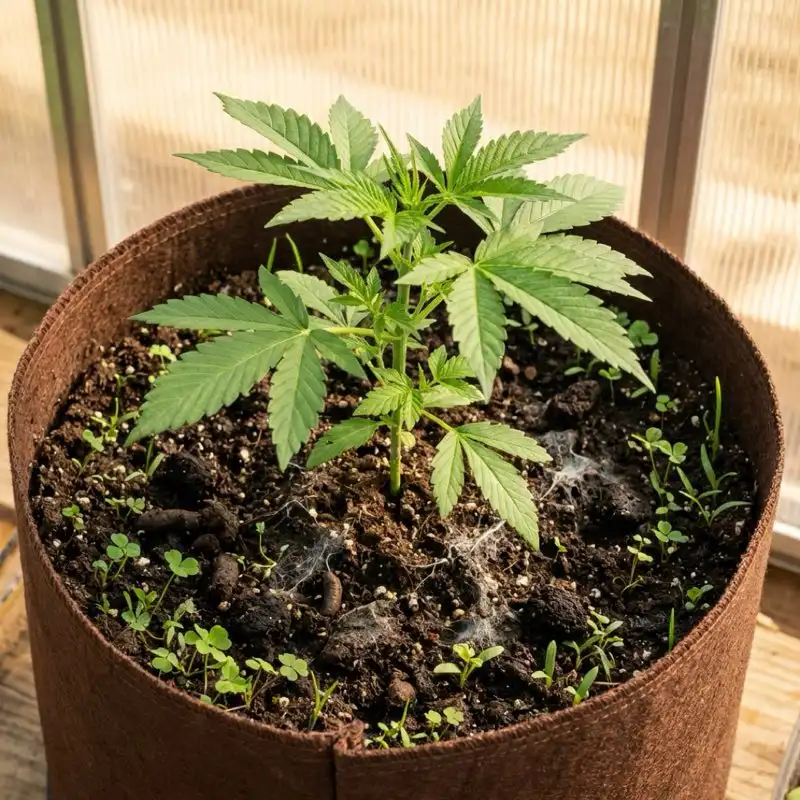
Living soil is not simply a growing medium — it is a functioning ecosystem. Where conventional cultivation treats soil as an inert substrate to be loaded with bottled nutrients, living soil cultivation harnesses billions of microorganisms, fungi, nematodes, and arthropods to create a self-regulating nutritional engine beneath your plants.
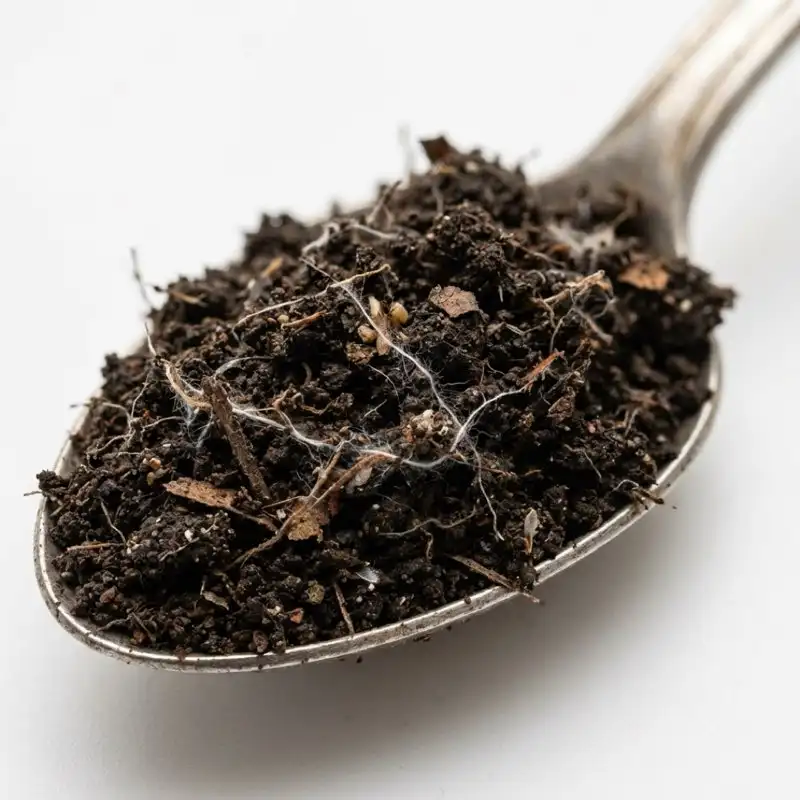
The concept draws from regenerative agriculture and the work of soil scientists like Dr. Elaine Ingham, whose Soil Food Web research demonstrated that healthy soil contains up to 1 billion bacteria per teaspoon, alongside thousands of fungal species and a cascade of predatory organisms that cycle nutrients into plant-available forms continuously.
Plants grown in mature living soil consistently produce more complex terpene profiles, denser resin coverage, and improved stress resilience compared to plants grown in synthetic nutrient programs. The microbial community also buffers pH naturally, reduces pathogen pressure, and builds soil structure over successive grows.
The Core Principle: Feed the Soil, Not the Plant
The foundational philosophy of living soil cultivation is indirect nutrition. Instead of applying chelated minerals directly to roots, you feed the microbial population with organic matter. Bacteria and fungi decompose that matter and, crucially, are themselves consumed by protozoa and nematodes.
This predator-prey cycle releases nutrients in plant-available ionic form precisely at the root zone — a process called the nutrient mineralization loop. Cannabis plants actively participate in this system, with roots exuding sugars, amino acids, and secondary metabolites that attract specific microbial communities.
In return, those microbes deliver phosphorus, nitrogen, calcium, and micronutrients on demand. The plant essentially trades photosynthate for minerals — an exchange that has evolved over 400 million years of plant-soil co-evolution.
2. Building the Perfect Living Soil Mix
A well-built living soil recipe balances three properties:
- Structure — drainage and aeration
- Water retention — moisture availability
- Biological activity — microbial habitat
Getting these right from the start reduces the need for intervention throughout the grow cycle.
The Base Recipe: A Proven Starting Formula
The following recipe produces approximately 200 liters of high-performance living soil suitable for container or in-ground cultivation. Scale proportionally for your space.
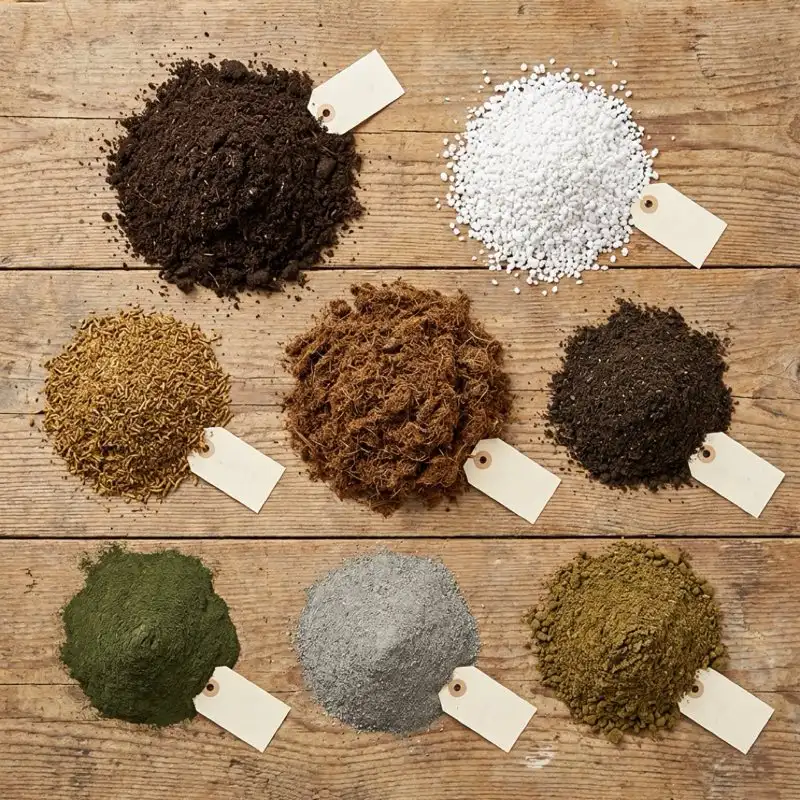
- 25% aged compost (hot-composted, fully finished, 6+ months old)
- 25% peat moss or coco coir (for water retention and slight acidity)
- 25% aeration material — perlite, pumice, or lava rock (6–10mm grade)
- 25% worm castings (high microbial density, chelated nutrients)
To this base, add the following amendments per 200 liters of mixed soil:
- Neem meal: 1 kg (slow-release nitrogen, pest suppression)
- Crustacean meal (crab/shrimp): 500 g (chitin, calcium, phosphorus)
- Basalt rock dust: 1 kg (broad-spectrum minerals, silica)
- Kelp meal: 300 g (micronutrients, growth hormones, cytokinins)
- Gypsum: 500 g (calcium and sulfur without altering pH)
- Biochar: 2–3 liters (microbial habitat, nutrient retention)
- Mycorrhizal inoculant: per label (colonization insurance)
The Cook Period: Why You Must Wait
After mixing, the soil requires a minimum 4–6 week cook period. During this time, soil temperature will spike to 50–70°C as microbial populations explode and break down raw amendments. Maintain moisture at approximately 50–60% field capacity and turn the pile every 4–7 days to ensure even decomposition and oxygen distribution.
After two weeks, begin testing pH. A finished living soil should stabilize between 6.2 and 6.8. If pH reads above 7.0, top-dress with additional peat moss. If below 6.0, add agricultural lime at 100g per 100 liters.
By week 6, the soil should smell earthy, sweet, and complex — like a forest floor after rain. Avoid planting into soil that still smells of ammonia, which signals incomplete decomposition.
3. No-Till vs. Traditional Cultivation in Living Soil
Once you have built your living soil, you face a critical decision: till between cycles or adopt a no-till regenerative system. Both approaches have merit, and the right choice depends on your scale, goals, and patience.
Traditional (Single-Cycle) Living Soil
In a traditional approach, you build a fresh batch of living soil for each grow cycle. After harvest, you re-amend the spent soil with fresh compost, worm castings, and dry amendments, then cook again for 3–4 weeks before replanting.
This approach offers clean starts with predictable nutrition and is ideal for growers running high-turnover commercial operations or those experimenting with new genetics. Strains like Swiss Miss feminized thrive under this system, delivering exceptional resin production when supported by a freshly charged microbial base.
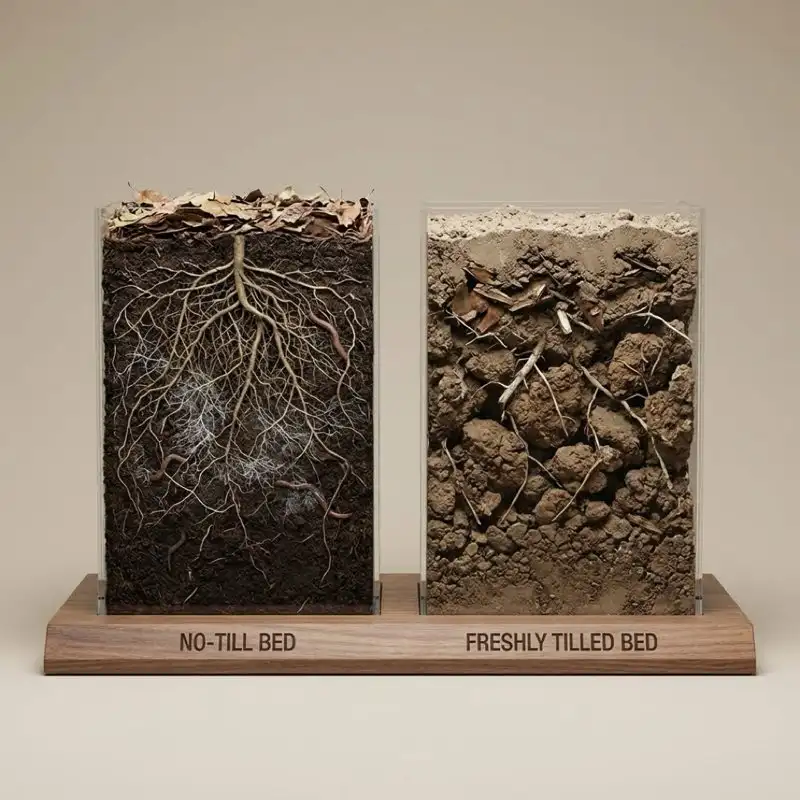
No-Till Regenerative Systems
No-till living soil is the advanced evolution of the practice. Rather than rebuilding the soil between cycles, you plant directly into the undisturbed ecosystem, cutting plant stalks at the soil line after harvest and leaving roots to decompose in place. Top-dressing with compost and worm castings between cycles replenishes nutrition without destroying the fungal networks that accumulated during the previous grow.
The advantages compound over time. A no-till bed in its third or fourth cycle will have developed fungal hyphal networks measuring kilometers per gram of soil, dramatically accelerating nutrient cycling and improving drought resilience.
These networks can also measurably increase cannabinoid and terpene density. The trade-off is complexity: pest and disease pressure requires more proactive management, and the system requires 12–18 months to reach full maturity.
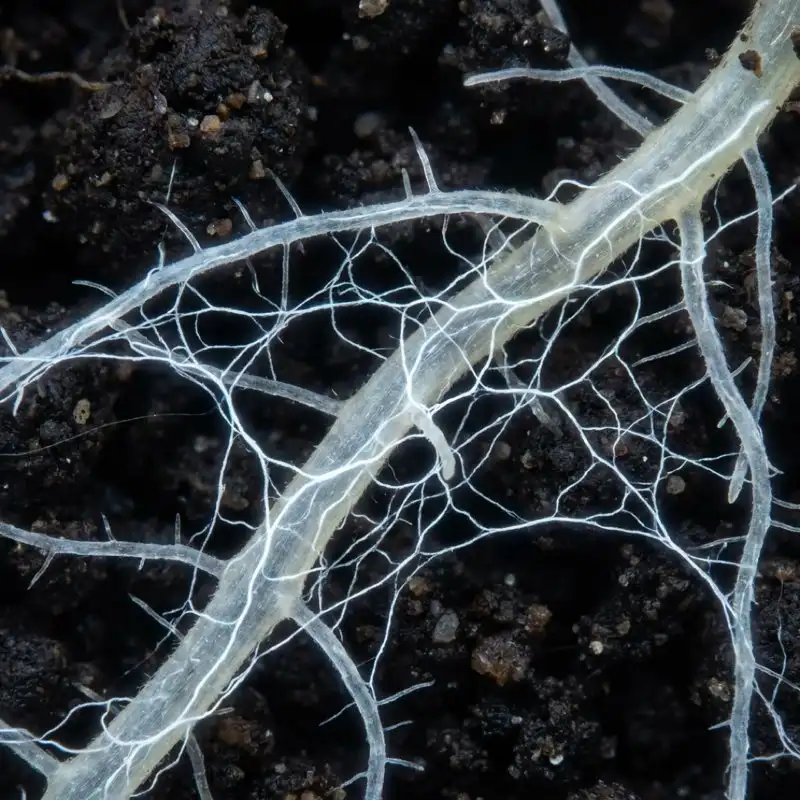
4. Mycorrhizal Networks: The Underground Internet
Of all the biological relationships in living soil, none is more important to cannabis cultivation than the mycorrhizal symbiosis. Mycorrhizal fungi colonize plant roots and extend hyphal threads — some as thin as 1/10th the diameter of a root hair — into soil pores too small for roots to access.
In exchange for plant sugars, these fungi dramatically expand the effective root surface area, in some studies by 700–1,000%.
Types of Mycorrhizae Relevant to Cannabis
There are two main categories: ectomycorrhizae, which form a sheath around roots, and endomycorrhizae (arbuscular mycorrhizal fungi, or AMF), which penetrate root cells directly. Cannabis forms AMF associations, with species like Rhizophagus irregularis being the most researched and commercially available.
To encourage maximum colonization, avoid high-phosphorus amendments during early establishment. Phosphorus above 150 ppm in the root zone suppresses AMF colonization — the plant no longer needs to trade with fungi for phosphorus, so it does not.
This is one reason synthetic high-P starter nutrients are incompatible with living soil systems. Keep early-stage feeding gentle and let the biological relationship establish over the first 3–4 weeks of growth.
Building Hyphal Networks: Practical Steps
- Inoculate seeds or seedling root zones directly at transplant with a quality AMF inoculant containing multiple species.
- Maintain consistent moisture — hyphal threads are fragile and die rapidly in dry conditions below 30% field capacity.
- Introduce earthworms at 5–10 per square foot of bed space. Their castings and movement create the macro-pores that fungal networks travel through.
- Avoid copper-based fungicides, synthetic fertilizers, and tillage — all are documented AMF inhibitors.
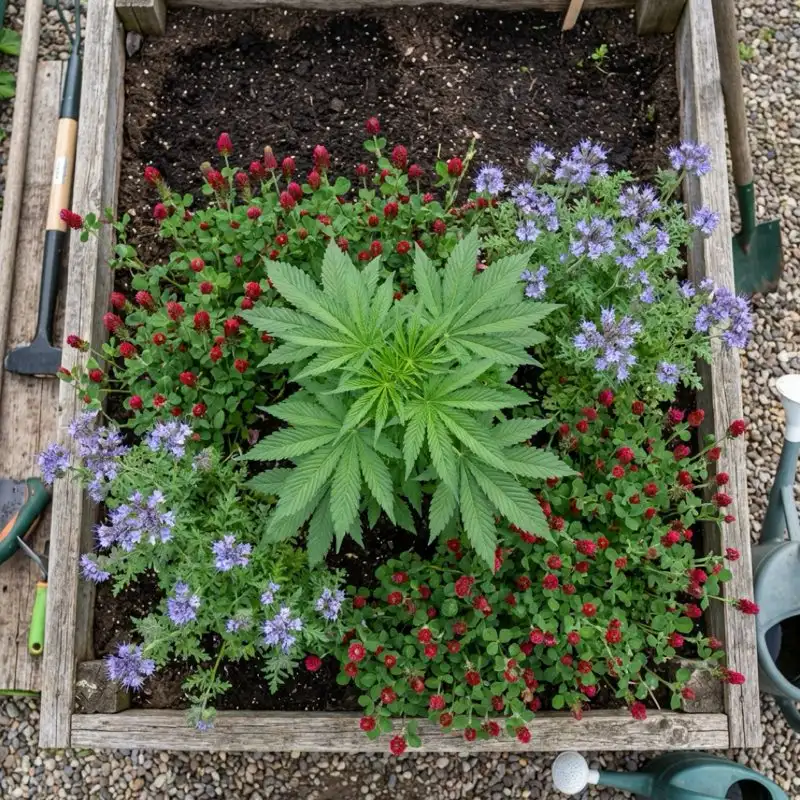
5. Cover Crops and the Living Mulch Layer
The soil surface is as important as the soil profile. Bare soil loses moisture rapidly, disrupts microbial communities in the top centimeter, and provides no habitat for beneficial predatory insects. Cover crops solve all three problems simultaneously while adding biological nitrogen fixation and root exudate diversity to your growing system.
Best Cover Crop Species for Cannabis Beds
- Crimson clover — nitrogen-fixing legume, shallow roots, easy to cut back without disturbing main root zone
- Hairy vetch — aggressive nitrogen fixer, adds significant biomass when cut and mulched
- Phacelia — attracts beneficial insects, breaks up soil crust, rapid germination
- Fenugreek — adds diverse root exudates, suppresses certain soil-borne pathogens
- Oats — fibrous root structure improves drainage, excellent winter-kill mulch in colder climates
Sow cover crops at transplant by scattering seed across the soil surface and lightly scratching in. Allow them to grow until they begin competing for light with your cannabis canopy — typically when your main plant enters pre-flower.
Then cut at the base, leaving roots intact and using the above-ground biomass as a surface mulch. This cut-and-drop technique feeds the soil surface biology and eliminates the need for separately sourced mulch materials.
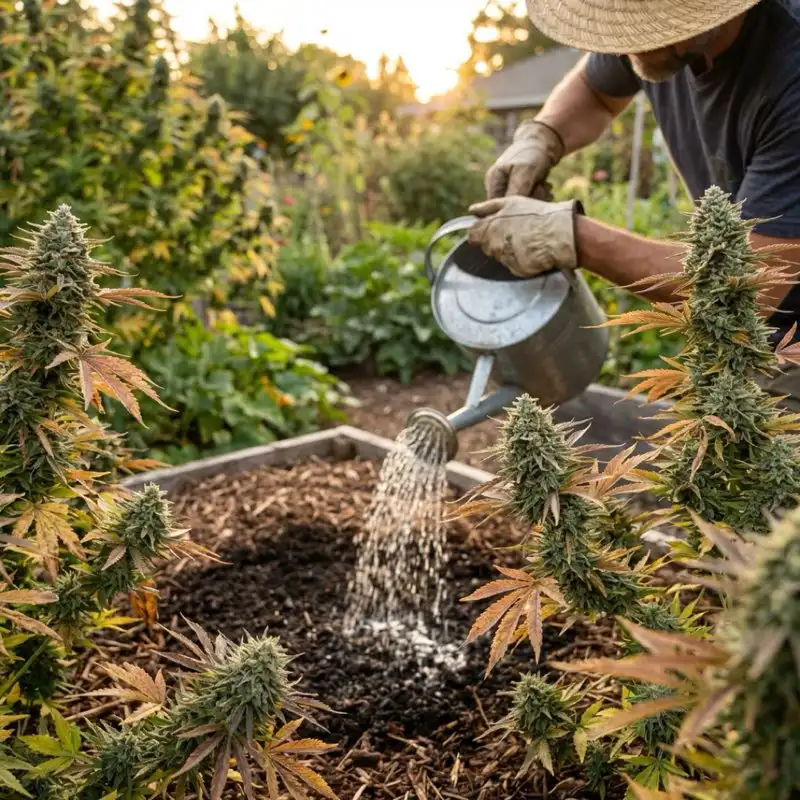
6. Water-Only Growing: The Goal of Mature Living Soil
The most compelling promise of living soil cultivation is true water-only growing — the ability to take a cannabis plant from seed to harvest using nothing but pH-balanced water. In a mature, well-built system, this is genuinely achievable, particularly for genetics selected for compatibility with organic growing methods.
Water Quality Parameters
Even in a water-only system, water quality matters. Target the following:
- pH: 6.2–6.8 for soil systems (the biological buffer will adjust slightly, but starting in range reduces stress)
- EC: below 0.4 mS/cm — high dissolved solids compete with plant uptake
- Chlorine: use filtered or aged water; chlorine and chloramine suppress soil bacteria at concentrations as low as 0.5 ppm
- Temperature: 18–22°C — cold water shocks soil biology; hot water reduces dissolved oxygen
Transitioning to Water-Only: A 3-Cycle Process
Most growers cannot achieve true water-only results in their first cycle, so plan for a progressive transition. In cycle one, supplement with compost teas and mild top-dresses of dry amendments. In cycle two, reduce liquid inputs and observe plant response.
By cycle three in an undisturbed no-till bed, most well-chosen genetics will complete their entire life cycle on water alone. Genetics with robust feeding efficiency — like the resin-dense Swiss Miss feminized — tend to adapt particularly well to this minimal-intervention approach.
7. Troubleshooting Common Living Soil Problems
Living soil systems are resilient but not infallible. The following are the most common issues growers encounter and their root causes.
Yellowing Leaves in Early Veg
Interveinal chlorosis in the first 3 weeks often indicates that the soil cook was incomplete and nitrogen is still locked up in undecomposed organic matter. Top-dress with worm castings at 1 liter per 10 liters of pot volume and water in with a mild aloe vera solution (1 tablespoon of powdered aloe per 4 liters).
Avoid bottled nitrogen — it disrupts the microbial balance you are trying to establish.
Fungus Gnats and Root Aphids
These are the most common pest pressure in living soil systems. Fungus gnats are largely cosmetic but their larvae damage fine roots and mycorrhizal connections. Allow the top 2–3 cm of soil to dry between waterings.
Introduce the following as preventative inoculants at the start of each cycle:
- Predatory nematodes (Steinernema feltiae)
- Predatory mites (Stratiolaelaps scimitus)
Top-dress with 2–3 cm of diatomaceous earth if populations establish.
Nutrient Excess (Tip Burn, Clawing)
Over-amendment is the most common mistake in living soil. If leaves show nitrogen toxicity — dark green color, downward-curling claw — do not flush. Flushing destroys microbial populations.
Instead, increase watering frequency slightly to accelerate biological cycling and allow the excess to mineralize. Add a top-dress of biochar at 500 ml per pot to adsorb excess nutrient ions temporarily.
8. Best Cannabis Strains for Living Soil in 2026

Not all cannabis genetics perform equally in living soil systems. The ideal candidates are cultivars with strong root vigor, natural pest resistance, and terpene complexity that benefits from the enhanced biology of a mature microbial system.
What to Look for in a Living Soil Strain
Prioritize genetics with indica-dominant or hybrid root architecture, which tends to form denser, more branched root masses ideal for mycorrhizal colonization. Landraces and cultivars with significant outdoor breeding history also tend to be more efficient feeders — an asset in a system where nutrition is mineralized gradually rather than delivered in soluble spikes.
Recommended Genetics from DSS Genetics
The Swiss Miss feminized is an excellent showcase strain for living soil methodology. Her Swiss alpine heritage translates into exceptional environmental resilience and a resin profile that genuinely reaches its ceiling only in biological systems where microbial-driven terpene precursors are consistently available.
Growers report that the complex floral and fuel-driven aromatic profile of Swiss Miss intensifies noticeably in mature no-till beds compared to coco or hydro runs — a direct reflection of the terpene-enhancing properties of a healthy soil food web.
Beyond Swiss Miss, the DSS Genetics catalog includes cultivars specifically suited to different living soil applications. For no-till outdoor beds, explore the robust genetics available at dssgenetics.com/products — cultivars selected for vigor, resin density, and the kind of root architecture that thrives in a biological growing environment.
Autoflowering genetics are increasingly popular in living soil systems because their shorter lifecycle allows growers to run more cycles per year within the same undisturbed bed, accelerating the maturation of the no-till ecosystem. Check the full autoflower range at DSS Genetics product catalog for options that combine autoflowering convenience with the terpene complexity that living soil enhances.
For growers who want maximum terpene expression in a single-cycle living soil setup, photoperiod feminized strains offer the longest root development window and the most time for mycorrhizal networks to fully establish before harvest. Exploring options like the varied feminized lines available through DSS Genetics gives you a strong foundation for building a living soil grow around genetics that will reward the system's biological richness.
Living soil cultivation represents the highest expression of cannabis horticulture — a system that rewards patience, observation, and a willingness to work with natural processes rather than against them. Whether you are building your first cook batch or running your fourth no-till cycle, the principles remain the same: healthy soil biology produces healthier plants, and healthier plants produce more complex, satisfying harvests.
Start with quality genetics, build your soil with care, and let the microbial world do the work.
6. Frequently Asked Questions
How long does it take to build living soil for cannabis?
Building living soil requires a minimum 4–6 week cook period after mixing all ingredients. During this time the microbial population expands, raw amendments decompose, and soil pH stabilizes between 6.2 and 6.8.
Rushing this process and planting into undercooked soil is the most common mistake beginners make. The soil should smell like a forest floor — earthy and sweet — before planting. Plan to start building your mix 6–8 weeks before your intended planting date to allow buffer time.
Can I grow cannabis water-only in living soil from the first cycle?
True water-only growing is achievable but typically requires 2–3 full grow cycles for the soil ecosystem to mature sufficiently. In the first cycle, most growers benefit from light supplementation with compost teas or mild top-dresses of worm castings and dry amendments.
By the second or third cycle in an undisturbed no-till bed, the fungal networks and nutrient cycling infrastructure are developed enough to support water-only cultivation from seed to harvest in most cases.
What is the difference between living soil and regular organic soil?
Regular organic soil uses organic-source nutrients (bone meal, blood meal, etc.) but may have minimal living biology if it has been bagged, sterilized, or stored dry. Living soil is specifically cultivated to harbor a thriving population of bacteria, fungi, nematodes, protozoa, and arthropods that actively cycle nutrients through the soil food web.
The distinction is that living soil feeds plants biologically, while regular organic soil still relies on passive nutrient release. A living soil system requires maintaining moisture, avoiding synthetic chemicals, and building microbial populations intentionally.
How do I prevent pests like fungus gnats in a living soil system?
Fungus gnat prevention in living soil centers on allowing the top 2–3 cm of soil to dry between waterings, which disrupts the egg-laying cycle of adult gnats. Preventative inoculation with predatory nematodes (Steinernema feltiae) and predatory mites (Stratiolaelaps scimitus) at the start of each cycle provides ongoing biological control.
A 2–3 cm top-dressing of diatomaceous earth creates a physical barrier that deters adult gnats. Avoid overwatering, which is the single largest contributor to fungus gnat establishment in organic soil systems.
Which cannabis strains perform best in living soil?
Strains with strong root vigor, natural environmental resilience, and complex terpene genetics tend to excel in living soil systems. Cultivars with outdoor breeding history or landrace genetics are often more efficient biological feeders.
Swiss Miss feminized from DSS Genetics is a standout example — her alpine heritage translates into excellent root architecture and a resin profile that reaches full expression in mature biological soil systems. Autoflowering strains are also increasingly popular because their short life cycle allows multiple runs per year within the same no-till bed, accelerating ecosystem maturation.