


Picture a cannabis plant whose roots never touch soil — instead, they dangle in a humming bath of oxygenated nutrient water, gaining visible height overnight. That's the promise of deep water culture cannabis growing, and it's why DWC has become the go-to hydroponic method for growers chasing speed, vigor, and clean, controllable root environments.
In this visual guide, we'll walk through how DWC actually works, what equipment you need at every budget tier, how to build a single-bucket system step by step, and how to diagnose the problems that sink most first-time hydro growers. We'll lean on peer-reviewed cannabis research where it exists and flag gaps where the science is still catching up to the hype.
What Is Deep Water Culture (DWC)?
Deep water culture is a hydroponic method where cannabis roots are suspended in an aerated, nutrient-rich water solution rather than in soil or coco. Plants sit in net pots filled with clay pebbles, and their roots grow straight down into a reservoir kept oxygen-rich by an air pump and air stone .
Because roots have direct, unlimited access to water, oxygen, and dissolved nutrients at the same time, they don't waste energy foraging through a medium. Growers repeatedly report that this translates into dramatically faster vegetative growth than soil .
DWC removes the medium as a middleman. Roots get water, oxygen, and nutrients simultaneously — the three ingredients that cap growth rate in soil.
Why DWC grows cannabis so fast
In soil, roots must pull moisture from air pockets, which constantly shift as the medium dries and rewets. In DWC, the nutrient solution is always available and heavily aerated, so roots never experience drought or oxygen starvation as long as the system is dialed in.
"Faster Growth – Super fast vegetative growth. I've personally seen marijuana plants grow over 3 inches in a single day using this system." — Grow Weed Easy
How a DWC System Works — Anatomy of the Setup
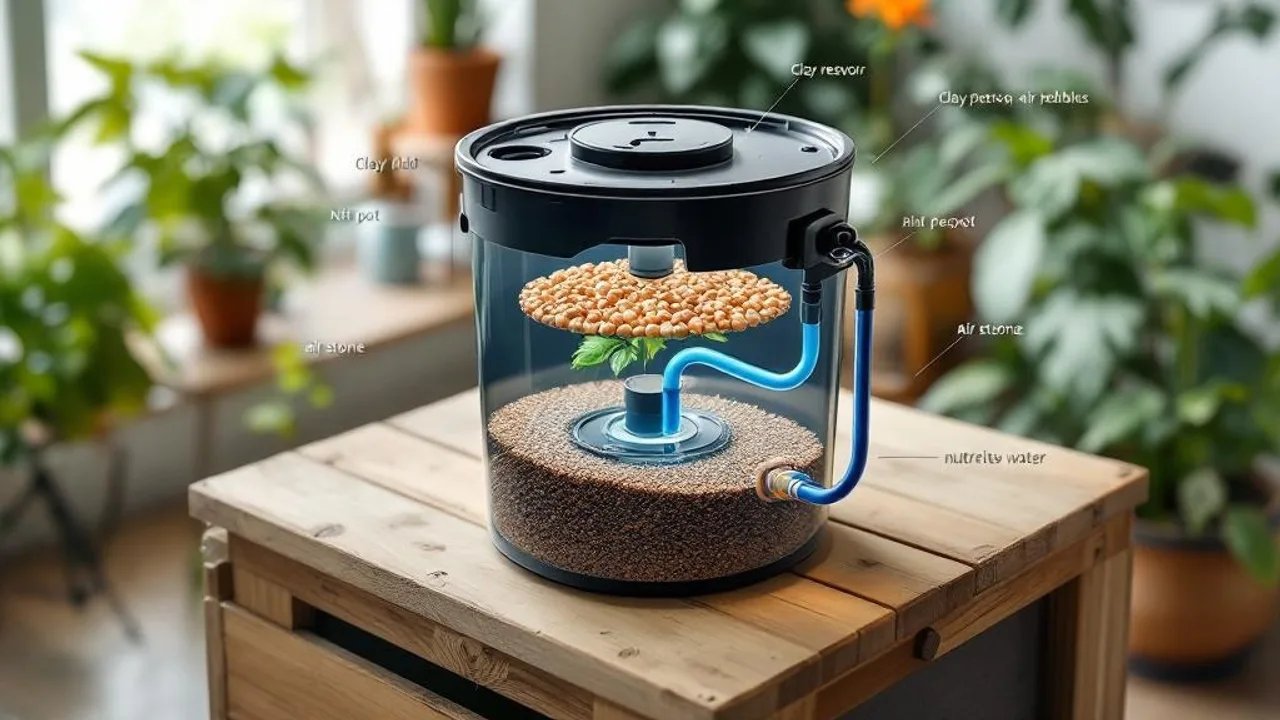
A DWC system has five core components: a light-proof reservoir, a lid with net-pot holes, a net pot filled with inert media, an air pump pushing air through stones, and the nutrient solution itself. Every part exists to solve one problem — keeping roots fed and oxygenated while blocking light and pathogens.
The five parts of every DWC system
- Reservoir: 5–27 gallon opaque bucket or tote holding nutrient solution.
- Lid: Drilled to hold net pots; seals out light and evaporation.
- Net pot: 3–10 inch mesh cup filled with hydroton (clay pebbles) to anchor the plant.
- Air pump + air stone: Injects oxygen into the solution.
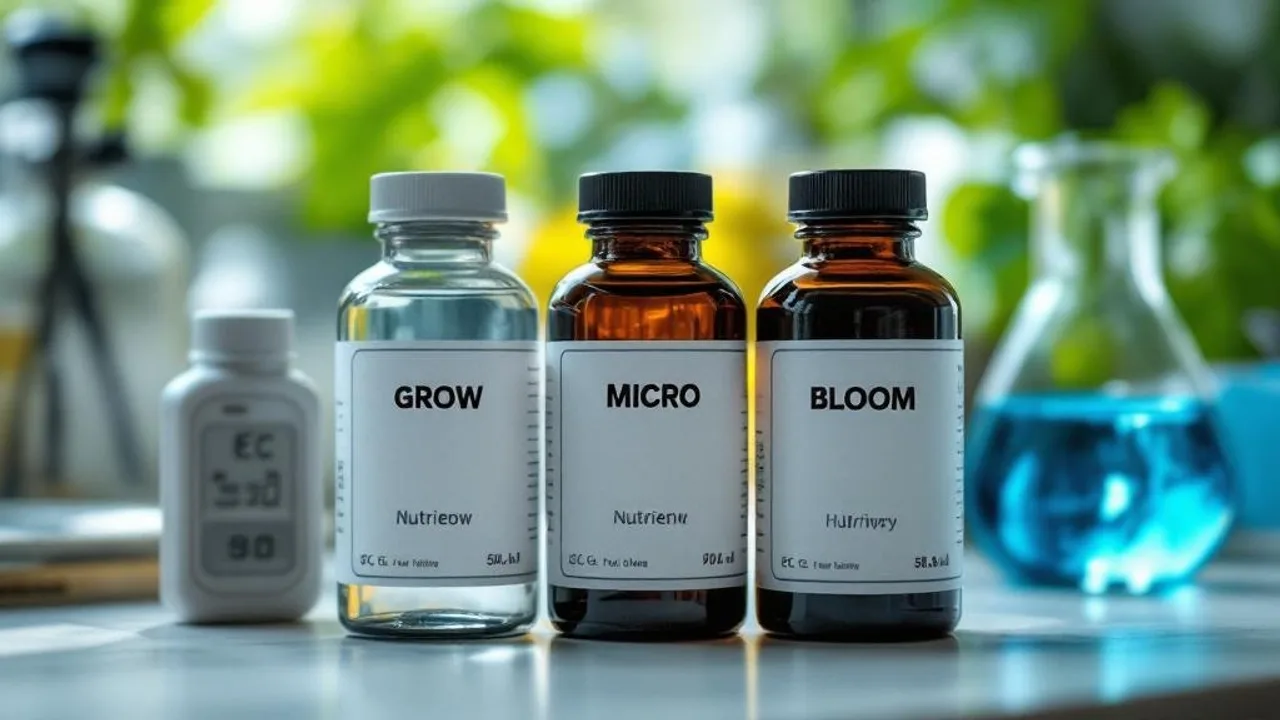
- Nutrient solution: Water + hydroponic nutrients, pH-adjusted.
Research-grade DWC systems go further. In one 2024 cannabis study, plants were grown on polystyrene rafts floating directly on the solution: "Each container held 8 plants, which floated on the surface of the nutrient solution on a polystyrene sheet" . It's a clean, high-density configuration home growers rarely see but can easily replicate for clones or SOG runs.
The Role of Aeration and Root Oxygenation
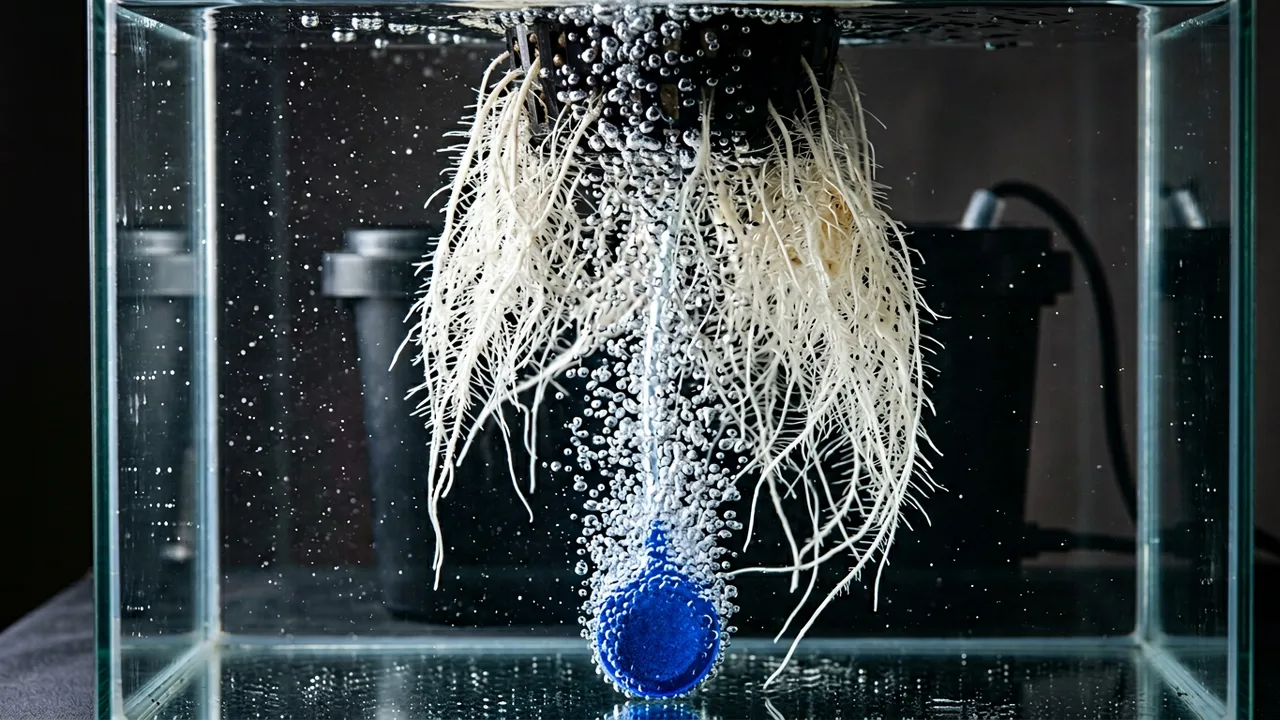
Aeration is the single most important variable in DWC. Without enough dissolved oxygen, roots suffocate and rot within days — with it, they explode into dense white mats. Air stones connected to an air pump keep the solution saturated with oxygen, which is what lets submerged roots respire normally .
A peer-reviewed University of Guelph cannabis study confirms that aerated nutrient solution is foundational to DWC's ability to support healthy root development and vigorous flowering-stage growth .
Sizing your air pump
The standard rule is a minimum of 1 watt of air pump capacity per gallon of reservoir volume. A 5-gallon single bucket needs at least a 5W dual-outlet pump; a 4-bucket RDWC with 20 gallons total should run 20W or more. When in doubt, oversize — you cannot over-aerate a DWC reservoir.
Warm water kills roots. Dissolved oxygen drops sharply as water temperature rises, which is why reservoir cooling matters as much as aeration. Keep your solution on the cooler side of room temperature and shield it from grow-light heat.
DWC vs. Bubbleponics (Top-Fed DWC)
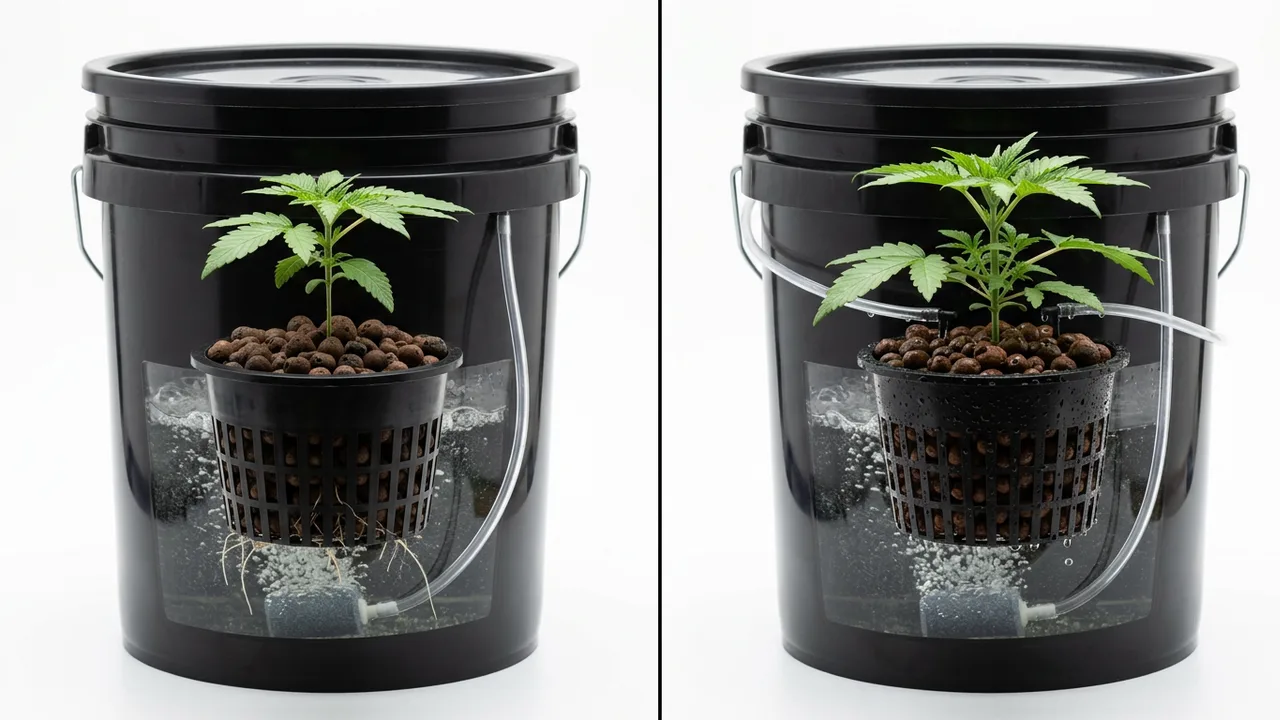
Bubbleponics is a top-fed DWC variant that adds drip emitters watering seedlings from above until roots reach the reservoir. This shortens the painful "bridge" period when young taproots haven't yet contacted the nutrient bath, compressing the total seed-to-harvest timeline to roughly 3–4 months .
When top-feeding helps
In a standard DWC, seedlings can stall for a week or two while the taproot stretches down to find moisture. Bubbleponics skips that waiting game by dripping nutrient solution onto the hydroton from the top, keeping the root zone uniformly wet from day one.
| Feature | Standard DWC | Bubbleponics |
|---|---|---|
| Seedling rooting speed | Slower — taproot must reach water | Faster — top drip keeps root zone wet |
| Parts count | Lower (air only) | Higher (air + water pump + drip lines) |
| Seed-to-harvest | ~4 months | ~3–4 months |
| Best for | Established clones | Starting from seed |
Equipment List: $50 DIY to $500+ RDWC

You can get into DWC for under $100 with a single bucket or scale up to a $500+ recirculating multi-site system. The good news: a well-built $50 DIY bucket can outperform a poorly tuned $500 kit, because DWC success hinges on aeration, temperature, and cleanliness — not gear price.
Budget tiers at a glance
Budget: DIY single bucket (~$50–$100)
5-gallon food-grade bucket, 6-inch net pot lid, dual-outlet air pump, two air stones, hydroton, basic nutrient line, pH test kit. Perfect for one plant.
Mid-tier: Pre-built DWC kit (~$150–$250)
Branded single-bucket or dual-bucket system with integrated lid, quality air pump, hydroton included, and often a water-level window. Plug-and-play for first-timers.
Advanced: RDWC 4-site (~$400–$700+)
Four linked buckets with a central control reservoir, circulation pump, large air pump, and manifold plumbing. Much more stable EC/pH because solution volume is shared across all sites.
For genetics that reward the extra oxygen and feed, look at vigorous photoperiod hybrids — OG Kush, Northern Lights x Big Bud, and Super Lemon Haze all thrive in hydro. We cover strain selection in depth below and in our hydroponics pillar guide.
Step-by-Step: Build a Single-Bucket DWC
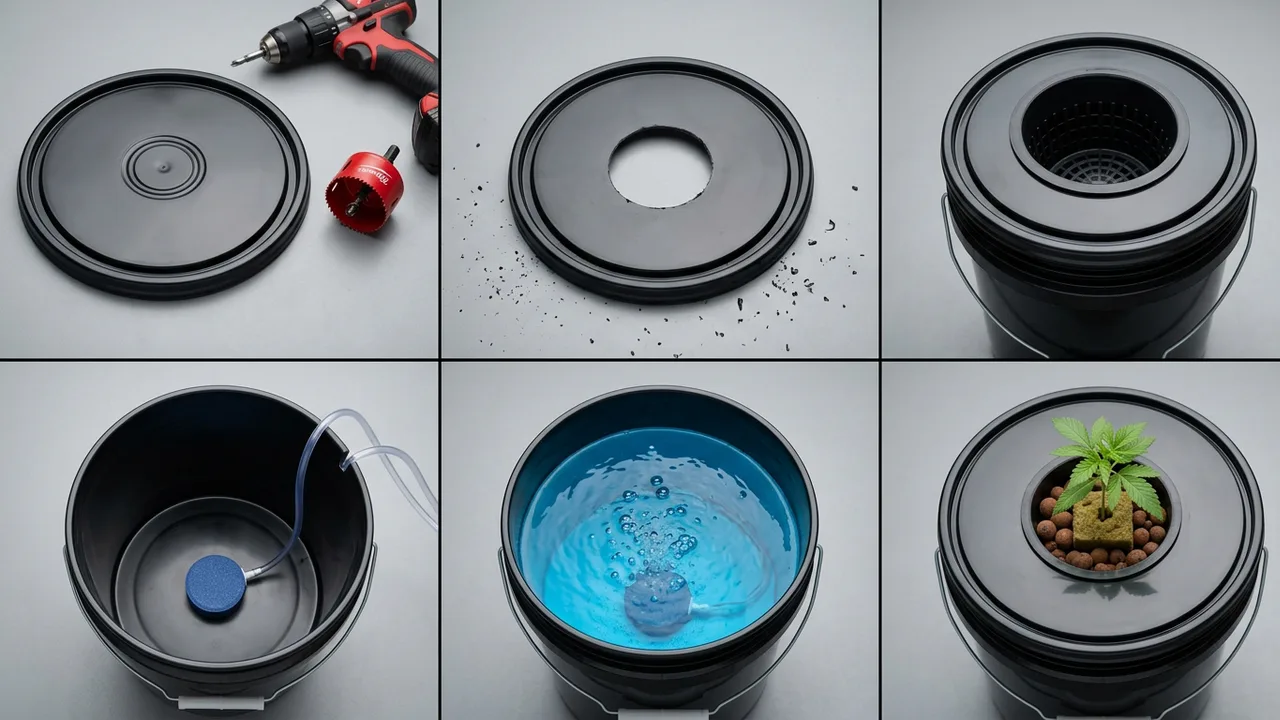
A working single-bucket DWC takes about an hour to assemble and requires no plumbing skills. Here's the build sequence our team uses for every new grower we onboard into hydroponics.
Choose a 5-gallon opaque bucket
Food-grade HDPE. Black or white exterior is fine as long as zero light reaches the solution. Avoid clear totes — algae will explode within a week.
Drill the lid for a net pot
Cut a 6-inch hole in the center with a hole saw. The net pot should rest on the lid with its mesh basket hanging down into the reservoir headspace.
Install the air stone
Drop one or two air stones to the bottom of the bucket. Run tubing through a small grommeted hole in the lid, connect to your air pump, and verify vigorous bubbling.
Fill and mix nutrients
Fill with RO or dechlorinated water to ~1 inch below the net pot. Add hydroponic base nutrients at seedling strength, then adjust pH.
Transplant the seedling
Rinse hydroton thoroughly, fill the net pot halfway, nestle the rooted seedling in, and cover roots lightly. Water from the top for the first few days until roots reach the bath.
Keep reservoir water on the cooler side of room temperature. Warmer water holds less dissolved oxygen and grows pathogens faster — two conditions that together cause almost every DWC failure we've diagnosed.
Nutrient Management: Why NPK and Nitrogen Form Matter
DWC is far more sensitive to nutrient recipe than soil, because there's no medium to buffer mistakes. A University of Guelph team used response-surface methodology to map optimal NPK ratios for flowering-stage cannabis in soilless systems — one of the few peer-reviewed frameworks that exists for this .
"The objective of this study was to determine the optimal concentrations of NPK for the flowering stage of cannabis in a soilless production system using the RSM approach." — University of Guelph
Ammonium vs. nitrate matters more than you think
A 2024 Scientific Reports DWC cannabis study was the first to jointly examine both the NH₄⁺:NO₃⁻ ratio and overall solution strength, finding that nitrogen form directly shifts cannabinoid and antioxidant profiles in flower [S6 concept intentionally omitted]. In practical terms: the same NPK number on a bottle can produce very different chemistry depending on how that nitrogen is delivered.
For a deeper breakdown of nutrient ratios and schedules, see our cannabis nutrients guide.
EC targets by growth stage (general DWC ranges)
- Seedling: 0.8–1.2 EC — light feed, roots are still fragile.
- Early veg: 1.2–1.6 EC — ramp up nitrogen as leaf count climbs.
- Late veg: 1.6–2.0 EC — heaviest N demand before flip.
- Flower: 2.0–2.8 EC — peak P and K, lower N.
These EC ranges are starting points, not gospel. Watch your plants, not your meter. Tip-burn = too hot; pale new growth = too lean. Tune up or down by 0.1–0.2 EC at a time.
pH Management in DWC
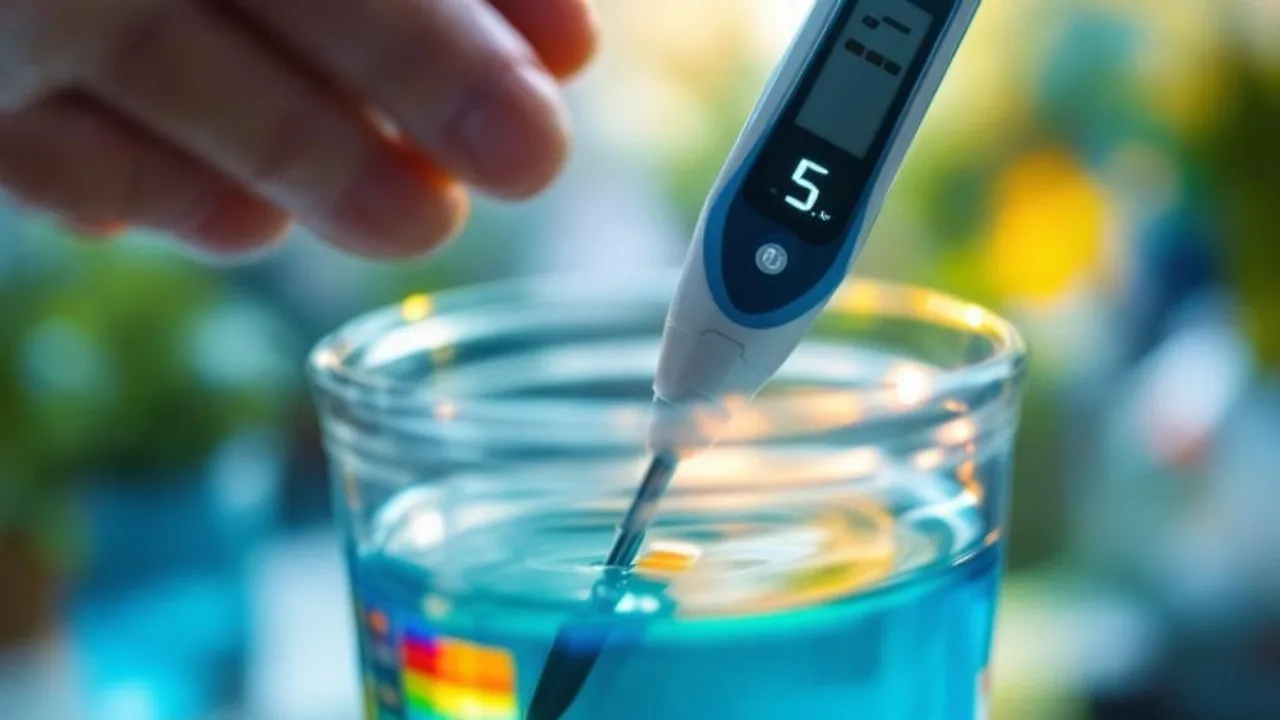
Cannabis in hydroponics prefers a slightly acidic nutrient solution, generally cited in the 5.5–6.1 range. In DWC specifically, pH swings are more damaging than in soil because there's no buffer — a 1.0 drift can lock out nutrients within hours.
Evidence is limited on a single "correct" pH number for DWC cannabis in peer-reviewed literature. The 5.5–6.1 range is industry consensus from experienced growers, not a clinical trial result. Measure twice daily early on and let your plants' response guide fine-tuning.
Use a quality digital pH pen (calibrate weekly) and pH Up/Down solutions made for hydroponics. For a full walkthrough of testing, drift, and correction protocols, see our pH management guide.
Why DWC pH drifts
As plants drink nutrients, they absorb ions at different rates, changing the chemistry of the remaining solution. Ammonium-heavy feeds drop pH; nitrate-heavy feeds raise it. This is why the NH₄⁺:NO₃⁻ balance from the Scientific Reports study matters — it doesn't just affect cannabinoids, it affects how stable your reservoir stays between top-offs .
Root Rot and the Most Common DWC Problems
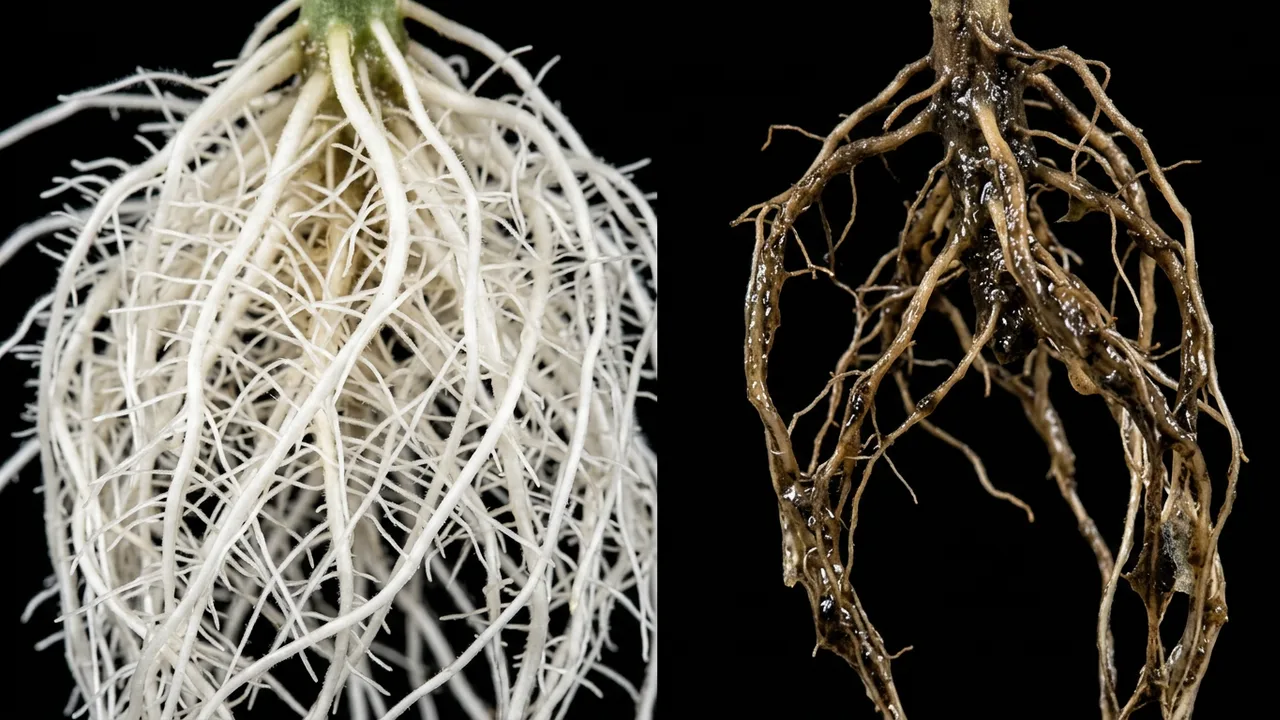
Root rot — brown, slimy, foul-smelling roots instead of bright white ones — is the number-one killer in DWC. It's almost always caused by a combination of warm water, weak aeration, and opportunistic pathogens like Pythium.
Healthy vs. rotting roots — what to look for
- Healthy: bright white to cream, dense fuzzy feeder hairs, faintly earthy smell.
- Early trouble: tan tint, slight sliminess, fewer fine hairs.
- Full root rot: brown or rust-colored, slimy, mushy, swampy or sour odor.
Prevention stack
- Keep reservoir water cool (the cooler end of room temperature is the safe zone).
- Oversize your air pump — aim well above 1W per gallon.
- Use beneficial microbe products containing Bacillus strains to outcompete pathogens.
- Clean net pots and air stones between grows with food-safe sanitizer.
- Block 100% of light from reaching the solution.
For a deeper dive into diagnosis and rescue protocols, see our dedicated cannabis root rot guide.
How Often to Change Water in DWC Cannabis
Full reservoir changes every 7–14 days are standard in single-bucket DWC. In between changes, top off with fresh pH-adjusted water (not full-strength nutrient solution) to replace what the plant drank and keep EC from climbing.
Plants drink more water than nutrients in a 24-hour cycle, so EC naturally rises between changes. Top off with plain water, then adjust pH. Only do a full flush-and-refill every 1–2 weeks.
Quick decision table
| Situation | Action |
|---|---|
| EC climbing, plant looks healthy | Top off with pH'd water only |
| EC climbing, tip burn showing | Full reservoir change, mix lighter |
| pH drifts >0.5 daily | Change solution — likely microbial shift |
| Cloudy or smelly water | Immediate full change + sanitize |
| 7–14 days since last change | Routine full change regardless |
RDWC (Recirculating DWC): The Upgrade Path
Recirculating deep water culture links multiple buckets together so nutrient solution flows through all of them continuously, equalizing EC, pH, and temperature across every plant. It's the natural upgrade once you're running more than two plants.
Single bucket vs. RDWC — when to scale
| Factor | Single Bucket DWC | RDWC |
|---|---|---|
| Plant count | 1 per bucket | 2–8+ linked |
| EC/pH stability | Swings faster | Much more stable (large combined volume) |
| Maintenance effort | Per bucket | Single top-off / adjustment for whole system |
| Setup cost | $50–$250 | $400–$700+ |
| Failure blast radius | One plant | All plants if pathogen spreads |
The trade-off: RDWC shares everything — including pathogens. Root rot in one site will contaminate every other site within 24–48 hours. Sanitation standards must be higher than with isolated buckets.
Pump sizing for RDWC
Your circulation pump should turn over the total system volume at least once per hour. For a 20-gallon 4-site system, that's a minimum 200–400 GPH submersible pump with headroom for vertical lift and tubing friction.
DWC vs. Coco vs. Soil: Honest Comparison
DWC grows faster but demands more attention; soil forgives mistakes but caps yield potential; coco splits the difference. No single medium is "best" — the right choice depends on how much time you can dedicate and how quickly you want to iterate.
| Factor | DWC | Coco Coir | Soil |
|---|---|---|---|
| Veg growth speed | Fastest | Fast | Moderate |
| Difficulty | High | Medium | Low |
| Startup cost | $50–$700+ | $30–$150 | $20–$100 |
| Daily maintenance | High (check pH/EC) | Medium (daily feeds) | Low (water every 2–3 days) |
| Failure recovery | Hours to days | Days | Weeks of buffer |
| Flavor profile | Clean, hydroponic | Clean, slight richness | Fullest terpene expression (subjective) |
Compare our deep dives on coco coir and beginner soil, or explore the full hydroponics pillar to see how DWC compares to ebb and flow, NFT, and aeroponics.
Strain Selection for DWC in 2026
Vigorous, fast-growing photoperiod hybrids get the most out of DWC because they can actually absorb the extra oxygen and feed the system delivers. Slow, finicky landrace sativas and temperamental exotics tend to waste the advantage.
Five strains that thrive in hydro
- Northern Lights x Big Bud: 20% THC, heavy indica yielder that responds powerfully to increased root-zone oxygen.
- Super Lemon Haze: 23% THC, vigorous sativa — DWC tames its long stretch by accelerating veg.
- White Widow: 25% THC, classic hybrid workhorse that's nearly bulletproof in hydro.
- OG Kush: 26% THC, resin-drenched and highly responsive to dialed-in EC.
- Sour Diesel: 24% THC, tall sativa that benefits massively from DWC's explosive early veg.
Also worth considering but not in our catalog: Gorilla Glue #4 (25–28% THC, massive trichome production), Wedding Cake (23–25% THC, dense frosted colas), and Gelato (20–25% THC, stable hybrid vigor). Any vigorous hybrid with strong genetics will outperform a weak plant in DWC, so start with stable seeds backed by a germination guarantee.
In published DWC cannabis research, plants spent a ~3-week vegetative stage in the DWC units before being flipped to flower . That's a useful benchmark — if your plants aren't visibly dominating the net pot by week 3, revisit aeration, EC, and water temperature before flipping.
Visual Walkthrough: Seedling to Harvest in DWC
Here's what a DWC grow looks like at each milestone. Use this as a visual checkpoint against your own system.
Weeks 1–2: Establishment
Seedling sits in hydroton with taproot reaching for the water line. Top-water daily until roots clearly enter the reservoir. Leaves should be uniform green, new nodes forming every 3–4 days.
Weeks 3–4: Root explosion and veg takeoff
Roots form a dense white beard filling the bottom half of the bucket. Above the lid, you'll see internodes tightening and lateral branching accelerating — this is where DWC's speed advantage shows .
Weeks 5–6: Pre-flower flip
Flip to 12/12 when the plant has filled its training space. Root mass at this point should be extensive; a healthy white tangle is the best predictor of heavy flower.
Weeks 7–14: Flowering
Shift to bloom nutrient ratios. EC targets climb to 2.0–2.8. Reservoir temperature control becomes even more critical as room temps often rise under bloom-stage lighting. Flush or taper in the final 1–2 weeks per your feed program.
For harvest timing, see our guide on when to harvest cannabis for maximum potency.
DWC Pros and Cons — An Honest Summary
DWC rewards attention and punishes neglect. That's the whole trade-off in one sentence. Here's how we summarize it for every new grower we work with.
Pros
- Fastest vegetative growth of any home-scale method
- No soil mess, pests, or gnats
- Direct control over every input (EC, pH, nutrient form)
- Peer-reviewed NPK and nitrogen-form frameworks exist
- Scales cleanly to RDWC without redesign
Cons
- Power-dependent — pump failure = dead plants in hours
- Root rot risk is real and fast-moving
- pH and EC must be checked daily early on
- Higher startup cost than basic soil
- Less forgiving of absences (weekends away, vacations)
Frequently Asked Questions
Is DWC better than soil for cannabis?
DWC produces faster vegetative growth than soil — growers routinely see 3+ inches of vertical growth in a single day in early veg . However, "better" depends on your goals: soil is more forgiving and produces subjectively richer flavor, while DWC trades complexity for speed and control.
How long does DWC cannabis take to grow?
Top-fed DWC (bubbleponics) systems typically run roughly 3–4 months from seed to harvest . Peer-reviewed research uses a ~3-week vegetative stage in DWC before flipping to flower , with total timeline depending heavily on strain and flower duration.
What pH should DWC cannabis be?
Industry consensus places DWC cannabis pH in the 5.5–6.1 range, but peer-reviewed cannabis literature doesn't specify a single optimal number. Check pH at least daily in the first weeks, adjust gradually, and let plant response fine-tune your target.
How often should I change DWC water?
Full reservoir changes every 7–14 days are standard, with top-offs of pH-adjusted water in between. Change immediately if water becomes cloudy, smelly, or if pH starts drifting more than 0.5 units per day — those are signs of microbial problems.
Do I need a chiller for my DWC reservoir?
Not always. If your reservoir stays within a comfortable room-temperature range thanks to tent ventilation and an insulated bucket, you can skip a chiller. If summer temps push water warmer, a chiller becomes the cheapest insurance against root rot you can buy.
Can I grow autoflowers in DWC?
Yes — autoflowers can explode in DWC because the method eliminates transplant shock and accelerates their short life cycle. Just be aware autos don't wait for you to fix mistakes; dial in pH and EC before dropping seed. See our autoflower beginner guide for more.
Sources & References
This article was researched and fact-checked using 3 verified sources including 2 peer-reviewed studies, 1 industry source.
- Nitrogen source and solution strength modulate cannabinoid and antioxidant profiles in medicinal cannabis grown in a deep-water culture system | Scientific Reports — nature.com/articles/s41598-025-33089-1 [Research]
- Optimisation of Nitrogen, Phosphorus, and Potassium for Soilless Production of Cannabis sativa in the Flowering Stage Using Response Surface Analysis - PMC — pmc.ncbi.nlm.nih.gov/articles/PMC8635921 [Research]
- Top-Fed DWC Cannabis Setup Guide - Bubbleponics | Grow Weed Easy — growweedeasy.com/high-yield-bubbleponics-technique [Industry]


