Here's a fact most beginners overlook: the size your cannabis plant reaches during the vegetative stage almost directly predicts your final yield. Everything that happens under the lights before you flip to flower — every node, every branch, every root — is an investment in the harvest you'll pull weeks later.
The cannabis vegetative stage is the engine of your entire grow. Get it right and plants explode with canopy, respond perfectly to training, and cruise into flower primed for heavy bud production. Get it wrong and you'll spend weeks chasing deficiencies, stunted growth, or plants that never reach their genetic potential.
This guide covers everything: exact light schedules, nitrogen-heavy feeding programs, temperature and humidity targets, training windows, and the specific signals that tell you it's time to flip. Whether you're running a compact 2×2 tent or a full 4×8 setup, this is the only vegetative stage reference you'll need.
What Is the Cannabis Vegetative Stage? (And Why It Matters)
The cannabis vegetative stage is the growth phase that follows the seedling stage and precedes flowering. During veg, the plant focuses almost entirely on building structure — stems, branches, leaves, and roots — rather than producing flowers or seeds.
Cannabis stays in veg as long as it receives more than 13–14 hours of light per day. Indoors, growers control this completely. Outdoors, the plant follows the natural sun cycle, typically entering veg in spring and flipping to flower in late summer as days shorten.
- Photoperiod strains veg until the grower reduces light to 12/12
- Autoflowering strains veg automatically for 3–5 weeks regardless of light schedule
- Root development, canopy spread, and node spacing all happen during this phase
- Training techniques are most effective while the plant is actively vegging
The vegetative stage is your single biggest lever for yield. A well-vegged plant with a wide, even canopy can produce 2–3× more than a plant that was rushed into flower too early. Time invested here pays off every harvest.
How Long Is the Vegetative Stage for Cannabis?
The vegetative stage for cannabis typically lasts between 2 and 8 weeks for indoor grows, though some cultivators run plants for 12–16 weeks to build massive canopies. The right duration depends on your grow space, training goals, and the strain you're growing.
There is no universal answer to how long to keep cannabis in the vegetative stage — it depends entirely on your setup and goals. Smaller spaces need shorter veg times; larger spaces reward longer ones.
| Setup Size | Recommended Veg Duration | Target Plant Size at Flip | Expected Yield Potential |
|---|---|---|---|
| 2×2 tent (1–2 plants) | 3–4 weeks | 10–14 inches | 1–2 oz per plant |
| 3×3 tent (2–4 plants) | 4–6 weeks | 14–20 inches | 2–4 oz per plant |
| 4×4 tent (4–6 plants) | 5–8 weeks | 18–24 inches | 3–6 oz per plant |
| 4×8 tent (6–12 plants) | 6–10 weeks | 20–30 inches | 4–8 oz per plant |
| SOG / ScrOG setup | 2–4 weeks (SOG) / 6–10 weeks (ScrOG) | Screen-dependent | Maximized per watt |
A reliable rule of thumb: flip your photoperiod plants to flower when they're roughly one-third to one-half the final height you want. Most strains double or triple in height during the stretch that follows the flip to 12/12.
Autoflowering strains remove this decision entirely. Varieties like Amnesia Haze Autoflower and Skywalker OG Autoflower transition on their own internal clock — typically around 3–5 weeks from germination — so the focus shifts to maximizing growth speed rather than timing the flip.
Cannabis Vegetative Stage Light Schedule: Getting It Right
The cannabis vegetative stage light schedule is the single most important environmental control you manage indoors. The most popular schedule is 18 hours of light and 6 hours of darkness (18/6), which gives plants enough dark time to rest while maximizing photosynthesis and growth rate.
Some growers run 20/4 or even 24/0 during veg, arguing that more light equals faster growth. The science is mixed — most plants benefit from at least a few hours of darkness for metabolic recovery, and 18/6 consistently outperforms 24/0 for vigorous, healthy development.
- 18/6 — The gold standard for veg. Fast growth, lower electricity costs than 24/0, and a healthy rest period
- 20/4 — Used by some growers to accelerate veg slightly, especially with clones or slow-starting seedlings
- 24/0 — Continuous light. Works for some strains but can cause light stress or 'foxtailing' in sensitive genetics
- 16/8 — More conservative; still keeps photoperiod plants in veg but grows slightly slower
Cannabis responds to light through phytochrome proteins that detect the ratio of red to far-red light. During the dark period, phytochrome Pfr (the active form) converts back to Pr. When dark periods exceed roughly 12 hours, this conversion triggers flowering hormones. Keeping dark periods under 12 hours reliably maintains vegetative growth.
Light intensity matters as much as duration during veg. Aim for a PPFD (photosynthetic photon flux density) of 400–600 µmol/m²/s for young vegetating plants, scaling up to 600–900 µmol/m²/s as plants mature and canopy fills in. Pair your lights with a quality VPD management strategy to ensure the plant can actually use the light you're throwing at it.
Step-by-Step: The Cannabis Vegetative Stage Week by Week
Understanding what to expect each week helps you catch problems early and know when to push harder on training or feeding. Here's a practical week-by-week breakdown for a typical photoperiod grow.
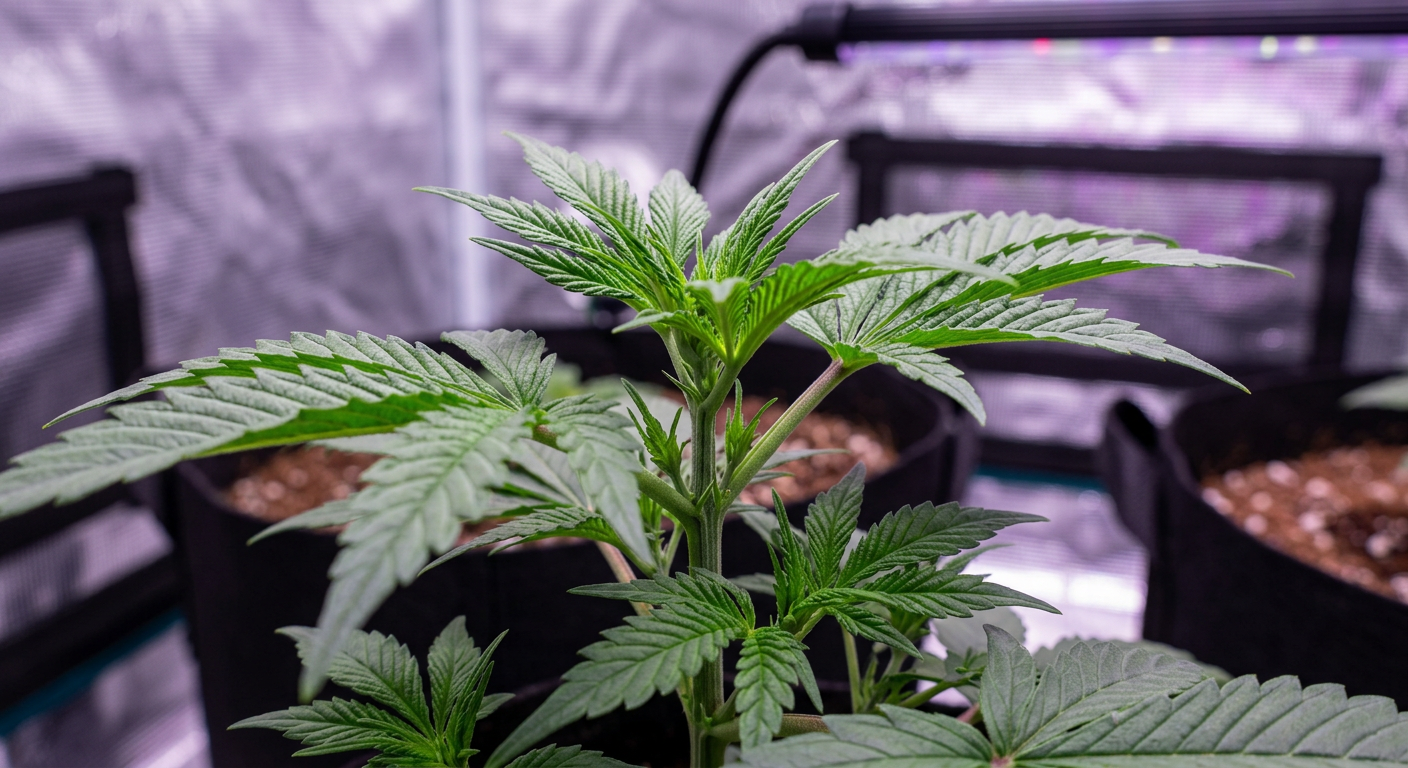
Week 1 of Veg — Transition from Seedling
True leaves appear and the plant's root system begins expanding rapidly. Nodes are tight together and growth looks slow above soil, but the roots are racing. Use light nutrient solution at 25–50% strength. Keep the environment stable at 75–80°F and 60–70% RH.
Week 2 of Veg — Explosive Above-Ground Growth Begins
By day 10–14, internodal spacing increases and you'll see 3–5 nodes forming. This is when you can begin low-stress training (LST) by gently bending the main stem. Ramp nutrients to 50–75% strength. Watch for the first signs of nitrogen uptake — deep green, waxy leaves indicate healthy feeding.
Week 3 of Veg — Training Window Opens Fully
Plants are now resilient enough for topping, FIMing, or aggressive LST. Topping at node 4 or 5 creates two main colas and dramatically widens the canopy. Feed at full vegetative strength. If you're running a ScrOG setup, begin weaving branches through the screen now.
Week 4 of Veg — Canopy Development and Sex Signs
Pre-flowers may appear at node junctions, allowing you to confirm sex in feminized strains or identify any males in regular seed grows. The canopy should be widening noticeably. Continue tucking and training. Small plants destined for a Sea of Green (SOG) may be ready to flip to flower around this point.
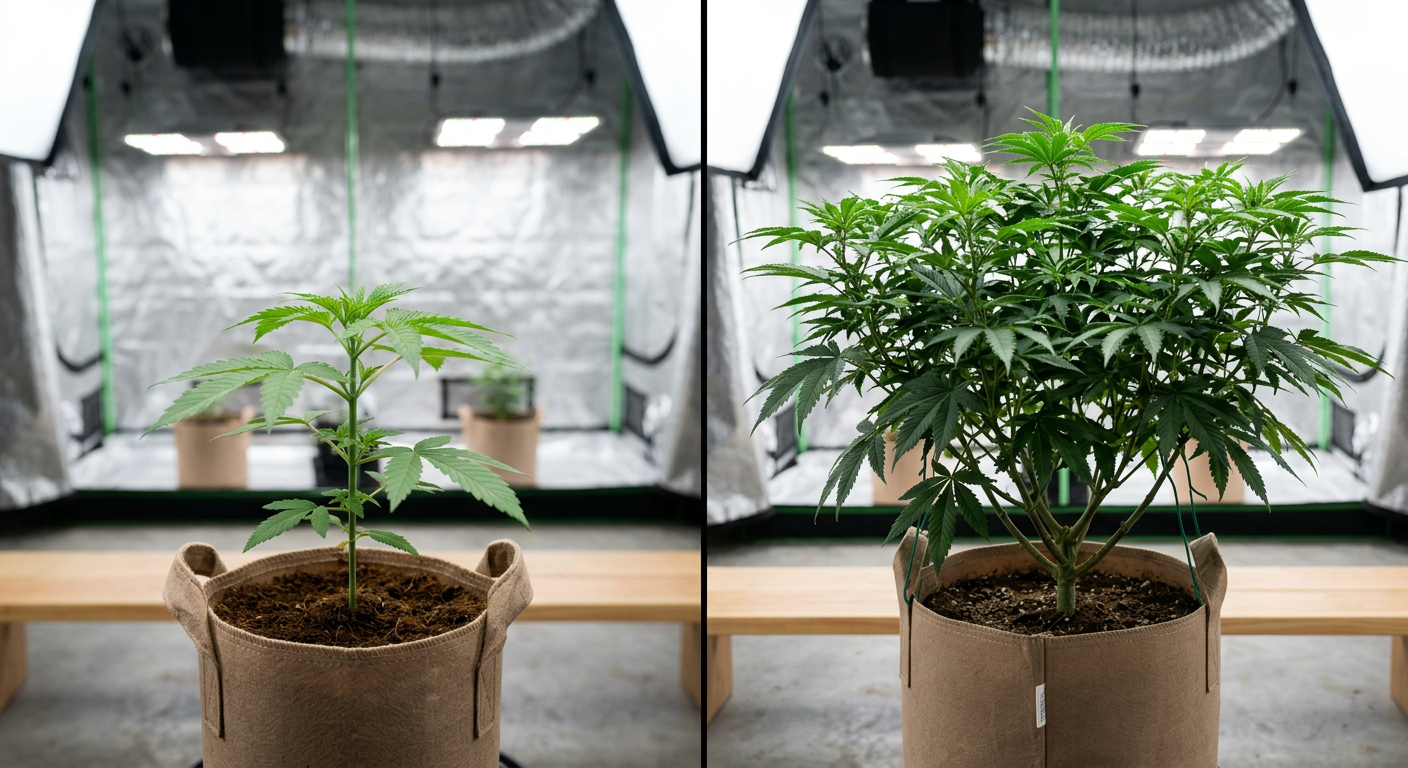
Weeks 5–8 — Canopy Fill and Final Veg Push
Longer veg runs push canopy width and branch count. Continue training every 2–3 days. Roots should be filling the container — if you see roots circling the drainage holes, it's time to transplant up or prepare to flip. By week 6–8 in a 4×4 or larger space, most photoperiod strains are ready for the transition to flower.
The most common beginner mistake is flipping too early. A plant with only 4–6 nodes at flip will produce a fraction of what a well-trained 8–12 node plant delivers. Give your genetics the time they need to build the structure that holds those heavy buds.
Vegetative Stage Nutrients for Cannabis: N-Heavy Feeding Explained

Vegetative stage cannabis feeding revolves around nitrogen. During veg, plants use nitrogen to build chlorophyll, proteins, and every new cell they create. A nitrogen-heavy feeding program — often described as a 3:1:2 NPK ratio or higher-N formulas — drives the lush, green, rapid growth you want before flower.
Understanding the role of each macronutrient during veg prevents both deficiencies and toxicities, two of the most common causes of stunted vegetative growth.
- Nitrogen (N) — The primary driver of vegetative growth. Dark green leaves, rapid node development, and vigorous stem thickening all depend on adequate nitrogen
- Phosphorus (P) — Lower needs during veg but still essential for root development and energy transfer (ATP)
- Potassium (K) — Supports water regulation, enzyme activation, and overall plant vigor throughout the lifecycle
- Calcium & Magnesium — Critical secondary nutrients; calcium builds cell walls and magnesium is the central atom in chlorophyll molecules
- Iron, Zinc, Manganese — Trace elements needed in small amounts but cause visible deficiencies when absent
| Veg Week | N-P-K Ratio | Feed Strength (EC) | pH Target (Soil) | pH Target (Hydro) |
|---|---|---|---|---|
| Week 1 | 2:1:1 | 0.8–1.2 | 6.2–6.5 | 5.8–6.0 |
| Week 2 | 3:1:2 | 1.2–1.6 | 6.2–6.5 | 5.8–6.0 |
| Week 3 | 3:1:2 | 1.6–2.0 | 6.2–6.8 | 5.8–6.2 |
| Week 4+ | 3:1:2 → 2:2:3 | 1.8–2.2 | 6.2–6.8 | 5.8–6.2 |
| Pre-flip (last week) | 1:3:2 (transition) | 1.6–2.0 | 6.2–6.8 | 5.8–6.2 |
Nitrogen toxicity looks like dark, shiny 'claw' leaves that curl downward at the tips. It's more common than deficiency in veg because growers overfeed. If you see clawing, flush with plain pH-balanced water and cut your nutrient strength by 25–30% before resuming feeding.
During the final week before flipping to flower, begin transitioning your nutrient profile — drop nitrogen slightly and introduce more phosphorus and potassium. This 'pre-flower transition' primes the plant's metabolic machinery for bloom production. Many premium nutrient lines include a specific 'transition' or 'week 1 bloom' formula designed for exactly this window.
For growers working with living soil, the feeding equation changes significantly. Healthy microbial populations in living soil setups cycle nutrients naturally, meaning you may only need top-dressings of nitrogen-rich amendments like blood meal or alfalfa during the first half of veg rather than liquid feeds every watering.
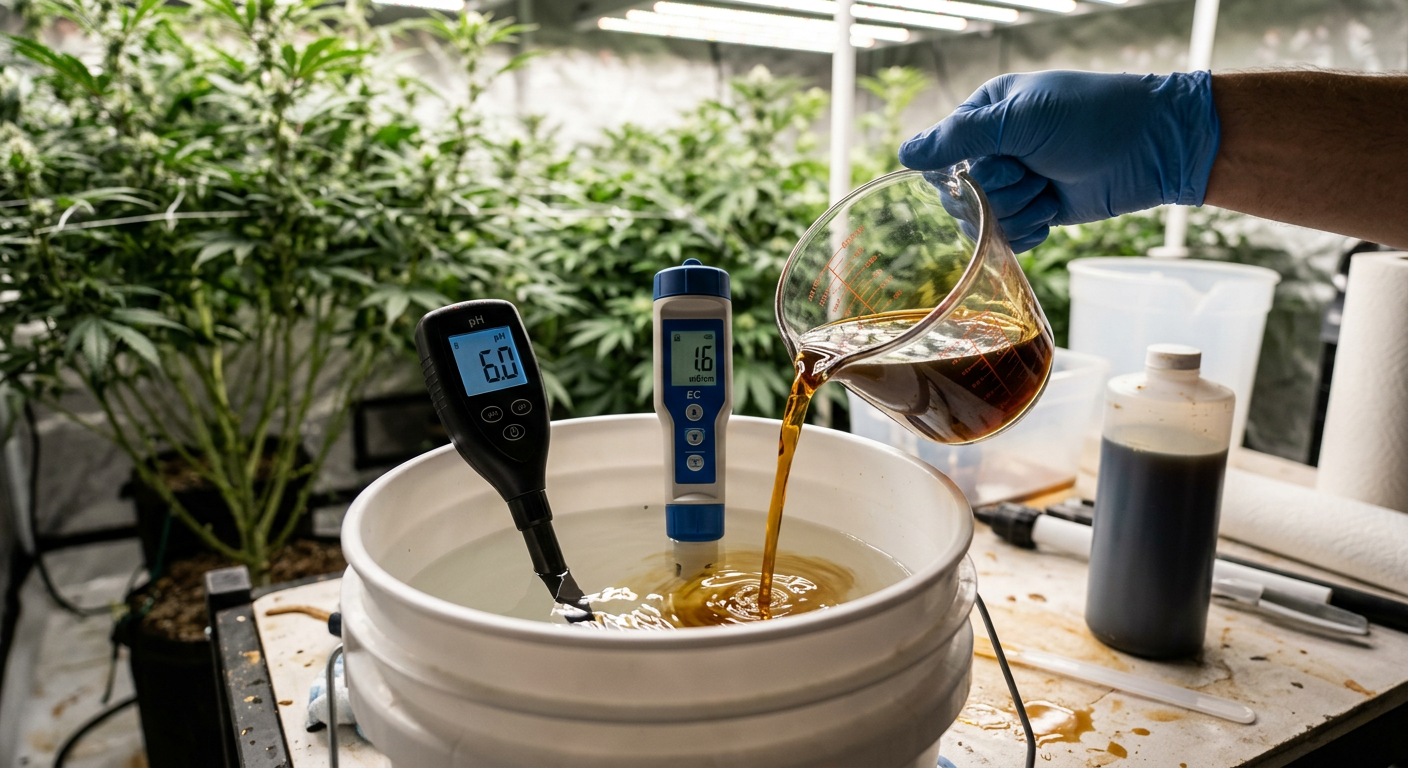
Always water until you get 10–20% runoff from the bottom of your container. Checking runoff EC and pH tells you exactly what's happening in the root zone — not just what you're putting in. Runoff EC significantly higher than input EC means salts are building up; flush immediately.
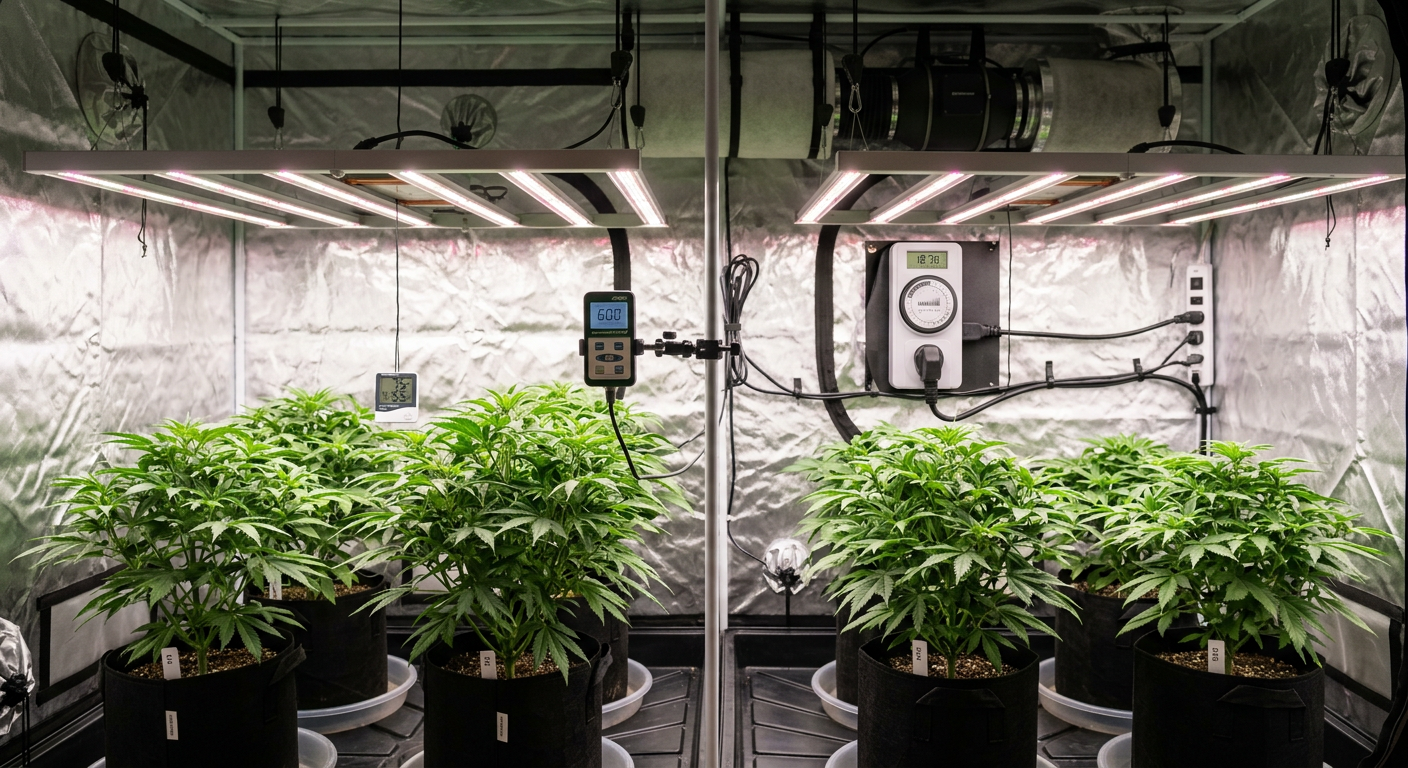
Temperature and Humidity During the Cannabis Vegetative Stage
Vegetative stage temperature and humidity for cannabis directly affects transpiration, nutrient uptake, and photosynthesis rates. Running the wrong environment — even with perfect feeding and lighting — will throttle growth speed and leave yields on the table.
The optimal temperature range during veg is 70–85°F (21–29°C) with lights on, dropping no more than 10°F during lights-off periods. Relative humidity should sit between 50–70% during the vegetative phase — higher than flowering, which helps plants transpire efficiently and take up more nutrients through their roots.
- Ideal daytime temp: 75–82°F (24–28°C)
- Ideal nighttime temp: 65–75°F (18–24°C)
- Ideal RH during veg: 55–70%
- VPD target during veg: 0.8–1.2 kPa
- CO₂ levels: 400–800 ppm ambient; 1000–1200 ppm if supplementing
Vapor Pressure Deficit (VPD) is the most accurate way to manage the temperature-humidity relationship during veg. At a VPD of 0.8–1.2 kPa, the plant's stomata open optimally, driving both transpiration and CO₂ uptake — the two engines of photosynthesis. Our full VPD guide for cannabis breaks this down with charts and calculators.
Temperature swings of more than 15°F between day and night can cause stress that slows growth and, in severe cases, triggers early pre-flowering or hermaphroditism in sensitive strains. Invest in a digital thermo-hygrometer with min/max memory so you can catch overnight temperature drops before they become a problem.
Watering Cannabis During the Vegetative Stage
Watering frequency during the vegetative stage should follow the 'wet-dry cycle' — water thoroughly until runoff, then allow the medium to dry out to about 30% moisture before watering again. This wet-dry cycle forces roots to chase water deeper into the medium, building the dense root architecture that supports massive yields.
Young veg plants in large containers need much less water than established plants. A common beginner mistake is watering a 3-gallon pot the same way you'd water a fully vegged 5-gallon — the small rootball can't pull moisture fast enough, leading to overwatering and root problems.
- Water when the top 1–2 inches of soil feel dry to the touch
- Lift containers — a light pot means it's time to water, a heavy pot means there's still moisture present
- Use room-temperature water (65–72°F) to avoid shocking roots
- Always pH-adjust water to 6.2–6.8 for soil, 5.8–6.2 for hydro and coco
- In coco coir, water daily or twice daily — coco requires much higher frequency than soil
Overwatering is the #1 killer of vegging cannabis plants. Symptoms look almost identical to nutrient deficiency: drooping, yellowing, and slow growth. Before you add more nutrients, check your watering schedule. Let the medium dry completely between waterings and you'll likely see the problem solve itself within 48 hours.
Training Techniques During the Vegetative Stage
The vegetative stage is the prime window for training cannabis plants. Every major technique — topping, FIMing, low-stress training, main-lining, and ScrOG — must be executed during veg while the plant is actively growing and can recover quickly before the demands of flower production begin.
The goal of all training is the same: create an even, wide canopy where multiple bud sites receive equal light intensity. A plant with one dominant main cola will always yield less than a trained plant with 8–16 even bud sites all hitting maximum PPFD.
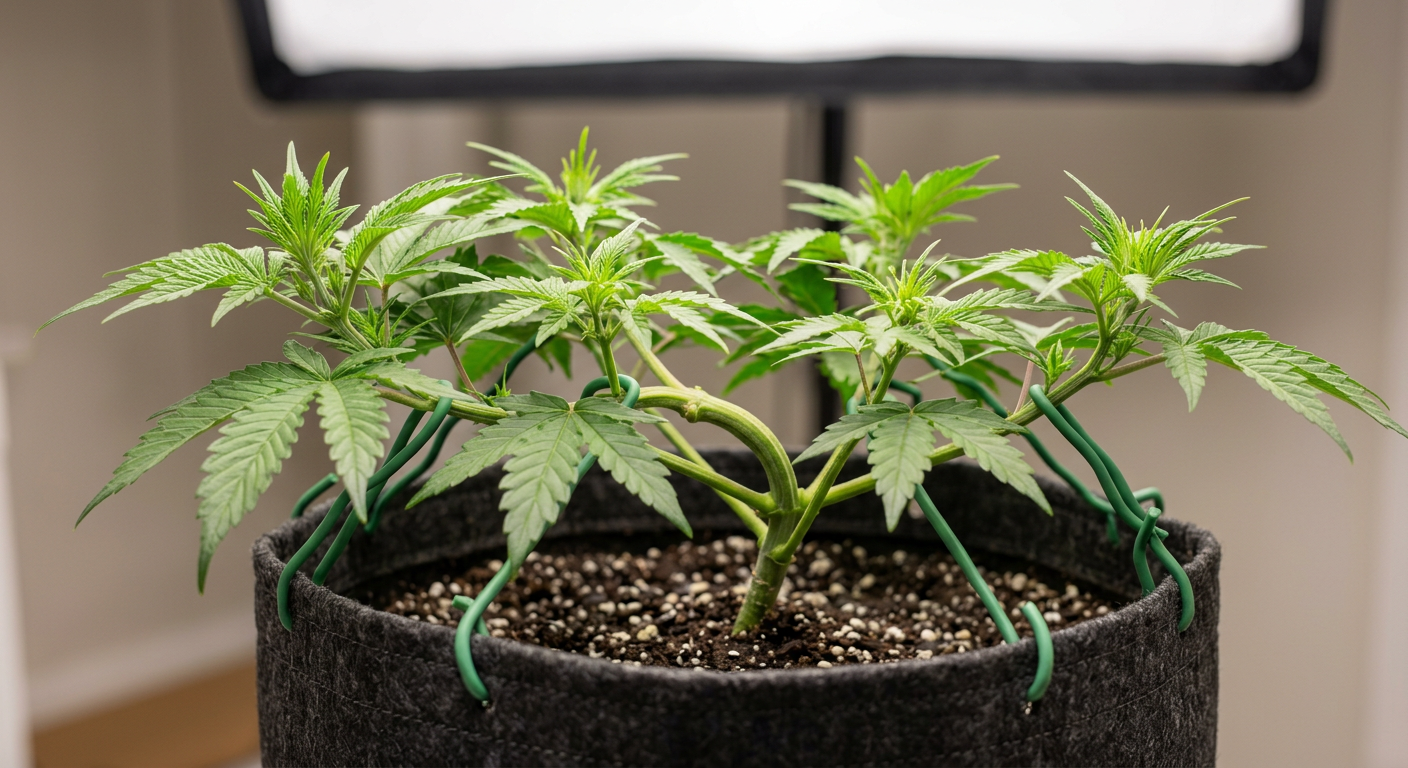
Low-Stress Training (LST)
Gently bend and tie the main stem and branches horizontally to spread the canopy. Start LST as early as week 2–3 of veg. Use soft plant ties or pipe cleaners — never wire. Re-tie every 2–3 days as branches spring back upright. LST works on any strain and is ideal for autoflowers that can't afford recovery time.
Topping
Remove the apical meristem (growing tip) between the 4th and 6th node to create two main colas instead of one. Top at least 2 weeks before your planned flip date to allow full recovery. Topping can be repeated — some growers top twice ('double-top') for 4 even main colas. Avoid topping autoflowers unless you have a fast-finishing genetic.
FIMing (F*** I Missed)
A less precise version of topping that removes about 75% of the new growth tip instead of the whole shoot. FIMing can produce 4 new main shoots from one cut and causes less stress than topping. It's a good option mid-veg when you want to multiply bud sites without taking a full recovery hit.
ScrOG (Screen of Green)
Install a horizontal screen at 12–18 inches above the canopy and weave branches through as they grow. The screen creates a perfectly level canopy where every bud site gets maximum light. ScrOG requires a longer veg time (6–10 weeks typically) to fill the screen but consistently delivers top-tier yields per square foot. Read our full ScrOG growing guide for setup instructions.
Defoliation During Veg
Removing large fan leaves that block light from lower bud sites is highly effective during mid-to-late veg. Focus on leaves that shade lower nodes — not random removal. Never strip more than 20–30% of leaf mass at one time. Plants recover faster from defoliation during veg than during flower, making this the best time to open up the canopy.
Autoflowering strains have a compressed timeline that limits aggressive training. Stick to LST and light defoliation for autos. Photoperiod strains have unlimited veg time and can handle multiple rounds of topping, ScrOG, and defoliation — take advantage of that flexibility.
When to Flip to Flowering: Reading the Right Signals
Knowing when to flip cannabis to flowering is one of the most important decisions in the entire grow cycle. The right moment balances plant size, canopy coverage, root health, and available vertical space in your tent or grow room.
Most growers flip when plants are 40–60% of their target final height, accounting for the 'stretch' — the explosive vertical growth that happens in the first 2–3 weeks of flower. Indica-dominant strains typically stretch 25–50% after the flip; sativa-dominant strains can double or even triple in height.
- Plant is ⅓ to ½ your maximum grow space height — Leaves room for flower stretch without hitting the light
- 6–8+ nodes visible — Enough branch structure to support multiple bud sites
- Canopy covers 70–80% of your grow space footprint — Maximizes light interception from day one of flower
- Pre-flowers visible at nodes — Plant has sexually matured and is ready to bloom on command
- Roots filling container but not severely rootbound — Healthy root-to-shoot ratio supports flower production
- Training is complete or nearly complete — All major training should happen during veg, not flower
High-THC photoperiod strains like OG Kush (26% THC), Purple Kush (27% THC), and Quantum Kush (30% THC) all reward longer veg times with significantly heavier yields. These genetics have the genetic ceiling to fill out large canopies — give them the veg time to build that structure before the flip.
For sativa-dominant or haze genetics like Super Lemon Haze or Tangerine Haze, flip earlier than you think you need to. These strains stretch aggressively and can overwhelm a tent if flipped too late. Flip at one-quarter to one-third of target final height for haze-dominant varieties.
Before you flip, do a final canopy inspection and remove any leaves or small branches below the lowest expected bud site. This 'lollipopping' focuses the plant's energy on productive upper sites and improves airflow — both of which translate directly to denser, higher-quality buds during flower.
Common Cannabis Vegetative Stage Problems (And How to Fix Them)
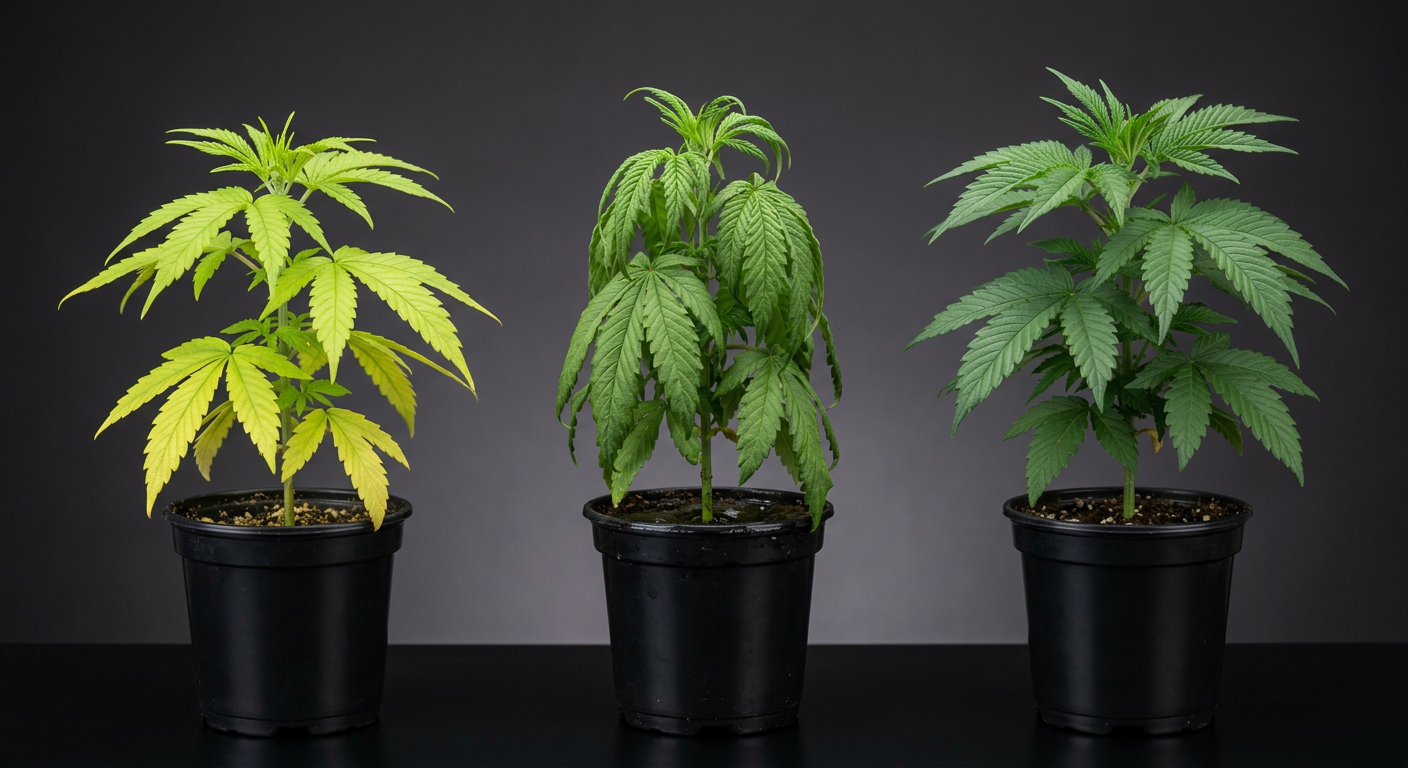
Cannabis vegetative stage problems fall into a few predictable categories: nutrient issues, environmental stress, pest and disease pressure, and light-related stress. Catching problems in veg is always better than dealing with them in flower when the plant is under greater physiological demand.
The most important skill is learning to distinguish between nutrient deficiencies (which show up on specific parts of the plant in predictable patterns) and environmental stress (which tends to affect the whole plant more uniformly).
| Problem | Visual Symptoms | Most Likely Cause | Fix |
|---|---|---|---|
| Nitrogen deficiency | Yellowing from lower, older leaves upward | Under-feeding or pH lockout | Check pH first; increase N at correct pH |
| Nitrogen toxicity | Dark green, glossy leaves; clawing tips | Over-feeding nitrogen | Flush, reduce feed strength by 25–30% |
| Cal-Mag deficiency | Brown spots, interveinal chlorosis | Soft/RO water, coco grows, pH imbalance | Add Cal-Mag supplement; adjust pH to 6.2–6.5 |
| Overwatering | Drooping, yellowing, slow growth | Too frequent watering; poor drainage | Let medium fully dry; improve drainage |
| Light burn / stress | Bleached or curled upper leaves | Light too close; intensity too high | Raise light or reduce intensity; check PPFD |
| Spider mites | Tiny dots on leaves; webbing under leaves | Low humidity; contaminated clones/tools | Raise RH; neem oil or predatory mites |
| Root bound | Wilting despite wet soil; slow growth | Container too small for root mass | Transplant to larger container immediately |
| pH lockout | Multiple deficiency symptoms simultaneously | pH out of range preventing nutrient uptake | Flush with pH-correct water; retest runoff |
If you're seeing problems across multiple leaves and nutrients despite correct feeding, pH lockout is almost always the culprit. Cannabis can only absorb specific nutrients at specific pH ranges — nitrogen absorbs best between 6.0–7.0 in soil, while iron requires a tighter range of 6.0–6.5. When pH drifts outside these windows, nutrients become chemically unavailable even when they're present in the medium.
For deeper troubleshooting at earlier growth stages, check our cannabis seedling care guide which covers the transition from sprout into the vegetative phase in detail.
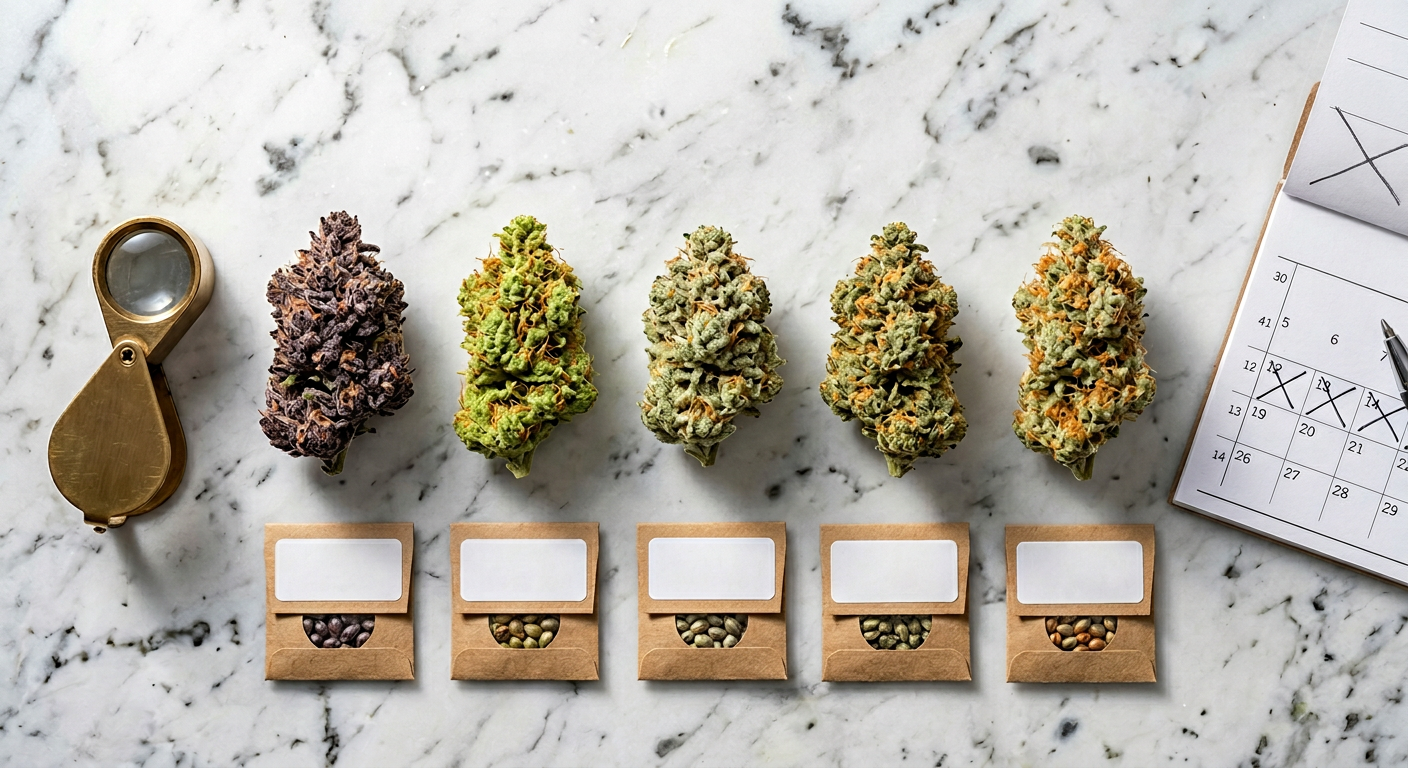
Choosing the Right Strains for Your Vegetative Stage Goals
Not all cannabis strains veg the same way. Indica-dominant varieties tend to grow bushier with tighter internodal spacing, making them easier to train and more suitable for shorter veg periods in compact spaces. Sativa-dominant strains stretch vertically and require more space, longer veg windows, and earlier training intervention.
Autoflowering varieties are a category of their own — they veg for a fixed 3–5 week window regardless of light schedule, making them perfect for growers who want fast, simple cycles without managing the flip.
Here are some excellent photoperiod choices that respond exceptionally well to vegetative training and reward longer veg times with premium yields:
- New York Power Diesel (24% THC) — Fast-vegging sativa hybrid that responds brilliantly to topping and LST
- Northern Lights x Big Bud (20% THC) — Classic indica structure; bushy canopy develops naturally with minimal training
- White Widow (25% THC) — Legendary resilience; handles aggressive training and bounces back fast
- Black Widow (26% THC) — Heavy-yielding with excellent canopy spread during extended veg periods
- Wonder Woman (22% THC) — Vigorous veg growth with a ScrOG-friendly wide branching structure
- Sour Diesel (24% THC) — Sativa-dominant; rewards long veg and aggressive training for massive colas
For autoflower growers looking to maximize their compressed veg window, fast-finishing and vigorous options include Skywalker OG Autoflower (23% THC) and Holy Grail Kush Autoflower (20% THC) — both deliver impressive canopy development in a tight timeline.
Starting from quality genetics is the foundation of any successful veg stage. Even perfect technique can't overcome weak or unstable seeds. Our complete cannabis seed germination guide walks you through getting every seed off to the strongest possible start before veg even begins.
Match your strain to your space and timeline before you start. A sativa that doubles in height during stretch will wreck a 5-foot tent if you veg it for 8 weeks. Know your genetics' growth patterns before you commit to a veg duration — strain selection is strategy.
Vegetative Stage Optimization Checklist
Use this master checklist at the start of every veg cycle to confirm your setup is dialed in before plants go in. Catching gaps in your environment, nutrients, or equipment during setup — rather than week 3 of a problem — saves entire harvests.
Environment Setup ✓
- Lights set to 18/6 schedule with a reliable timer
- PPFD measured at canopy level (target: 400–600 µmol/m²/s early veg)
- Temperature holding 75–82°F with lights on
- Humidity holding 55–70% RH
- VPD calculated and within 0.8–1.2 kPa range
- Oscillating fan creating gentle stem movement (builds stem strength)
- Intake and exhaust fans balanced for negative pressure
Nutrient & Water Prep ✓
- pH meter calibrated and accurate
- EC/TDS meter ready for runoff checks
- Base nutrients, Cal-Mag, and pH adjustment solutions stocked
- Water source pH and EC measured
- Feed schedule written and ready for the veg duration
Training Plan ✓
- Training technique chosen and supplies ready (ties, screen, scissors)
- Topping date planned (target: node 4–6, at least 2 weeks before flip)
- Final canopy size target confirmed against grow space dimensions
- Flip date estimated based on growth rate and space constraints
Plant Health Monitoring ✓
- Visual inspection every 2–3 days for deficiency, pests, or stress signs
- Runoff EC and pH checked weekly
- Container weight checked before each watering to prevent overwatering
- Sex confirmed (for photoperiod strains) before committing to extended veg
For growers just getting started, our complete beginner's guide to growing cannabis indoors covers tent setup, equipment selection, and the full indoor growing framework that supports a successful vegetative stage.
Frequently Asked Questions
How long should I keep cannabis in the vegetative stage?
Most indoor growers veg photoperiod cannabis for 4–8 weeks depending on their grow space size and training goals. Smaller tents (2×2) need only 3–4 weeks. Larger spaces (4×4 and up) reward 6–10 week veg periods with significantly heavier yields. Autoflowers veg automatically for 3–5 weeks regardless of light schedule — you don't control their transition timing.
What is the best light schedule for the cannabis vegetative stage?
The 18/6 light schedule (18 hours on, 6 hours off) is the gold standard for cannabis vegetative growth. It maximizes photosynthesis while giving plants a rest period for metabolic recovery. Some growers use 20/4 to push growth speed slightly, but 24/0 continuous light offers diminishing returns and can stress sensitive strains. The key rule: keep dark periods under 12 hours to prevent flowering.
What nutrients does cannabis need during the vegetative stage?
Cannabis needs nitrogen-heavy nutrients during the vegetative stage. A 3:1:2 NPK ratio (nitrogen:phosphorus:potassium) drives the lush green growth of veg. Calcium and magnesium are also critical secondary nutrients — especially in coco coir or with soft or reverse-osmosis water. Feed at increasing EC levels (0.8–2.2) as plants mature, and always pH-adjust your solution to 6.2–6.8 for soil or 5.8–6.2 for hydro and coco.
When should I flip cannabis from vegetative to flowering stage?
Flip your cannabis to flower when plants are one-third to one-half your maximum available height, have at least 6–8 well-developed nodes, and the canopy covers 70–80% of your grow space footprint. For indica-dominant strains, this often means flipping around week 4–6 of veg. Sativa-dominant strains should be flipped earlier — at one-quarter of target height — because they stretch much more aggressively after the flip.
What temperature and humidity should I maintain during cannabis veg?
Keep temperatures between 75–82°F (24–28°C) with lights on and relative humidity between 55–70% during the cannabis vegetative stage. Aim for a VPD of 0.8–1.2 kPa for optimal stomatal function and nutrient uptake. Avoid temperature swings greater than 15°F between lights-on and lights-off periods, as this can cause stress and slow vegetative growth. Higher humidity during veg (compared to flower) helps plants transpire efficiently and absorb more nutrients.
Frequently Asked Questions
How long should I keep cannabis in the vegetative stage?
Most indoor growers veg photoperiod cannabis for 4–8 weeks depending on grow space size and training goals. Smaller tents need only 3–4 weeks while larger spaces reward 6–10 week veg periods. Autoflowers veg automatically for 3–5 weeks regardless of light schedule.
What is the best light schedule for the cannabis vegetative stage?
The 18/6 light schedule (18 hours on, 6 hours off) is the gold standard for cannabis vegetative growth. It maximizes photosynthesis while giving plants a rest period. Keep dark periods under 12 hours to reliably prevent plants from switching to flowering mode.
What nutrients does cannabis need during the vegetative stage?
Cannabis needs nitrogen-heavy nutrients during veg — a 3:1:2 NPK ratio drives lush green growth. Calcium and magnesium are critical secondary nutrients, especially in coco or with soft water. Feed at increasing EC levels from 0.8 up to 2.2 as plants mature and always pH-adjust your solution.
When should I flip cannabis from vegetative to flowering stage?
Flip when plants are one-third to one-half your maximum available height, have at least 6–8 nodes, and the canopy covers 70–80% of your grow space. Indica-dominant strains can veg longer; flip sativa-dominant strains early since they stretch aggressively after the transition to 12/12.
What temperature and humidity should I maintain during cannabis veg?
Keep temperatures between 75–82°F with lights on and relative humidity between 55–70% during veg. Target a VPD of 0.8–1.2 kPa for optimal nutrient uptake. Avoid temperature swings greater than 15°F between day and night periods to prevent stress and stunted growth.