You spent months dialing in your grow: the lights, the nutrients, the training, the harvest timing. Then you rushed the cure and ended up with harsh, grassy weed that doesn't come close to its potential. It happens to more growers than most will admit. Learning how to cure cannabis in mason jars correctly is what separates a good harvest from a great one, and it comes down to a simple, consistent process that almost nobody explains clearly.
This guide gives you the full picture: the right jars, the exact fill level, the week-by-week burping schedule with specific timing, how to read your hygrometer, and how to diagnose every problem before it ruins your crop. No filler. No vague advice. Just the step-by-step execution you need.
Why Mason Jars Are the Gold Standard for Curing Cannabis
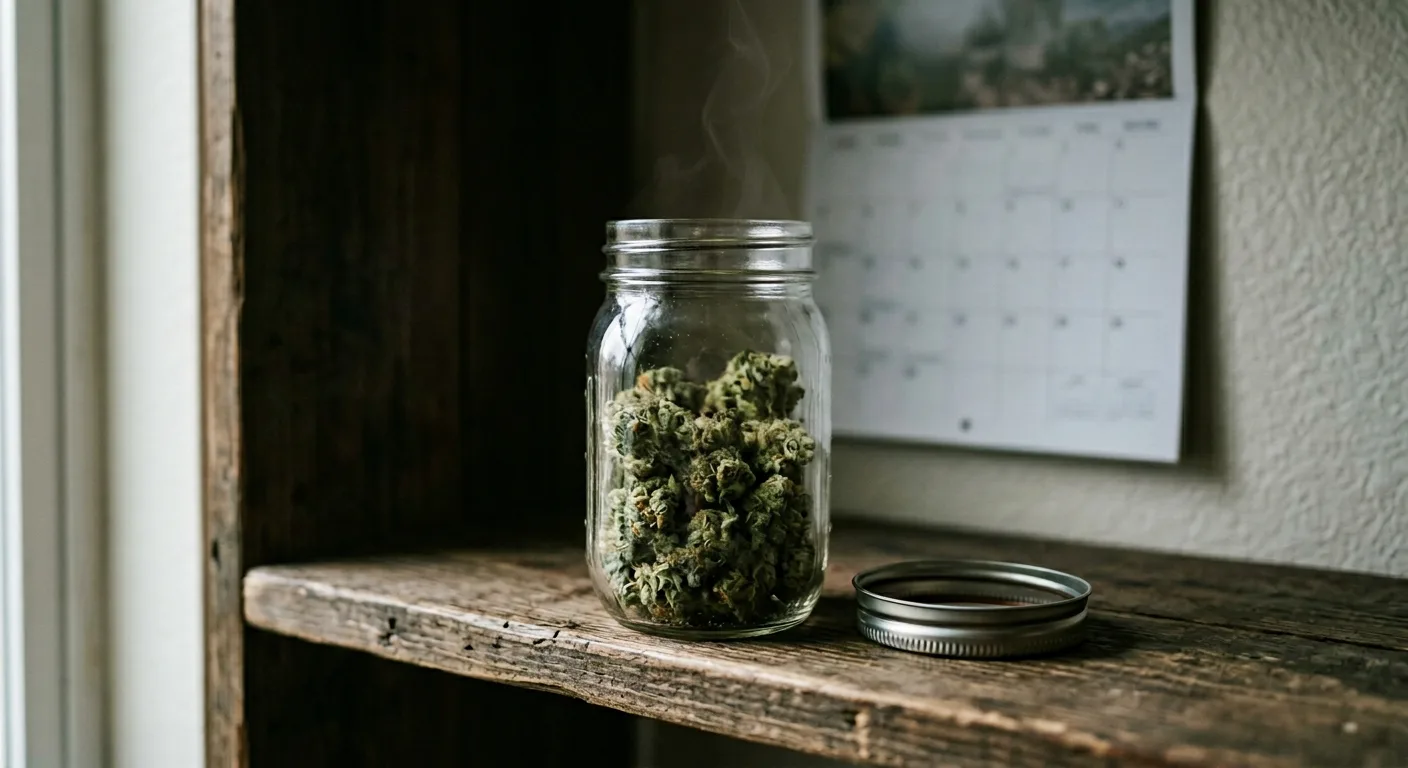
Mason jars, specifically glass, wide-mouth canning jars, are the best curing containers available because glass is inert, airtight, and non-porous. They create a stable microenvironment where humidity and gas exchange can be precisely controlled during the cure.
Plastic bags, plastic tubs, and vacuum-sealed pouches all have serious problems for curing. Plastic off-gasses trace chemicals that absorb into your buds over weeks, subtly altering flavor. Plastic is also slightly porous, meaning it does not maintain a truly stable humidity environment. Metal tins can cause the same chemical-interaction issues and often seal so tight that gas exchange becomes impossible.
Glass mason jars solve all of these problems at once:
- Chemically inert, no off-gassing or flavor contamination
- Truly airtight when sealed, no passive humidity leakage
- Reusable and easy to clean between harvests
- Transparent: you can visually inspect buds without opening
- Available in multiple sizes for different batch sizes
- Inexpensive, wide-mouth quart jars cost roughly $1 to $2 each
Wide-mouth quart mason jars (32 oz) are the ideal size for most home growers. They hold enough material to cure efficiently while staying small enough to handle easily. Pint jars (16 oz) work well for smaller batches or single-strain samples.
The wide-mouth design matters. Narrow-mouth jars make it difficult to load and unload buds without damaging trichomes, and the restricted opening slows gas exchange during burping. Always choose wide-mouth over regular-mouth jars for curing cannabis.
What You Need Before You Start: Equipment Checklist
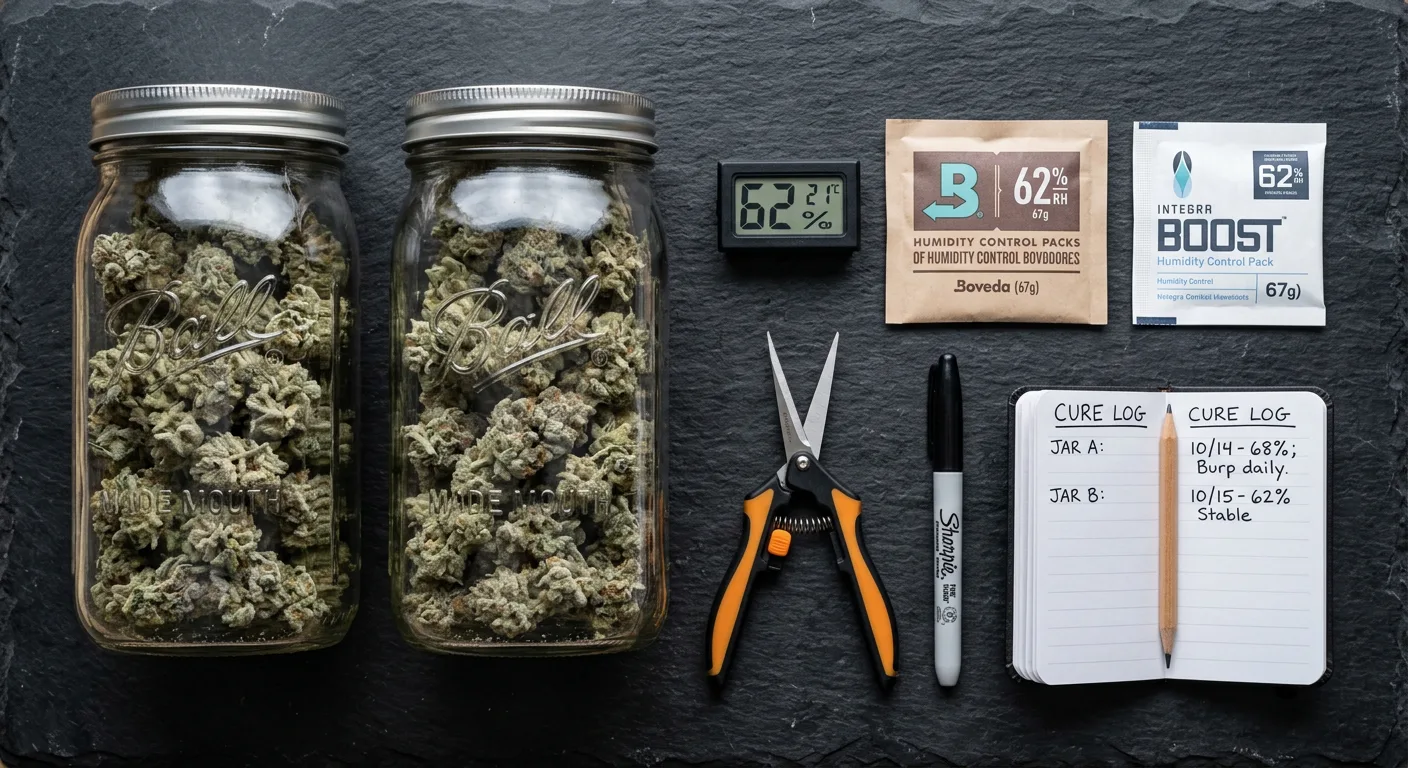
Before you jar your first bud, gather everything on this list. Missing even one item, especially the hygrometer, leads to guessing instead of measuring, and guessing during the cure is how you lose a harvest to mold or over-drying.
- Wide-mouth quart mason jars (32 oz), one jar per 25 to 30 grams of dried bud
- Small digital hygrometers, one per jar if possible, or rotate between jars
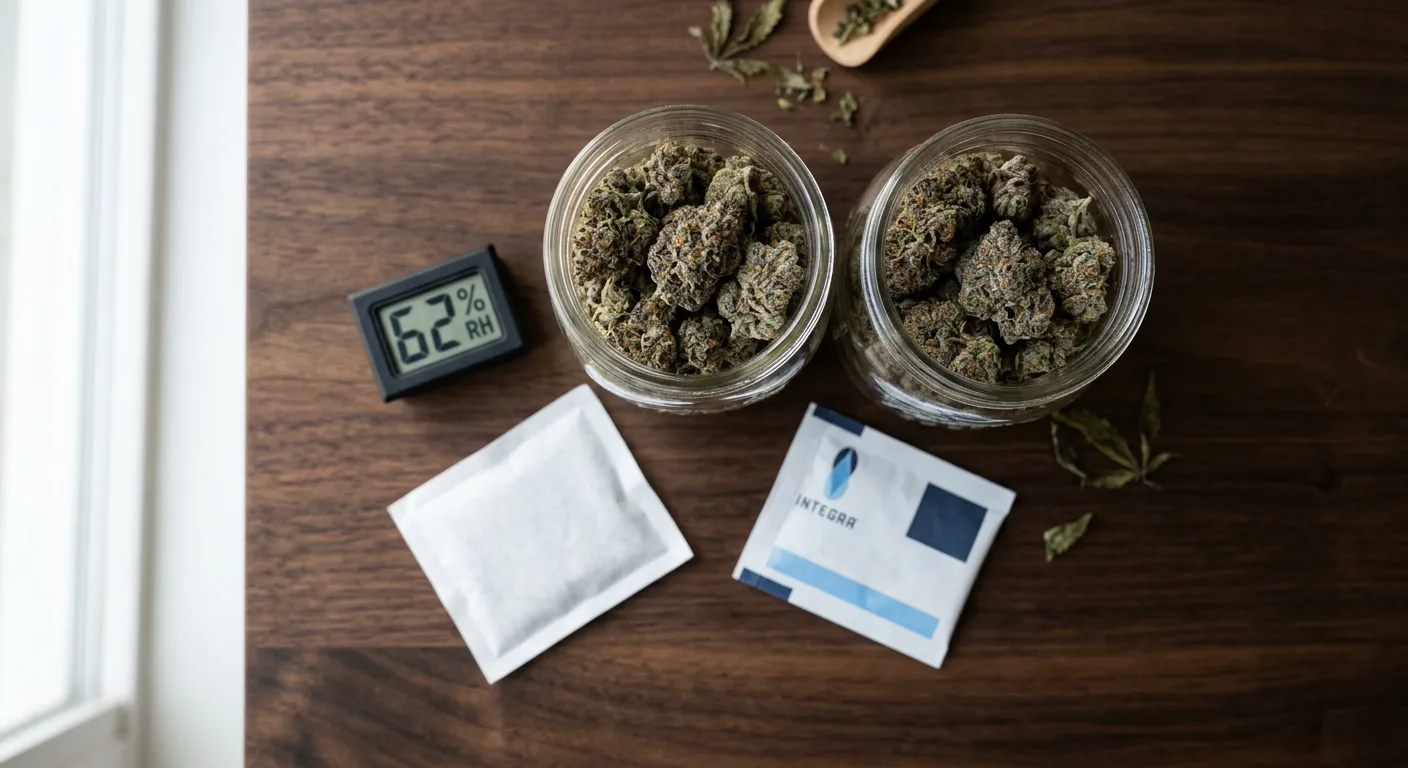
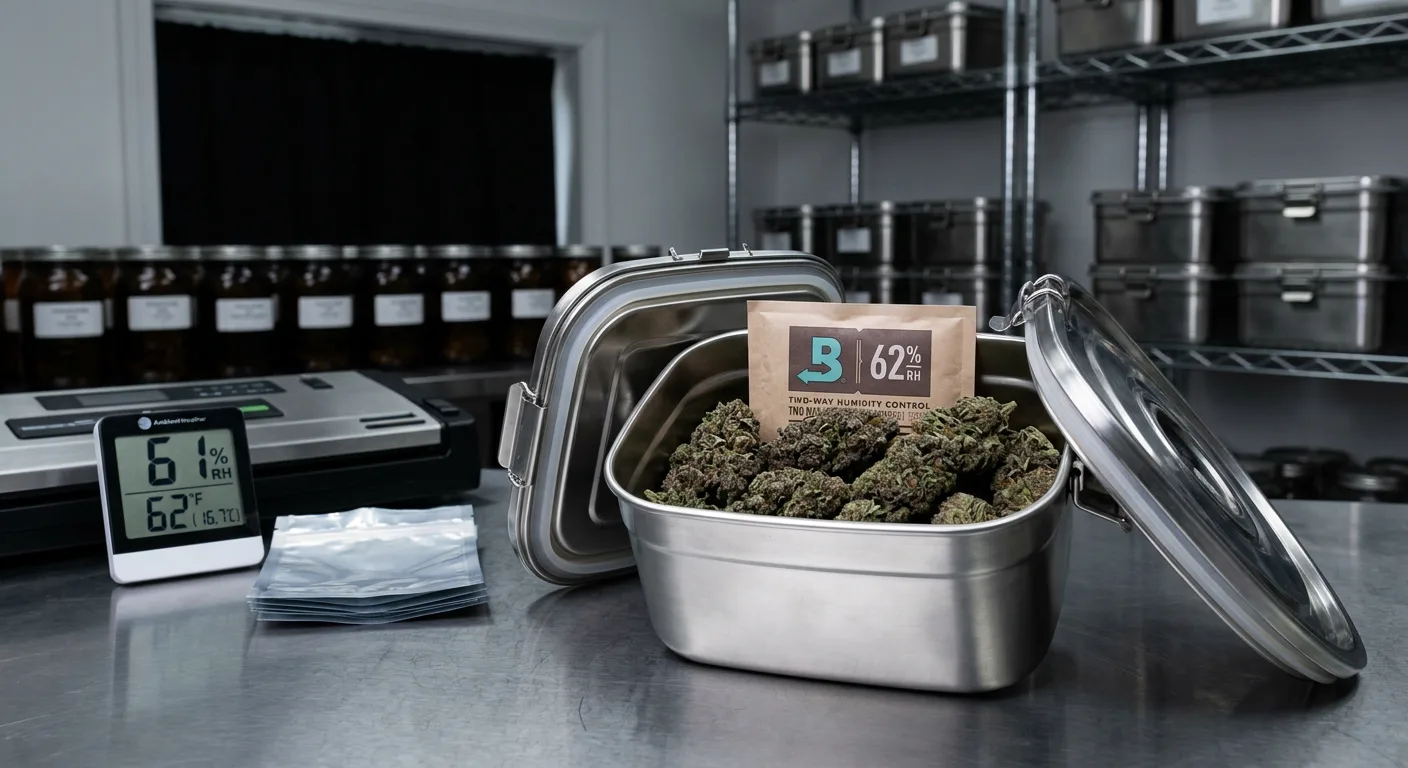
- 58–62% humidity packs (Integra Boost or Boveda), one pack per quart jar
- Fresh lids and bands, old lids may not seal properly
- Masking tape and a marker for strain labels and jar dates
- A dark, cool storage location, closet, cabinet, or dedicated curing box
- A notebook or phone app to log daily humidity readings and observations
Buy at least one hygrometer per jar if you are curing multiple strains. Different genetics can release moisture at different rates, and a single shared hygrometer will not catch problems in individual jars fast enough to prevent mold.
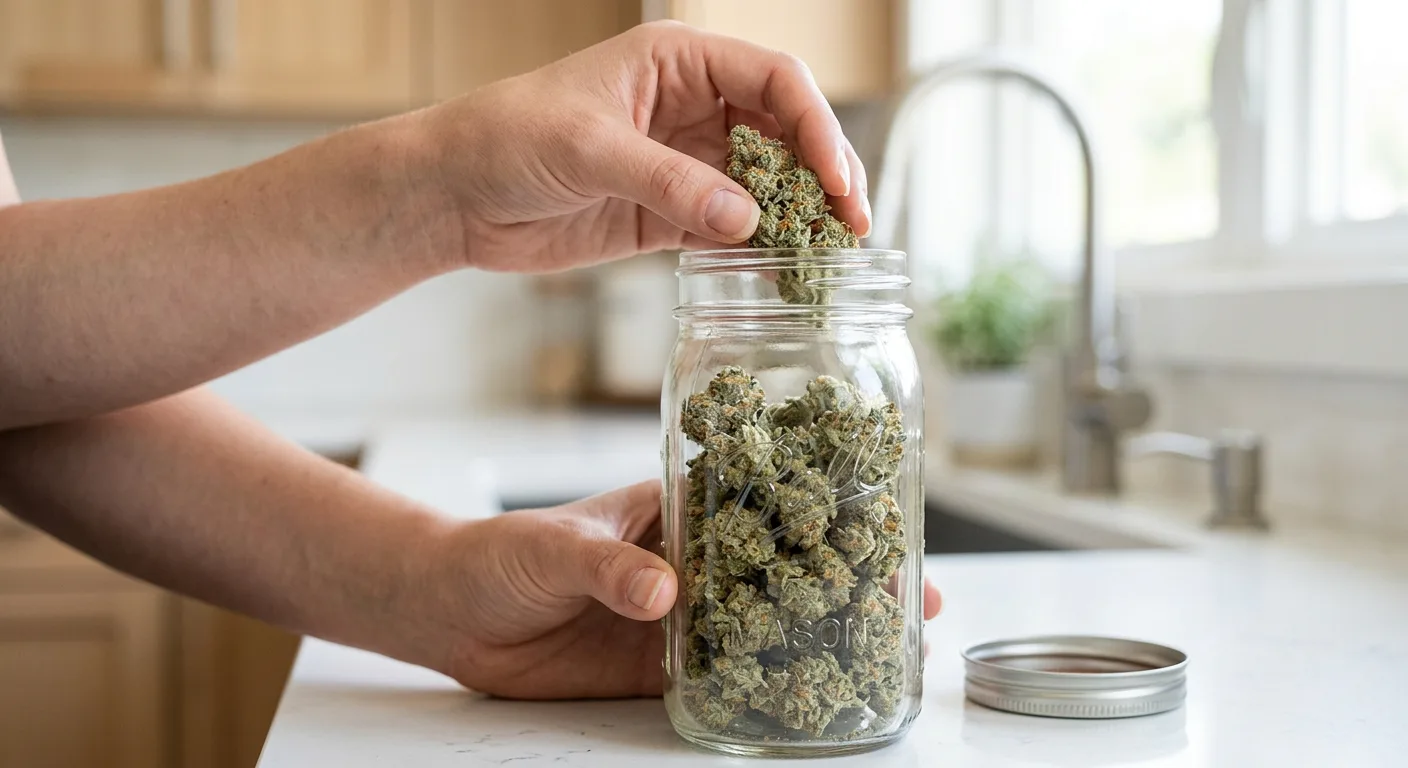
Jar Sizing: How Much Cannabis Per Jar?
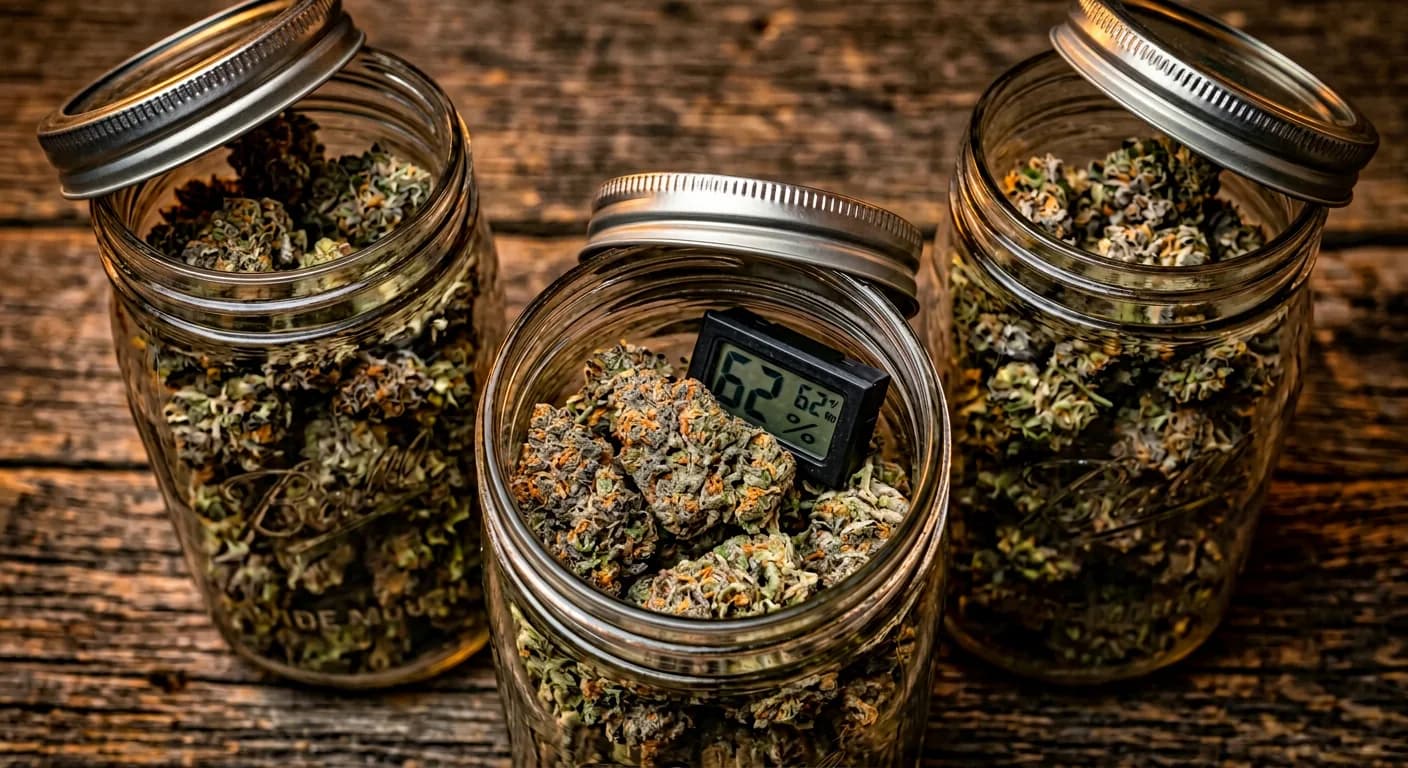
The right ratio is roughly 25 to 30 grams of dried, trimmed cannabis per 32-ounce (quart) mason jar. This fills the jar to approximately 75% capacity, leaving a quarter of the jar as open headspace above the buds. That headspace is not wasted: it is the gas exchange zone where carbon dioxide, oxygen, and moisture vapor circulate each time you burp the jar.
If you are working with smaller quantities, a pint jar (16 oz) holds 12 to 15 grams comfortably at the 75% fill level. Half-gallon jars (64 oz) work for large batches of a single strain but require more discipline with burping because the larger volume traps more moisture and gas.
Never pack a jar so tight that buds compress against each other. Compressed buds cannot release moisture evenly and create pockets of trapped humidity, prime conditions for mold growth. If the buds feel squeezed when you put the lid on, move some to a second jar.
How to Fill Your Mason Jars Correctly
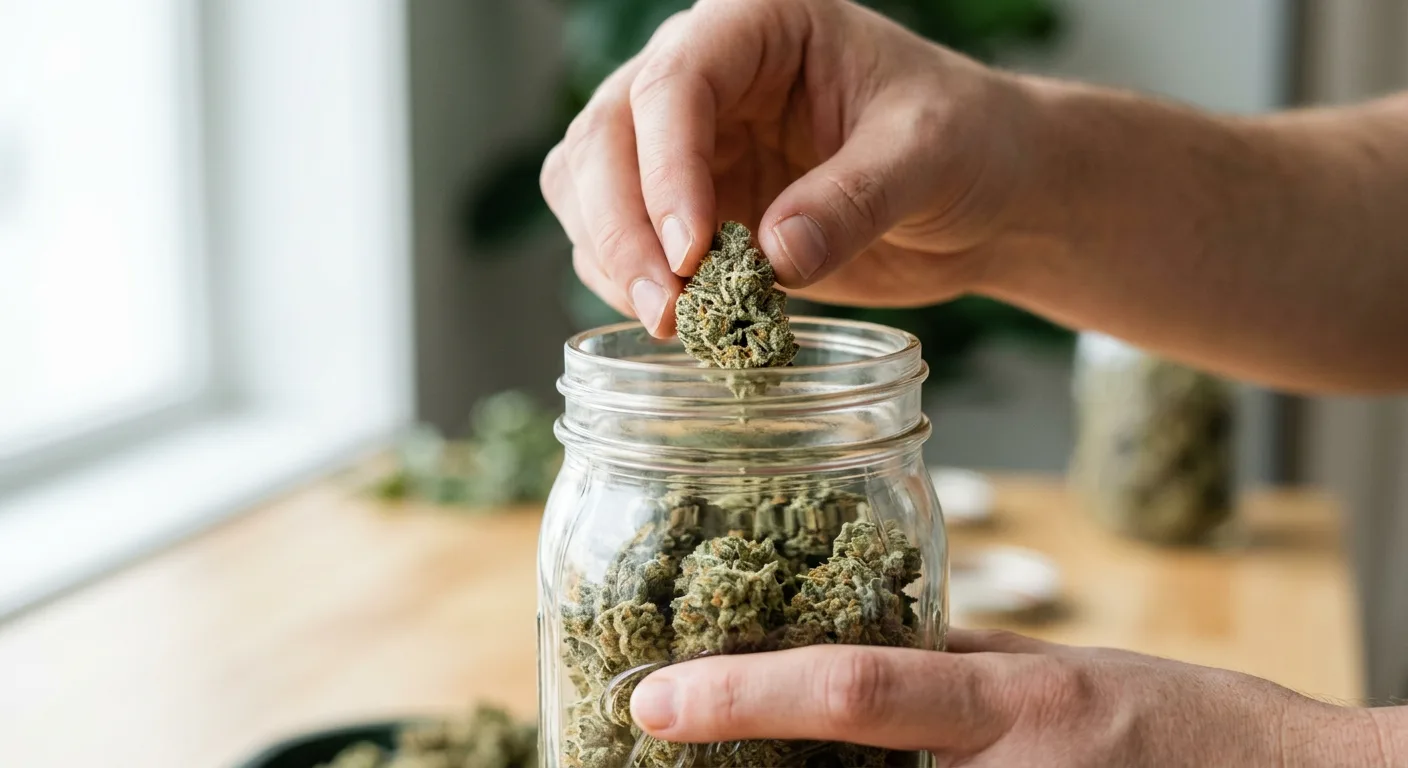
Filling your jars correctly sets the entire cure up for success. The 75% fill rule is the single most important rule in this whole process, and it is the step most beginners get wrong by overfilling in an attempt to minimize the number of jars they need.
Follow these steps exactly when loading your jars:
Confirm Your Buds Are Properly Dried First
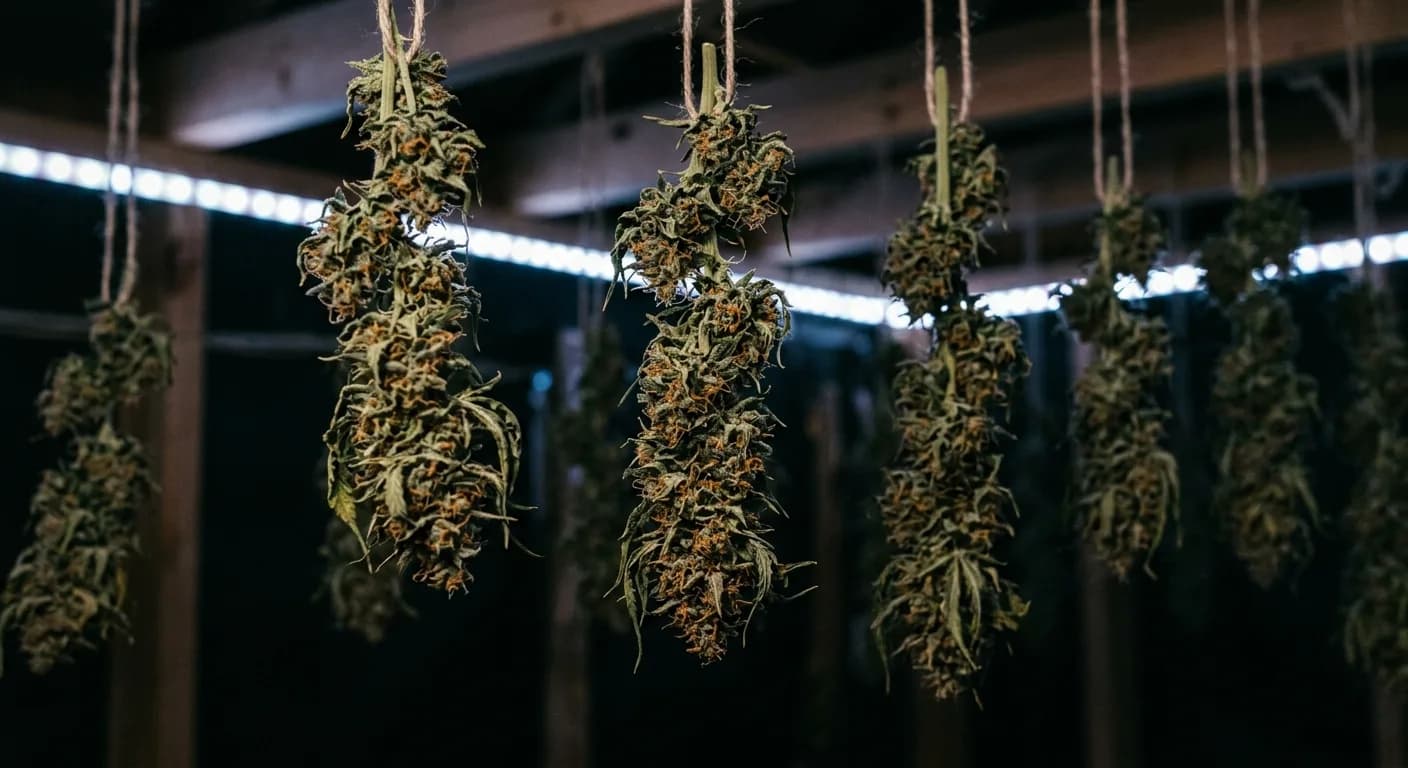
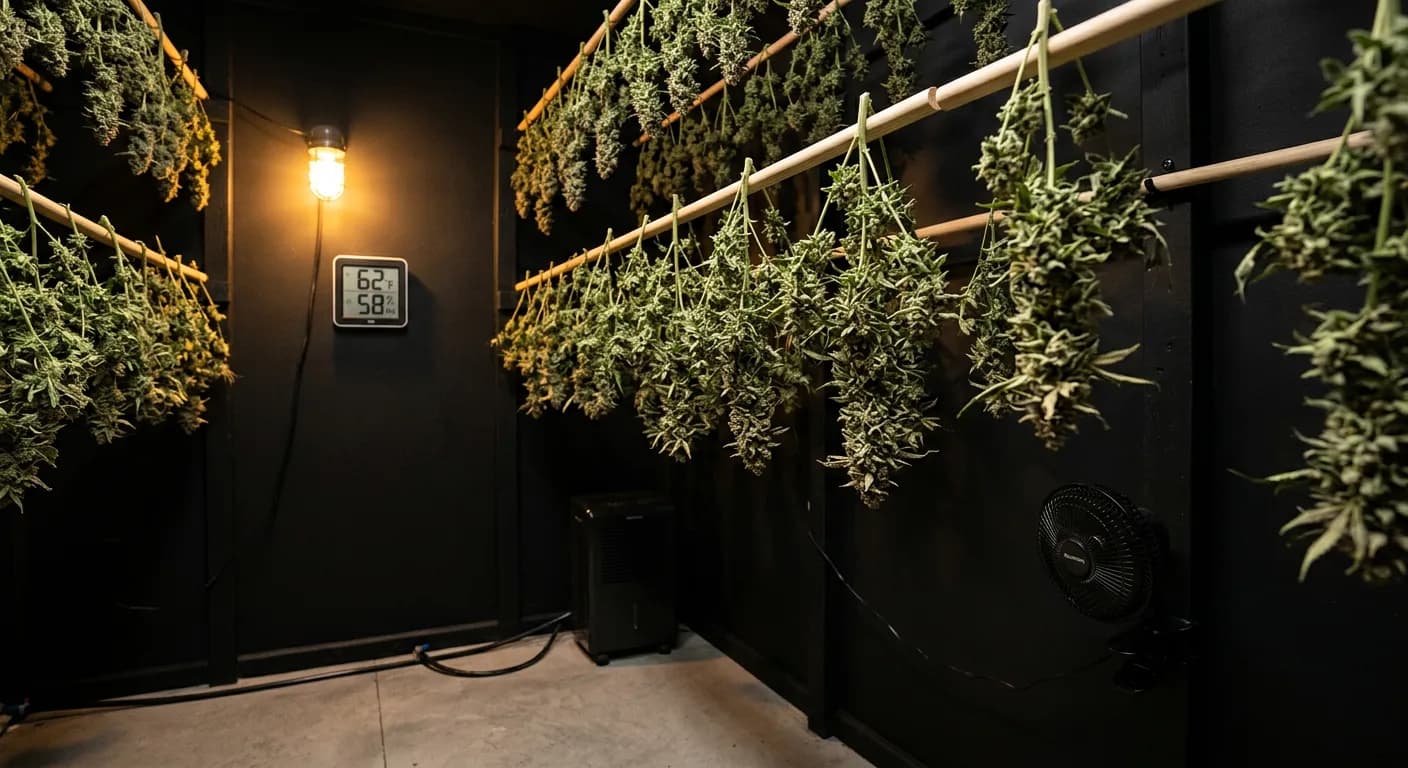
Buds must be dry enough before jarring: the outer surface should feel dry to the touch, and small stems should snap cleanly rather than bend. If the stems still bend like green wood, wait another 24 to 48 hours on the drying rack. Jarring wet buds is the fastest route to a moldy, ruined harvest. Target 10 to 15 days of hang drying in a room at 60 to 65°F with 45 to 55% RH before jarring.
Trim Before Jarring (If You Haven't Already)
Whether you wet-trimmed at harvest or dry-trimmed after drying, your buds should be fully trimmed before they go into jars. Sugar leaves left on the buds during curing add chlorophyll and plant material that slows the cure and degrades flavor. Trim tight, remove all fan leaf material, and then jar.
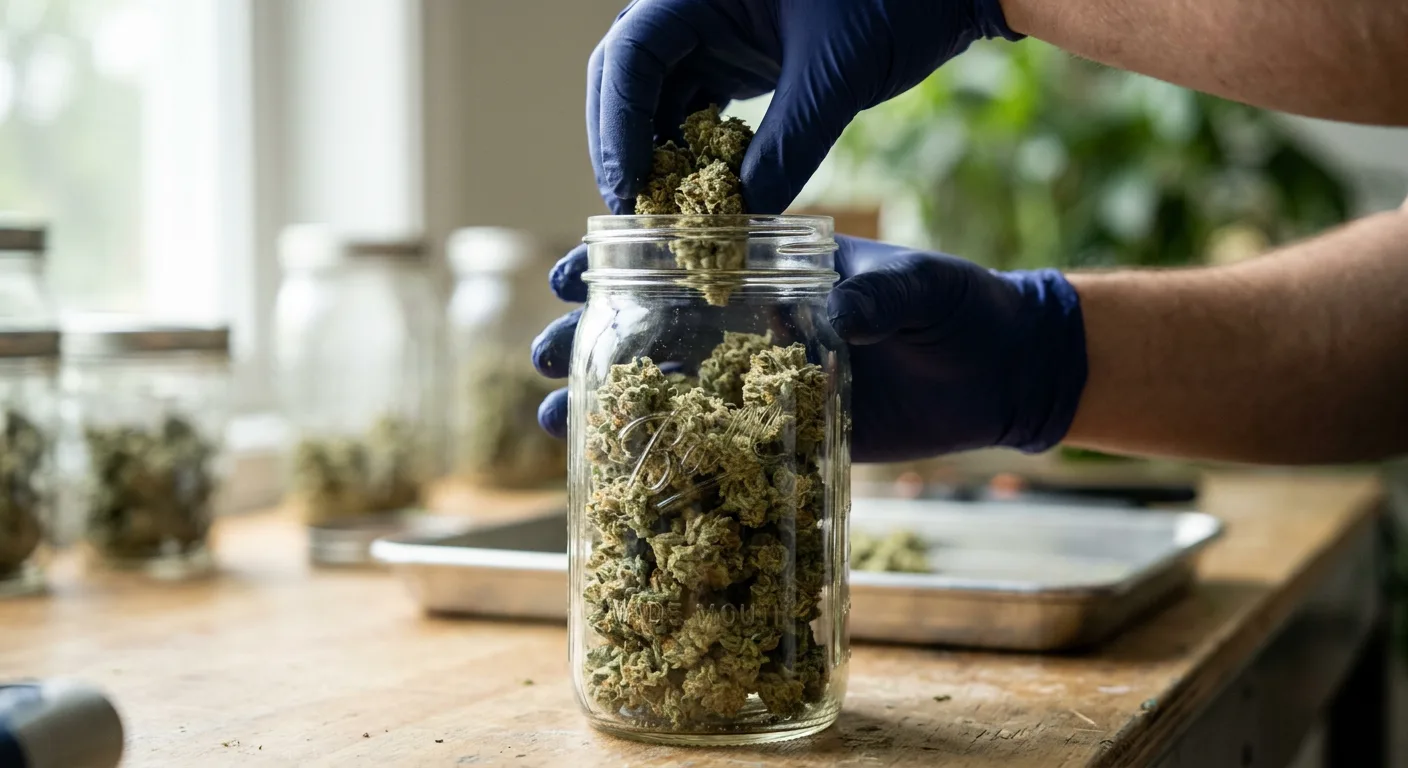
Fill to the 75% Mark and Gently Shake to Settle
Place buds loosely into the jar, do not press or compact them. Fill to about three-quarters of the jar's height, then give the jar one or two gentle shakes to let the buds settle naturally. If they settle below the 75% mark, add a few more buds. If they sit above it, remove some. The goal is loose, uncrowded buds with clear headspace above them.
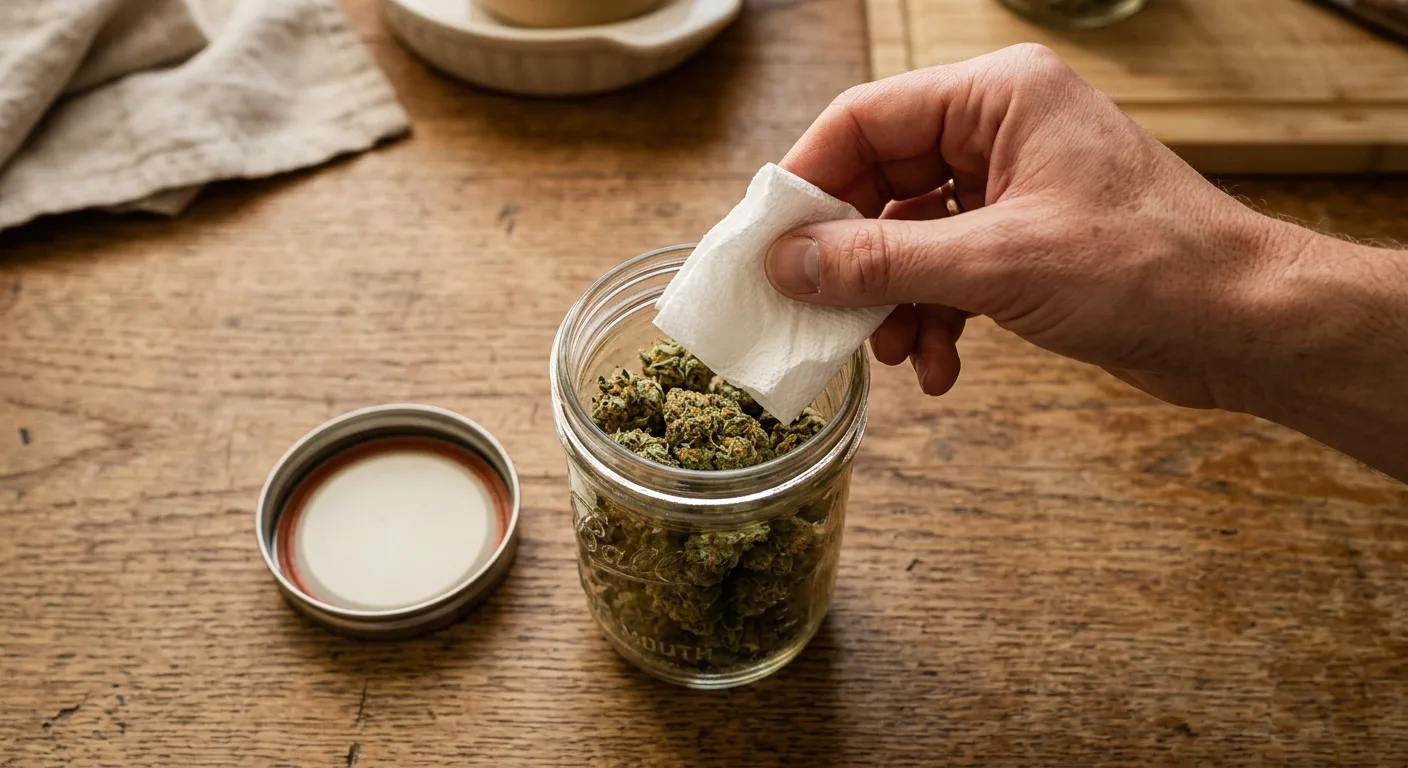
Add Your Hygrometer and Humidity Pack
Place a small digital hygrometer inside the jar before sealing. Add a 58–62% humidity pack if you have one. Seal the lid finger-tight, label the jar with the strain name and the date you jarred it, and move it to your dark storage location. Do not open the jar for the first 8 to 12 hours, let the humidity inside equilibrate before your first burp.
Check Your Opening Hygrometer Reading
After 8 to 12 hours, open the jar and read the hygrometer. If RH is above 70%, your buds are too wet. Leave the lid off for 2 to 4 hours, then re-check. If RH is below 55%, your buds dried out too much: a humidity pack will help slowly rehydrate them. If RH is between 58 and 65%, you are in the correct range to begin the burping schedule.
The Science of Curing in 60 Seconds
Curing is an enzymatic and biochemical process that continues after the plant is harvested. Inside a sealed jar, residual moisture migrates from the interior of the bud (and from the inner stem tissue) toward the drier outer surface of the flower, a process called moisture redistribution.
During the cure, enzymes still active in the harvested plant break down chlorophyll, the compound responsible for the harsh, grassy taste of uncured cannabis. Simultaneously, anaerobic conditions inside the jar allow bacteria and enzymes to convert some non-aromatic compounds into volatile terpene precursors, deepening the flavor profile. This is why properly cured cannabis smells dramatically different from freshly dried weed. The cure does not just dry the bud. It chemically transforms it.
Burping, opening the jar briefly, serves two functions: it releases built-up carbon dioxide and moisture vapor that have accumulated inside the sealed jar, and it introduces fresh oxygen to slow anaerobic bacterial activity. Too little burping allows harmful bacteria to proliferate and moisture to concentrate in hot spots. Too much burping (leaving lids off for hours every day in Week 1) dries the buds out too fast and halts the enzymatic process before it finishes.
The Complete Week-by-Week Burping Schedule
The burping schedule is the engine of the cure. Follow the timing in this schedule and you will avoid the two most common curing failures: mold from under-burping and over-drying from burping too aggressively.
Here is the complete week-by-week cannabis jar curing burping schedule, broken down with specific times and what to watch for at each stage:
Week 1: Days 1–7: Burp Twice Daily, 10 to 15 Minutes Each
This is the most active and most critical phase of the cure. Your buds are still redistributing significant moisture from their cores to their surfaces, and gas builds up quickly inside sealed jars. During Week 1, open every jar twice per day, once in the morning and once in the evening, and leave the lids off for 10 to 15 minutes each time.
- Morning burp: Open all jars, gently roll the buds to expose different surfaces, smell for any off-notes, read the hygrometer, and leave lids off for 10 to 15 minutes
- Evening burp: Repeat the same process: roll, smell, read, wait 10 to 15 minutes, reseal
- What you are smelling for: Fresh-cut grass and chlorophyll are normal in Days 1 through 3. A mild earthy smell developing by Days 4 through 7 means the cure is working. Any ammonia smell is a red flag. See the troubleshooting section
- Target RH: 58 to 65%, slightly higher early in the week, stabilizing toward 60 to 62% by Day 7
If you detect an ammonia smell at any point during Week 1, do not just burp for 15 minutes and reseal. Ammonia means the buds are too wet and harmful bacteria are active. Remove the lid completely and leave the jar open for 2 to 4 full hours. If the smell persists, spread the buds on a clean drying rack for several hours before re-jarring. Ammonia smell that is ignored can ruin an entire jar within 24 to 48 hours.
Weeks 2 and 3: Days 8–21: Burp Once Daily, 5 to 10 Minutes
By Day 8, the most intense moisture redistribution has slowed. You can reduce burping to once per day, leaving lids off for 5 to 10 minutes during each session. Continue smelling and reading the hygrometer every time you burp.
- The grassy chlorophyll smell should be mostly gone by Day 10 to 12 in a well-executed cure
- You should begin to detect the strain's true terpene character emerging: earthy, citrus, floral, or fuel notes becoming clearer and more distinct
- RH should be stabilizing in the 58 to 62% range with less fluctuation between burps
- If RH is consistently dropping below 58%, add a 62% humidity pack and reduce burp duration to 5 minutes
Keep a simple curing log. Write the date, the hygrometer reading before and after each burp, and a one-line smell note for each jar. This takes 2 minutes per session and gives you a clear picture of how the cure is progressing, and whether any jar is trending toward a problem.
Week 4: Days 22–28: Burp Every 2 to 3 Days
By Week 4, your cannabis has completed what most consider the minimum viable cure. The chemistry inside the jars has slowed significantly. You now burp every 2 to 3 days, just long enough to exchange the air inside the jar and do a quick smell and visual check.
- Buds at this stage should feel slightly tacky when squeezed gently, not dry and crispy, not wet or spongy
- Trichomes will have shifted slightly toward amber in many strains
- Flavor when sampled should be noticeably smoother and more complex than it was in Week 1
- A 2-week cure is smokeable. A 4-week cure is good. What comes next is where it gets exceptional.
Month 2 and Beyond: Seal, Store, and Wait
From Day 29 onward, you move into long-term curing. Burp once every 5 to 7 days through Month 2, then drop to once every 2 weeks through Month 3. By Month 3, most jars can be sealed completely and stored with only a monthly check.
- Continue storing in a dark, cool location, 60 to 70°F, away from light and temperature swings
- Keep humidity packs inside the jars during long-term storage
- A 6-month cure on a high-resin, terpene-rich strain produces a noticeable jump in flavor complexity that no short cure can replicate
- Properly cured and stored cannabis maintains quality for 12 to 18 months with minimal THC degradation
The week-by-week burping schedule summarized: Week 1 = twice daily for 10 to 15 minutes. Weeks 2 to 3 = once daily for 5 to 10 minutes. Week 4 = every 2 to 3 days. Month 2 = every 5 to 7 days. Month 3+ = seal and store with monthly checks only.
| Cure Stage | Time Period | Burp Frequency | Burp Duration | Target RH |
|---|---|---|---|---|
| Active Cure | Week 1 (Days 1–7) | 2× daily | 10–15 min | 58–65% |
| Mid Cure | Weeks 2–3 (Days 8–21) | 1× daily | 5–10 min | 58–62% |
| Late Cure | Week 4 (Days 22–28) | Every 2–3 days | 5 min | 58–62% |
| Long Cure | Month 2 (Days 29–60) | Every 5–7 days | 5 min | 58–62% |
| Storage | Month 3+ (Day 61+) | Every 2–4 weeks | 2–3 min check | 58–62% |
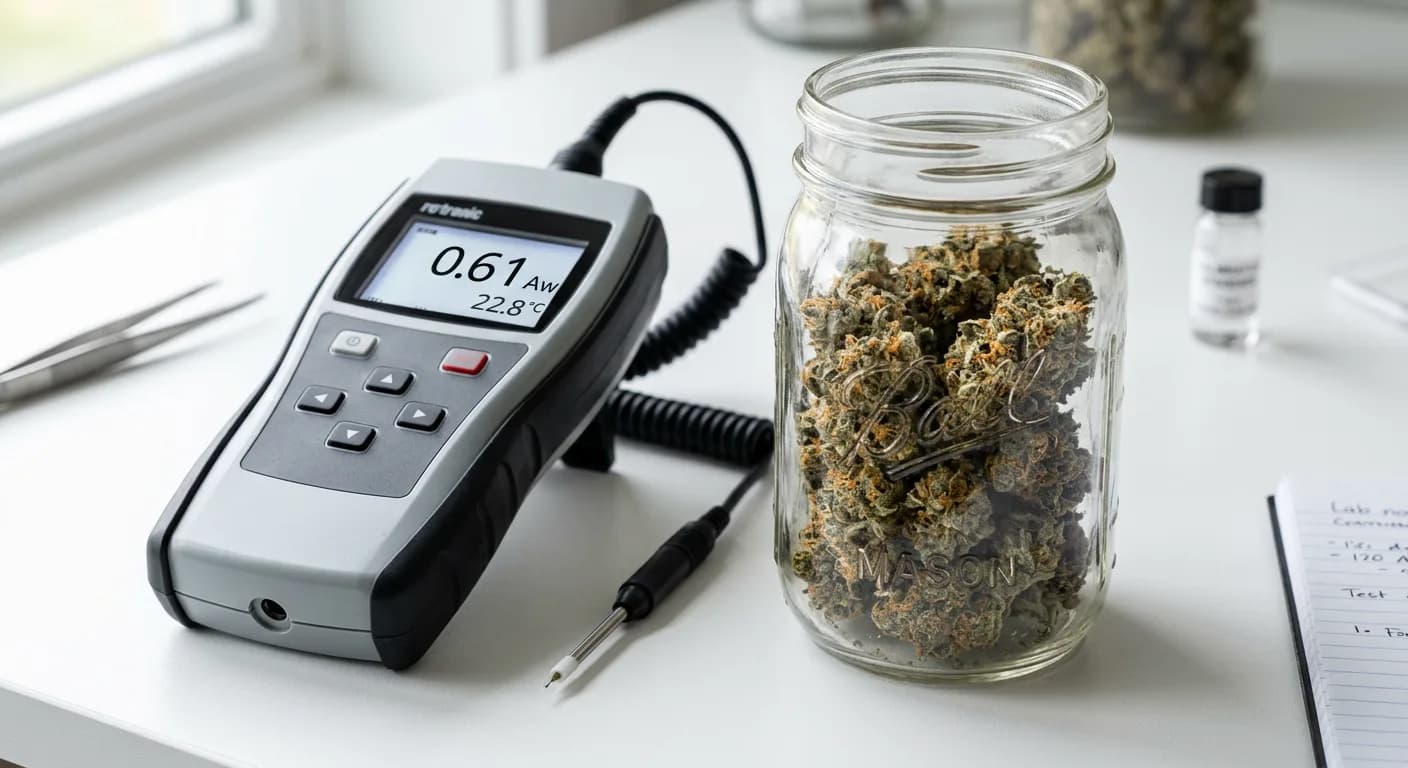
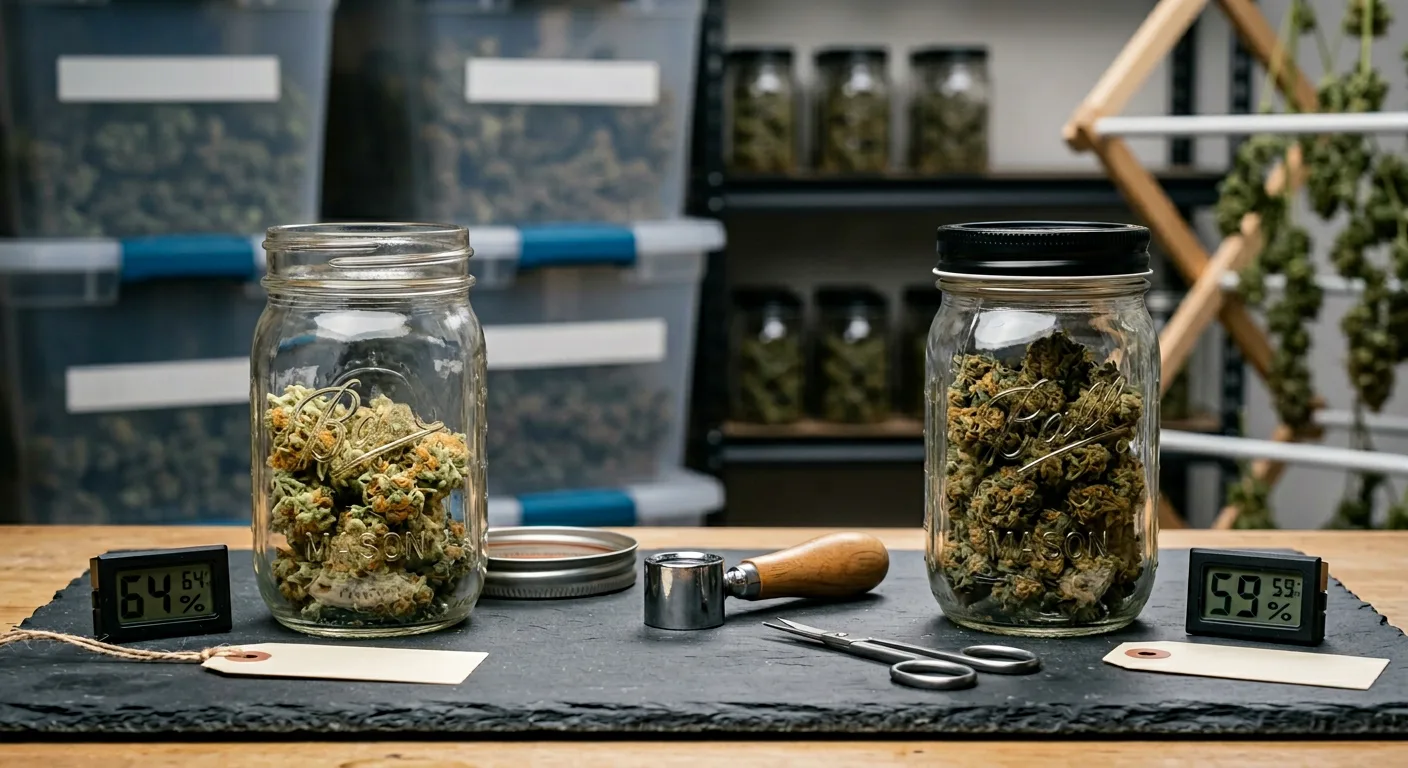
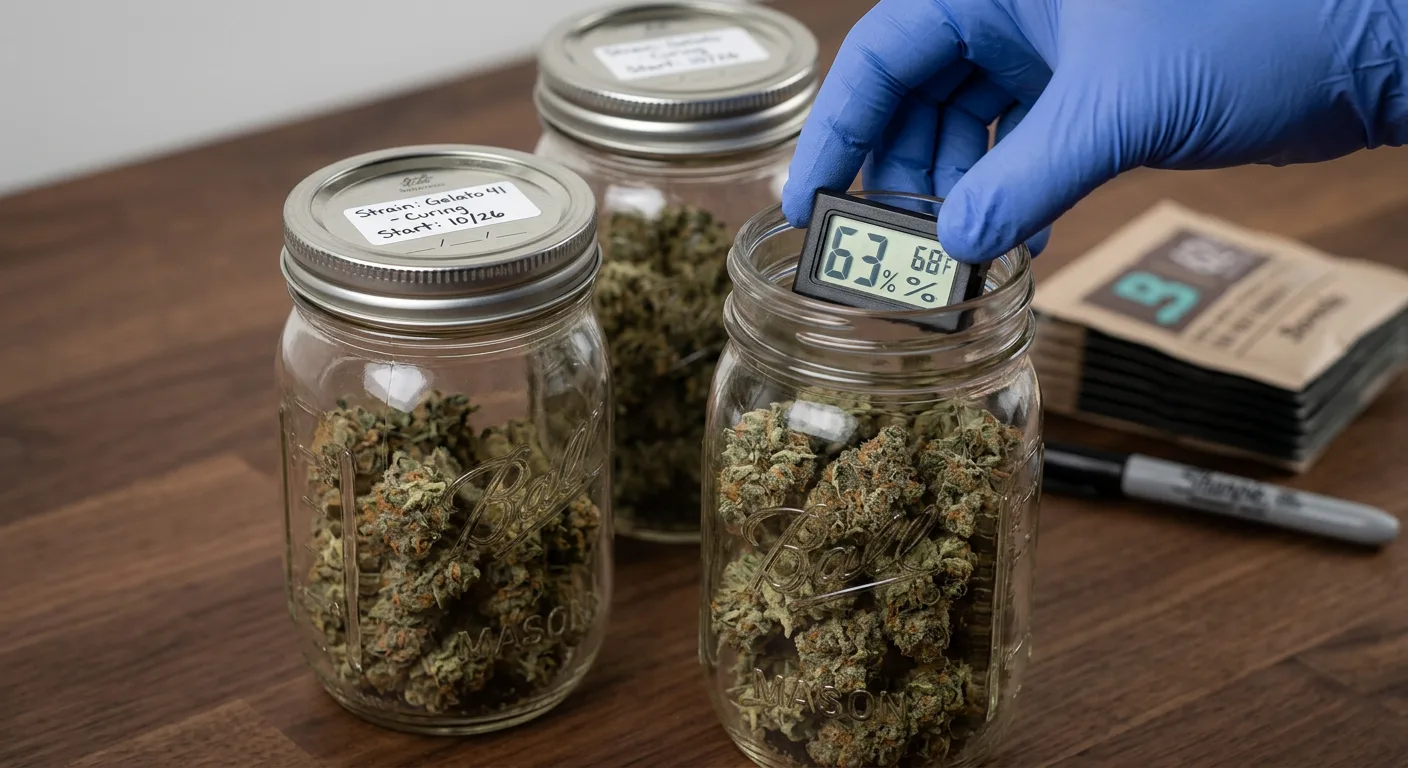
How to Use a Hygrometer Inside Your Curing Jars
A hygrometer inside each jar is not optional: it is the difference between managing your cure with data and guessing in the dark. Small digital hygrometers designed for humidors or small enclosures fit perfectly inside wide-mouth quart jars and cost $5 to $15 each.
Here is how to interpret the readings at every stage of the cure:
- Below 55% RH: Buds are too dry. Terpenes are degrading and the enzymatic cure has stalled. Add a 62% humidity pack immediately and reduce burp duration to 2 to 3 minutes until RH climbs back above 58%
- 55–57% RH: Slightly low, add a humidity pack and monitor. Buds will not mold but flavor development is slowing
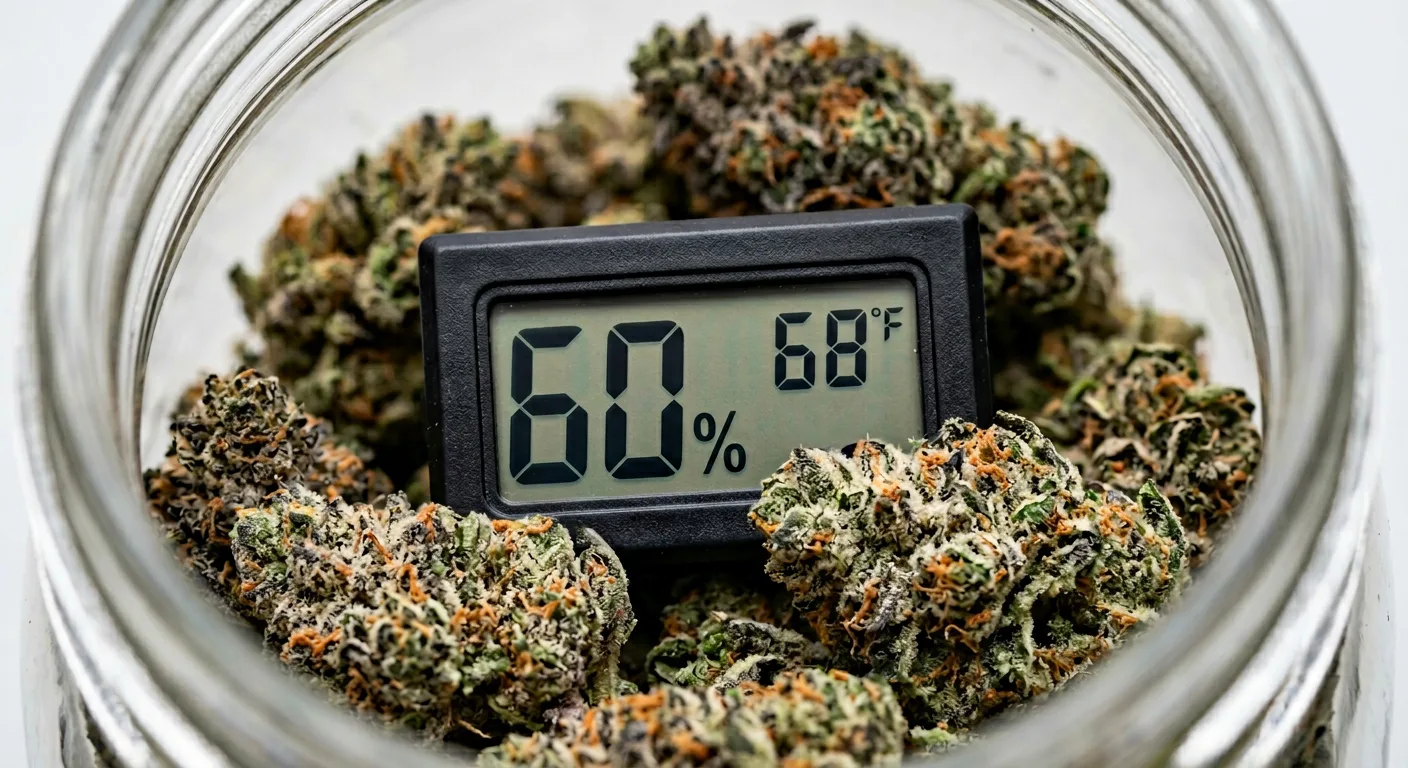
- 58–62% RH: The sweet spot. This is your target for the entire cure. Maintain this range and the cure will proceed correctly
- 63–65% RH: Slightly elevated, burp for a full 15 minutes today and leave the lid off an extra 5 minutes. Monitor closely over the next 24 hours
- Above 65% RH: Too wet, risk of mold increases significantly. Leave lid off for 1 to 2 hours, recheck, and consider spreading buds on a drying rack if RH does not drop below 65% within 2 hours
- Above 70% RH: Serious risk zone: the buds were jarred too wet. Remove all buds from jars, spread on a drying rack for 4 to 8 hours, and re-jar only once RH stabilizes below 65%
Hygrometers need to be calibrated occasionally. A quick calibration check: seal your hygrometer in a small zip-lock bag with a damp paper towel for 2 hours. It should read approximately 98 to 99% RH. If it reads significantly different, note the offset and adjust your readings accordingly. Most quality hygrometers are accurate within 2 to 3% out of the box.
Integra Boost vs Boveda: Which Humidity Pack Should You Use?
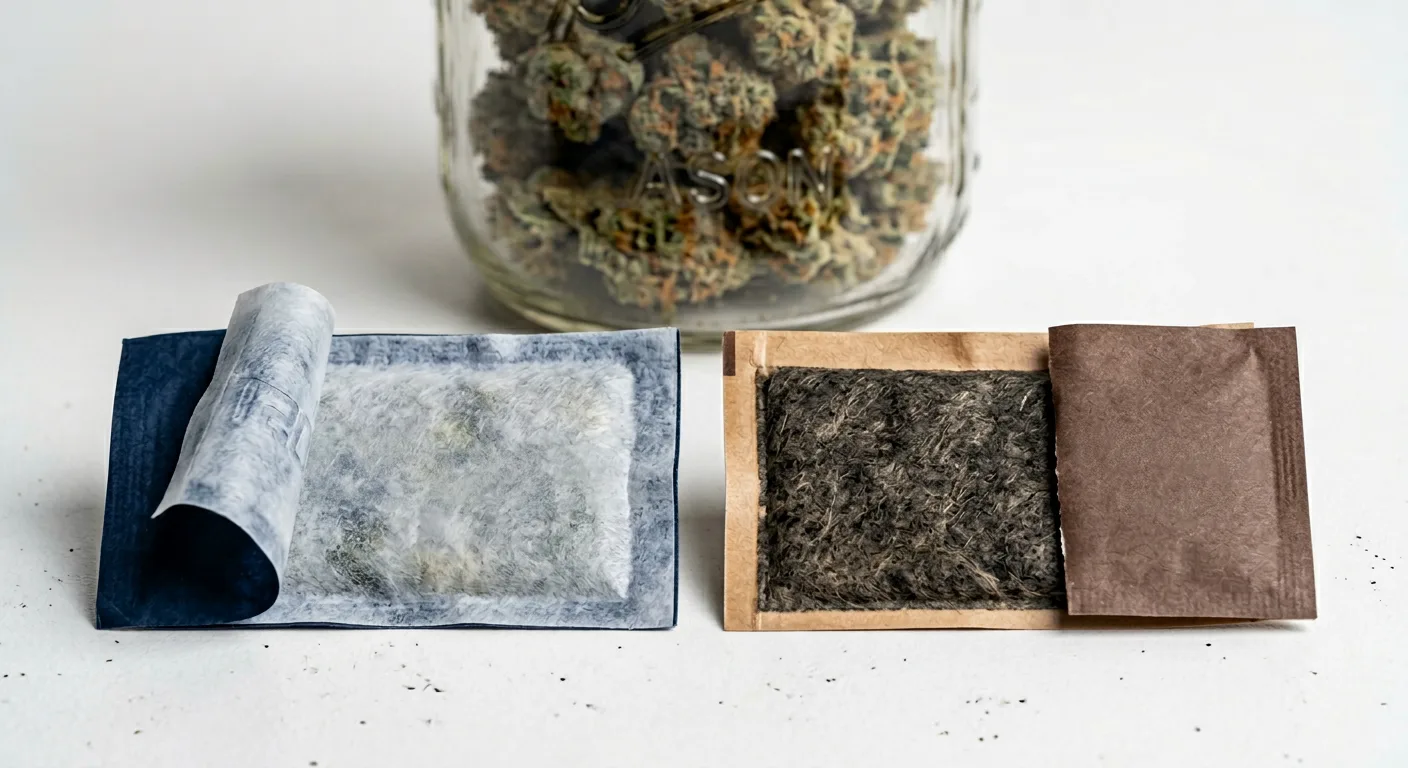
Both Integra Boost and Boveda are 2-way humidity control packs that can absorb or release moisture to maintain a target relative humidity. Both come in 58% and 62% options. For curing cannabis, the 62% pack is the standard recommendation: it keeps RH in the middle of the ideal 58 to 62% range.
Here is how the two compare in real curing use:
| Feature | Integra Boost | Boveda |
|---|---|---|
| Target RH options | 55%, 62%, 69% | 49%, 58%, 62%, 65%, 69% |
| Response speed | Fast: absorbs and releases quickly | Moderate, slower, more gradual response |
| Feel when spent | Becomes hard/rigid | Becomes hard and chalky |
| Replacement indicator | Replacement card included | No indicator, check by feel |
| Effect on terpenes | Widely reported as terpene-neutral | Some growers report slight glycerin transfer over long cures |
| Cost per pack | Slightly lower | Slightly higher |
| Best for | Active curing phase, fast response needed | Long-term storage stability |
For the active cure (Weeks 1 through 4), Integra Boost packs perform slightly better due to their faster response time. For long-term storage past Month 2, either brand works well. Many experienced growers switch to Boveda for the storage phase simply because they prefer the reliability of the brand over many months.
Do not use humidity packs as a substitute for proper pre-jar drying. A humidity pack cannot save buds that were jarred too wet: it will saturate quickly and stop functioning. Packs are maintenance tools, not rescue tools. Your buds must be at the right moisture level before they go into jars.
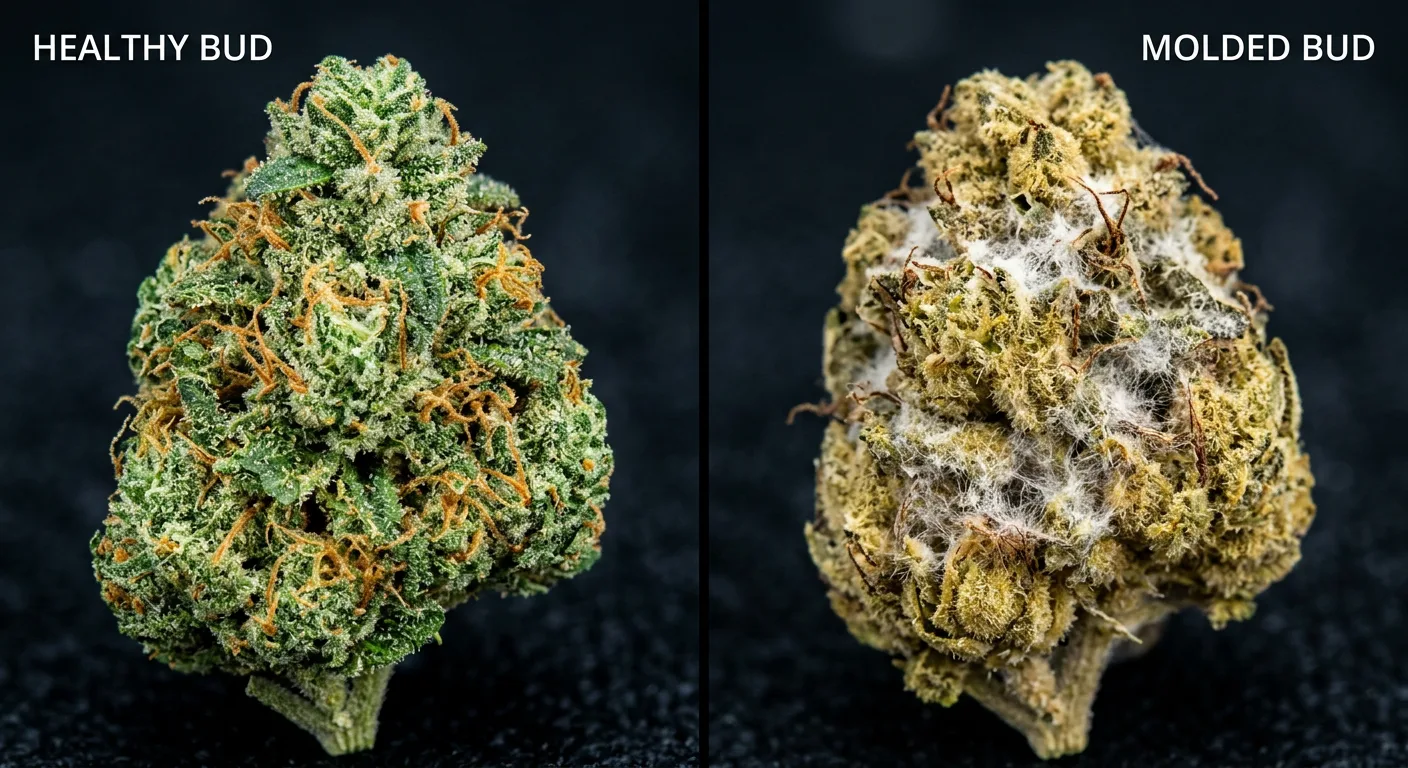
Signs Your Cannabis Is Curing Properly (And Signs It Isn't)
Knowing what a successful cure looks, feels, and smells like, and what a failing one looks, feels, and smells like, lets you intervene before problems become irreversible.
Signs the Cure Is Working
- Grassy or hay smell fades noticeably between Day 3 and Day 10
- True terpene profile begins emerging by end of Week 2, strain-specific citrus, earth, pine, or fuel notes
- Buds feel slightly tacky and springy when gently squeezed, not crispy, not wet
- Hygrometer reads 58 to 62% consistently with smaller fluctuations between burps as the cure progresses
- Color shifts slightly, green deepens, purple genetics may intensify, trichomes maintain their milky appearance
- Smoke is noticeably smoother with less harshness in the throat compared to uncured bud from the same harvest
Signs of Problems
- Ammonia smell at any point, too wet, bacteria active (see troubleshooting section)
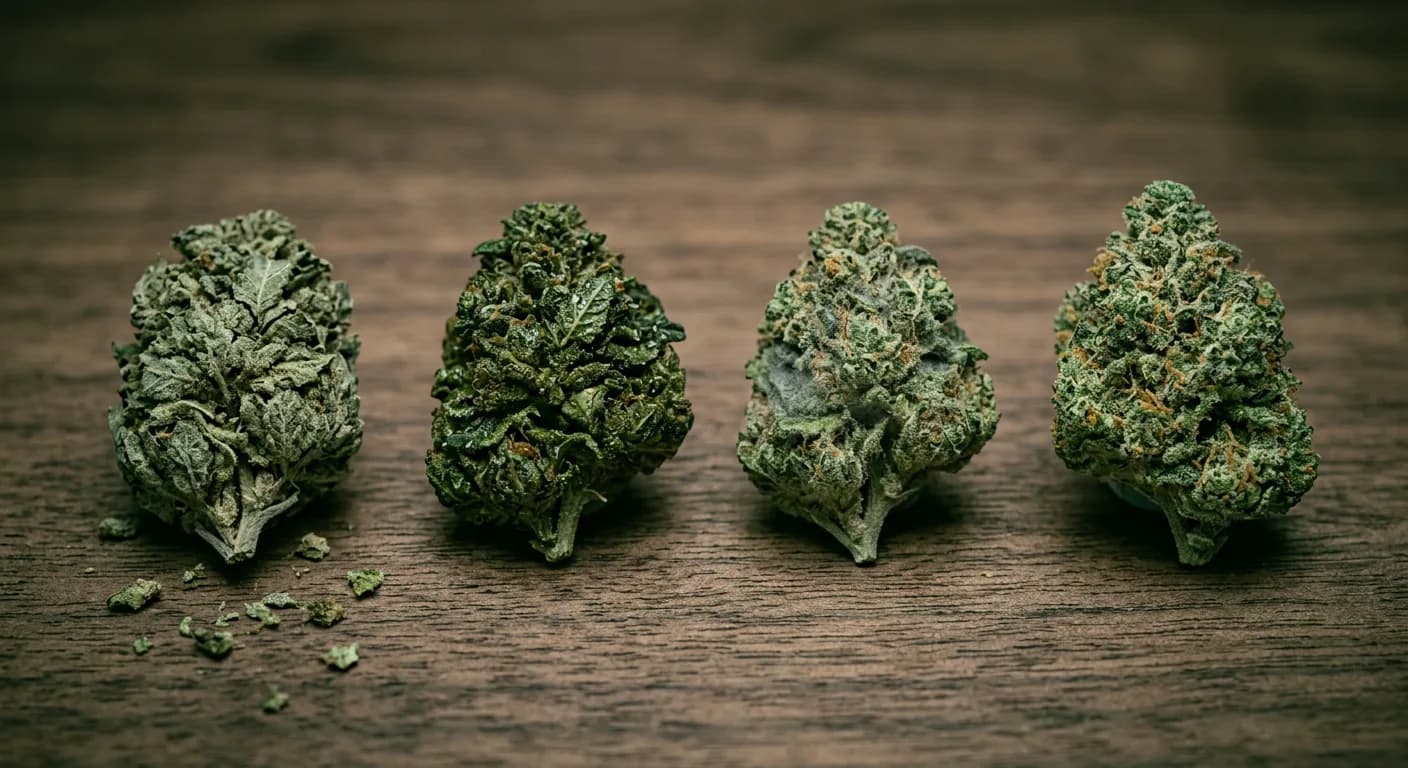
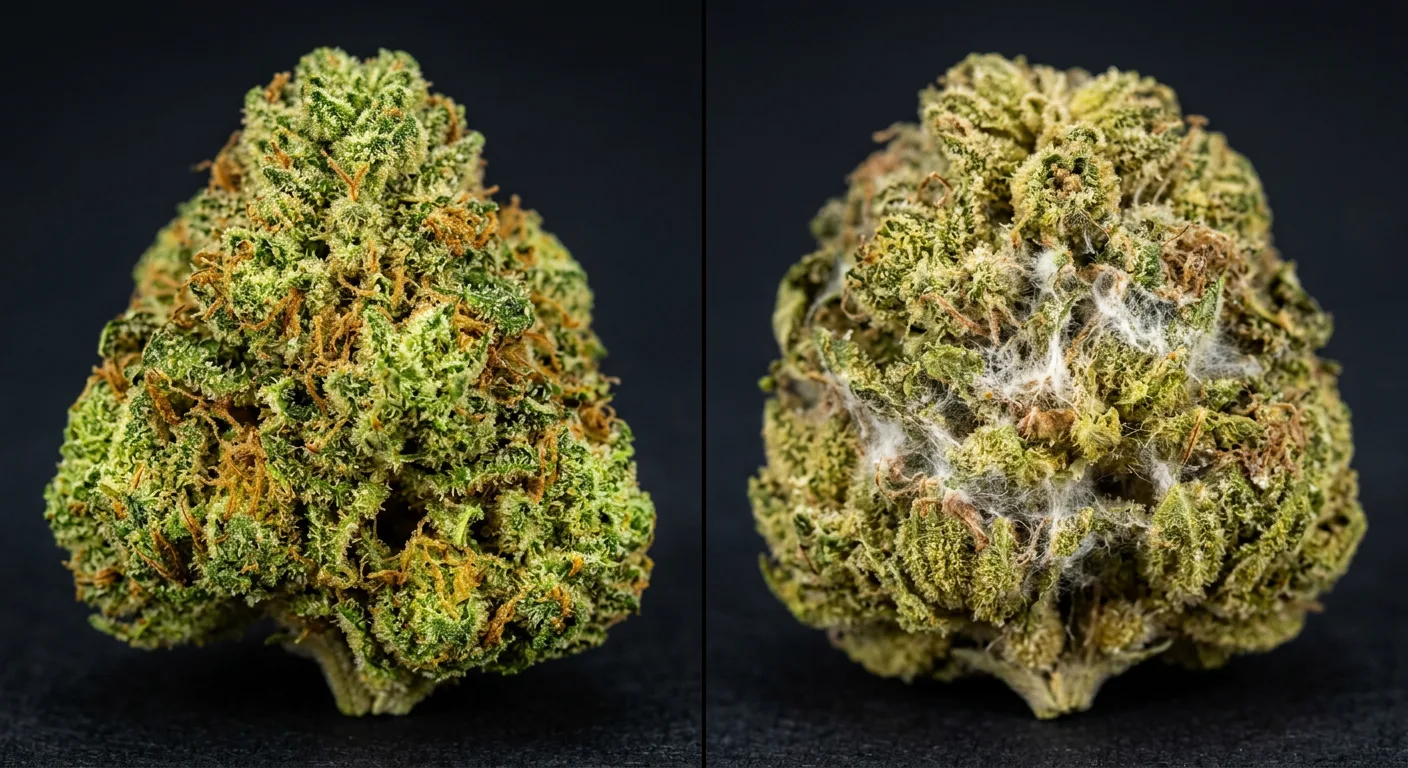
- White fuzzy patches on bud surfaces, mold; discard affected buds immediately. Do not try to salvage
- Musty or sour smell that isn't strain-specific, bacterial contamination
- Buds crumble and feel powdery, over-dried, RH too low, terpenes degrading
- Hygrometer consistently above 65% after 48 hours of active burping: buds were jarred too wet
- No smell change at all after 2 weeks, over-dried bud with enzymatic activity stalled
The single most reliable sign that a cure is progressing correctly is smell progression. If your cannabis smells noticeably different, and better, at the end of Week 2 compared to Day 1, the process is working. If the smell has not changed, something is wrong with the moisture levels.
Troubleshooting: Fixing the Most Common Curing Problems
Even experienced growers run into curing problems. Here is exactly what to do when each situation occurs, with specific actions and timeframes.
Problem 1: Ammonia Smell
Cause: Buds are too wet and anaerobic bacteria are breaking down plant proteins, releasing ammonia gas.
Fix: Remove the lid immediately and leave the jar open for 2 to 4 hours in a well-ventilated room. Do not seal the jar until the ammonia smell is completely gone. If the smell returns within 24 hours of resealing, spread buds on a clean drying rack for 4 to 6 hours before re-jarring. Monitor RH closely for the following 48 hours.
Problem 2: Buds Are Too Wet After Jarring
Cause: Buds were jarred before completing the drying phase: inner moisture has moved to the bud exterior too quickly.
Fix: Remove buds from jars and spread them in a single layer on a clean drying rack in a room at 60 to 65°F with 50% RH. Leave them for 4 to 8 hours, then re-check by feel and hygrometer before re-jarring. Do not leave them on the rack for more than 8 hours or you risk over-drying.
Problem 3: Buds Are Too Dry
Cause: RH has dropped below 55%, either due to insufficient moisture in the bud at jarring time or over-burping.
Fix: Add a 62% Integra Boost or Boveda humidity pack to the jar immediately. Reduce burp duration to 2 to 3 minutes maximum until RH climbs back above 58%. If RH stabilizes below 58% even with a fresh pack, the bud may have been dried too aggressively and terpene loss is already occurring: a longer cure can still improve smoothness but some aromatic complexity may be permanently lost.
Problem 4: White Fuzz or Visible Mold
Cause: Mold spores (most commonly Botrytis, also called bud rot) have germinated due to persistently high humidity above 65% combined with inadequate burping.
Fix: There is no cure for mold. Remove and discard all affected buds immediately. Do not attempt to pick off the fuzz and keep the rest. Mold spreads microscopically before it is visible, and consuming moldy cannabis is a health risk. Thoroughly wash and dry-sterilize affected jars before reuse. If any nearby jars share similar RH readings, inspect them immediately and increase burping frequency.
Problem 5: No Smell Change After 2 Weeks
Cause: Buds were over-dried before jarring, so enzymatic activity stalled, there is not enough moisture for the chemical transformation to continue.
Fix: Add a fresh 62% humidity pack and seal the jar for 48 hours without burping. Check RH. If it climbs to 58% or above, resume the normal schedule. The cure may still improve flavor over additional weeks even if progress has been slow, but very over-dried bud may not recover its full terpene potential.
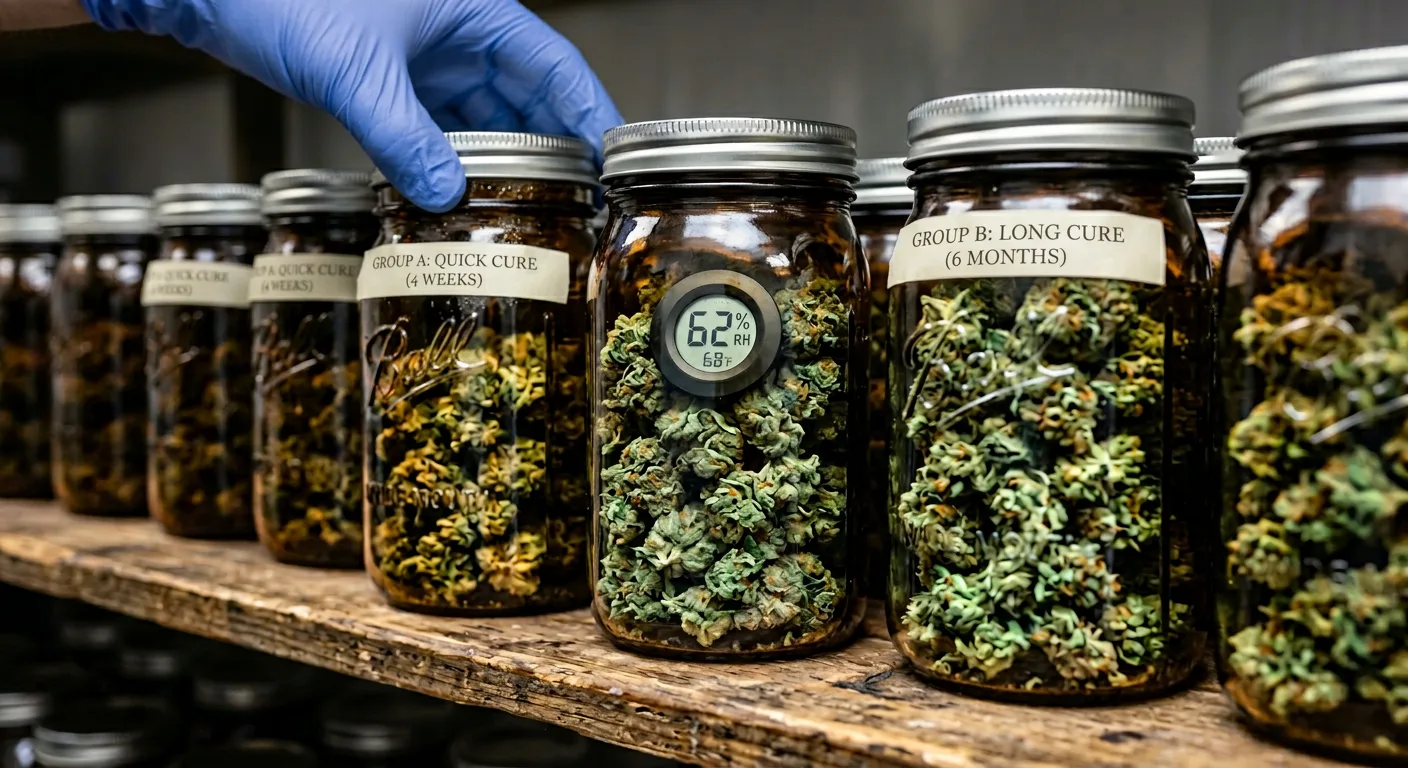
Minimum Cure vs Optimal Cure: How Long Should You Actually Wait?
The honest answer depends on what you want from the finished product. There are three distinct quality tiers defined by cure length, and each produces a noticeably different result when smoked or consumed.
- 2-week minimum cure: Smokeable. Chlorophyll breakdown is mostly complete, harshness is reduced, and basic flavor is present. This is the floor, acceptable but not impressive. Most of the enzymatic transformation is still in progress.
- 4 to 8-week optimal cure: This is where quality cannabis lives. Terpene profiles are fully developed, the smoke is smooth, and the full effects of the strain become apparent. The difference between a 2-week and a 6-week cure on the same genetics is dramatic and immediately noticeable to any experienced consumer.
- 3 to 6-month connoisseur cure: Reserved for terpene-rich genetics that reward patience. At 3 months, citrus and floral terpenes in particular reach a depth and complexity that shorter cures simply cannot achieve. At 6 months, premium genetics develop a rounded, aged character sometimes compared to fine wine or aged spirits. THC remains largely intact with proper storage. Light and heat degrade THC far faster than time alone.
If you can only wait 2 weeks, you will have decent weed. If you can wait 4 to 8 weeks, you will have great weed. If you can wait 3 to 6 months on the right genetics, you will have something exceptional. Patience during the cure is the most underrated skill in home cultivation.
Which Strains Benefit Most From a Long Cure?
Not every strain transforms equally during a long cure. The strains that show the most dramatic improvement over extended curing time are those with complex, resinous terpene profiles: particularly genetics expressing citrus, floral, tropical, and fuel notes. Heavy indica-dominant strains with dense trichome structures also continue developing for months.
In general terms, these terpene profiles respond most dramatically to a long cure:
- Citrus and tropical terpene profiles (limonene, terpinolene, myrcene), the brightness of citrus deepens and rounds out over weeks 4 through 12, moving from sharp lemon toward complex bergamot and mandarin notes. Strains like Super Lemon Haze (23% THC) and Tangerine Haze (18% THC) are textbook examples of genetics that transform dramatically with a 6 to 8-week cure.
- Diesel and fuel profiles, the pungent fuel character of diesel genetics mellows and integrates beautifully during a long cure. Sour Diesel (24% THC) and New York Power Diesel (24% THC) both develop rounder, more complex fuel profiles after 6 to 8 weeks that are noticeably superior to the same strain sampled at 2 weeks.
- Floral and berry profiles, linalool and ocimene-rich genetics open up slowly and reward patience enormously. OG Kush-type genetics like OG Kush (26% THC) develop a signature aged earthiness that many experienced growers specifically wait for. Blueberry Haze (20% THC) expresses dramatically richer berry notes at Month 2 compared to Week 2.
- High-resin exotics, dense, trichome-heavy strains like White Widow (25% THC) and Purple Kush (27% THC) continue developing resinous complexity well past the 4-week mark, with Purple Kush in particular producing sweeter, more candy-like grape notes at 8 to 10 weeks.
Strains with simpler terpene profiles, including many autoflowering varieties, still benefit from curing, but the improvement plateaus earlier, usually around 4 to 6 weeks. For most autos, a focused 4-week cure produces the best return on patience relative to the total time investment.
If you want to explore terpene science in more detail before selecting your next grow, our guides on caryophyllene, linalool, and terpinolene explain exactly how each compound develops and which growing and curing conditions maximize their expression.
Label every jar with the strain name, harvest date, and jar date. When you sample at Week 2, Week 4, and Week 8, write down tasting notes. This practice quickly teaches you which genetics in your personal garden reward long curing and which reach their peak earlier, information that directly improves every future harvest decision.
Long-Term Storage: Keeping Cured Cannabis at Peak Quality
Once your cannabis has completed the active cure, proper long-term storage preserves what you worked so hard to develop. The three enemies of stored cannabis are light, heat, and oxygen, and mason jars in a dark, cool location defend against all three simultaneously.
Ideal Storage Conditions
- Temperature: 60 to 70°F (15 to 21°C), below 70°F slows terpene and cannabinoid degradation significantly
- Humidity: 58 to 62% RH inside the jar, maintained by your humidity pack
- Light: Complete darkness, UV light degrades THC into CBN faster than almost any other factor; store in a cabinet, closet, or opaque curing box
- Oxygen: Minimized by keeping jars sealed with minimal headspace for very long-term storage beyond 6 months
For cannabis stored correctly in sealed mason jars with a humidity pack, quality remains excellent for 12 months and usable for 18 to 24 months. Beyond 24 months, THC conversion to CBN accelerates and the sedating effects become more pronounced as the stimulating effects diminish, something to be aware of if you are curing large quantities in one go.
If you are thinking about starting your next grow to fill those jars again, our grow planner tool helps you schedule your entire grow cycle from seed to harvest, and our yield estimator can help you plan how many jars you will actually need. Our germination guarantee covers every seed order so you can plan your grow with confidence.
A sealed mason jar in a dark closet at 65°F with a humidity pack inside is close to the ideal long-term cannabis storage setup, and it costs almost nothing beyond the jar itself. You do not need specialized cannabis storage products to achieve professional-quality results.
Building Your Curing Habit: A Simple Routine That Sticks
The most common reason cures fail is not equipment failure or bad genetics: it is inconsistency. Missing 2 or 3 burping sessions in Week 1 can allow moisture pockets to develop and mold to take hold before you notice anything wrong. Building a consistent daily habit during the critical first 3 weeks is the most important thing you can do after jarring your cannabis.
Here is a simple daily routine that takes less than 10 minutes and keeps your cure on track:
- Set a phone alarm for your morning burp and your evening burp, same time every day
- When the alarm fires, go to your storage location and open every jar
- Gently roll the buds to expose new surfaces, then set a 10-minute timer
- While the jars are open, read each hygrometer and note the reading in your log
- Smell each jar for 2 to 3 seconds, just enough to check for ammonia or off-notes
- When the timer fires, reseal and return jars to storage
- Total time: under 10 minutes for up to 6 jars
If you want to go deeper into the environmental factors that affect cannabis quality across the whole growing cycle, including how humidity management during the grow itself affects what ends up in the curing jar, our guide to cannabis humidity control and VPD covers the full picture. The VPD calculator is also a useful free resource during your next grow to help you dial in conditions that produce the highest-quality flower before it ever reaches the curing jar.
Growers who keep detailed curing logs consistently produce better results than those who rely on memory alone. After 2 or 3 grows with logs, patterns emerge: which strains hit their peak RH faster, which ones take longer to lose the grassy smell, which ones reward patience past 8 weeks. That data makes every subsequent harvest decision smarter and more intentional.
Frequently Asked Questions
How long should you cure cannabis in mason jars for best flavor?
For the best flavor, cure cannabis in mason jars for a minimum of 4 weeks. The optimal window for most strains is 4 to 8 weeks, at which point the chlorophyll has fully broken down, moisture has redistributed evenly, and the strain's true terpene character has fully developed. Citrus, floral, and fuel-forward genetics continue improving up to 3 to 6 months for connoisseur-level results. A 2-week cure is smokeable but noticeably inferior in smoothness and flavor complexity.
How much cannabis should you put in a mason jar for curing?
Fill your mason jar to approximately 75% capacity, about 25 to 30 grams of dried, trimmed bud in a standard quart (32 oz) jar. The remaining 25% headspace above the buds is essential for gas exchange during burping. Overfilling prevents moisture and CO2 from escaping efficiently and creates conditions where mold can develop in compressed areas of the bud mass.
What does ammonia smell mean when curing cannabis in jars?
An ammonia smell when you open a curing jar means the buds were jarred too wet and anaerobic bacteria are actively breaking down plant proteins and releasing ammonia gas. This is a warning sign, not a death sentence, if caught early. Remove the lid immediately, leave the jar open for 2 to 4 hours in a ventilated room, and do not reseal until the smell is completely gone. If the smell returns after resealing, spread the buds on a drying rack for several hours before re-jarring.
Do you need a hygrometer inside every mason jar?
Ideally, yes, one small digital hygrometer per jar gives you accurate, real-time data for each individual jar without cross-contamination from opening other jars. If you are on a budget, one hygrometer rotated between jars every 24 hours is workable, but it means you only get one reading per jar per day and may miss rapid humidity changes. Given that hygrometers cost as little as $5 to $8 each, one per jar is strongly recommended for any serious curing setup.
Can you cure cannabis in plastic containers instead of mason jars?
You can, but you should not if quality is the goal. Plastic containers off-gas trace chemicals over weeks of contact with cannabis, subtly altering terpene profiles and potentially adding unwanted flavors. Plastic is also slightly porous, meaning it does not maintain a truly stable humidity environment. For a short-term cure of 2 to 3 weeks in an emergency, food-grade airtight plastic will work. For any cure beyond that, and especially for long-term storage, glass mason jars are worth every penny.