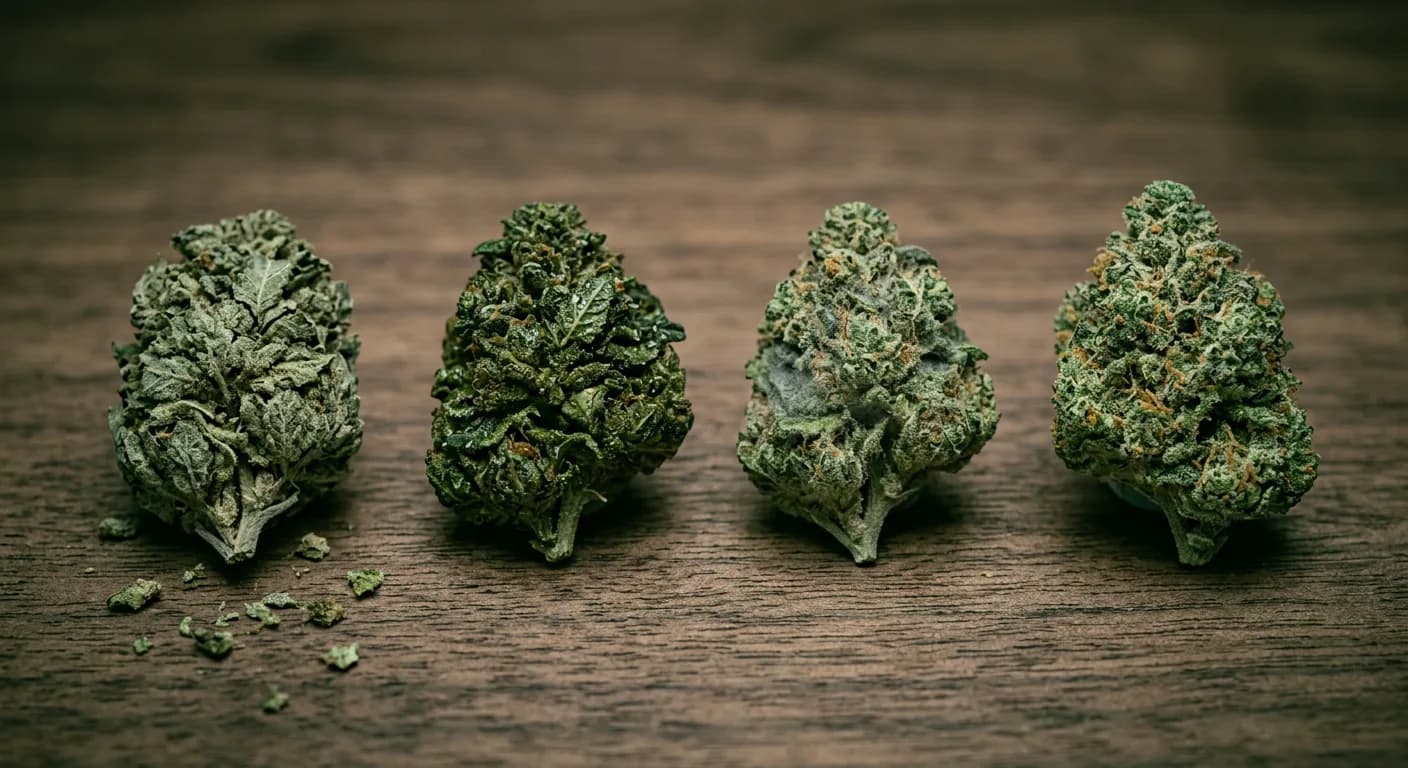
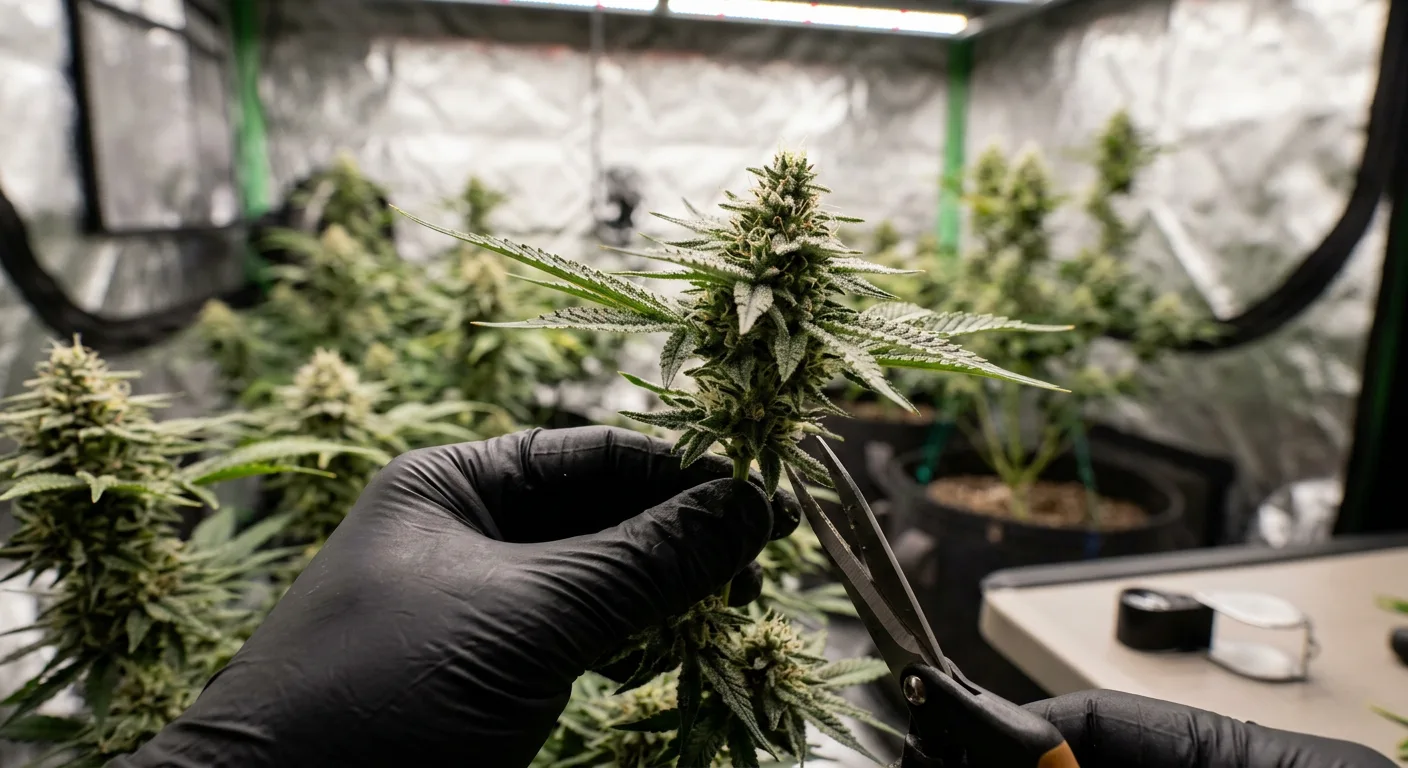
You just harvested your first 2x2 tent grow, trimmed the buds, and now you're staring at one or two small piles of cannabis wondering, does all the curing advice I've read actually apply to me? Learning how to cure a small cannabis harvest is genuinely different from curing a pound-sized haul, and most guides skip the details that matter most at small scale.
The good news: small batches of 1–4 ounces are easier to manage than large ones. You need fewer jars, less space, and less monitoring time. But there are specific failure modes, especially around jar sizing and oxygen exposure, that beginners consistently hit. This guide fixes every one of them.
Whether you pulled 28 grams off a single autoflower or 100 grams from two plants, everything you need is here.
Why Small Harvests Are Actually Easier to Cure: With One Major Catch
Curing a small cannabis harvest of 1–4 ounces is genuinely more forgiving than managing a large one. You're dealing with one or two jars instead of dozens, the whole process is visible at a glance, and problems are caught early because you're checking fewer containers. Small-batch growers have a real advantage here.
The catch is that the same mistakes cost proportionally more. Ruin one jar out of twenty in a large grow and you've lost 5% of your harvest. Ruin your single jar and the entire grow is degraded. That asymmetry is why small-batch curing needs its own playbook, not less care, just the right kind of care.
The Three Failure Modes Unique to Small Batches
- Wrong jar size: Using a large jar for a small amount of bud leaves too much oxygen headspace, which oxidizes terpenes and degrades flavor faster than you'd expect.
- Over-burping out of anxiety: Beginners with only one jar open it far too often, which extends the curing timeline and increases mold risk from ambient humidity spikes.
- No hygrometer: With a single jar and no monitoring, you have zero feedback on whether humidity is in range: you're guessing every time.
Small harvests cure best when the jar size matches the bud volume, a hygrometer sits inside every jar, and you follow a structured burping schedule instead of opening on impulse. Get those three things right and a small batch cures beautifully.
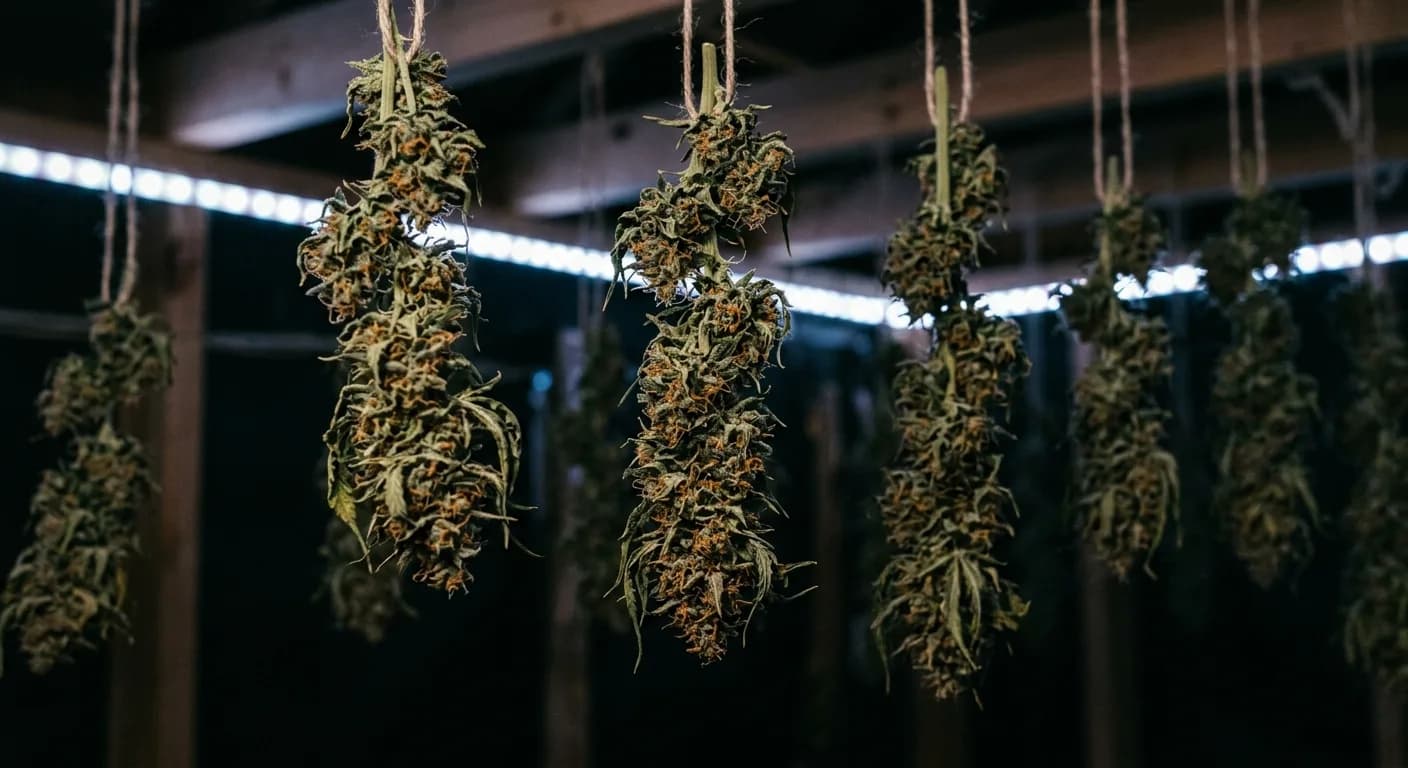
Before you even think about jars, make sure your buds are properly dry. The cannabis drying room setup guide covers the target conditions, 60–65°F and 55–60% RH for 7–14 days, until small stems snap cleanly rather than bending. Putting underdried buds into a jar is the single fastest route to mold.
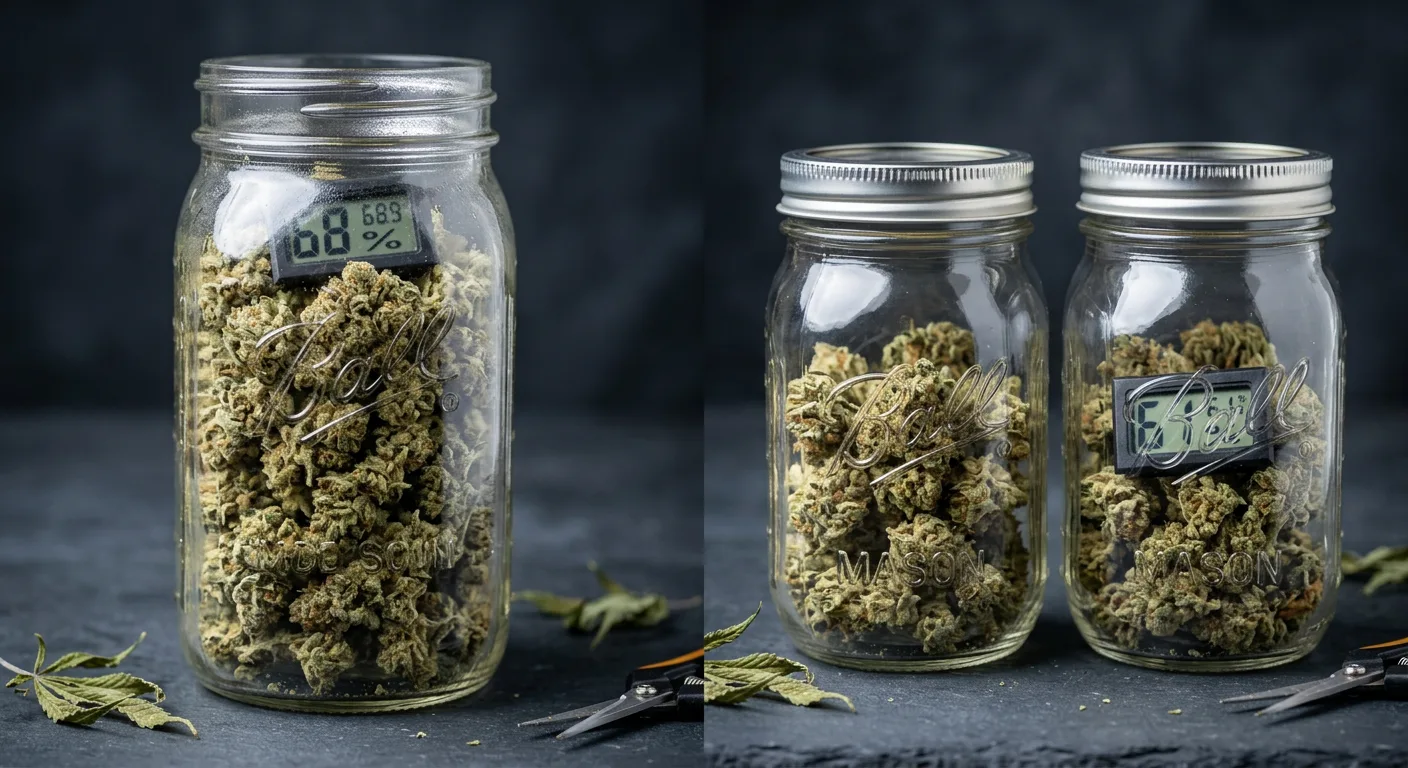
Jar Sizing Guide: Match Your Jar to Your Harvest Weight
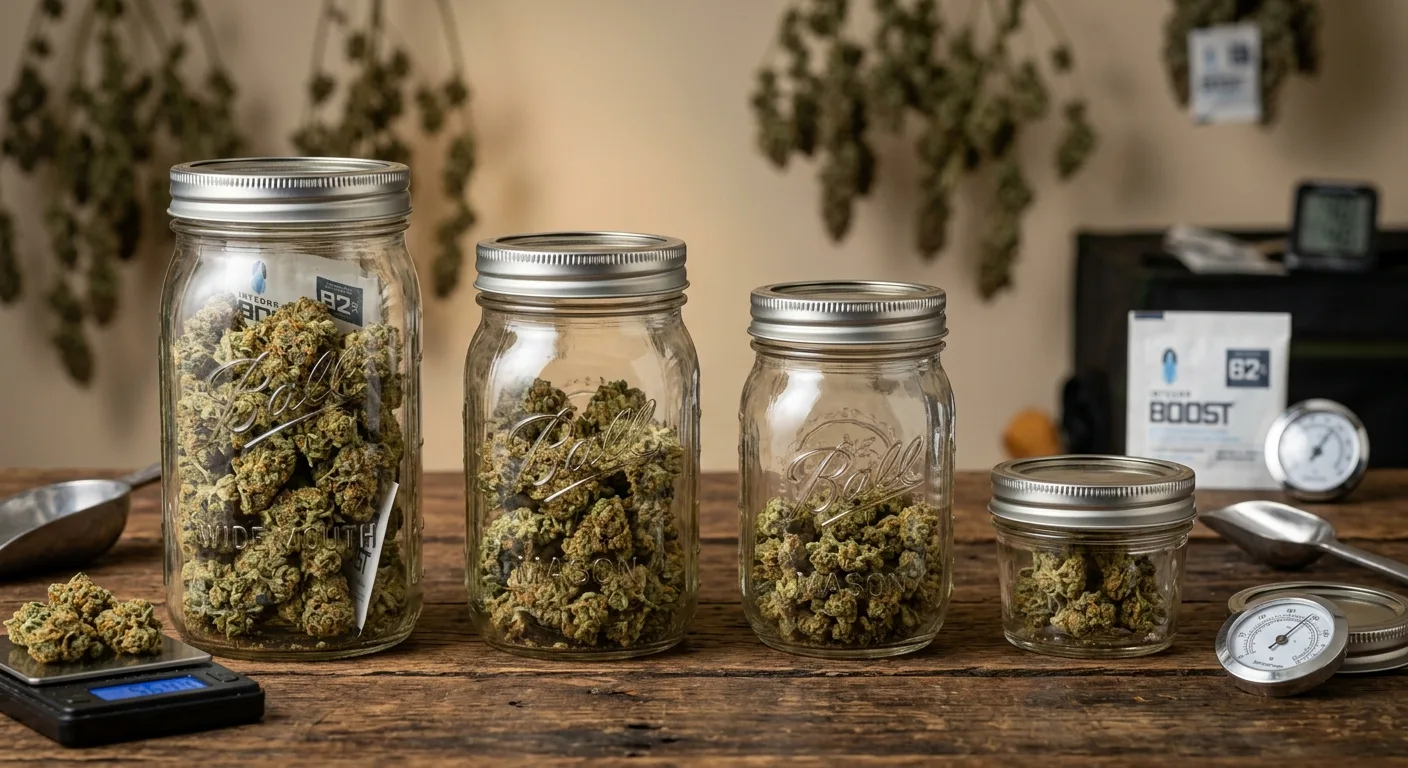
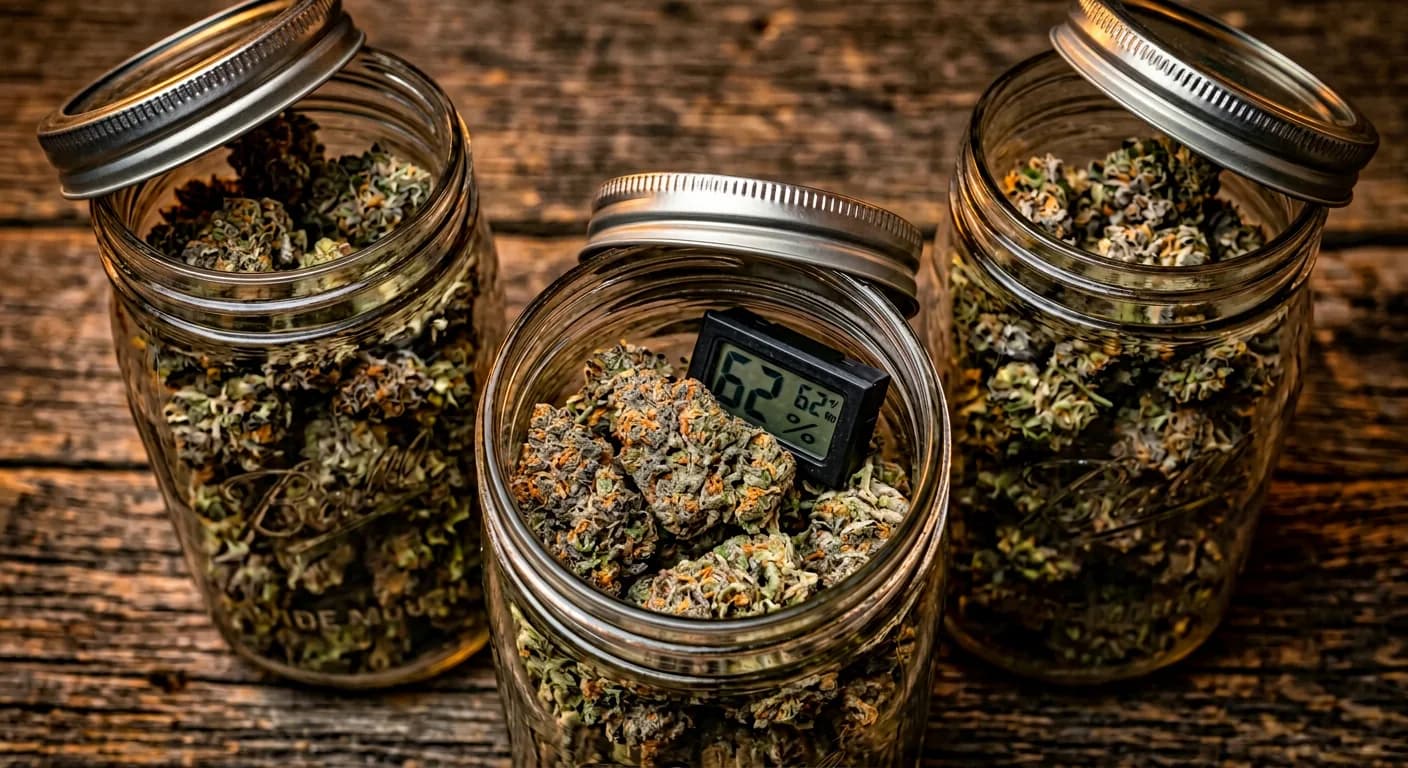
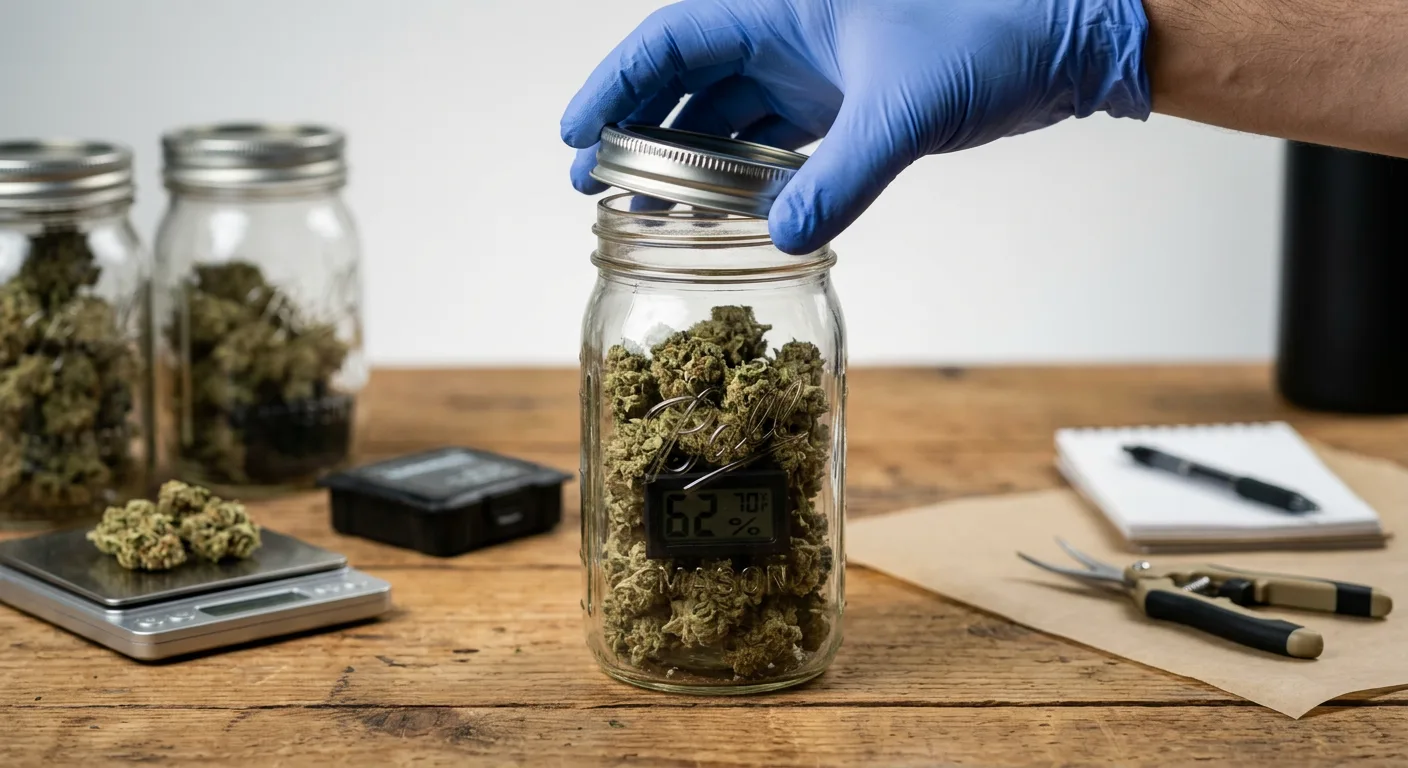
The right jar size for curing cannabis depends entirely on how much dried bud you have. The goal is to fill the jar about two-thirds full, no more, no less. That fill level gives buds enough room to breathe while keeping oxygen headspace low enough to protect terpenes.
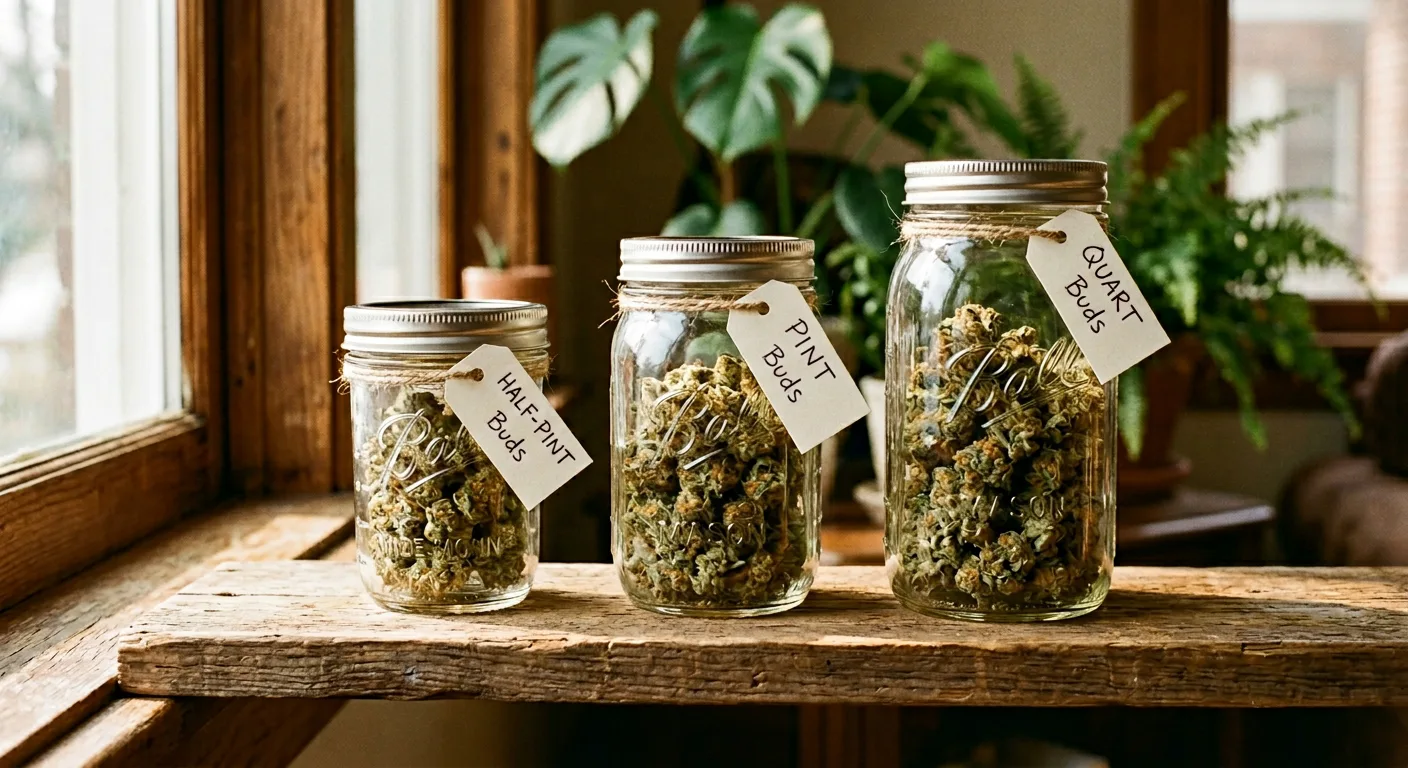
The Standard Jar Sizes and What They Hold
| Jar Size | Volume (oz / ml) | Ideal Harvest Weight | Max Harvest Weight | Best For |
|---|---|---|---|---|
| Half-Pint | 8 oz / 237ml | Under 0.5 oz (14g) | 0.6 oz (17g) | Micro-cures, single-plant autos |
| Pint | 16 oz / 473ml | 0.5–1 oz (14–28g) | 1.1 oz (31g) | Single autoflower or small photoperiod |
| Quart | 32 oz / 946ml | 1–2 oz (28–56g) | 2.2 oz (62g) | Standard 2x2 tent harvest |
| Half-Gallon | 64 oz / 1893ml | 2–4 oz (56–113g) | 4.5 oz (127g) | Larger 2x2 or small 2x4 tent harvest |
Wide-mouth mason jars are far easier to work with than regular-mouth jars at this scale. Wide-mouth pint and quart jars from Ball or Kerr are available at most grocery stores for under $15 per 12-pack and are the industry standard for a reason, they seal airtight and open without disturbing buds.
Why Quart Jars Are the Sweet Spot for Most 2x2 Growers
A typical autoflower in a 2x2 tent yields 1–2 oz of dried, trimmed bud, which drops perfectly into a quart jar at the two-thirds fill mark. For this reason, most beginner growers need exactly one or two quart mason jars and nothing more. You do not need specialty jars, UV glass, or airtight stash jars to cure small amounts well.
If your harvest lands between two jar sizes, always go smaller. A slightly fuller jar is far better than a jar with large empty headspace. You can gently pack buds without crushing them, just don't compress them forcefully.
The Fill Ratio Problem: Why Under-Filling a Large Jar Ruins Your Cure
The two-thirds fill rule exists because cannabis buds release moisture and off-gas compounds (including CO₂ and terpene vapors) as they cure. If the jar is only one-quarter full, there's a large volume of oxygen sitting above the buds that accelerates oxidation, the same process that makes old cannabis smell like hay or cut grass instead of its original terpene profile.
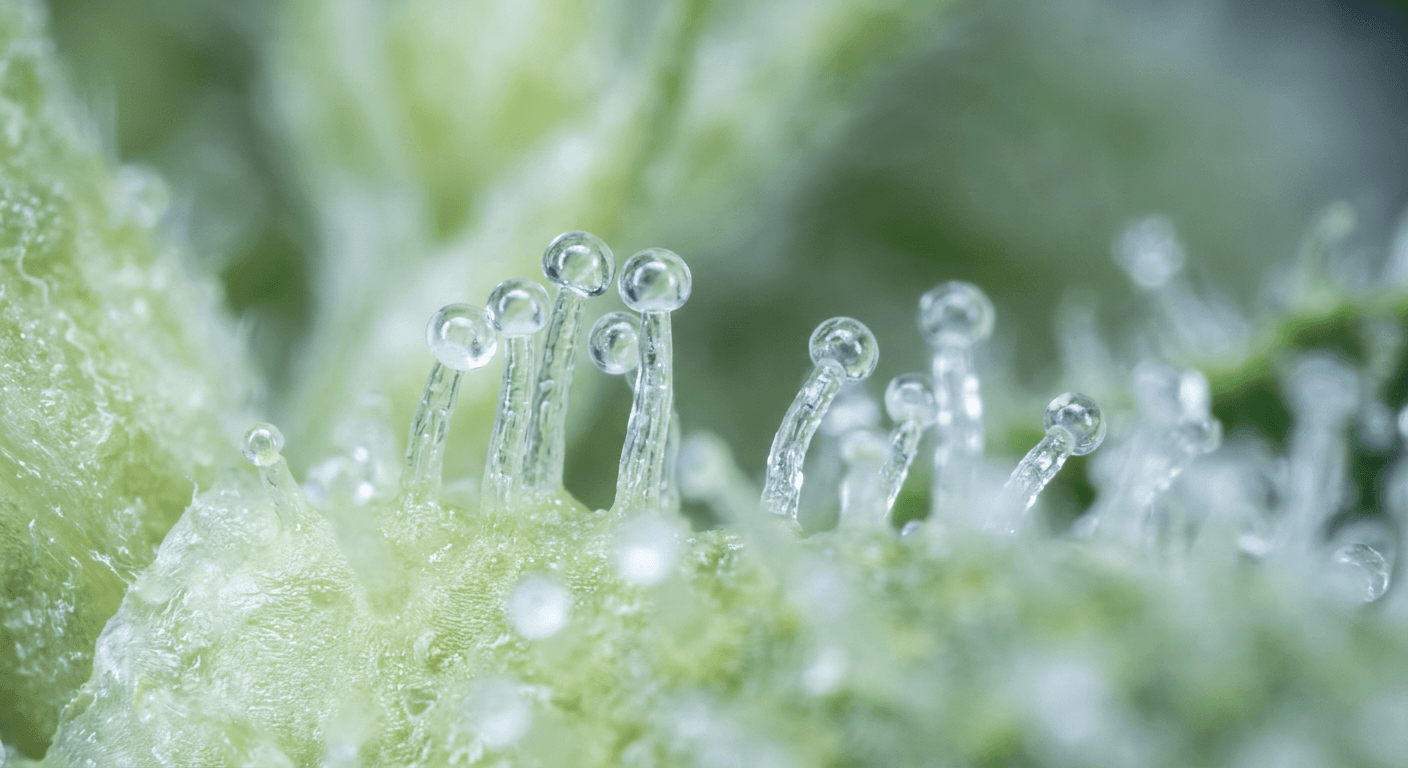
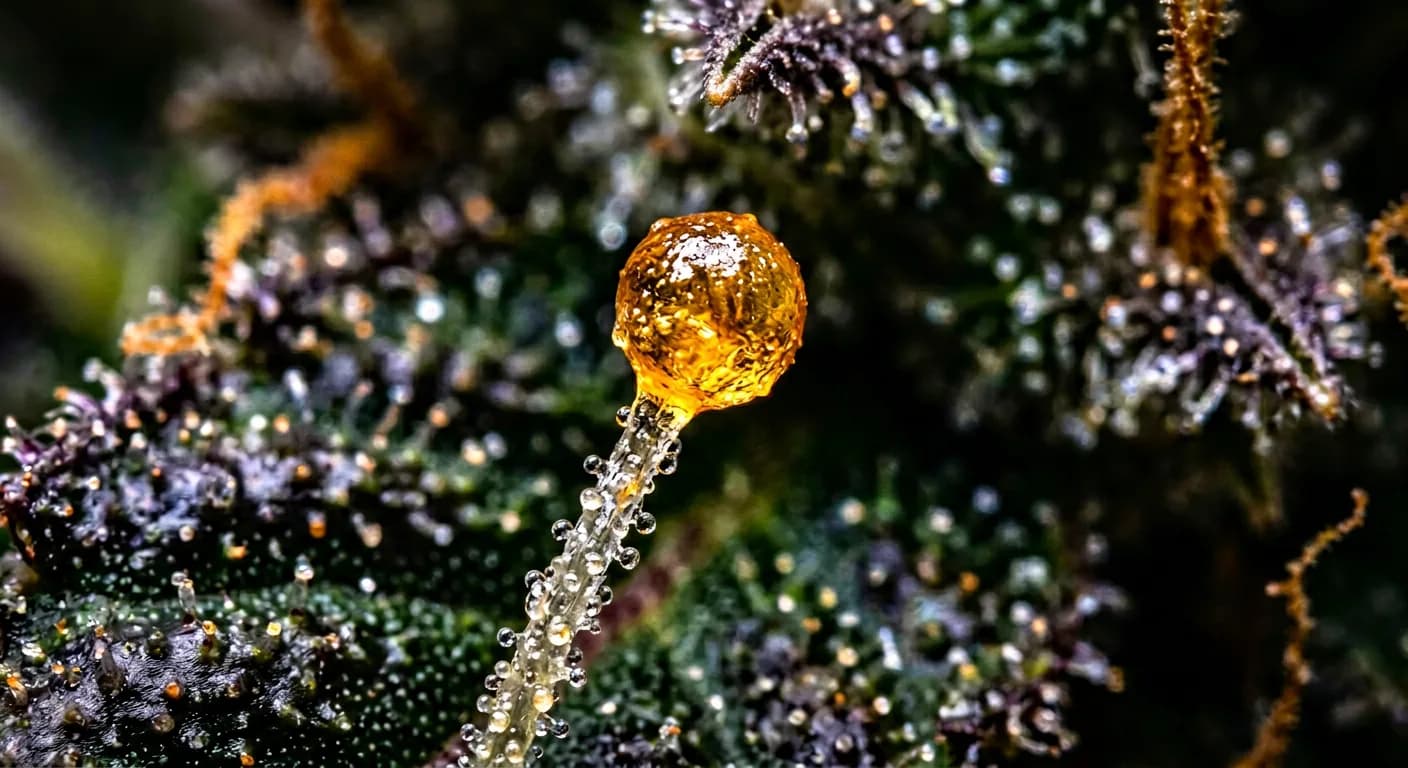
Oxygen is the enemy of terpene preservation. The primary aromatic terpenes, myrcene, limonene, linalool, are all susceptible to oxidative degradation. A jar filled to two-thirds keeps that headspace oxygen low and allows CO₂ from the curing process to partially displace it during sealed periods.
Common beginner mistake: Using a half-gallon jar for 1 ounce of bud because it was the only clean jar available. That jar is 90% empty air. Terpenes will degrade noticeably within the first two weeks. Always match jar size to bud volume before you start.
What Happens Chemically When the Jar Is Too Empty
During curing, plant enzymes break down chlorophyll and convert some remaining sugars. This process consumes oxygen and produces CO₂. In a correctly filled jar, the headspace CO₂ builds up during sealed periods and acts as a partial buffer against further oxidation. In an under-filled jar, that CO₂ is diluted by too much ambient oxygen, and the buffer never forms effectively.
You can read more about how terpene preservation works at the chemical level in the pinene terpene guide, the same principles that govern grow-room preservation apply directly inside the cure jar.
Fixing a Fill Ratio Problem Mid-Cure
If you're already two days into a cure and realize your jar is too large, you can transfer the buds to a smaller jar immediately without resetting the clock. Move buds gently, reseal tightly, and continue your burping schedule from where you left off. Early correction causes no harm.
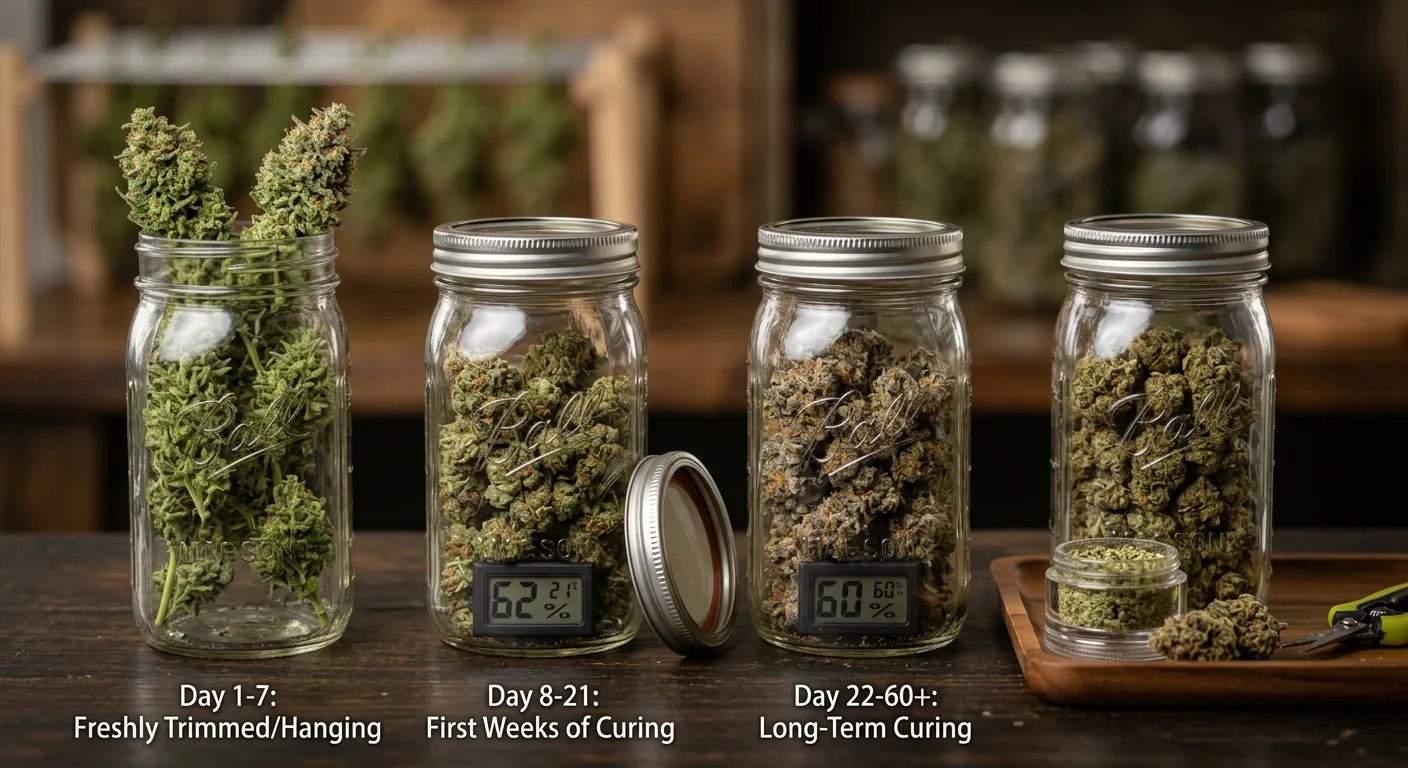
Burping Schedule for Small Batches: Less Is More
Burping means opening the jar briefly to exchange the built-up CO₂ and moisture-saturated air for fresh air. For small jars, particularly pint and quart sizes, the internal environment equilibrates faster than it does in a large jar, which means the burping windows are slightly shorter and the transition from daily to every-other-day burping comes a little sooner.
Week-by-Week Burping Schedule for 1–4 oz Batches
Days 1–7: Open Once Daily for 10–15 Minutes
During the first week, buds are still releasing significant moisture. Open each jar once per day, leave the lid off for 10–15 minutes, and check for any ammonia smell, that indicates anaerobic bacterial activity from underdried buds. If you smell ammonia, leave the lid off for 30–45 minutes and check again the next day.
Days 8–14: Open Once Daily for 5–10 Minutes
Moisture release slows through the second week. Your hygrometer should read 58–65% RH within a few hours of sealing. If it reads above 70%, increase burping frequency. If it reads below 55%, add a small Boveda 62% pack to the jar.
Days 15–28: Open Every 2–3 Days for 5 Minutes
By the third week, moisture equilibrium is mostly stable. Small jars reach this state slightly earlier than large ones because there's less total moisture to redistribute. Check your hygrometer reading each time you burp, consistent readings of 60–63% RH mean the cure is progressing correctly.
Days 29–56: Open Once a Week
From week 4 onward, the cure deepens mostly through anaerobic enzyme activity inside the sealed jar. Weekly checks are all that's needed. The buds are smokeable at this point, but every additional week of curing improves smoothness, flavor complexity, and the way the high develops. Week 8 is the gold standard.
Set a phone alarm labeled 'Burp jars' for the same time each day during weeks 1–2. The 10-minute window is easy to forget when life gets busy, and missing two or three burpings in a row during the first week raises mold risk significantly in a still-wet batch.
When Humidity Is Too Low, and Too High
- RH below 55%: Buds are drying out, not curing. Add a Boveda 62% mini pack and seal the jar. Check again in 24 hours.
- RH 65–70%: Slightly high but manageable. Increase burping to twice daily for 3–4 days until it drops.
- RH above 70%: Risk of mold. Remove buds, spread them on a clean dry surface for 1–2 hours, then return to the jar with a brief unsealed period each day until the reading stabilizes below 65%.
- RH consistent at 58–63%: Ideal. Maintain your schedule without changes.
For deeper humidity pack comparisons including Boveda vs Integra Boost for small jars, the humidity packs storage guide has side-by-side testing data worth reviewing.
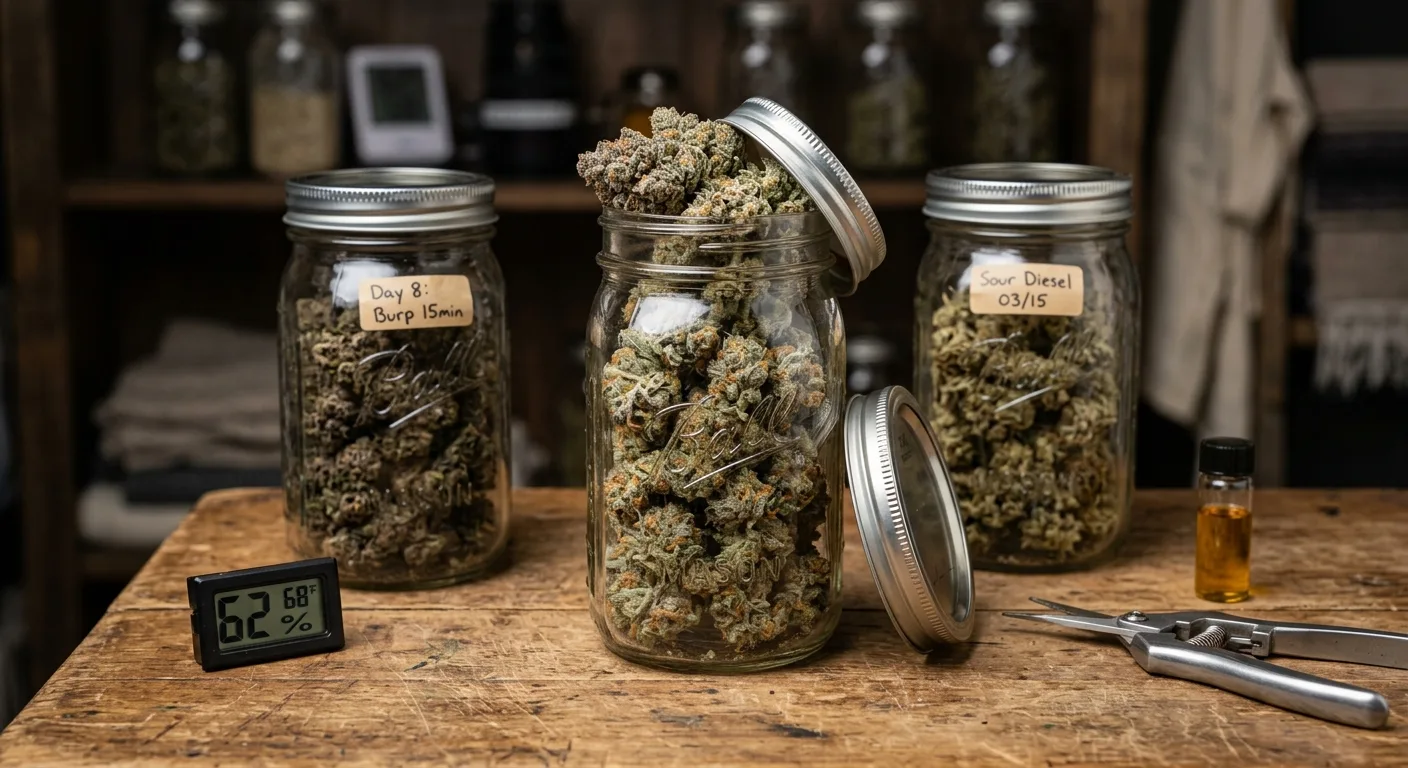
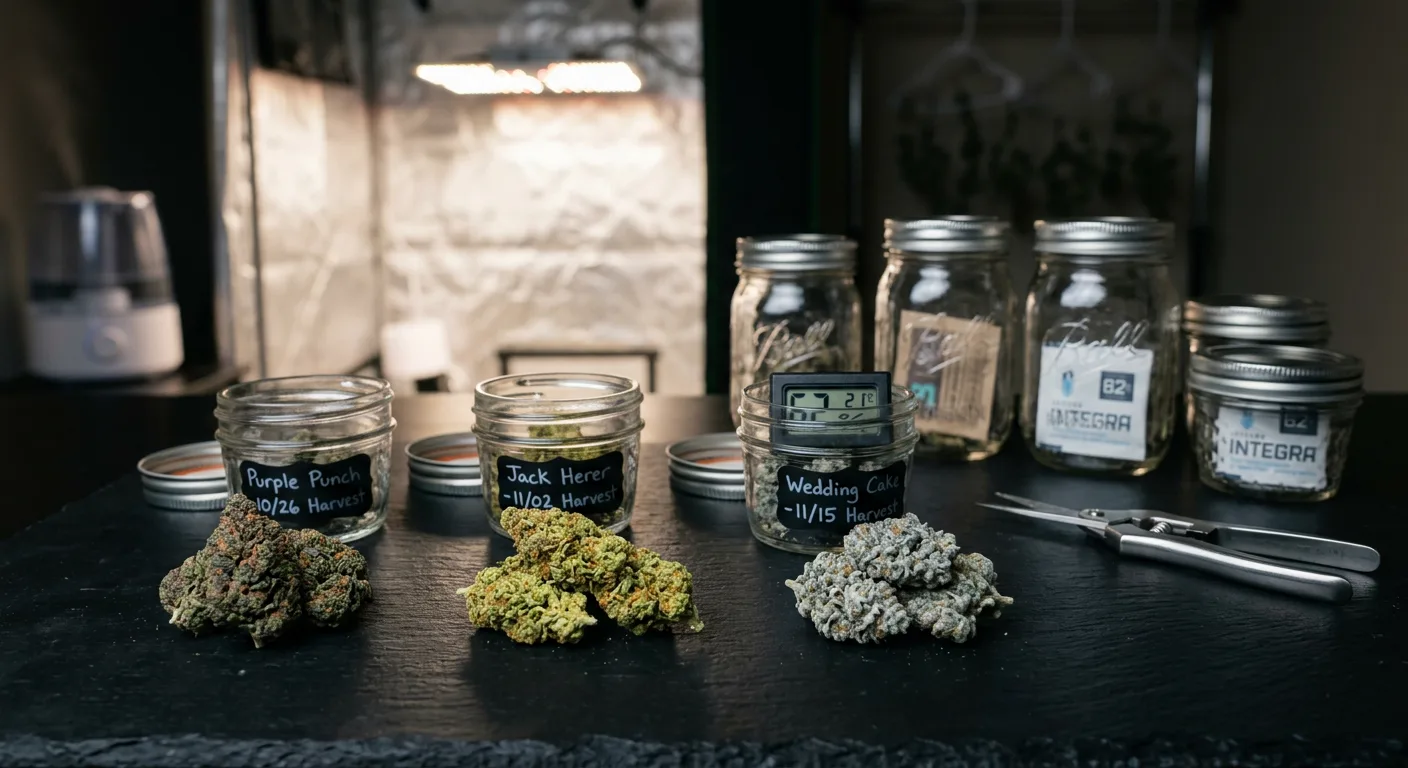
Single Jar vs. Multiple Jars: When to Split Your Small Harvest
Even with a small harvest, splitting your bud across two jars instead of one often makes sense. Separating by phenotype or bud size gives you more control and protects the entire harvest if one jar develops a humidity problem. The decision depends on what you're working with.
When One Jar Is Fine
- All buds came from a single plant and smell identical
- Your total harvest fills one jar to the two-thirds line
- Buds were dried under identical conditions throughout
- You have no phenotype variation to preserve separately
When You Should Split Into Two Jars
- You grew two different strains, keep them separate even at small scale
- Top colas dried faster than lower, smaller buds, moisture content differs
- You noticed different aromas from different branches during trim
- Your total harvest is over 2 oz, which fills one quart jar past the two-thirds mark
- You want to sample at week 4 without disturbing the main jar
Phenotype separation matters even at 2 ounces total. Two plants of the same strain can express different terpene profiles and moisture characteristics. Mixing them in one jar means the drier batch pulls moisture from the wetter batch, extending your cure timeline for both. Separate jars cure each batch on its own schedule.
This is especially relevant if you grew an autoflowering strain alongside a photoperiod, the two plants almost certainly dried at different rates and will need different burping attention during the first two weeks.
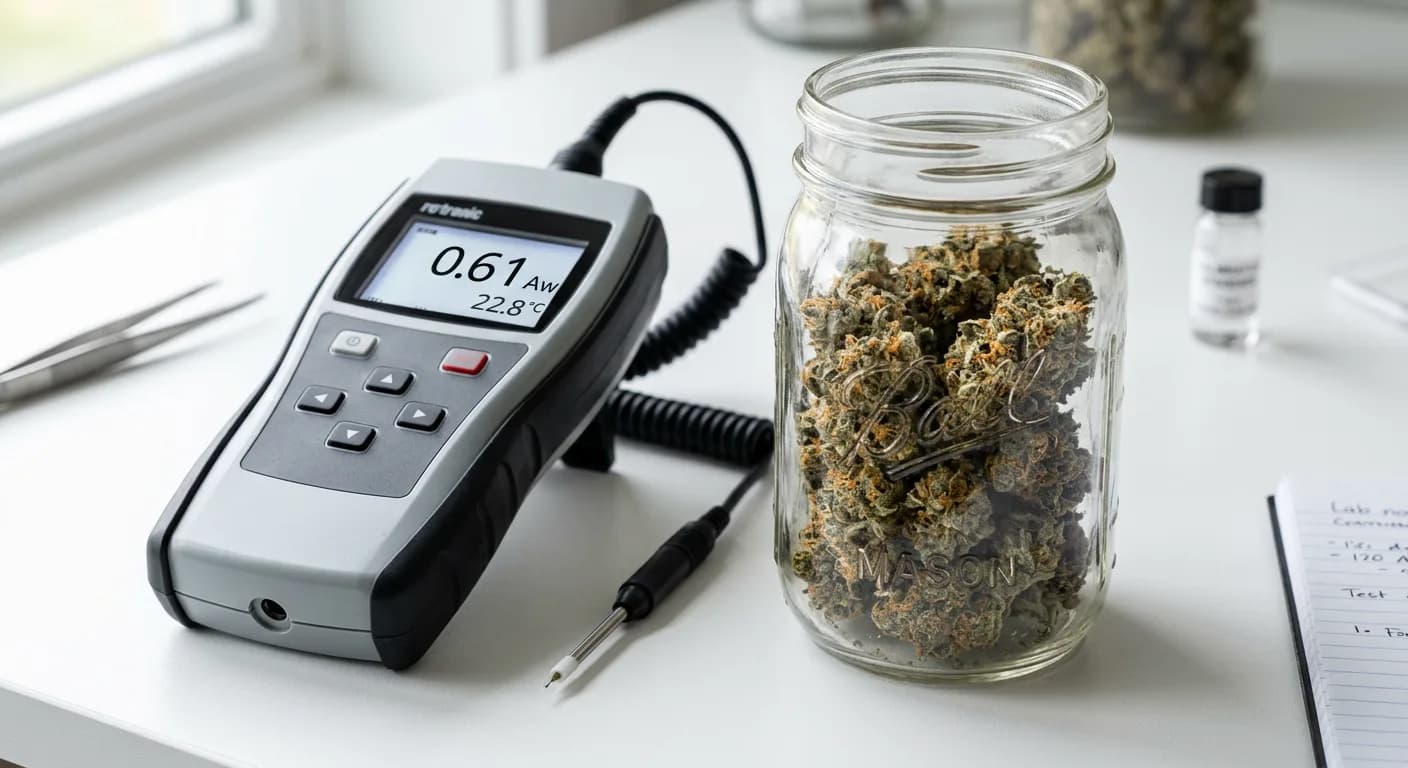
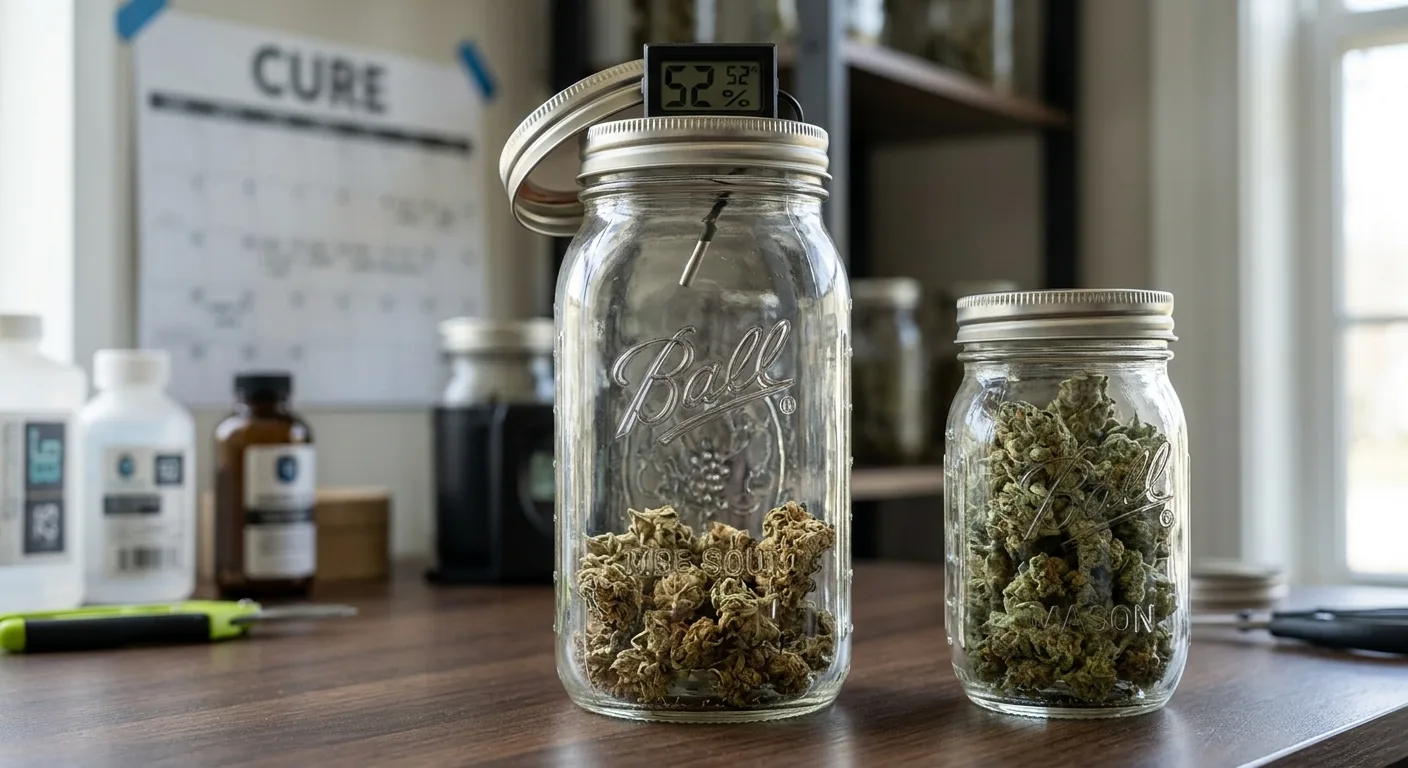
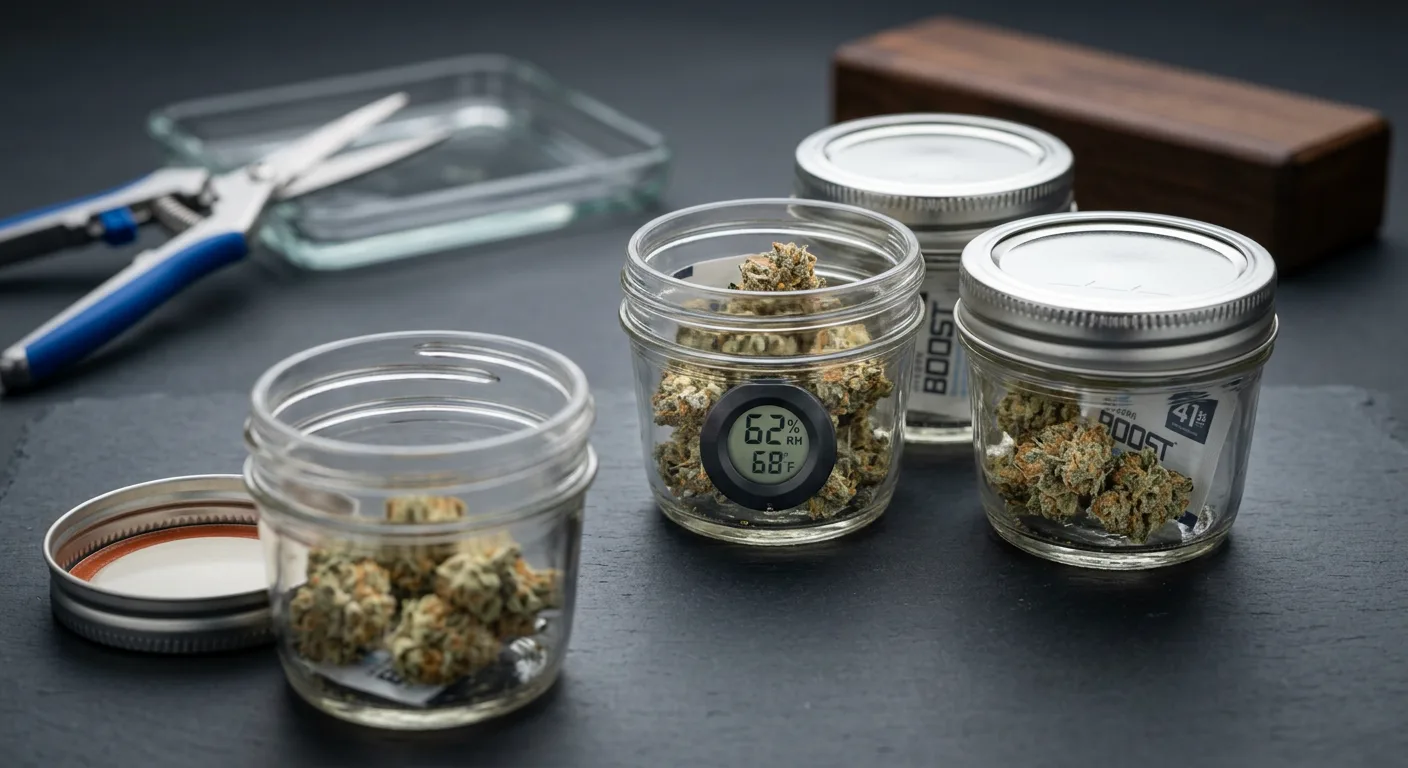
Using Hygrometers in Small Jars: Which Ones Actually Fit
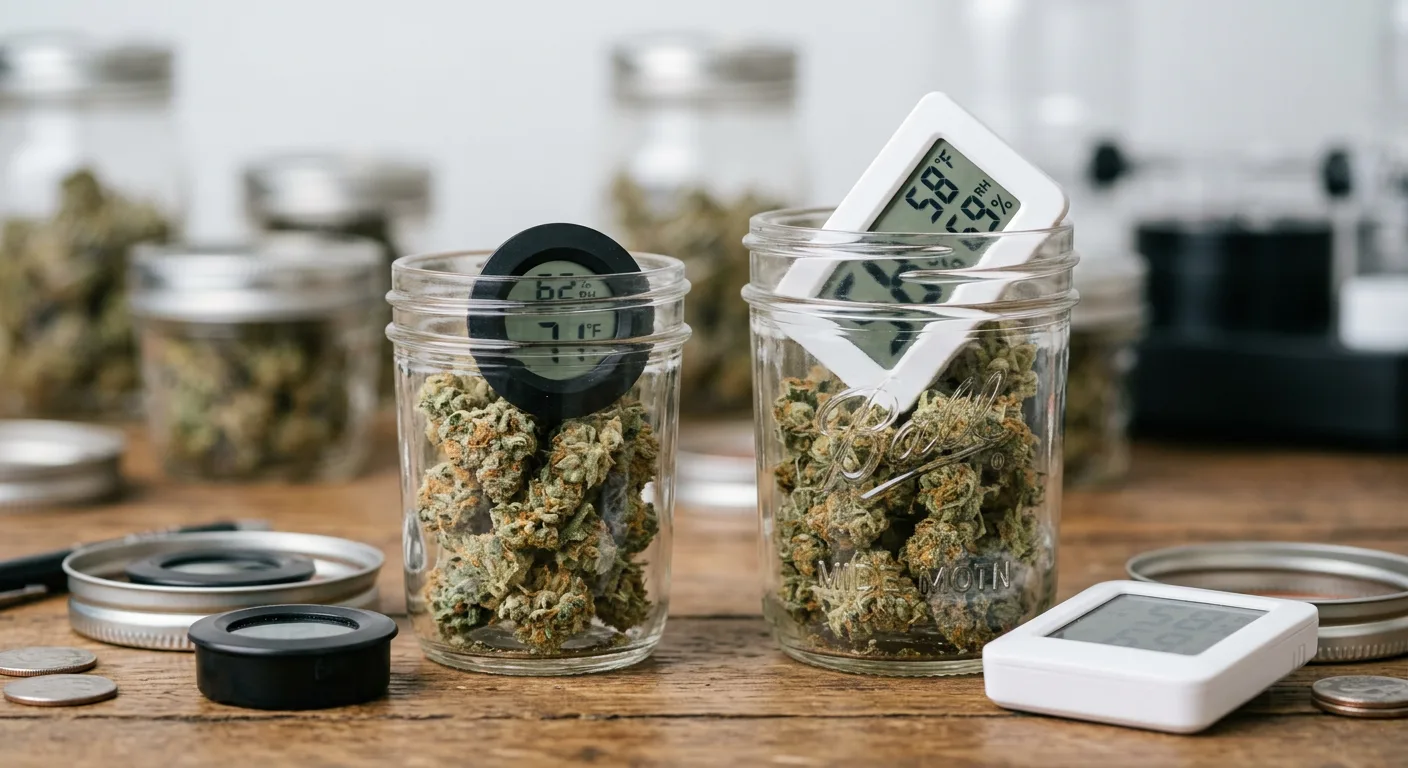
A hygrometer inside your cure jar removes all guesswork. Without one, you're opening the lid, squeezing a bud, and hoping for the best. With one, you open the lid once a day, read the number, close the lid, and move on. For a small harvest where every bud counts, that precision is worth the $8–15 investment.
Mini Hygrometer Sizing for Mason Jars
| Hygrometer Model | Dimensions | Fits Pint Jar? | Fits Quart Jar? | Approximate Price |
|---|---|---|---|---|
| Govee Mini (H5075) | 1.3" × 1.1" | Yes (tight) | Yes (easy) | ~$8–10 |
| Inkbird IBS-TH2 Mini | 1.5" × 1.1" | Borderline | Yes | ~$10–12 |
| SensorPush HT1 | 1.5" × 1.5" | No | Yes | ~$49 |
| Generic 'cigar hygrometer' round | ~1.2" diameter | Yes | Yes | ~$5–8 |
The Govee Mini is the practical choice for most small-batch growers. It's accurate to ±3% RH, fits easily inside a quart jar without touching the buds, and its readings stabilize within 30–45 minutes of sealing, which is fast enough to read right after your daily burp the following day.
Place the hygrometer face-up on top of the buds, not buried inside them. This gives you a clean reading of the jar's air environment and makes it easy to read through the glass without opening the lid. For wide-mouth jars, you can read some mini units without removing the lid entirely.
What to Do If You Can't Fit a Hygrometer
In a half-pint jar, even a mini hygrometer may not fit. In that case, use a calibrated Boveda 62% mini pack as your humidity control and focus your attention on the bud feel test, properly curing buds at 60–63% RH feel slightly firm on the outside but give slightly when pressed, like a fresh grape. Crispy means too dry; squishy means still too wet.
The Micro-Cure: What to Do When Your Harvest Is Under 1 Ounce
A harvest under 1 ounce, whether that's 14 grams from a small autoflower or 20 grams from a plant that underperformed, is called a micro-cure, and it has its own specific setup. The principles are identical, but the equipment scales down and the tolerance for error narrows slightly because the batch is so small.
The Half-Pint Setup for Harvests Under 14 Grams
Choose a Wide-Mouth Half-Pint Mason Jar
A standard Ball wide-mouth half-pint (8 oz / 237ml) is ideal. It fits up to 14–17 grams at the two-thirds fill mark. If your bud is fluffy rather than dense, even 12 grams may fill it to two-thirds, check the level visually before sealing.
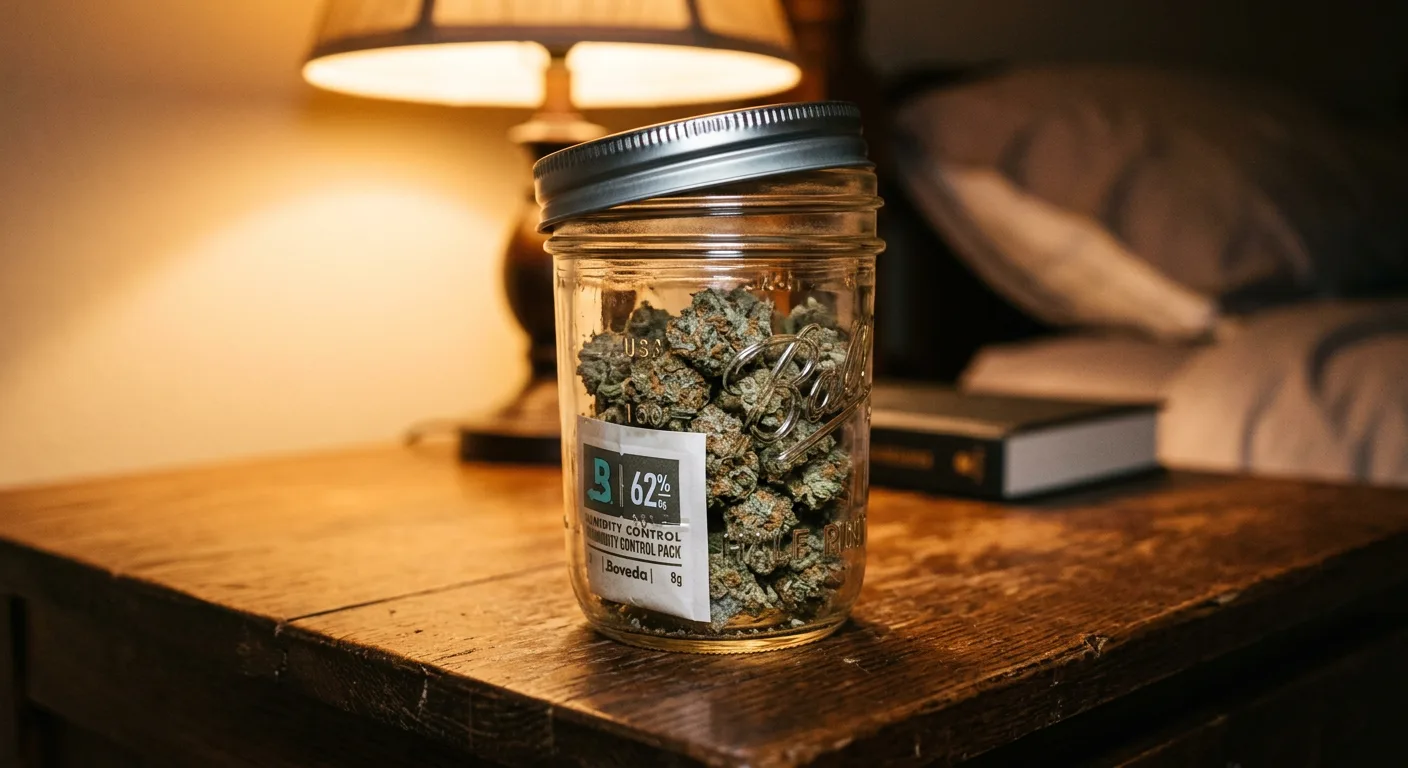
Add One Boveda 62% Mini Pack
The Boveda mini (the small 4-gram pack) is specifically sized for half-pint to pint jars. Tuck it against the inside wall of the jar without burying it in the buds. It will maintain 62% RH passively between your daily burpings during weeks 1 and 2.
Follow the Same Burping Schedule: No Shortcuts
Smaller jars equalize faster, but the curing chemistry still takes time. Don't skip the two-week daily burping phase just because the jar is tiny. The Boveda pack makes humidity management easier, but the daily air exchange during the first 14 days is still necessary to let off-gas byproducts escape.
A harvest under 14 grams is not too small to cure properly. The half-pint plus Boveda mini setup costs less than $3 in materials and produces results identical to larger cures. Never skip curing just because your batch is small, the flavor difference between a 2-week cure and a 4-week cure is significant even at 10 grams.
What About Sub-7-Gram Harvests?
If your entire harvest is under 7 grams (a quarter ounce), a half-pint jar is still the right choice, just add a single Boveda mini pack and check the fill ratio. If the jar is less than half full, consider a 4-oz quilted jelly jar (half the size of a half-pint) as an alternative. Any airtight glass jar works as long as you maintain the two-thirds fill ratio and monitor humidity.
Patience Management: The Biggest Mistake Small-Batch Growers Make
Here is the honest truth about curing a small harvest: the hardest part is not the jar selection, the burping schedule, or the hygrometer. It's leaving the jar alone. When your entire harvest is sitting in one jar, the temptation to open it, smell it, pull a bud out, and try it is overwhelming, and every unnecessary opening degrades the final product.
What You're Actually Risking Every Time You Open Out of Schedule
- Terpene volatilization: The fragrant compounds that create your strain's aroma are volatile. Every unscheduled opening releases a small amount that never returns to the jar.
- Humidity spike: If ambient humidity in your room is above 65%, opening the jar pulls that moisture in, raising the jar's RH and extending drying time or triggering mold risk.
- Premature sampling: Buds pulled at week 2 smoke harshly and deliver a less developed high compared to week 4 buds from the same batch. You're not getting an accurate read on your crop's potential.
Set a rule and stick to it: The jar opens on a schedule, not on impulse. Write the date on a sticky note on the lid. Note the day you're allowed to pull a test bud (day 28 minimum). Treating your cure like a structured experiment rather than a snack drawer produces dramatically better results.
How to Manage the Urge to Check Constantly
- Use a hygrometer so you can 'check' without opening, read the display through the glass
- Label the lid with the date sealed and the first allowed taste date
- Keep jars in a dark cabinet or box so they're not visible every time you walk by
- Set a single daily phone reminder for your burp, open once, smell it, close it, done
- Note the smell at each burp in a simple grow journal, this makes the process feel active without over-opening
Once you're past the daily burping phase at day 14, most of the patience battle is won. At that point, you're opening every 2–3 days and the cure is doing its work undisturbed. The buds you pull at week 6 will justify every day of restraint from week 2 onward.
For storage after your cure is complete, the long-term cannabis storage guide covers how to transition from active curing to stable preservation without losing the quality you've built.
Quick-Reference Curing Timeline for Small Harvests
Use this table as your week-by-week reference. All timelines assume buds were properly dried to the stem-snap stage before jarring, and that jars are filled to approximately two-thirds capacity with the correct jar size for the harvest weight.
| Week | Burp Frequency | Duration per Burp | Target RH | What to Watch For |
|---|---|---|---|---|
| Week 1 (Days 1–7) | Once daily | 10–15 min | 60–65% | Ammonia smell = re-dry immediately |
| Week 2 (Days 8–14) | Once daily | 5–10 min | 60–65% | RH stabilizing; aroma improving |
| Week 3 (Days 15–21) | Every 2 days | 5 min | 58–63% | Terpene complexity increasing |
| Week 4 (Days 22–28) | Every 2–3 days | 5 min | 58–62% | Minimum smokeable quality reached |
| Weeks 5–6 (Days 29–42) | Once weekly | 5 min | 58–62% | Flavor deepening significantly |
| Weeks 7–8 (Days 43–56) | Once weekly | 5 min | 58–62% | Peak cure quality reached |
| Beyond Week 8 | Monthly check | 2–3 min | 58–62% | Transition to long-term storage |
The transition from week 4 to week 8 is where small batches show the most improvement per day. Chlorophyll breakdown is largely complete by week 4, but terpene polymerization, the chemical process that binds aromatic compounds into more stable, complex configurations, continues actively through week 6 to 8. This is why the same bud sampled at day 28 versus day 56 often smells and tastes dramatically different.
Harvest Weight Quick-Reference
- Under 0.5 oz (14g): Half-pint jar + Boveda mini 62% + 8-week cure target
- 0.5–1 oz (14–28g): Pint wide-mouth jar + mini hygrometer + 6–8 week cure target
- 1–2 oz (28–56g): Quart wide-mouth jar + mini hygrometer + 6–8 week cure target
- 2–4 oz (56–113g): One half-gallon jar, or two quart jars split by bud size or phenotype + 6–8 week cure target
Strains That Produce Consistent Small Harvests Worth Curing Properly
The strains you grow directly affect how rewarding the curing process is. Autoflowers are the natural choice for 2x2 tent growers because they finish faster and produce compact, dense buds that cure predictably. Here are some options that perform well in small spaces and develop excellent post-cure quality.
Autoflowering Options for Beginners
Skywalker OG Autoflower: dense, resinous indica-dominant buds with 23% THC that develop a deep earthy and pine terpene profile through curing. A reliable choice for small tents that rewards a full 8-week cure. View Skywalker OG Auto.
Holy Grail Kush Autoflower: hybrid with 20% THC and a complex terpene structure that benefits noticeably from weeks 5–8 of curing, where the fuel and sweet notes separate and deepen. View Holy Grail Kush Auto.
Banana Kush Autoflower: consistently produces dense, fruity buds with 18% THC. The tropical terpene profile is volatile and rewards careful curing with minimal over-burping. View Banana Kush Auto.
Swiss Cheese Autoflower: compact, beginner-friendly structure with 17% THC and a classic skunky aroma that develops well over a 6-week cure. Good choice for first-time curers who want a forgiving phenotype. View Swiss Cheese Auto.
Well-Known Industry Autoflowers (Not Carried Here)
Wedding Cake Auto: produces extremely dense, trichome-covered buds with a sweet vanilla profile. The high resin content makes curing humidity management critical. Keep RH at 62% maximum. Popular for hash making after cure.
Zkittlez Auto: tropical and fruity with a moderate 17–19% THC range. One of the most rewarding small-batch cures available because the fruit terpenes deepen dramatically between weeks 4 and 8.
Northern Lights Auto (classic cut), the benchmark beginner autoflower. Low-odor during growth, dense harvests, and consistent curing behavior across most environments. Excellent for first-time small-batch curing.
Feminized Photoperiods for Small Tents
If you're running a photoperiod plant in a 2x2, Purple Kush Feminized (27% THC) produces compact, heavy buds that develop beautiful terpene complexity through a proper cure. Similarly, OG Kush Feminized (26% THC) has a resinous structure that responds exceptionally well to a full 8-week cure, the classic fuel and earth notes only fully emerge after week 6.
If you want to plan your expected yield before you even germinate, use the yield estimator tool to set realistic expectations for your setup. And if you're choosing seeds for your first grow, the feminized vs regular seeds guide explains why feminized and autoflowering seeds are almost always the right call for small-tent first-timers.
Predictable yields make curing planning much easier. If you know your strain typically delivers 1–1.5 oz in your setup, you can buy the right jars before harvest day instead of scrambling with the wrong container. The grow planner tool helps map out your entire cycle from seed to cure date.
Full Curing Checklist for Small Harvests
Use this checklist before you seal your first jar and during the cure cycle. Print it or bookmark this page and refer to it at each stage.
Before You Jar
- Buds are fully dry, small stems snap cleanly, not bend
- Jar size matches harvest weight (two-thirds fill rule confirmed)
- Wide-mouth mason jar is clean, dry, and odor-free
- Mini hygrometer is placed face-up on top of buds
- Harvest date labeled on lid with first burp date noted
- Jar stored in cool, dark location (65–72°F, away from light)
During the Cure
- Days 1–14: Opening jar once daily, noting smell and RH reading
- No ammonia smell present (re-dry immediately if detected)
- RH staying within 58–65% range consistently
- Boveda pack added if RH dropped below 55%
- No visible mold, white fuzz, or unusual discoloration on buds
- Transitioning to every-2-day burping by day 15
- Weekly burping schedule in place by day 29
After the Cure
- Week 4+ bud sampled, smooth smoke, developed aroma
- Week 8 target reached for full cure quality
- Jar moved to long-term storage setup if not consuming immediately
- Hygrometer removed or replaced with Boveda maintenance pack
Everything after week 8 is long-term storage territory, and the storage guide referenced earlier covers temperature, light, and container options for keeping your cured harvest potent for 12 months or more.
Frequently Asked Questions
How much weed fits in a mason jar for curing?
A pint mason jar holds 0.5–1 ounce of dried cannabis buds at the ideal two-thirds fill ratio. A quart jar holds 1–2 ounces. A half-gallon jar holds 2–4 ounces. Never pack a jar more than two-thirds full, buds need airspace to breathe and equalize moisture during the cure.
Can you cure cannabis in a small jar?
Yes, small jars like pint or half-pint mason jars work extremely well for curing cannabis, especially for harvests under 1 ounce. The key is matching jar size to your harvest weight so the jar is about two-thirds full. Avoid using a large jar for a tiny amount of bud, excess oxygen accelerates terpene oxidation and degrades flavor faster than most beginners expect.
How long does it take to cure a small cannabis harvest?
A small harvest of 1–4 ounces reaches a baseline cure in 2–4 weeks with proper daily burping. The first two weeks require daily opening. Weeks 3–4 require burping every 2–3 days. By week 4 most batches smoke smoothly. A full 8-week cure produces noticeably better flavor and a more developed high, the investment in patience is always worth it.
Do I need a hygrometer to cure cannabis in a small jar?
A hygrometer is not strictly required, but it removes all guesswork. For small jars, look for mini digital hygrometers measuring under 1.5 inches square, models like the Govee Mini or Inkbird IBS-TH2 fit inside a quart mason jar. Target 58–65% RH during the active cure. Without a hygrometer, you're estimating by bud feel alone, which is much less reliable especially for first-time growers.
Can I use a Boveda pack for curing a small cannabis harvest?
Boveda 62% packs are excellent for curing small harvests, particularly in half-pint and pint jars where a mini hygrometer may not fit. Use the small 4-gram Boveda mini for half-pint jars and the 8-gram size for pint jars. During the first two weeks, still burp the jar daily, the Boveda pack regulates humidity but does not remove the CO₂ and off-gas byproducts that the curing process releases. After week 2, the Boveda pack largely maintains the jar between weekly burpings.