You watched your seed crack, the taproot emerge, and the first tiny shoot push through the soil — and now something is wrong. Cannabis seedling problems hit hardest in the first two weeks, and most growers can't tell a normal developmental quirk from an actual emergency.
This is not a general seedling care guide. This is a visual diagnosis tool. You describe what you see, and we tell you exactly what it means, what caused it, and what to do in the next 24–48 hours. Work through the 8 most common failure modes below and fix the problem before it costs you the plant.
If you haven't started germinating yet, visit our complete germination guide to build the right foundation before any seedling touches soil.
How to Use This Diagnosis Guide
The fastest way to use this guide is to match your visual symptom to the right section heading. Each problem section follows the same four-part structure so you can triage quickly and act immediately.
- Visual symptom — exactly what you see on the plant
- Root cause — the biology behind the problem
- Immediate fix — what to do in the next 24 hours
- Prevention — how to avoid it next grow
Not sure what you're looking at? Use our free Plant Diagnosis Tool — describe the symptom and it will narrow down the most likely cause based on your setup.
One critical note before you dive in: do not stack fixes. If your seedling is yellowing and drooping, resist the urge to flush, feed, and adjust your light all at once. Diagnose one root cause first, make one change, and observe for 24 hours.
Problem #1: Damping Off (Fungal Stem Collapse)
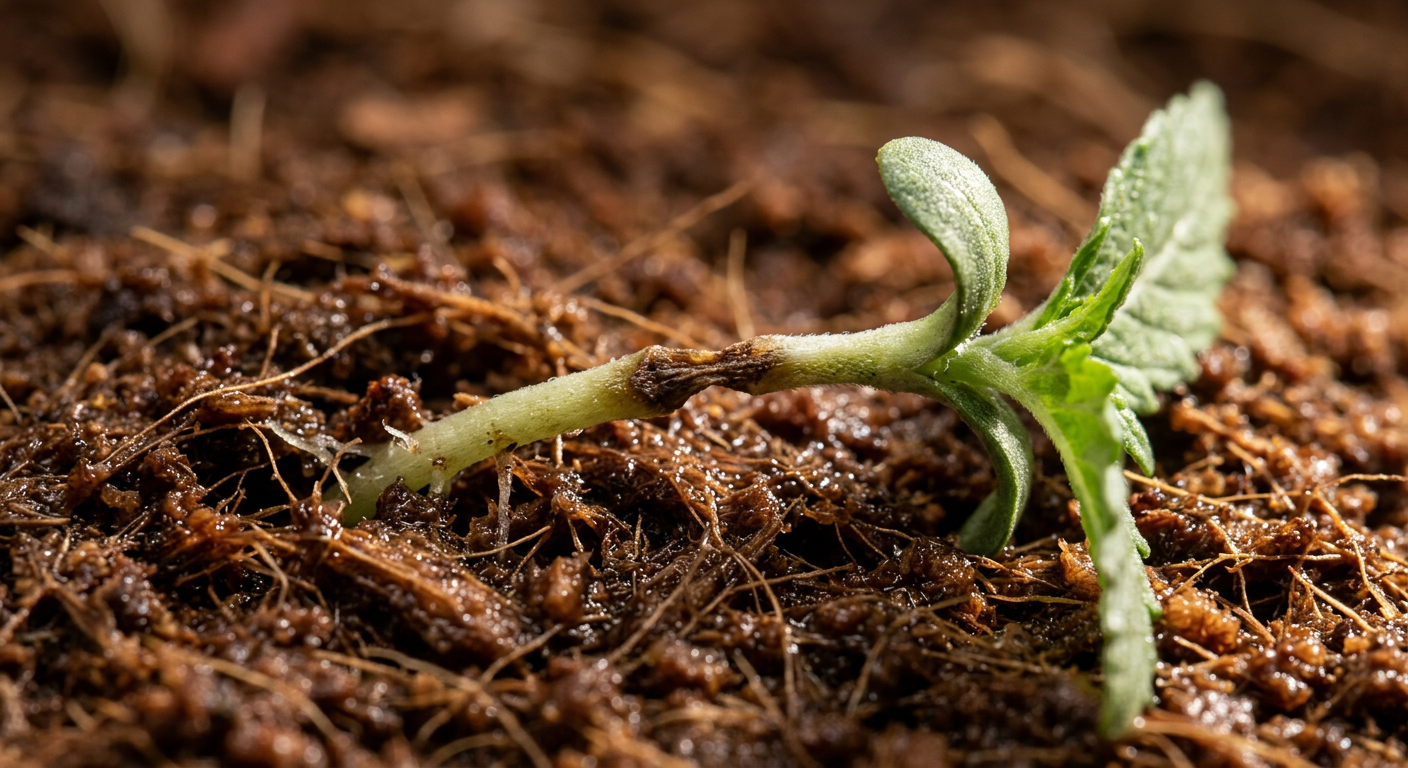
Damping off is the most lethal cannabis seedling problem in the first two weeks. It kills plants in under 24 hours and cannot be reversed once the stem collapses. Identification is everything here — acting the moment you spot early signs can save the rest of your grow.
Visual Symptom
The stem turns dark brown or grey at the soil line and appears pinched, thin, or water-soaked at that point. The plant then falls over suddenly — it doesn't wilt gradually, it collapses. The rest of the stem above the lesion may still look green and healthy, which makes it especially confusing.
Root Cause
Damping off is caused by soil-borne fungal pathogens, most commonly Pythium, Rhizoctonia, and Fusarium. These fungi thrive in three specific conditions that frequently co-occur during seedling stage:
- Consistently wet or waterlogged growing medium
- Poor airflow around the stem base
- Temperatures below 20°C (68°F) in the root zone
Immediate Fix
There is no fix once the stem has collapsed — the plant is gone. However, if you catch the discolouration before collapse, isolate the affected seedling immediately so spores don't spread. For remaining plants, reduce watering frequency dramatically and increase airflow with a small fan oscillating nearby (not blowing directly on stems).
Never reuse growing medium that contained a damping-off event. The fungal spores survive in old soil and will attack your next seedlings. Start fresh with sterile, pre-moistened seedling mix.
Prevention Next Time
- Water seedlings with a spray bottle or narrow-spout can — target the perimeter, not the stem
- Allow the top 1–2cm of medium to dry before watering again
- Keep seedling room temperature between 22–26°C (72–79°F)
- Run a gentle fan 24/7 to strengthen stems and reduce surface moisture
- Add a light dusting of cinnamon powder to the soil surface — it has natural antifungal properties
Damping off is 95% a watering problem. If your seedling medium is wet enough to stick to your finger when you press 2cm deep, it's too wet for a seedling under 7 days old.
Problem #2: Stretching and Etiolation (Seedling Too Tall)
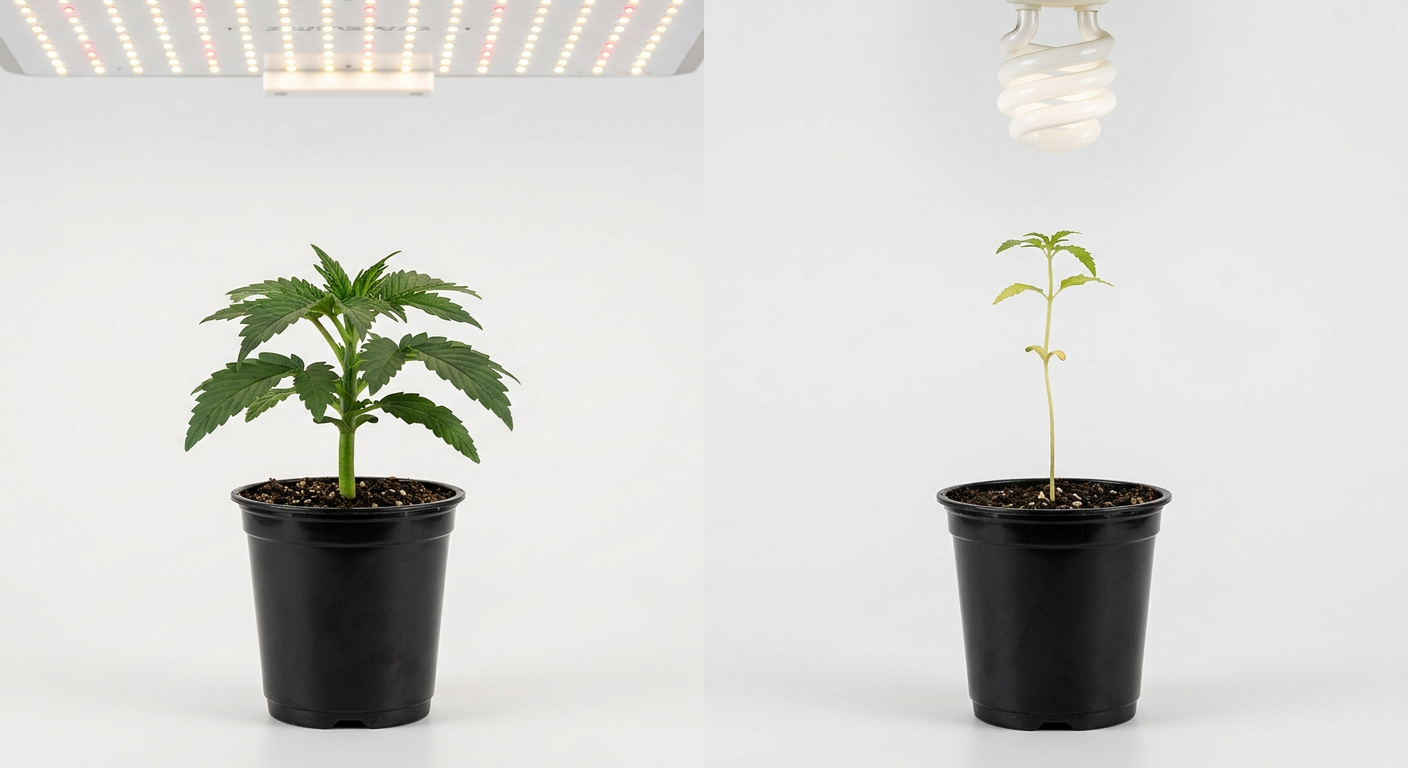
A stretching cannabis seedling — one that grows a long, pale, weak stem reaching upward — is one of the easiest problems to diagnose and one of the most preventable. It's caused entirely by inadequate light. The fix is straightforward, but acting fast matters because a severely stretched stem rarely recovers full structural strength.
Visual Symptom
The seedling's stem is unusually long — often 8–15cm tall — before producing its second node of true leaves. The stem is pale green or yellowish rather than dark green, and it may lean toward the nearest light source. The internodal distance (space between leaf sets) is noticeably large.
Root Cause
Cannabis seedlings stretch when photoreceptors in the stem detect insufficient light intensity. The plant responds by elongating cells in the stem — a process called etiolation — to physically reach closer to the light source. Common causes include:
- Light positioned too far above the canopy (more than 50–60cm for most LEDs at seedling stage)
- Light wattage too low for the canopy area (under 15W true draw per square foot for seedlings)
- Using regular household bulbs instead of full-spectrum grow lights
- Seeds germinated in low-light conditions for too long before transferring to grow space
Immediate Fix
Lower the light immediately
Move your light to 20–30cm above the seedling canopy for LED panels, or 5–10cm for CFL/T5 fluorescents. Check your light manufacturer's seedling-stage recommendation.
Support the stem
If the stem is falling over, gently bury 2–4cm of the lower stem by adding growing medium around it. Cannabis can form roots along any buried section of stem.
Increase light intensity
If your light is already close but the seedling still stretches, your light may be underpowered. Switch to a dedicated seedling LED or add a second CFL bulb beside the first.
Prevention Next Time
Use our free Light Calculator before your next grow to confirm your light intensity matches your canopy size. Start seedlings with the light at the correct height from day one — don't wait until stretching appears to adjust.
Problem #3: Yellowing Cotyledons — Normal Fade or Deficiency?
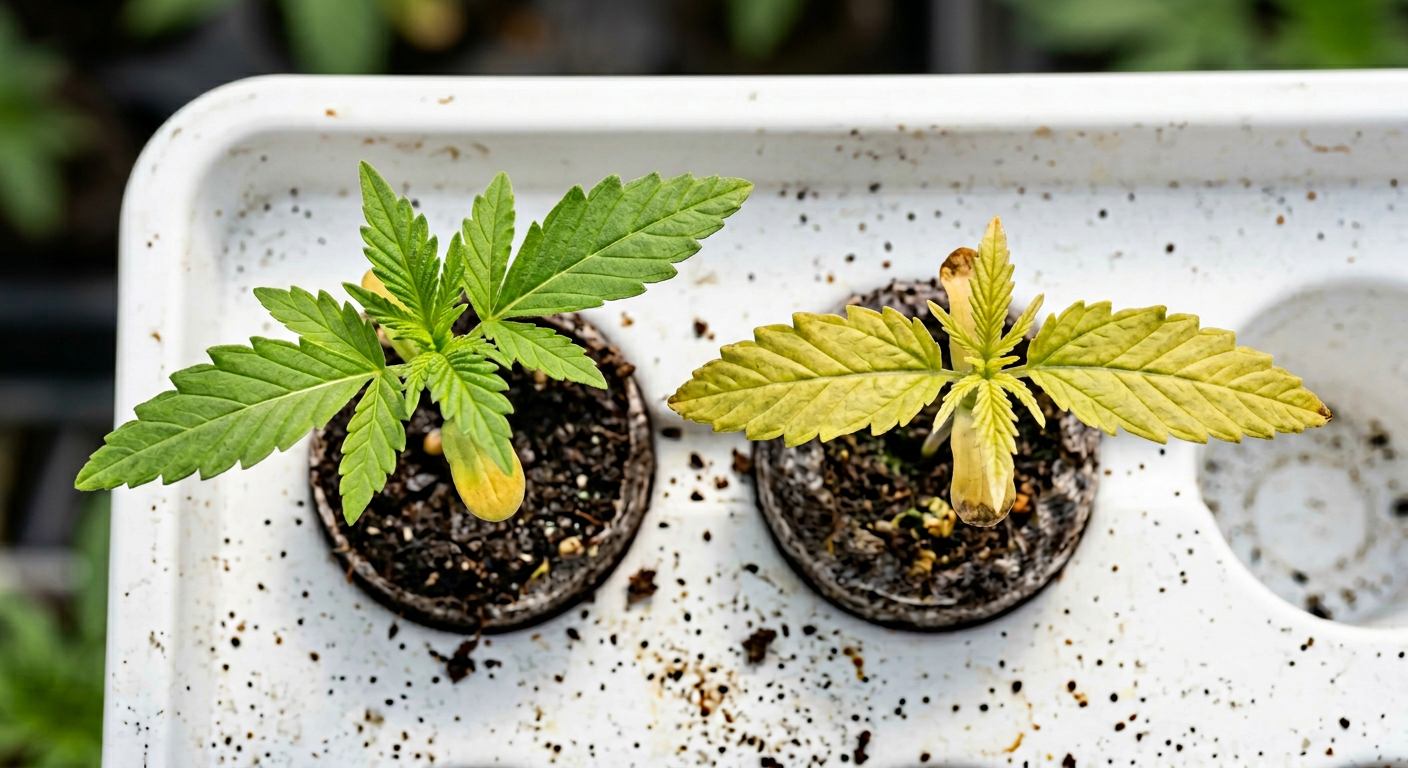
Yellow cotyledons in week one send new growers into a panic, but the majority of cases are completely normal. The key is knowing which leaves are yellowing and when, because the answer changes the diagnosis entirely.
Visual Symptom: Normal Cotyledon Fade
The two small, oval first leaves (cotyledons) turn yellow and begin to droop at 7–14 days old, while the true leaves above them look green and healthy. This is the seedling consuming stored nutrients from the seed endosperm. The cotyledons have done their job.
Visual Symptom: Actual Deficiency
If the first set of true leaves (the serrated cannabis-shaped leaves) are also yellowing, or if new growth coming in at the top looks pale or lime-green, something is actually wrong. Nitrogen deficiency is the most common cause at this stage.
Root Cause by Scenario
| What's yellowing | When | Most likely cause | Action |
|---|---|---|---|
| Cotyledons only | Day 7–14 | Normal — nutrients consumed | Do nothing |
| First true leaves | Week 1 | pH too high (lockout) | Check and adjust pH to 6.0–6.5 |
| All leaves pale/lime | Week 2 | Nitrogen deficiency or pH lockout | Light feed at 1/4 strength, check pH |
| Random patches or edges | Any point | Heat stress or light burn | Lower temps, raise light |
Immediate Fix
Before adding any nutrients, check your pH. In soil, seedlings need a pH of 6.0–7.0 — ideally 6.2–6.5. A pH above 7.2 locks out nitrogen and iron, causing yellowing even when those nutrients are present. Fix the pH first and yellowing will often resolve on its own within 48 hours.
Cannabis seedlings do NOT need added nutrients in the first 10–14 days in quality seedling mix. Pre-fertilised coco or soil provides everything they need. Early feeding is a leading cause of nutrient burn at this stage — pale tips or brown edges on new growth.
Prevention Next Time
Use a dedicated seedling/germination mix — not standard potting soil, which is too hot in nutrients for young plants. Always pH your water even at the seedling stage. Start checking at day 10 rather than waiting for symptoms to appear.
Problem #4: Curling or Clawing Leaves (Heat or Overwatering)
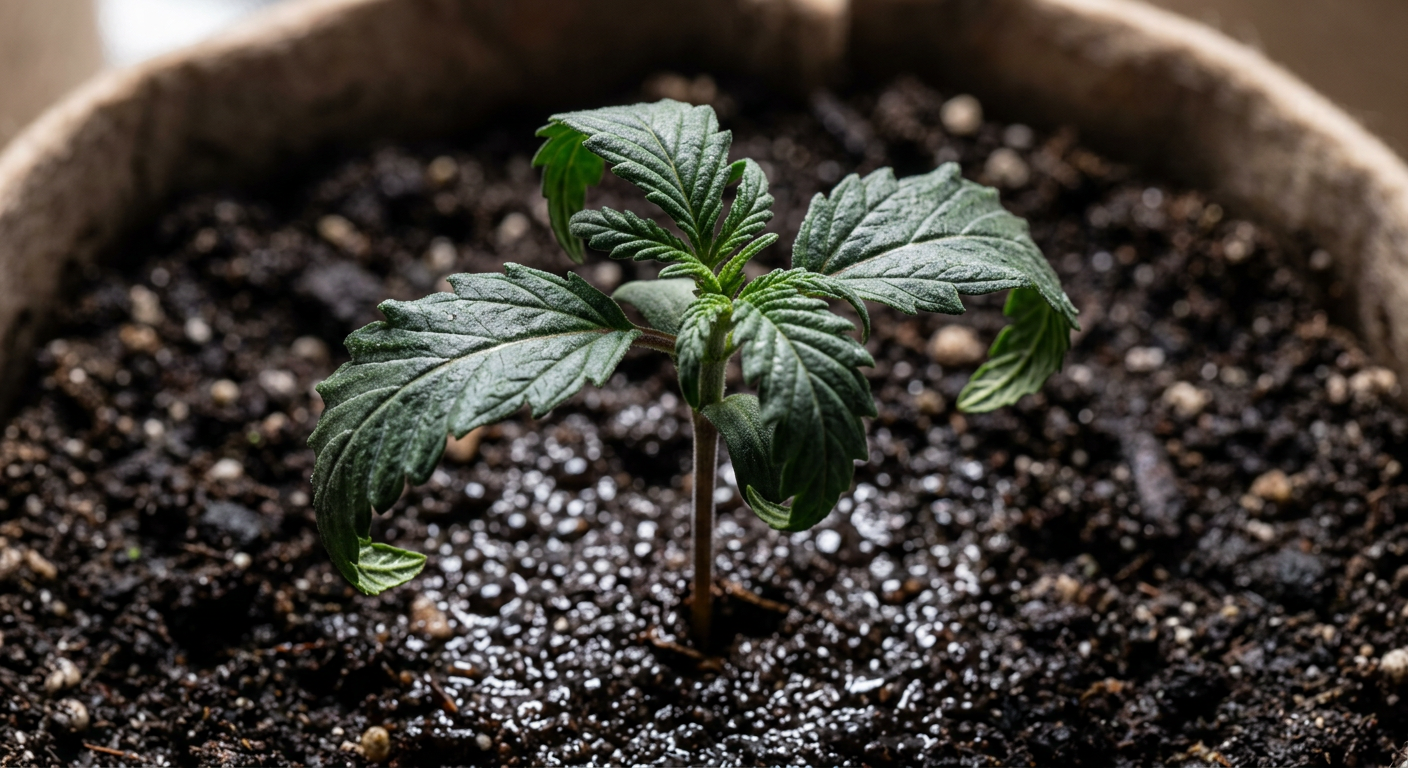
Curling seedling leaves are one of the most frequently misdiagnosed cannabis seedling issues because heat stress and overwatering produce nearly identical visual symptoms. Getting the cause right determines whether you adjust your light or your watering schedule — doing the wrong one makes things worse.
Visual Symptom
Leaves curl downward and inward along the edges, forming a claw-like shape. The leaves may feel slightly stiff or crispy (heat) or appear unusually dark green and soft (overwatering). In severe cases, the entire seedling droops toward the medium.
How to Tell Heat Stress from Overwatering
- Heat stress: Leaves curl upward and taco first before curling down at tips. Soil surface dries quickly. Growth tips may bleach slightly. Room temperature above 30°C (86°F).
- Overwatering: Leaves curl down uniformly. Soil surface stays wet for 24+ hours. The plant looks droopy at the same time each day regardless of light intensity. Pot feels heavy when lifted.
Immediate Fix for Heat Stress
Check the temperature at canopy level — not the room temperature, which can differ by 4–6°C from what the plant actually experiences under the light. Target 22–26°C (72–79°F) at canopy. Raise the light, add an exhaust fan, or reduce light hours temporarily to drop heat.
See our detailed guide on cannabis temperature control by growth stage for specific ranges at every phase of growth.
Immediate Fix for Overwatering
Stop watering immediately
Let the medium dry until the pot feels noticeably lighter when lifted — usually 1–2 days depending on pot size and humidity.
Improve drainage
Ensure your pots have adequate drainage holes. Seedlings in containers without drainage will always stay too wet. Consider lifting pots off trays slightly to allow airflow underneath.
Reduce water volume
For seedlings under 2 weeks old, water only 30–60ml per watering in a small ring around the stem. This forces roots to search outward rather than sitting in constant moisture.
Prevention Next Time
The finger test is your best tool: press your finger 2cm into the growing medium. Water only when it comes back dry. A seedling in a 0.5L cup at 24°C will typically need watering every 1–2 days — no more. Pair this with our humidity and VPD guide to keep your environment balanced.
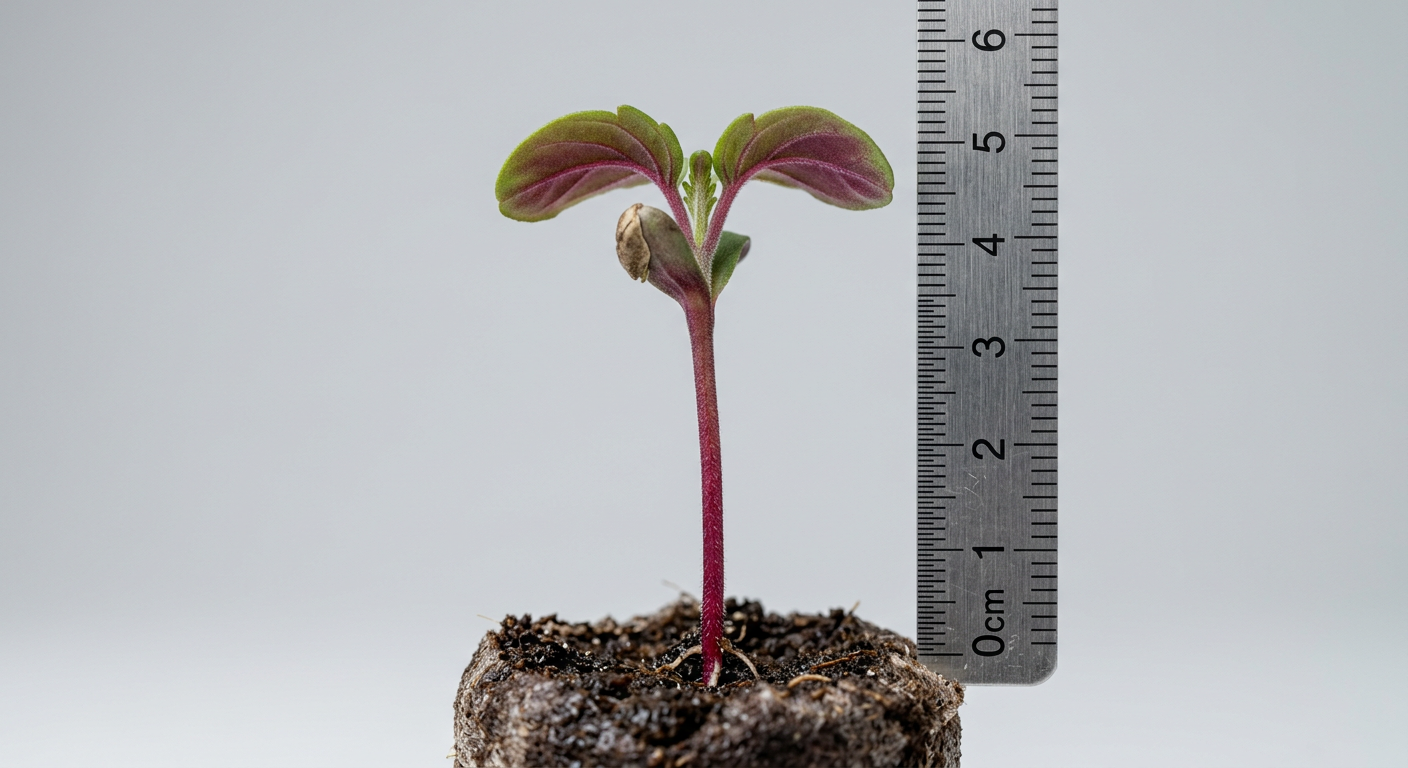
Problem #5: Purple or Red Stems (Phosphorus or Genetics?)
Purple stems on a cannabis seedling trigger immediate concern — but in many cases, they're completely harmless. This is one of the most nuanced diagnosis calls in the first two weeks because the visual symptom is identical whether caused by phosphorus deficiency, cold temperatures, or genetics. Context is everything.
Visual Symptom
Red or purple colouration appearing on the main stem, petioles (leaf stalks), and sometimes the underside of leaves. In genetic purpling, the colouration is uniform and the plant grows vigorously. In phosphorus deficiency, the colouration is accompanied by slowed growth, dark green leaves, and possibly yellowing.
How to Diagnose the Cause
- Genetics: Purple shows from day 3–5, growth rate is normal, no other symptoms present, leaves are green and healthy.
- Cold temperature: Purple appears when temperature drops below 18°C (64°F), especially at night. Check root-zone temperature, not just air temperature.
- Phosphorus deficiency: Purple alongside dark green or bronze leaf colouration, slow growth, and soil pH above 7.0 or below 5.5 (which locks out phosphorus).
Strains with purple genetics — like Purple Kush (27% THC) or Purple Power — will frequently show purple stems even in perfect conditions. This is an indicator of anthocyanin expression, not a problem. Know your strain's genetic profile before diagnosing.
Immediate Fix
If you suspect temperature-induced purpling, raise your grow room temperature above 22°C (72°F), especially during the dark cycle. If you suspect phosphorus deficiency, check and correct your pH first — phosphorus is most available between pH 6.0–7.0 in soil. Only introduce a diluted phosphorus supplement (at 1/8 strength) after confirming pH is correct and purpling persists at day 10+.
Prevention Next Time
Keep night temperatures within 5°C of daytime temperatures to prevent cold-induced purpling. Use our VPD Calculator to track temperature and humidity together — a temperature that looks acceptable in isolation may be too cold when VPD is factored in at the seedling stage.
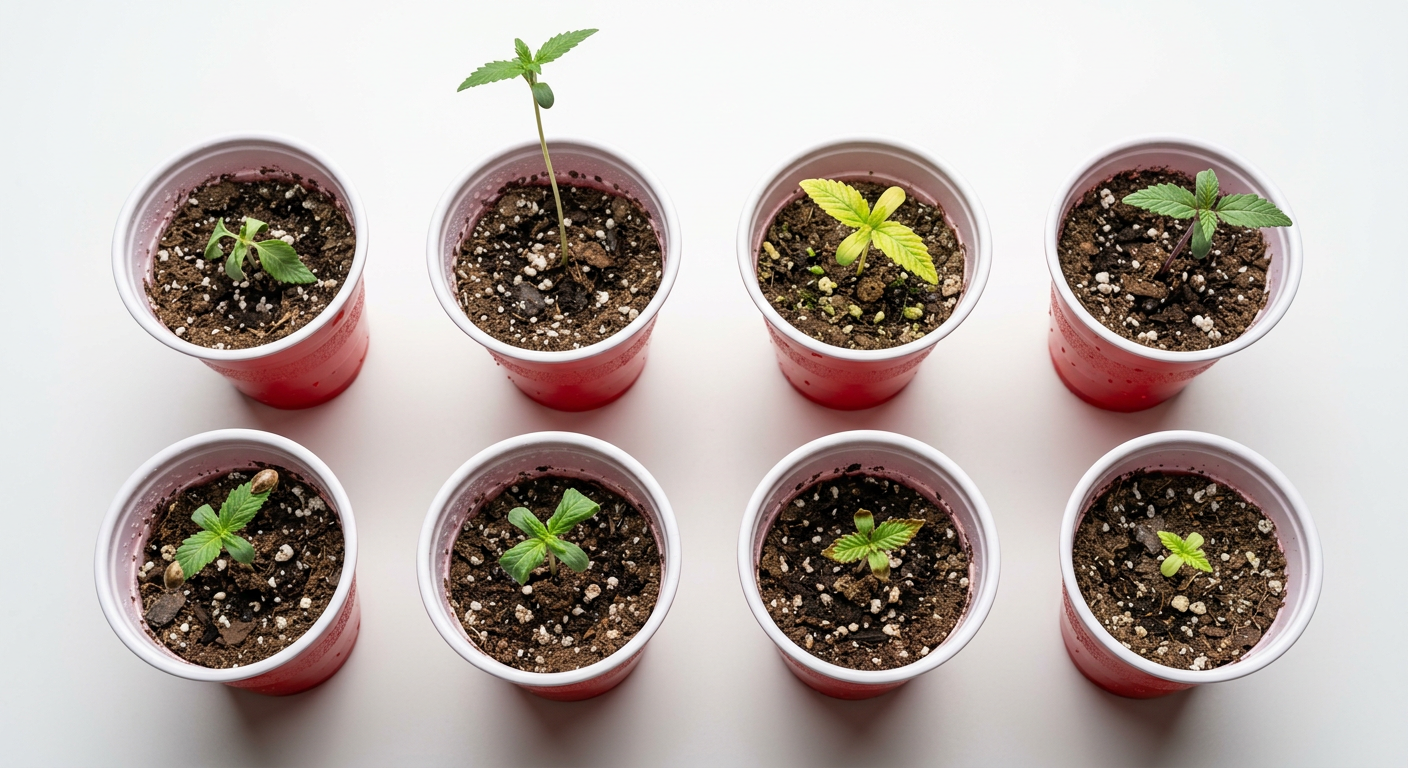
Problem #6: No Growth After Sprouting (Root Bound or pH Lockout)
A seedling that sprouted successfully but simply refuses to grow is one of the most frustrating cannabis seedling problems to solve. The plant looks alive, the cotyledons are green, but days pass with no new leaf development. Two causes dominate this scenario.
Visual Symptom
The seedling stands still for 4–7 days after sprouting. Cotyledons may look healthy but no true leaves are emerging, or the first true leaves appeared and then growth stopped completely. The plant looks disproportionately small for its age.
Cause 1: pH Lockout
Even when nutrients are present, an incorrect pH makes them chemically unavailable to the root system. The plant starves despite having everything it needs. In seedlings, this is the most common cause of stalled growth because new growers often don't pH their water during the first week, assuming it isn't needed yet.
Check your growing medium's pH immediately. In soil: target 6.0–7.0. In coco coir: 5.8–6.3. In hydro: 5.5–6.1. Use a calibrated digital pH meter — pH strips are not accurate enough.
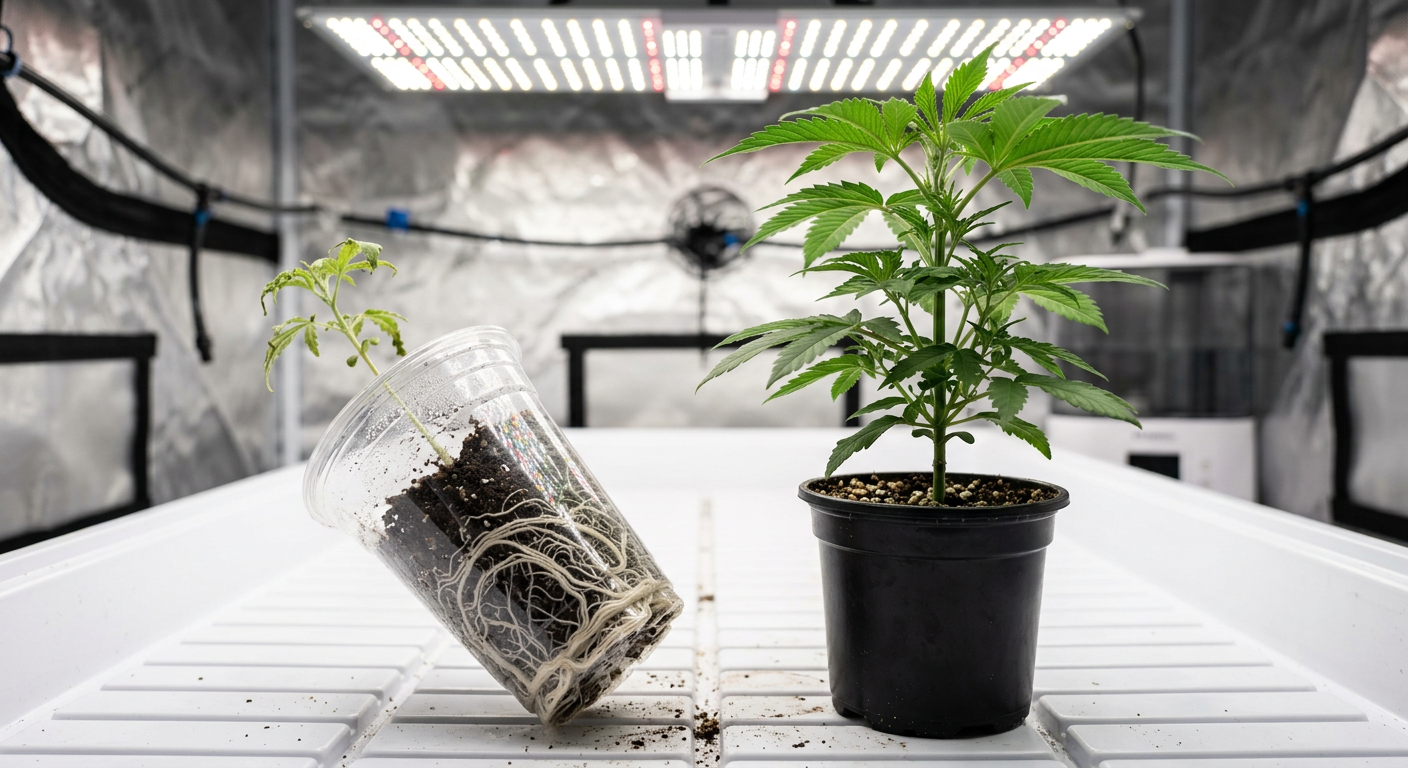
Cause 2: Root Bound in Too Small a Container
Less common in the first two weeks, but if you germinated directly in a very small container (under 100ml) and watering frequency has increased while plant size hasn't, the roots may have circled the container and begun strangling themselves. Check by gently unpotting — circling brown roots confirm this.
Immediate Fix
Test and correct pH
Flush the medium with pH-corrected water (6.2–6.5 for soil) to reset the medium's pH. Use 2x the pot volume in flush water. Within 24–48 hours, growth should resume.
Transplant if root bound
If roots are circling, transplant to a 0.5–1L container immediately. Handle the root ball gently, transplant at the same depth, and water lightly with pH-corrected water.
Check medium temperature
Root zone temperatures below 18°C dramatically slow root metabolic activity. Bring the root zone to at least 20°C — a seedling heat mat set to 24°C is ideal.
If your seedling is stuck, always fix pH before doing anything else. It costs nothing, takes 10 minutes, and resolves the majority of stalled-growth cases within 48 hours.
Prevention Next Time
Always pH your water from the first watering, even in week one. Start seeds in a container that's appropriately sized — a 0.5–1L cup or a Jiffy pellet is ideal for the first 10–14 days before transplanting to a final vessel. Visit our seedling care guide for a full transplant timeline.
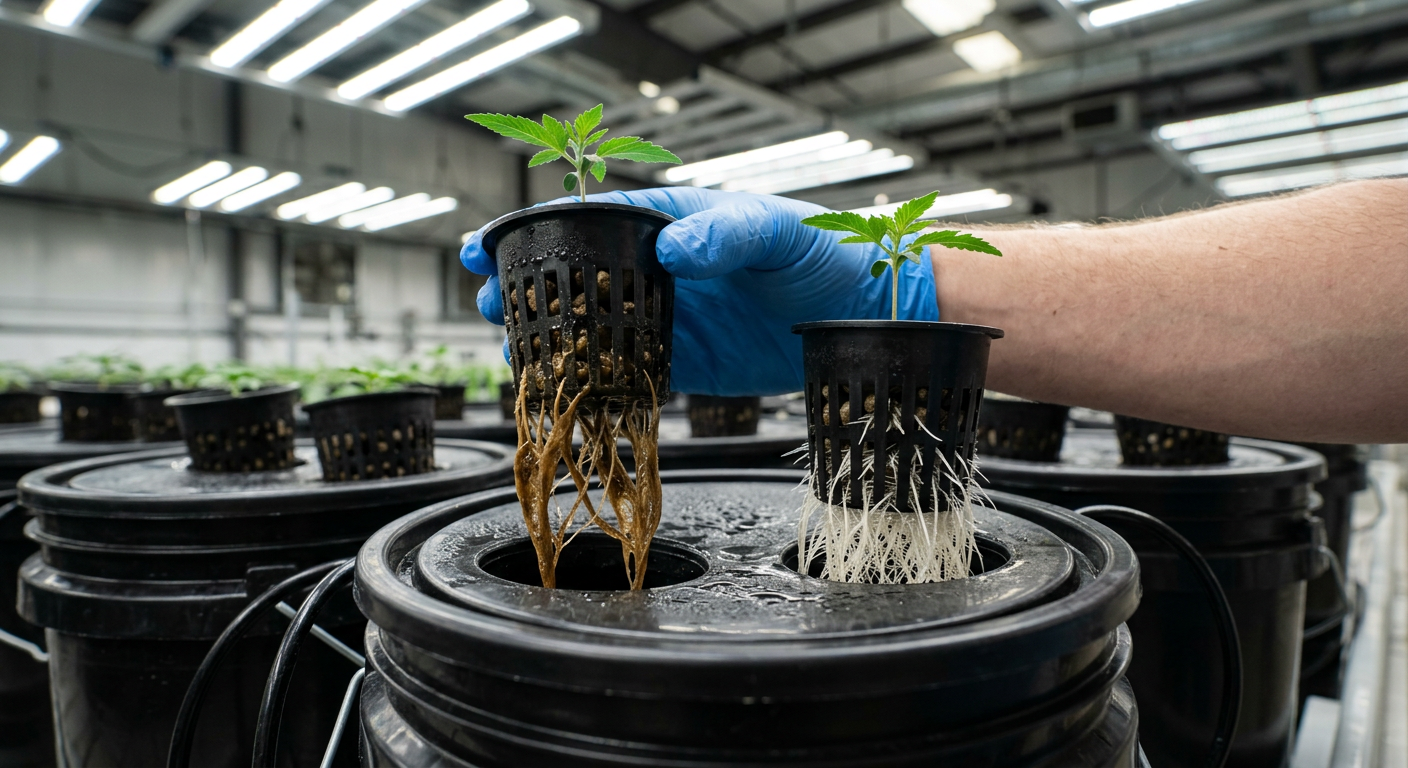
Problem #7: Root Rot in Early Hydro Setups
Root rot is the hydroponic grower's equivalent of damping off — fast-moving, hard to reverse, and almost entirely preventable. It's particularly dangerous in early DWC (deep water culture) or recirculating setups because the environmental conditions that encourage root rot are the same conditions beginners often create by accident.
Visual Symptom
Healthy cannabis roots are white, firm, and slightly fuzzy with tiny root hairs. Root rot roots are brown, slimy, and often carry a foul smell — similar to swamp water or rotting vegetation. The plant above may show wilting, yellowing, or stunted growth even though the reservoir is full of nutrient solution.
Root Cause
Root rot in hydro is caused by Pythium species — the same pathogen responsible for damping off. It thrives when:
- Reservoir temperature exceeds 22°C (72°F) — the ideal range is 18–20°C
- Light leaks into the reservoir, encouraging algae growth
- Dissolved oxygen levels drop (inadequate airstone/pump)
- Reservoir is not cleaned between grows
Immediate Fix
Remove the affected plant and examine the roots carefully. Trim away any obviously brown, dead root material with sterile scissors. Add hydrogen peroxide (H2O2) to the reservoir at a rate of 3ml of 3% H2O2 per litre of water — this kills anaerobic pathogens and re-oxygenates the solution. Alternatively, use a beneficial bacteria product containing Bacillus subtilis to outcompete the pathogens.
Do not use H2O2 and beneficial bacteria products simultaneously — the peroxide will kill the beneficial bacteria. Choose one approach and commit to it. Beneficial bacteria is the better long-term strategy for recirculating systems.
Prevention Next Time
- Keep reservoir temperature at 18–20°C using a water chiller or frozen water bottles
- Wrap reservoirs in light-proof material or use opaque containers
- Run an airstone rated for at least 2x your reservoir volume per hour
- Add beneficial bacteria (Hydroguard or similar) from day one as a preventative
- Change reservoir solution every 7 days during seedling stage
Problem #8: Helmet Head (Seed Shell Stuck on Seedling)
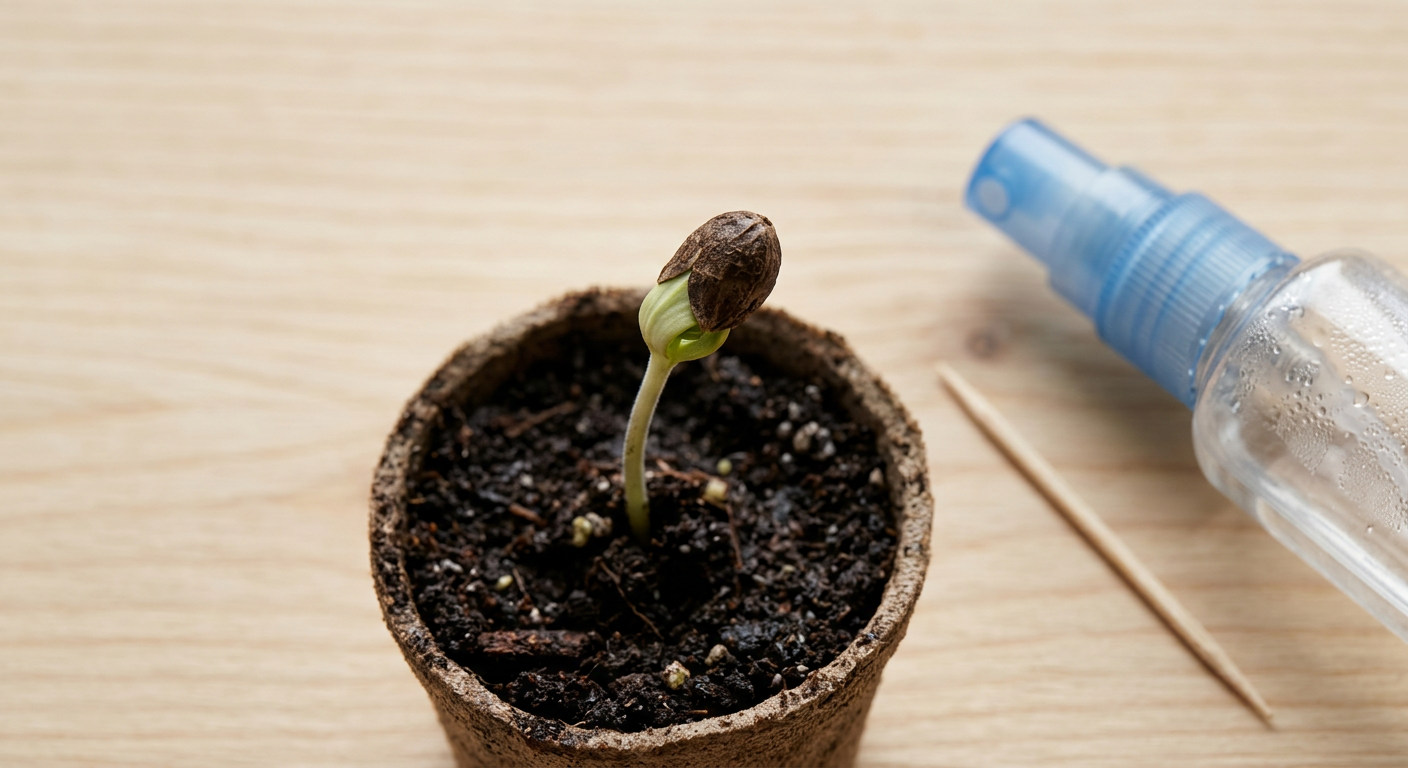
Helmet head is exactly what it sounds like: the seed shell remains clamped around the cotyledons after the seedling has emerged from the soil, preventing the first leaves from opening. It's common, annoying, and can be fixed in minutes — but it requires a careful hand.
Visual Symptom
The seedling stands upright with a small dark brown or tan shell visibly gripping the folded cotyledons at the top of the stem. The cotyledons can't open because the shell — and sometimes the inner seed membrane — is holding them closed. Left untreated for 24–48 hours, the seedling will use all its stored energy trying to push the shell off and may die.
Root Cause
Helmet head happens when the seed was planted at the wrong depth (too shallow), the seed coat didn't receive enough moisture to soften, or the outer seed membrane is unusually thick. Seeds with a thin outer seed coat — a sign of seed maturity and quality — are far less likely to cause helmet head, which is one reason starting with vigorous, properly stored seeds makes the whole grow easier.
Immediate Fix
Moisten the shell
Using a spray bottle, mist the seed shell lightly with plain pH-corrected water (6.5). Wait 30 minutes. The moisture softens the shell and often allows the seedling to push it off without any intervention.
Gently remove with a toothpick
If misting doesn't work after 2–3 hours, use a toothpick or tweezers to very carefully grip the outer shell (not the seedling) and gently wiggle it off. Work slowly — the cotyledons tear easily at this stage.
Check for the inner membrane
Sometimes the outer shell releases but a thin translucent inner membrane still holds the cotyledons together. Carefully peel this away using tweezers under good lighting. This is the step where most damage occurs — take your time.
The best time to remove a stuck shell is when the seedling has just begun to push it slightly — there's a small gap forming between the shell and the emerging leaves. This is the window where moisture plus gentle pressure works most reliably.
Prevention Next Time
Plant seeds 1–1.5cm deep with the pointed end facing down and the seam facing sideways. This natural positioning allows the emerging seedling to leverage the shell off as it grows. Also, pre-soaking seeds for 12–18 hours before planting softens the seed coat and dramatically reduces helmet head incidence. See our germination guide for the full pre-soak method.
Prevention Checklist: Setting Up for a Problem-Free First Two Weeks
Most cannabis seedling problems are not random bad luck — they're predictable failures that occur when specific environmental conditions go out of range. This checklist covers every variable that matters in the first two weeks.
Environment Targets for Weeks 1–2
| Parameter | Ideal Range | Problem Below | Problem Above |
|---|---|---|---|
| Air temperature | 22–26°C (72–79°F) | Purple stems, slow growth | Heat stress, leaf curl |
| Root zone temp | 20–24°C (68–75°F) | Stalled growth, root rot risk | Pythium activity increases |
| Relative humidity | 65–75% RH | Moisture stress, tip curl | Damping off risk |
| Soil pH | 6.0–7.0 | Nutrient lockout | Nutrient lockout |
| Coco/hydro pH | 5.8–6.3 | Iron/calcium lockout | Phosphorus lockout |
| Light distance (LED) | 25–40cm | Stretching | Light burn on new growth |
| Watering frequency | Every 1–2 days | Underwatering, tip curl | Damping off, root rot |
Pre-Germination Checklist
- pH meter calibrated within the last 30 days
- Growing medium is seedling-specific (low nutrients)
- Containers have drainage holes
- Light positioned at correct height for seedling stage
- Grow room temperature stable at 22–26°C
- Humidity at 65–75% RH
- Small oscillating fan set to lowest setting
- Clean, sterile containers (never reused without sterilising)
- Water pre-pHed to 6.2–6.5
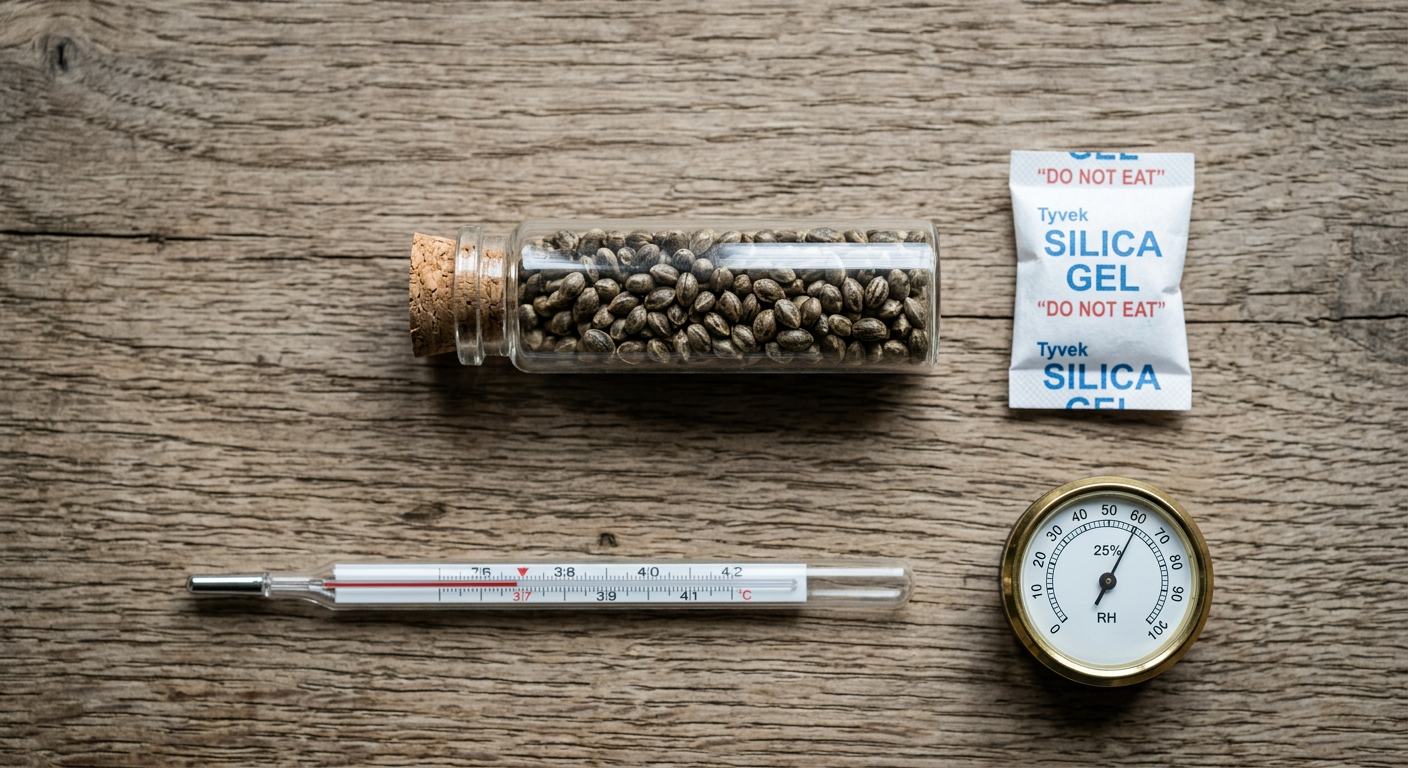
- Seeds stored correctly until germination day
Daily Observation Checklist (Days 1–14)
- Check soil surface moisture before watering (not on a schedule)
- Verify canopy temperature with a thermometer (not just room temp)
- Check stem base for any discolouration or softening (damping off early sign)
- Note whether growth is progressing — photo log recommended
- Confirm humidity hasn't dropped below 60% RH
- Check light height if stem is growing faster than expected
- Look for any seed shells stuck on emerging cotyledons
A photo taken every 24 hours under the same light conditions is the single most useful diagnostic tool you can use. Side-by-side comparisons reveal stalled growth and colour changes that are invisible day-to-day.
The Role of Seed Quality
Not every seedling problem can be traced to environment. Some issues — including poor germination rates, weak stems, and erratic growth — originate with the seed itself. Properly stored, mature, genetically stable seeds produce seedlings with stronger cotyledons, more vigorous root development, and better stress tolerance from day one.
Robust genetics like Northern Lights x Big Bud (20% THC) and White Widow (25% THC) are widely known as beginner-friendly strains with strong seedling vigour, making them excellent choices if you want a more forgiving first grow. For autoflower growers who want reliable seedling performance, Amnesia Haze Autoflower (17% THC) and Skywalker OG Autoflower (23% THC) are solid choices with consistent germination records.
High-THC strains like OG Kush (26% THC), Black Widow (26% THC), and Quantum Kush (30% THC) can also be grown by beginners, but their seedling stage may benefit from extra attention to VPD and pH stability.
Quick Reference: Problem vs. Cause vs. Fix
Use this table as a fast-lookup reference when you spot something wrong and need to triage quickly before working through the full diagnosis section.
| What You See | Most Likely Cause | First Action |
|---|---|---|
| Stem collapsed at soil line | Damping off (fungal) | Remove plant, dry out remaining pots, increase airflow |
| Tall, pale, leaning stem | Light too far or too weak | Lower light to 25–30cm, check wattage |
| Yellow cotyledons, green true leaves | Normal — seed nutrients consumed | Do nothing |
| Yellow true leaves, pale new growth | pH lockout or N deficiency | Check and correct pH first |
| Leaves curling downward like claws | Overwatering or heat | Check soil moisture + canopy temperature |
| Purple or red stems | Genetics, cold, or P deficiency | Check temp first, then pH, then add phosphorus last |
| No new growth for 5+ days | pH lockout or root bound | pH flush the medium |
| Brown slimy roots (hydro) | Root rot (Pythium) | H2O2 treatment or beneficial bacteria + lower reservoir temp |
| Shell stuck on cotyledons | Helmet head | Mist shell with water, wait 30 min, then gently remove |
| White spots on leaves | Light burn, spider mites, or PM | Check undersides for mites, check light distance, check for white powder |
Tools to Help You Diagnose and Prevent Problems
The right diagnostic tools save plants. These free resources cover the variables that matter most in the seedling stage:
- Plant Diagnosis Tool — describe your symptom, get an immediate diagnosis
- VPD Calculator — check whether your temperature and humidity combination is ideal for seedlings
- Grow Planner — map your entire grow from germination to harvest so nothing is missed
- Nutrient Calculator — check whether your feed schedule is appropriate for the seedling stage before you apply anything
- Light Calculator — verify your light intensity at canopy level to prevent stretching
For new growers setting up for the first time, the complete indoor grow tent setup guide walks through every piece of equipment needed to maintain the environment ranges listed in this article.
The most common pattern in seedling failures is a cascade: one problem creates conditions for a second. Overwatering raises humidity at the stem base, which invites damping off. A stretched seedling topples and damages the stem, inviting fungal entry. Fix problems at the root cause and you prevent the chain reaction.
Frequently Asked Questions
Why are my cannabis seedlings turning yellow in week one?
Yellow cotyledons in week one are usually normal — the seedling is consuming stored nutrients from the first round leaves as true leaves take over. If the true leaves are also yellowing or new growth is pale, check your pH first (target 6.0–7.0 in soil). Correct pH before adding any nutrients.
Why is my cannabis seedling stretching toward the light — what do I do?
Stretching means your light is too far away or too weak. Move your LED to 25–30cm above the canopy, or switch from a household bulb to a full-spectrum grow light. If the stem is already long and floppy, gently bury the lower 2–4cm of stem in growing medium — cannabis forms roots along buried stem sections.
Why is my cannabis seedling drooping after germination?
Drooping right after germination is almost always overwatering. The roots are tiny and can't absorb water fast enough when the medium stays continuously wet. Water only 30–60ml in a small circle around the stem, then wait until the top 2cm of medium feels dry before watering again.
What causes white spots on cannabis seedling leaves in the first week?
White spots in week one usually come from water droplets sitting on leaves under intense grow lights — they act as magnifying lenses and burn small white dots. Spider mite damage appears as tiny circular white or yellow dots, mainly on the leaf surface. Early powdery mildew shows as white powder that doesn't wipe off cleanly. Remove humidity domes and check leaf undersides for mites.
My cannabis seedling isn't growing after sprouting — what should I do?
Start by checking and correcting your pH — pH lockout is the cause in the majority of stalled-seedling cases. Flush with pH-corrected water at 6.2–6.5 for soil. Also check root-zone temperature (target 20–24°C) and ensure the container isn't too small for root development. In most cases, growth resumes within 48 hours of a pH flush.