Walk into a grow tent with 80% relative humidity at day 50 of flower, and you're not just looking at damp air — you're watching a botrytis outbreak in slow motion. Cannabis humidity control is the single environmental variable growers get wrong most consistently, and the consequences range from stunted seedlings to a completely lost harvest. This guide fixes that with real numbers, proven equipment, and the VPD science that separates good grows from great ones.
Whether you're dialing in a 2×4 tent with a compact dehumidifier or managing a multi-light room, every principle in this guide scales with you. We'll cover seedling through late flower, explain VPD in plain language, and give you a checklist at each step so nothing gets missed.
Why Humidity Is a Make-or-Break Factor in Cannabis Growing
Relative humidity (RH) describes how much water vapor the air holds compared to its maximum capacity at a given temperature. For cannabis, this number controls how fast plants transpire, how efficiently they uptake nutrients, and how vulnerable they are to mold and pests.
Too low and plants stress, curl their leaves, and struggle to move nutrients efficiently. Too high and you create the warm, wet microclimate that Botrytis cinerea and powdery mildew love. Neither extreme produces top-shelf cannabis.
- Transpiration rate: High RH slows transpiration, reducing calcium and magnesium uptake to leaves and buds.
- Stomata behavior: Plants open stomata wide in optimal humidity, increasing CO₂ absorption and growth rate.
- Pathogen risk: RH above 60% in flower dramatically increases Botrytis and PM risk, especially in dense canopies.
- Nutrient transport: Water movement through the plant relies on the vapor pressure differential — disrupted by extreme RH in either direction.
Humidity doesn't just affect mold risk — it directly controls how fast your plants feed, breathe, and grow. Getting RH right at each stage is as important as dialing in your light or nutrients.
For a deeper look at preventing mold specifically, check out our guide on Cannabis Mold Prevention: Humidity & Airflow. The present guide focuses on optimizing humidity for growth performance, not just disease prevention.
Understanding VPD: The Science Behind Cannabis Humidity Levels
Vapor Pressure Deficit (VPD) is the difference between the amount of moisture in the air and the maximum moisture the air can hold at a given temperature. It's expressed in kilopascals (kPa) and gives a far more accurate picture of plant stress than RH alone.
Here's why it matters: 60% RH at 20°C feels very different to a plant than 60% RH at 28°C. Temperature changes the air's moisture capacity, so the same RH number creates very different transpiration conditions at different temperatures. VPD combines both variables into one actionable number.
The Science: Plants regulate transpiration through stomata. When VPD is too low (air already saturated), stomata close and the plant stalls. When VPD is too high (air very dry), the plant loses water faster than roots can supply it, causing wilting and nutrient lockout. The sweet spot — roughly 0.8–1.6 kPa depending on stage — keeps stomata open and transpiration flowing at a healthy, controlled rate.
You don't need to do the math yourself. A VPD chart — or a digital controller that reads both temp and RH — converts the numbers for you. For the full breakdown, our VPD for Cannabis: The Complete 2026 Grower's Guide covers every calculation in detail.
| Growth Stage | Target RH | Target Temp (lights on) | Target VPD (kPa) |
|---|---|---|---|
| Germination / Clones | 75–85% | 22–26°C / 72–79°F | 0.4–0.8 |
| Seedling (week 1–2) | 65–75% | 22–26°C / 72–79°F | 0.6–0.9 |
| Early Veg (week 3–4) | 55–70% | 22–28°C / 72–82°F | 0.8–1.1 |
| Late Veg (week 5+) | 50–65% | 24–28°C / 75–82°F | 1.0–1.3 |
| Early Flower (week 1–3) | 45–55% | 22–26°C / 72–79°F | 1.1–1.4 |
| Mid Flower (week 4–6) | 40–50% | 20–25°C / 68–77°F | 1.2–1.6 |
| Late Flower (week 7+) | 35–45% | 18–24°C / 64–75°F | 1.4–1.8 |
| Final Week / Flush | 30–40% | 18–22°C / 64–72°F | 1.5–2.0 |
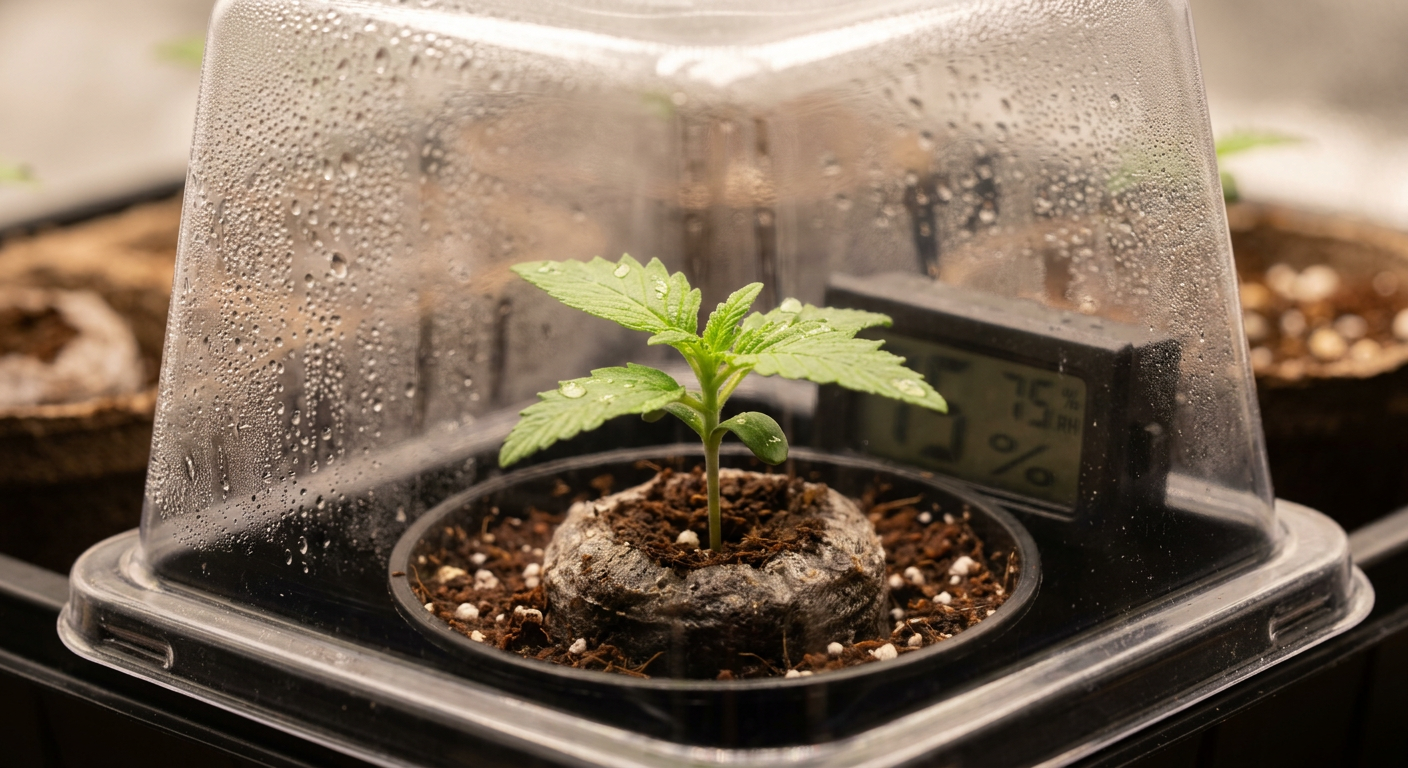
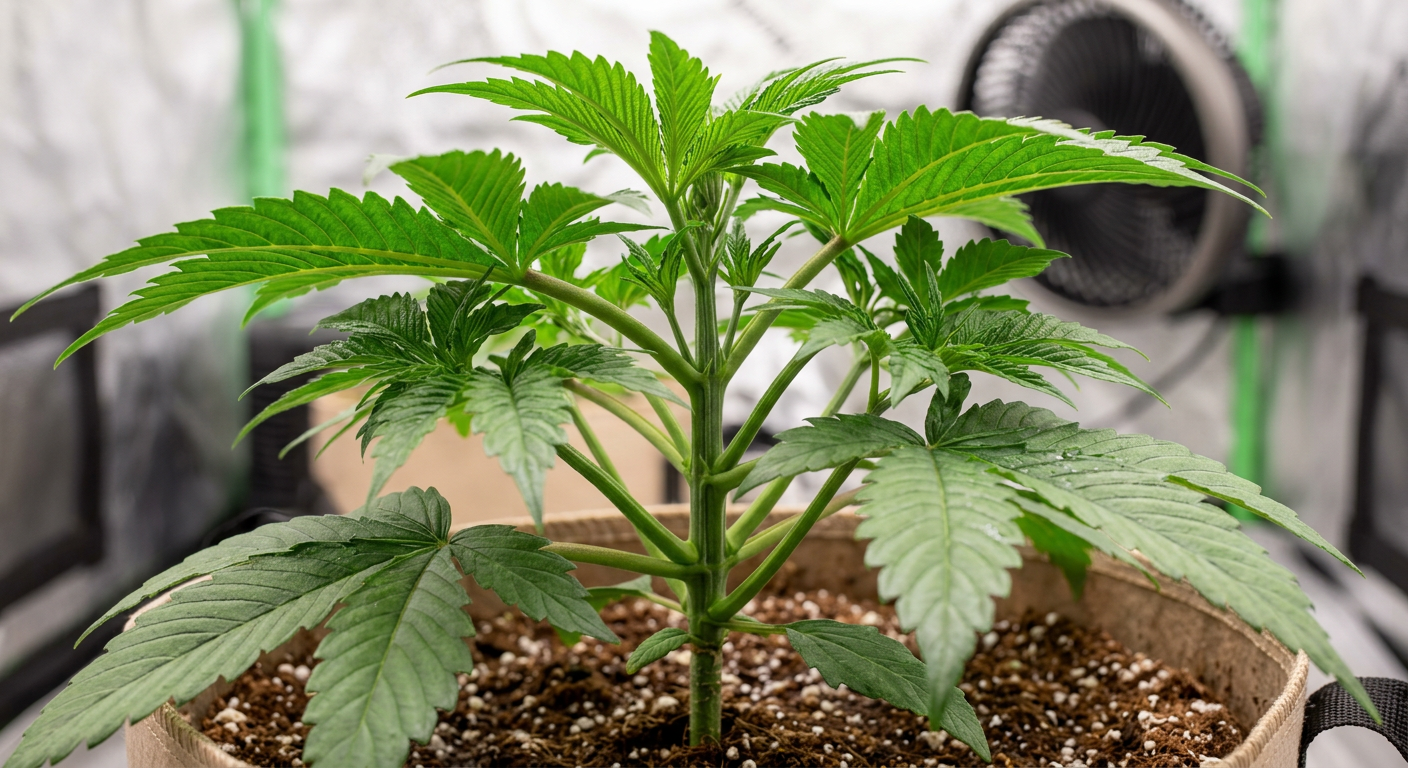
Cannabis Seedling Humidity: Getting the First Weeks Right
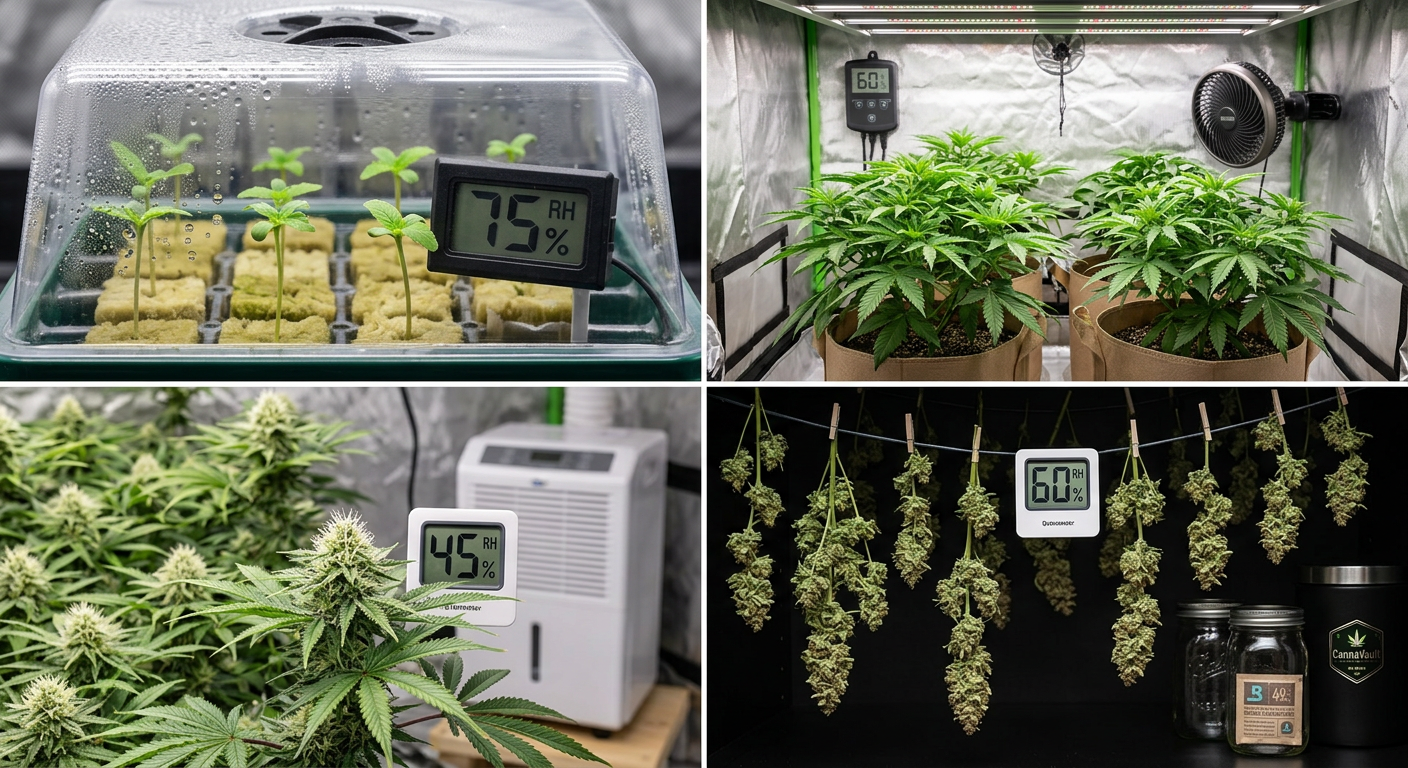
Cannabis seedlings are fragile. Their root systems are tiny and undeveloped, which means they rely heavily on foliar absorption — drawing moisture directly through their leaves — to stay hydrated in the first 1–2 weeks. This is why cannabis seedling humidity targets run significantly higher than later stages.
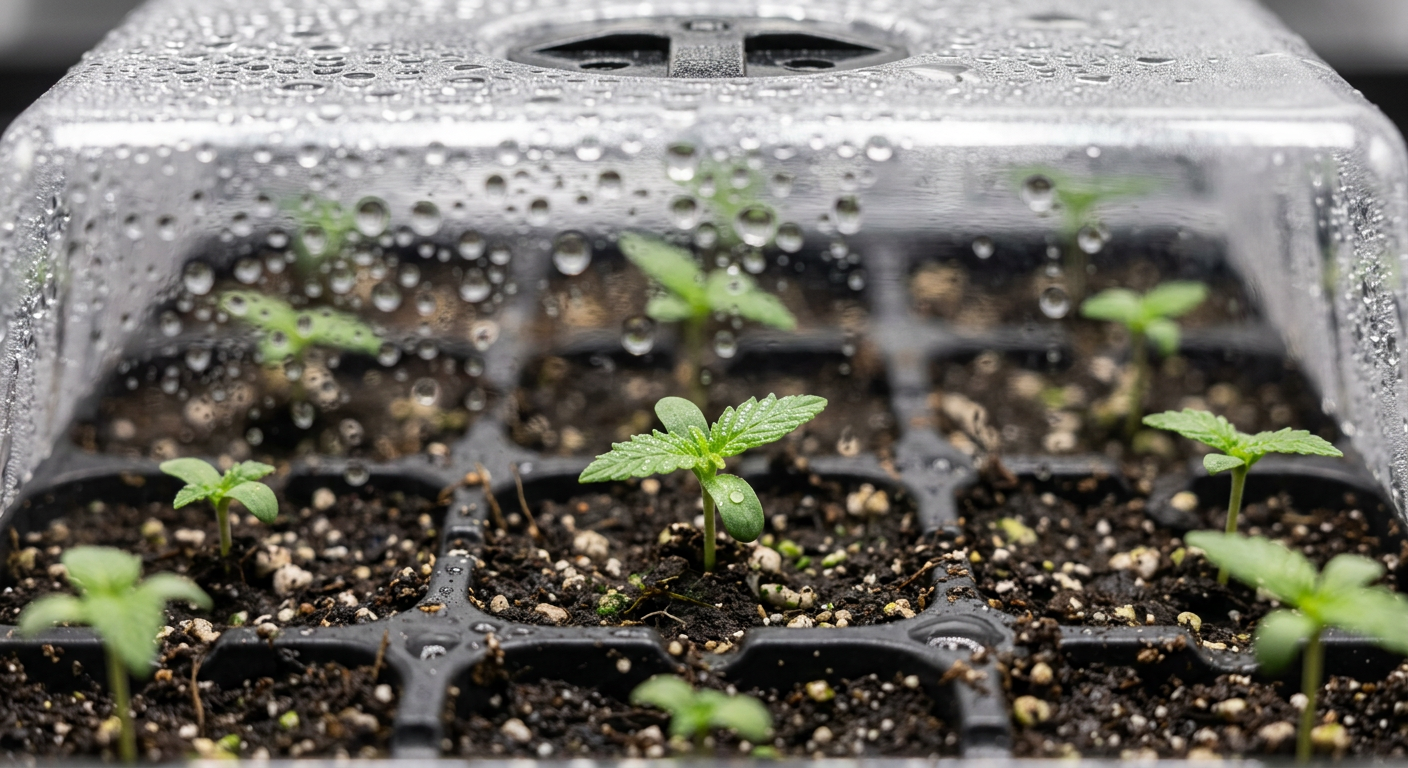
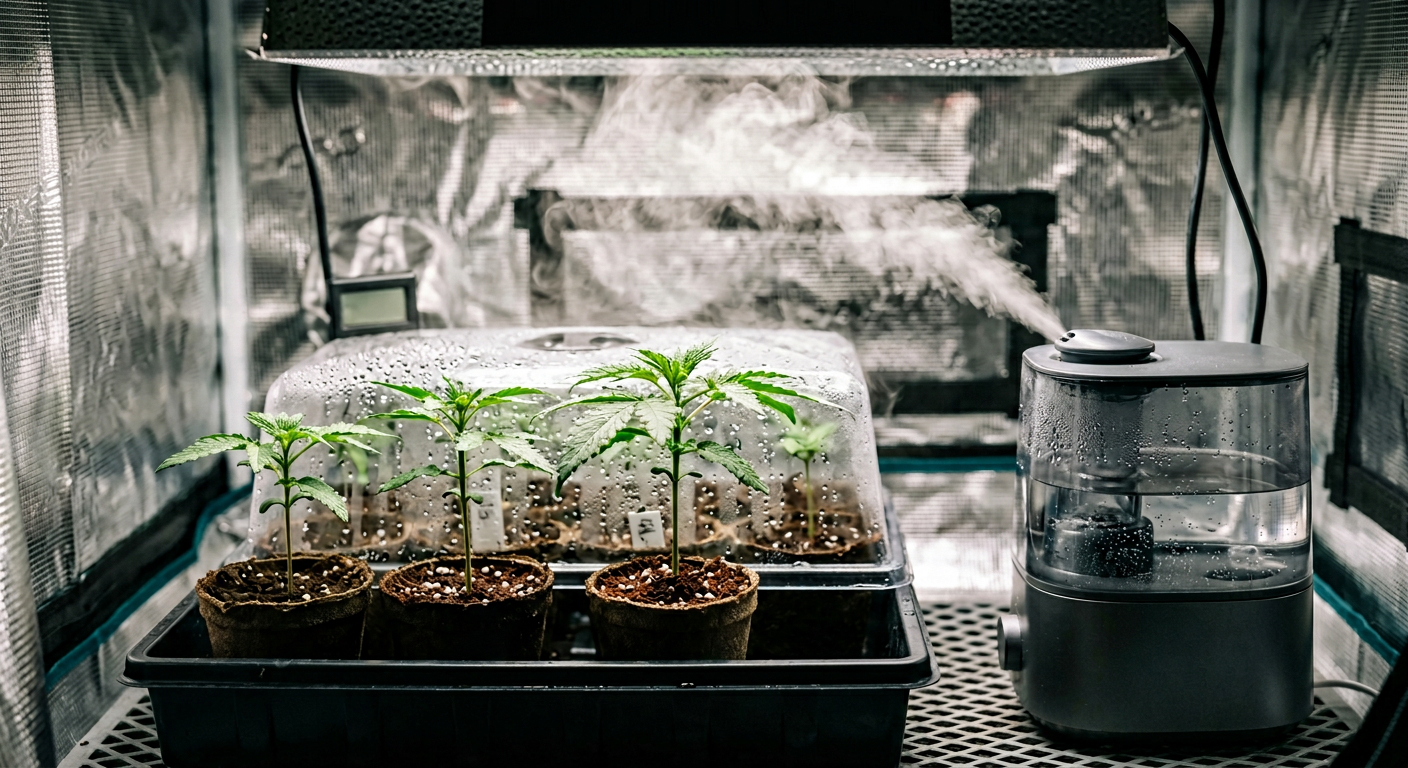
Target 70–80% RH for seedlings, dropping to 65–70% as the first true leaves fully develop. Many growers use a clear humidity dome over their seedling tray to hold moisture in. Lift the dome 10–15 minutes daily to exchange fresh air and prevent stagnant conditions.
Set Up Your Seedling Humidity Zone
Place seedlings under a humidity dome or in a dedicated propagation tray. Use a small ultrasonic humidifier set to 70–75% RH and a digital hygrometer positioned at canopy level. Check readings twice daily — morning and evening.
Introduce Gradual Air Exposure
Starting at day 5–7, prop the dome slightly open for an hour at a time. Increase ventilation incrementally over 5–7 days. This hardens the seedlings without shocking them with sudden low humidity.
Transition to Vegetative Humidity
By week 2–3, when the second or third node has formed, remove the dome entirely and begin dialing RH down toward the 55–65% vegetative range. Do this over 3–5 days, not overnight.
Strains with dense, compact genetics — like Northern Lights x Big Bud or Purple Kush — tend to be slightly more tolerant of humidity swings as seedlings compared to thin-leafed sativa types. Still, the targets above apply across the board.
Pro Tip: If you don't have a humidity dome, a clear plastic bag with a few small air holes works perfectly for the first 7–10 days. Rest it loosely over the seedling container to trap humid air without fully sealing it.
For a full breakdown of seedling care beyond humidity, see our Cannabis Seedling Care Guide: Sprout to Transplant Success.
Cannabis Veg Humidity Levels: Building a Strong Plant
The vegetative stage is where cannabis does its fastest structural growth — root expansion, node development, and canopy spread all accelerate. With a strong root system now supplying water from the substrate, plants no longer need sky-high RH to stay hydrated. The optimal range for cannabis veg humidity levels drops to 50–65%.
VPD targets during veg run from 0.8–1.3 kPa. This range keeps stomata open and encourages vigorous transpiration, which drives rapid nutrient uptake and growth. Temperatures in the 24–28°C range pair well with 55–65% RH to hit this VPD window consistently.
- Early veg (week 3–4): 55–70% RH — still slightly elevated to support continued root development
- Mid veg (week 5–6): 50–65% RH — strong plants now thriving in normal room conditions
- Late veg / pre-flower: 45–55% RH — begin stepping down toward flowering targets
The vegetative stage is your window to train plants and build yield potential. See our Cannabis Vegetative Stage: Complete Growth Guide for the full picture on topping, LST, and canopy management alongside humidity control.
High-THC strains that grow particularly well when veg conditions are dialed in include OG Kush (26% THC), Skywalker OG Autoflower (23% THC), and Quantum Kush (30% THC) — all of which reward tight environmental management with heavy, dense harvests.
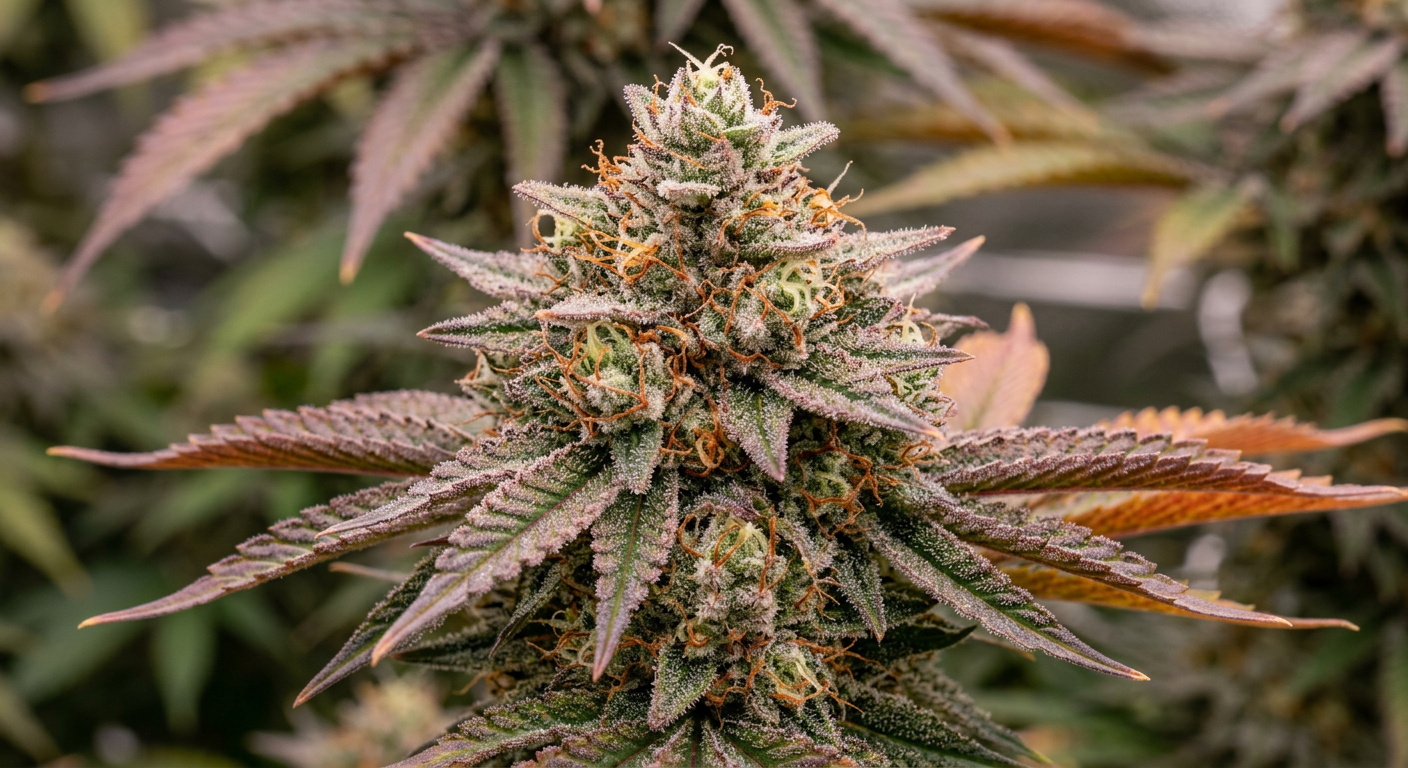
Cannabis Flower Humidity Percentage: The Critical Window
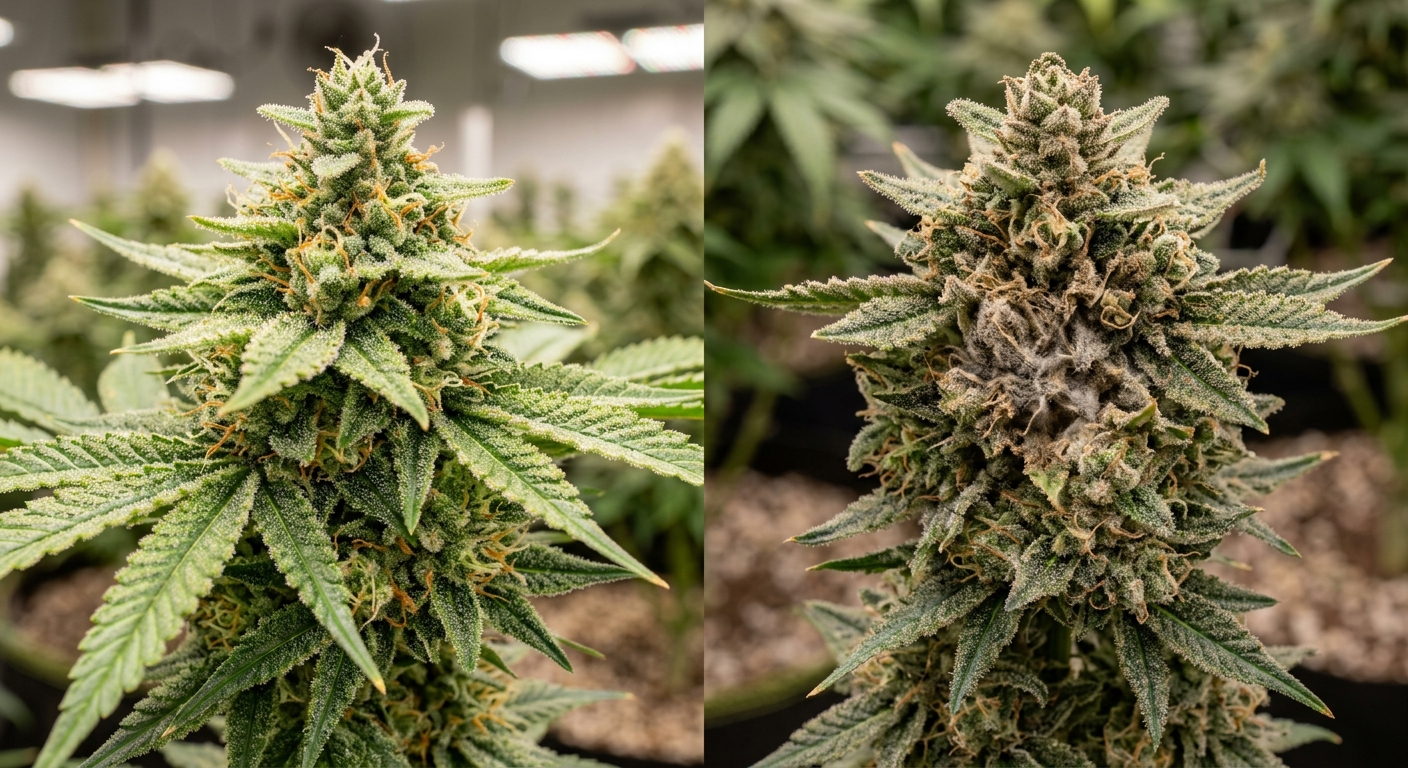
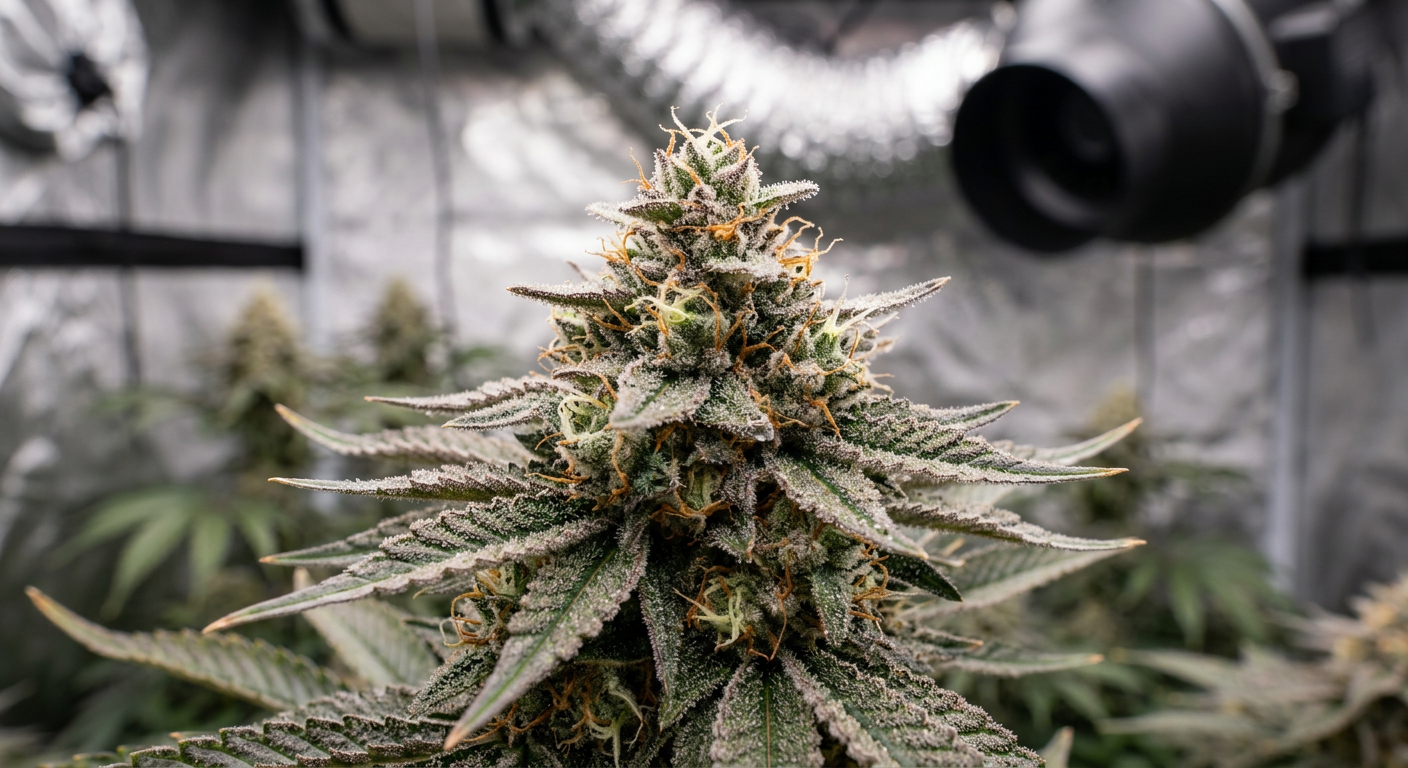
Flowering is where cannabis humidity control becomes non-negotiable. Buds forming dense calyxes and bracts create microenvironments with near-zero airflow in their cores. If ambient RH climbs above 55% during mid-to-late flower, the moisture trapped inside developing colas can trigger Botrytis before you see a single visible sign on the outside.
The cannabis flower humidity percentage should drop progressively across the flowering stage. Don't try to hold one number for the entire 8–10 weeks. Instead, step it down every 2 weeks as buds fatten and density increases.
- Weeks 1–3 (early flower / stretch): 45–55% RH
- Weeks 4–6 (bud development): 40–50% RH
- Weeks 7–9 (late flower / ripening): 35–45% RH
- Final week (pre-harvest): 30–40% RH — some growers push to 30% to stress trichome production
Warning: Never let RH exceed 60% during flowering. Even a 12-hour spike to 65% in a dense canopy can initiate Botrytis growth inside buds, which spreads invisibly for days before appearing as gray rot on the outside. By the time you see it, significant internal damage has already occurred.
Strains with particularly tight bud structure benefit most from aggressive late-flower dehumidification. White Widow, Super Skunk, and Northern Lights x Amnesia Haze are classic examples of high-density strains where the 35–45% target in late flower pays serious dividends.
For the complete flowering stage management guide — including week-by-week changes and trichome development — see our Cannabis Flowering Stage: Day-by-Day Timeline & Guide.
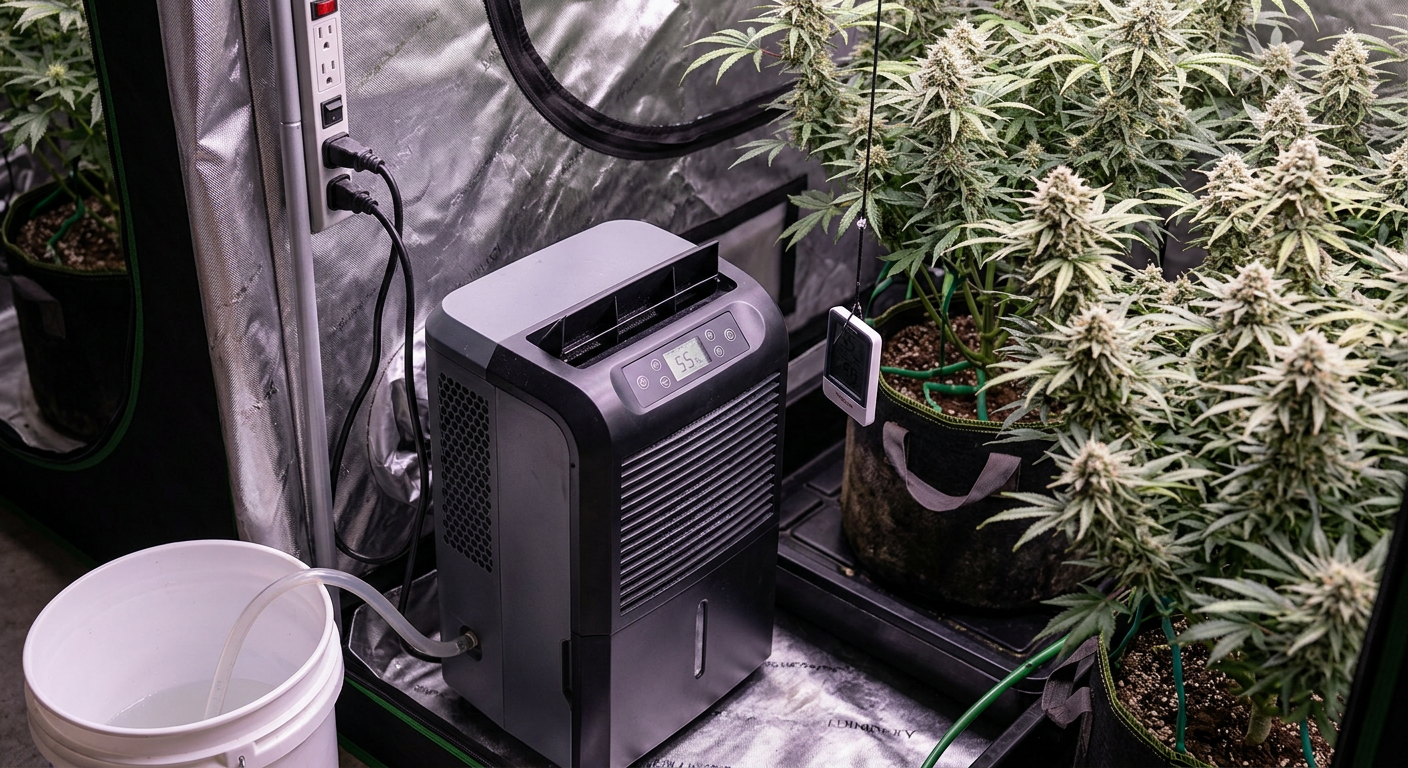
Dehumidifier for Cannabis Tent: Choosing and Sizing the Right Unit
A dehumidifier for a cannabis tent is not optional once you hit mid-flower — it's essential. The question is which type to buy, how to size it, and where to position it. Getting these decisions right prevents the most common mistake: buying a unit that's technically rated for your room size but can't keep up with transpiring plants under high heat and lights.
Calculate Your Moisture Load
Plants transpire roughly 1–2 liters of water per kilogram of plant mass per day under strong lighting. A 4-plant, 600W setup produces 4–8 liters of airborne moisture daily. Your dehumidifier's rated daily extraction capacity must exceed this number — not match it.
Choose the Right Dehumidifier Type
Refrigerant (compressor) dehumidifiers work best when temperature is above 18°C — which describes most cannabis tents. Desiccant dehumidifiers work better in cold spaces below 15°C. For standard grows, go refrigerant. Look for units with a built-in humidistat and a continuous drain option.
Position for Maximum Airflow Interaction
Place the dehumidifier inside the tent (if space permits) or at the air intake/exhaust pathway. Avoid placing it directly under the canopy, where it creates heat hotspots. Position intake fans to pull air past the dehumidifier before it reaches the plants.
| Setup Size | Daily Moisture Load | Recommended Dehumidifier Capacity | Notes |
|---|---|---|---|
| 2×2 tent (1–2 plants) | 1–3 L/day | 12–20 L/day rated | Mini unit works fine |
| 2×4 tent (2–4 plants) | 3–6 L/day | 20–30 L/day rated | Mid-range unit, continuous drain ideal |
| 4×4 tent (4–9 plants) | 6–12 L/day | 30–50 L/day rated | Full-size unit required |
| 4×8 or larger room | 12–20 L/day | 50+ L/day rated | Commercial unit or dual setup |
Pro Tip: Always buy 20–30% more dehumidification capacity than your calculation suggests you need. Manufacturers rate units under ideal conditions — your hot, plant-filled grow tent is not ideal conditions for a dehumidifier. Oversizing saves crops.
Humidifier for Cannabis Seedlings and Dry Environments
While dehumidification dominates most mid-to-late grow conversations, a humidifier for cannabis seedlings is equally important for growers in dry climates, during winter, or when using high-airflow setups that strip moisture too aggressively. RH below 40% during seedling or early veg stages stunts growth and forces plants into stress responses.
Ultrasonic humidifiers are the most popular choice for grow tents. They produce a cool mist, are quiet, and give precise output control. Evaporative humidifiers are slightly less precise but require no electricity-powered heating element, reducing heat load inside a tent.
- Ultrasonic humidifiers: Fast, precise, and affordable — ideal for seedling domes and small tents. Watch for white mineral dust from hard water; use distilled water where possible.
- Evaporative humidifiers: Self-regulating to some degree — they slow output as RH rises. Better for large rooms where overshoot is a concern.
- Whole-room HVAC humidifiers: For larger facilities, inline duct humidifiers integrate directly with your HVAC system for the most consistent control.
Grower Science: Ultrasonic humidifiers can aerosolize minerals from tap water into fine white particles that settle on leaf surfaces. In high concentration, this clogs stomata and reduces photosynthesis efficiency. Use RO or distilled water in your ultrasonic humidifier, especially during seedling and early veg when leaves are most sensitive.
Pair your humidifier with a controller that reads RH at canopy level, not at device level. Humidity gradients inside tents can be surprisingly steep — the top of the canopy may read 65% while the base reads 75%. Place your sensor at the average canopy height for the most representative reading.
Air Exchange Rates and Their Role in Cannabis Humidity Control
No dehumidifier or humidifier works optimally without correct air exchange. Your exhaust fan rate determines how quickly humid, CO₂-depleted air leaves the tent and fresh, drier air enters. Get the air exchange rate wrong and no amount of expensive equipment compensates.
The standard rule of thumb: exchange the entire volume of your grow space once every 1–3 minutes during lights-on. A 2×4×6 ft tent holds approximately 135 cubic feet. At one full exchange per minute, you need at least a 135 CFM fan — more realistically 200+ CFM to account for ducting resistance and carbon filter restriction.
Calculate Your Required CFM
Multiply tent length × width × height (in feet) to get cubic feet. Divide by your target air exchange time in minutes (1–3 minutes). Then multiply by 1.25 to account for carbon filter resistance. That's your minimum fan CFM rating.
Balance Exhaust and Passive Intake
Use one exhaust fan pulling air out (connected to your carbon filter) and passive intake ports at the bottom of the tent for fresh air to enter. Passive intake works up to about 400 CFM exhaust. Beyond that, add an active intake fan at roughly 80% of exhaust CFM.
The relationship between your carbon filter and humidity is worth noting specifically. Activated carbon in carbon filters for cannabis tents absorbs odors most efficiently between 40–70% RH. Above 70%, moisture saturation reduces the carbon's odor-scrubbing capacity significantly. Another reason to keep RH in check — especially in flower when odor management matters most.
- High RH impact on carbon filters: Carbon pores fill with water vapor at RH above 70%, reducing odor absorption by up to 40%.
- Filter lifespan: Running a carbon filter in consistently high humidity shortens its effective life from 12–18 months to as little as 6 months.
- Pre-filter wraps: A fine polyester pre-filter wrap on your carbon filter reduces moisture and particulate ingestion, extending life significantly.
For a complete introduction to setting up your ventilation alongside all other tent components, our Complete Indoor Grow Tent Setup: Visual Step-by-Step Guide walks through every component in order.
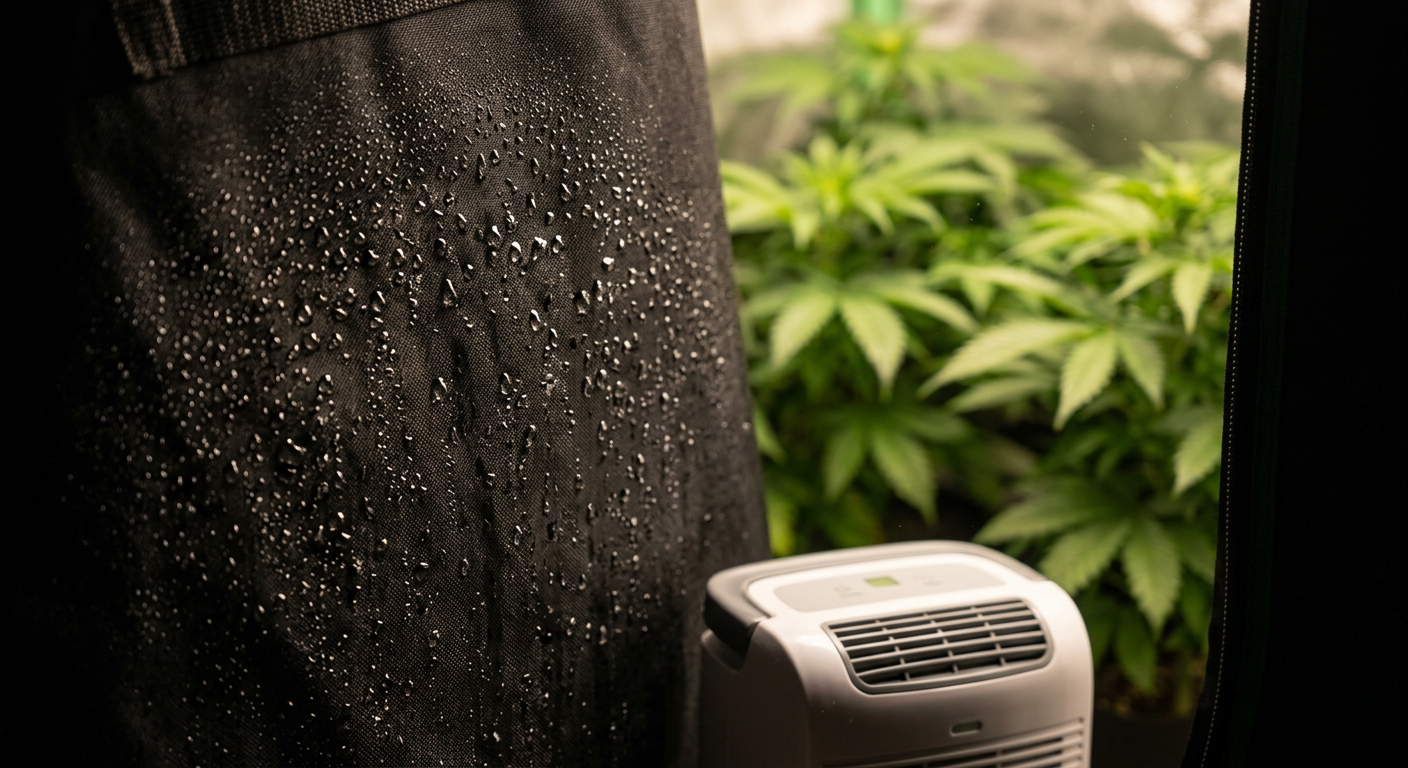
Condensation Prevention: Protecting Walls, Equipment, and Buds
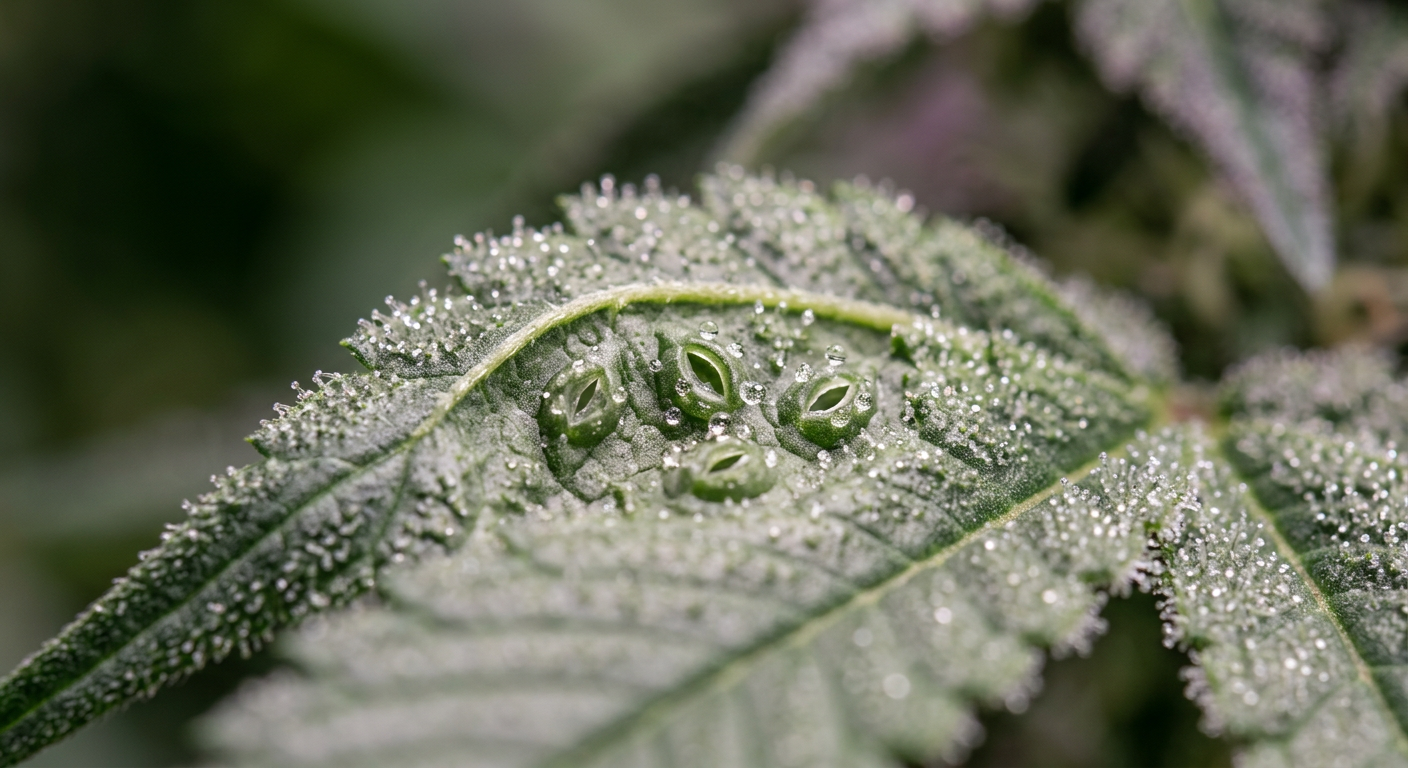
Condensation forms when warm, moist air contacts a surface below the dew point temperature. In grow tents, this means water droplets on tent walls, ducting, light fixtures, and — most dangerously — the undersides of leaves and inside dense bud sites. Condensation is the direct precursor to mold.
The most common condensation trigger in grow spaces: lights turn off. Tent temperature drops 5–10°C, the air's moisture-holding capacity falls sharply, and RH spikes 10–20% from the same absolute humidity. If your lights-off RH wasn't already well below 60%, this spike can push you into dangerous territory for hours every night.
- Night RH spike prevention: Run your dehumidifier on a timer or controller that increases output during lights-off periods.
- Temperature stabilization: A small oscillating fan running during lights-off reduces temperature stratification and minimizes condensation on cool surfaces.
- Wall insulation: In cold climates, thin foam insulation panels on tent walls prevent the outer wall surface from dipping below the dew point.
- Avoid cold water in the room: Large reservoirs or cold drainage pans near the tent create localized cold spots that attract condensation.
Warning: If you see water droplets forming on your light hood, reflective tent walls, or ducting, your humidity is critically high. This is an emergency — increase extraction immediately, add dehumidification, and check all bud sites for early mold. Do not wait until the next scheduled check.
Condensation is RH made visible. If you can see water droplets forming anywhere in your grow space, your plants have been exposed to dangerously high humidity for long enough to cause visible physical phase change in the air. Respond immediately.
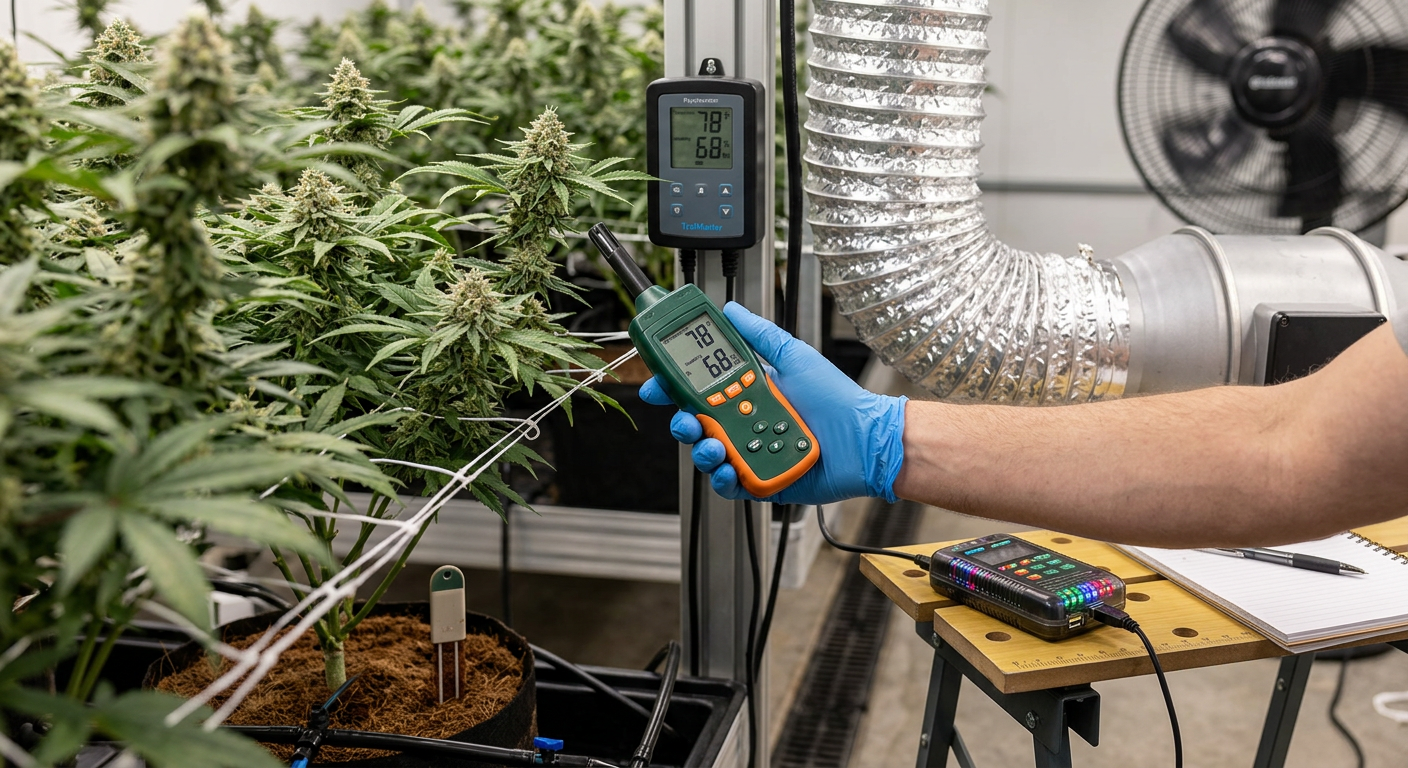
Measuring Cannabis Humidity: Meters, Placement, and Accuracy
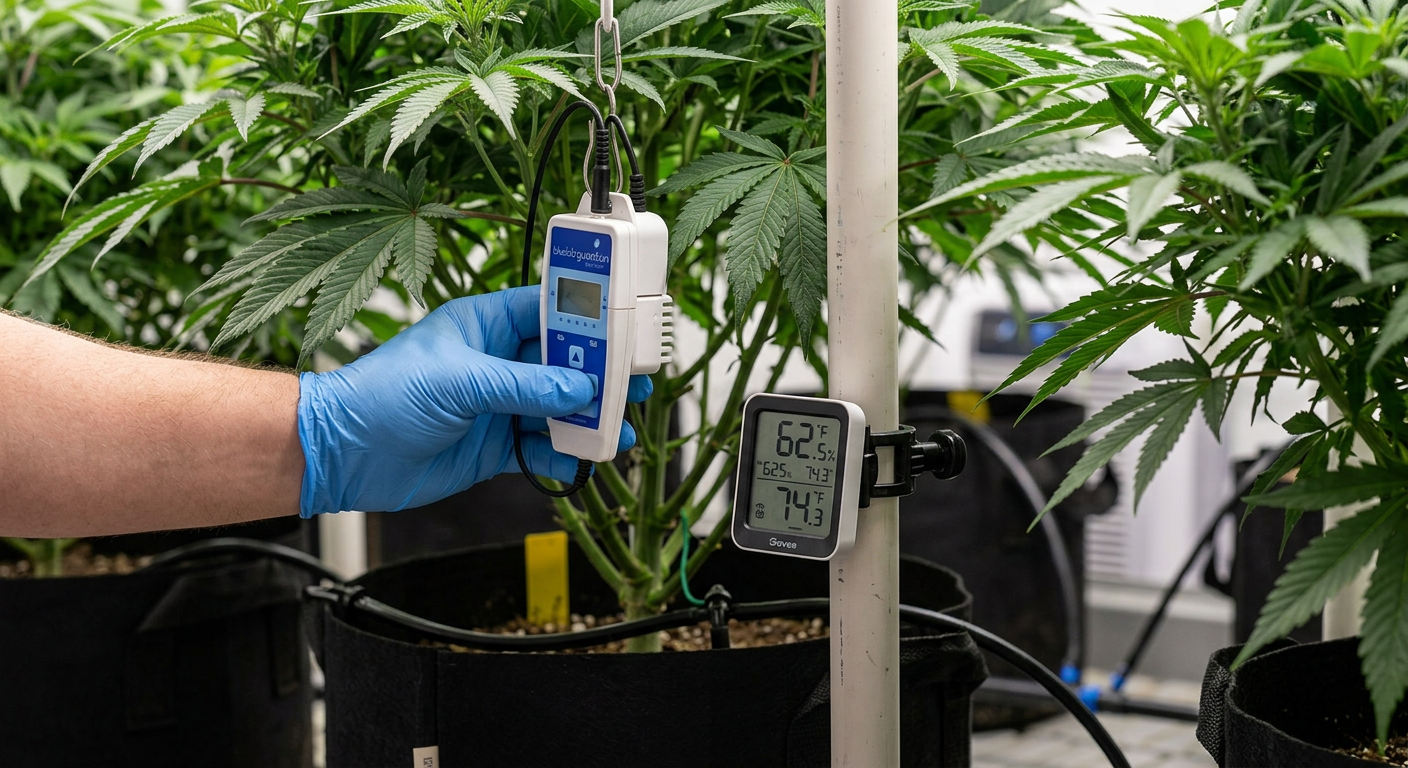
You cannot control what you cannot accurately measure. Measuring cannabis humidity correctly requires the right sensor type, placed in the right location, and calibrated regularly. This is the step most guides gloss over — and it's where many growers unknowingly operate on bad data.
Digital hygrometers using capacitive sensors are the current standard for home grows. They're accurate to ±2–3% RH when new and calibrated, affordable, and available with data-logging and min/max memory functions. Analog dial hygrometers are not reliable enough for VPD-based growing — their drift can reach ±10% RH.
Choose the Right Hygrometer Type
For a single tent, a digital hygrometer-thermometer combo unit with min/max memory is the minimum. For multi-tent setups, wireless sensor systems (like those from Inkbird or Govee) let you monitor multiple locations from one app. For serious grows, a dedicated VPD controller with integrated temp/RH sensors and automated device control is worth the investment.
Place Sensors Correctly
Position your primary RH sensor at canopy height — within 15–30 cm of the top of the plant canopy. This is where air temperature and humidity most directly affect the leaf surface and VPD calculation. Do not rely on a sensor mounted on the tent wall or near the floor.
Calibrate Every 3–6 Months
Use a two-point salt calibration kit (75% RH using saturated sodium chloride solution, and 33% using magnesium chloride) to verify accuracy. Most quality digital hygrometers maintain ±3% accuracy for 12–18 months. Cheaper units drift faster — recalibrate or replace them more often.
- Budget pick: AcuRite or ThermoPro TP49 — accurate to ±3% RH, under $15
- Mid-range: Inkbird IBS-TH2 — wireless, app-connected, data logging, ±3% RH
- Advanced: Trolmaster or Autopilot APCEM2 — integrates with fan controllers, dehumidifiers, and humidifiers for fully automated VPD management
Pro Tip: Place a second inexpensive sensor inside the densest part of your canopy during mid-to-late flower. Bud microclimate humidity can be 5–10% higher than ambient tent readings. This secondary reading tells you what your buds are actually experiencing — not what the air at the top of the tent is doing.
Troubleshooting Humidity Fluctuation in Cannabis Grows
Humidity fluctuation in cannabis grows is more damaging than stable-but-slightly-wrong readings. Plants stressed by constant RH swings — especially swings of 15%+ within a 24-hour period — show reduced growth, increased susceptibility to pests, and inconsistent terpene and trichome development.
The most common causes of humidity swings and how to fix each one:
- Lights-on to lights-off temperature drop: Add a small heater on a thermostat to maintain temperature within 3–4°C across both periods. Alternatively, switch to a schedule that doesn't create extreme temperature differentials.
- Watering spikes: After watering, surface evaporation temporarily raises RH by 5–15%. Water during the lights-on period so transpiration helps absorb the moisture spike, and increase fan speed for 2–3 hours post-watering.
- Weather and ambient changes: External weather conditions — rain, heat waves, seasonal changes — bleed into your grow space through passive intakes. Install a hygrostat on your intake fan to respond dynamically to changing outdoor conditions.
- Overloaded dehumidifier: A dehumidifier running at 100% capacity 24/7 can't respond to spikes. Ensure your unit is sized for 20–30% headroom above your average daily extraction need.
- Canopy size increase: As plants grow through veg and early flower, total leaf surface area increases dramatically and transpiration output nearly doubles. Your humidity control setup must scale with plant mass — add equipment as the canopy expands.
For a complete environmental overview that connects humidity to temperature management, see our companion guide on Cannabis Temperature Control: Optimal Ranges by Growth Stage.
Stage-by-Stage Humidity Checklist: Your Complete Reference
Use the checklist below as your operational reference throughout the grow cycle. Each stage builds on the last — the transitions are as important as hitting the targets themselves.
✅ Germination & Seedling Checklist
- ☐ Set up humidity dome or clear propagation cover
- ☐ Target 70–80% RH at canopy level
- ☐ Ultrasonic humidifier connected and set with RH controller
- ☐ Hygrometer positioned inside dome, not outside tent
- ☐ Lift dome 15 min twice daily for air exchange
- ☐ Begin gradual dome removal at day 7–10
- ☐ Confirm VPD reading: 0.4–0.8 kPa
✅ Vegetative Stage Checklist
- ☐ Remove humidity dome completely by week 3
- ☐ Target RH: 50–65% (earlier weeks toward higher end)
- ☐ Exhaust fan cycling air every 1–3 minutes
- ☐ Oscillating fan providing gentle leaf movement
- ☐ VPD reading: 0.8–1.3 kPa
- ☐ Canopy-level hygrometer in place
- ☐ Review light schedule and confirm lights-off temperature drop is under 4°C
✅ Flowering Stage Checklist
- ☐ Dehumidifier installed and sized for current plant mass
- ☐ RH stepping down every 2 weeks (55% → 50% → 45% → 40% → 35%)
- ☐ Continuous drain line on dehumidifier (no manual emptying)
- ☐ Secondary humidity sensor inside canopy
- ☐ Carbon filter pre-filter wrap installed
- ☐ VPD reading: 1.2–1.6 kPa at peak flower
- ☐ Lights-off RH spike monitored and managed
- ☐ No condensation visible on walls, ducting, or lights
- ☐ Air exchange rate confirmed: every 1–2 minutes
✅ Late Flower / Pre-Harvest Checklist
- ☐ RH at 30–40%
- ☐ Temperature reduced to 18–22°C during lights-on for trichome optimization
- ☐ All bud sites visually inspected every 2 days for mold signs
- ☐ Dehumidifier running at peak output
- ☐ Review harvest timing guide: When to Harvest Cannabis for Maximum Potency
Strains that perform exceptionally well when these humidity protocols are followed precisely include high-yielding dense varieties like Banana Kush Autoflower, Cookies Kush, and Sour Diesel Feminized — all of which develop tight, resinous buds that reward the low late-flower RH targets covered in this guide.
After harvest, humidity management continues through drying and curing — target 45–55% RH and 15–20°C for the drying room. Our full post-harvest guide covers every step: Cannabis Drying & Curing: Complete 2–8 Week Process Guide.
Frequently Asked Questions
What is the ideal humidity for cannabis during flowering?
The ideal humidity for cannabis flowering drops progressively from 45–55% in early flower to 35–45% in late flower. Final week targets of 30–40% RH help prevent Botrytis in dense buds and can encourage trichome production. Never exceed 60% RH during any point in the flowering stage.
How do I control humidity in a cannabis tent without a dehumidifier?
Without a dehumidifier, increase air exchange rate with a more powerful exhaust fan, reduce watering frequency, improve canopy airflow with oscillating fans, and introduce desiccant pouches in smaller setups. However, in mid-to-late flower with multiple plants, a proper dehumidifier is strongly recommended — the moisture load from transpiring plants exceeds what fans alone can manage.
What happens if cannabis humidity is too low during veg?
RH below 40% during vegetative growth causes stomata to close, slowing photosynthesis and nutrient uptake. Plants may curl leaf edges upward (taco shape), show slowed growth, and become more susceptible to spider mites, which thrive in dry conditions. Add a humidifier and target 50–65% RH to restore healthy transpiration.
Does humidity affect cannabis terpene development?
Yes. Maintaining optimal VPD — which balances temperature and humidity together — during flowering directly supports terpene biosynthesis. Excessively dry conditions (RH below 30%) can cause terpene volatilization off the bud surface. Late-flower targets of 35–45% RH at slightly lower temperatures (18–22°C) help preserve and develop terpene profiles before harvest.
How does a carbon filter relate to humidity control in a cannabis tent?
Carbon filters work most efficiently at 40–70% RH. When humidity exceeds 70%, water vapor occupies the activated carbon's pores, reducing odor absorption by up to 40% and shortening filter lifespan. Keeping RH in the recommended ranges protects your filter's performance and extends its useful life from 12–18 months down to 6 months or less in consistently high humidity.


