You checked your plants yesterday. Everything looked perfect. Today, a dense cola is wearing a grey fur coat — and that smell is unmistakable. Cannabis mold prevention is the single skill that separates growers who consistently pull quality harvests from those who watch months of work disintegrate in 48 hours.
Botrytis cinerea (bud rot) and powdery mildew are responsible for more lost harvests than any pest, nutrient deficiency, or beginner mistake combined. The good news? Both are almost entirely preventable when you understand the two levers that control them: humidity and airflow.
This guide gives you exact numbers, actionable setups, and organic solutions so you never lose another crop to mold again.
What Makes Cannabis So Vulnerable to Mold?
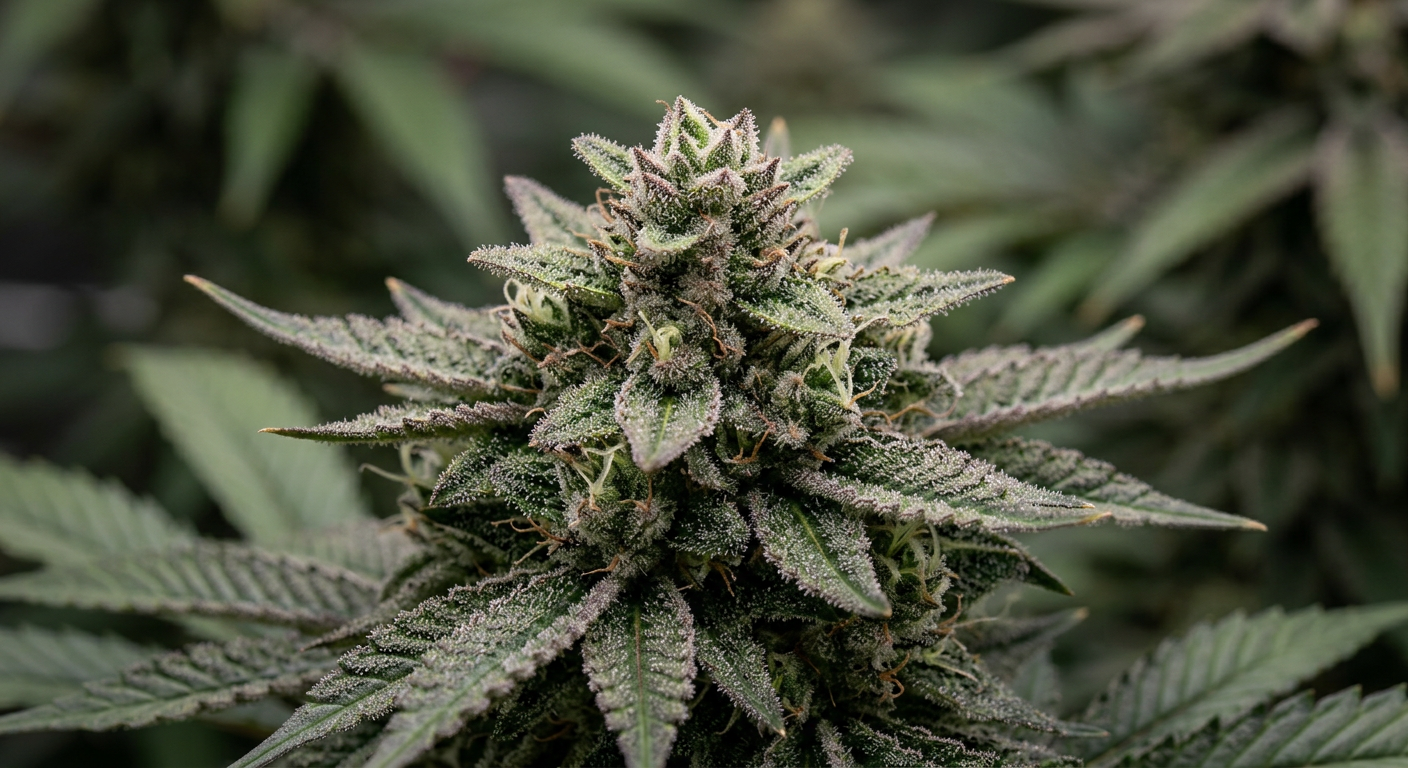
Cannabis mold prevention starts with understanding why the plant is a prime target. Cannabis produces dense, resinous flowers that trap moisture like a sponge. That moisture, combined with warm temperatures and stagnant air, creates the perfect incubator for fungal pathogens.
The two main culprits behave very differently, so knowing which enemy you're facing changes everything about how you respond.
| Pathogen | Scientific Name | Primary Target | Ideal Conditions | Speed of Damage |
|---|---|---|---|---|
| Bud Rot | Botrytis cinerea | Dense buds, stems | RH 70%+, 15–25°C, stagnant air | 24–72 hours |
| Powdery Mildew | Podosphaera macularis | Leaf surfaces | RH 50–70%, 20–27°C, poor airflow | 3–7 days visible |
| Fusarium | Fusarium oxysporum | Roots, stems | Wet soil, warm temps, 24–28°C | Slow, systemic |
| Downy Mildew | Peronospora spp. | Leaf undersides | RH 85%+, cool nights | 5–10 days |
Cannabis mold spores are already present in almost every growing environment — they travel on clothing, in water, through ventilation ducts, and on clone material. You cannot eliminate spores, but you absolutely can deny them the conditions they need to germinate and spread.
The Science: Botrytis spores require free surface moisture (dew point contact) to germinate. When relative humidity stays below 50% RH during lights-off, the leaf and bud surface temperature rarely drops below the dew point — meaning spores sit dormant instead of activating. This is why your overnight RH target is just as critical as your daytime number.
The Exact Humidity Levels to Prevent Mold in Cannabis
Hitting the right humidity levels to prevent mold in cannabis isn't one fixed number — it changes at every stage of the plant's life. Seedlings need humidity to thrive; late-flower buds need dryness to survive. Using a single RH setting throughout your grow is one of the most common and costly mistakes a grower can make.
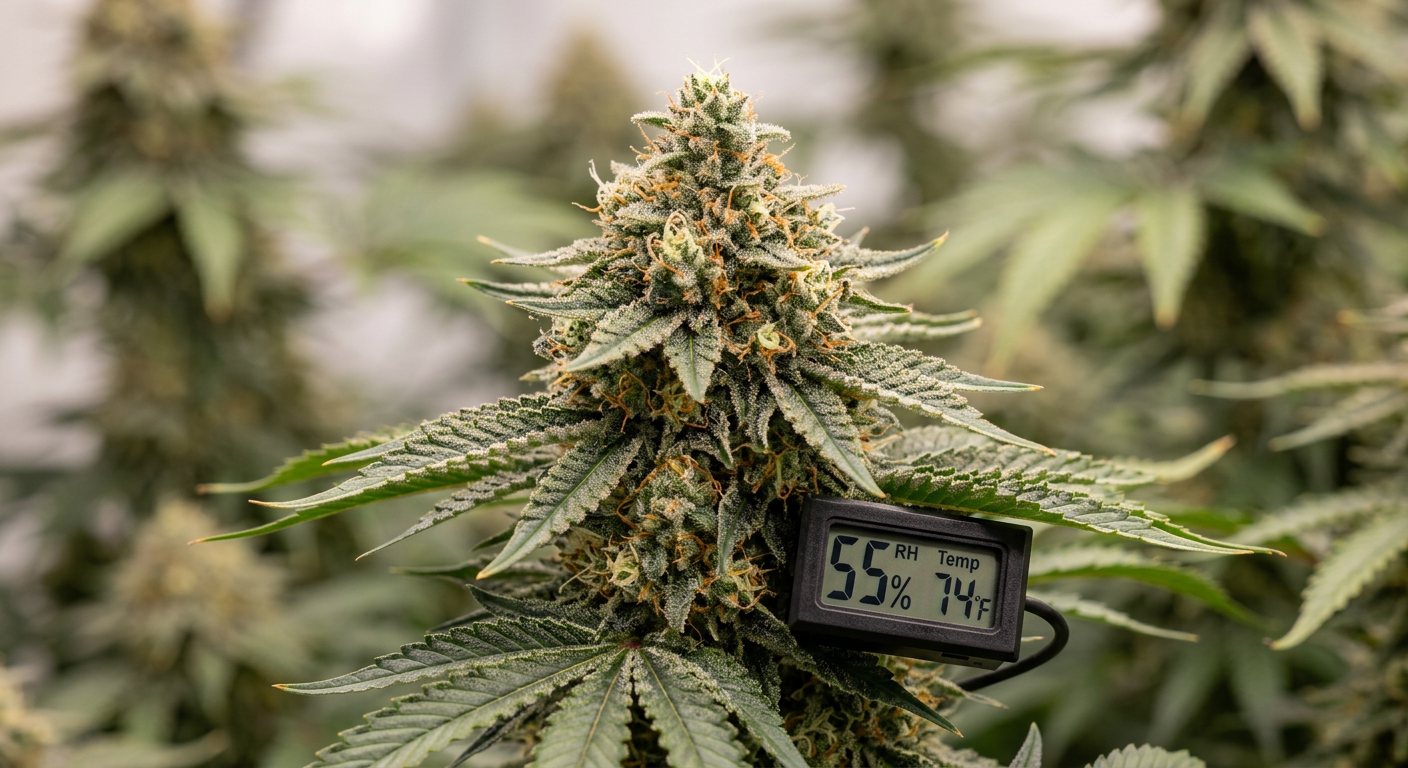
Use this stage-by-stage framework as your baseline, then fine-tune using a quality digital hygrometer placed at canopy level.
Seedling Stage (Week 1–2): 65–70% RH
Young seedlings haven't developed a robust root system yet, so they absorb much of their water through leaf stomata. Higher humidity reduces transpiration stress and supports rapid early growth. Keep temps at 20–25°C and ensure gentle airflow — not directed at the seedlings — to prevent damping off.
Vegetative Stage (Week 3–8): 50–65% RH
Roots are established and the plant can handle lower humidity. Staying in the 50–65% range supports vigorous growth, keeps powdery mildew at bay, and begins conditioning the plant for flower-stage dryness. Temps of 22–28°C with strong canopy airflow are ideal.
Early Flower (Week 1–4 of 12/12): 45–55% RH
Bud sites are forming but not yet dense. Maintain 45–55% RH and watch for the first signs of powdery mildew on lower fan leaves. This is the window to dial in your dehumidification strategy before buds pack on serious mass.
Late Flower (Week 5–Harvest): 40–50% RH
This is the highest-risk window for cannabis botrytis bud rot. Buds are dense, resin is thick, and any spike above 55% RH can trigger catastrophic infection within 48 hours. Target 40–50% RH with zero tolerance for moisture pockets. If you're growing outdoors, prioritise harvest timing around weather forecasts.
Drying & Curing: 55–65% RH (Drying) / 58–62% RH (Curing)
The harvest isn't the finish line for mold risk. Drying rooms should stay at 55–65% RH with temps of 15–20°C. During curing in jars, target 58–62% RH and burp jars for 15–30 minutes daily for the first two weeks to release trapped moisture. A digital hygrometer inside each jar removes all guesswork.
Key Rule: Every 5°C drop in temperature raises relative humidity by roughly 5–10 percentage points. If your grow room cools significantly during lights-off, your overnight RH can spike dangerously even when daytime numbers look fine. Always check overnight readings with a min/max hygrometer.
For a deeper dive into how humidity and temperature interact at the plant level, read our guide on VPD for Cannabis: The Complete 2026 Grower's Guide — understanding Vapour Pressure Deficit will transform how you think about climate control.
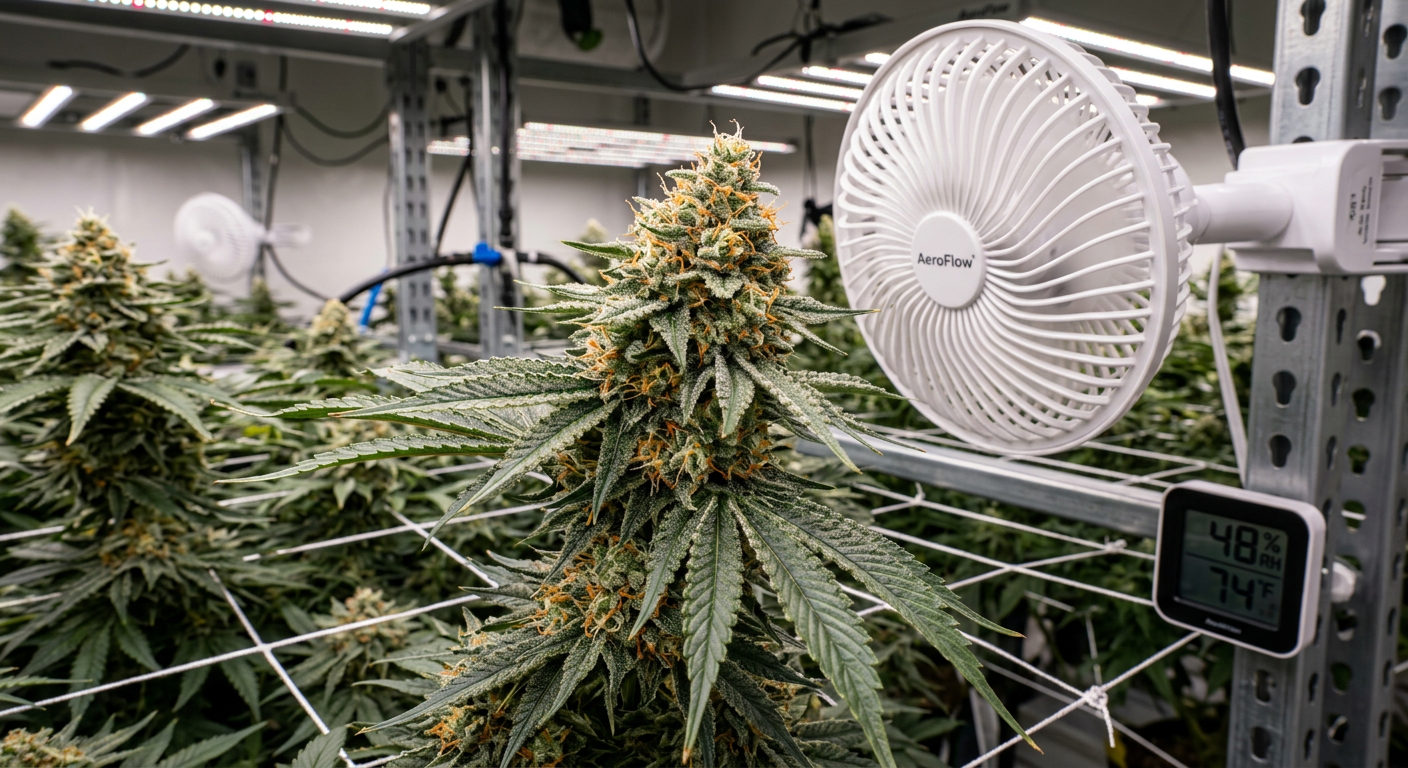
Airflow Setup: The Mechanical Foundation of Mold Prevention
Airflow for cannabis to prevent mold works on two levels: macro-level air exchange (moving stale, humid air out of the space) and micro-level canopy airflow (disturbing the boundary layer of moist air that sits directly on leaf and bud surfaces). You need both, and most hobby growers nail one while ignoring the other.
Here's the complete airflow architecture for a mold-proof grow room:
Inline Extraction Fan + Carbon Filter
Size your inline fan to exchange the total room volume at least once every 1–3 minutes. For a 1.2m × 1.2m × 2m tent (2.88m³), you need a minimum 87–288 CFM fan. Run it continuously — never on a timer — during flowering. Mount it high in the space since hot, humid air rises. Your carbon filter controls odours while the fan drives air exchange.
Passive Intake or Active Intake Fan
Fresh, drier air must replace what your extraction fan removes. For tents up to 1.2m², passive intake vents (kept open and unobstructed) work well. For larger spaces or sealed rooms, a dedicated intake fan pulling filtered outside air keeps positive pressure balanced. Intake air should ideally pass through a MERV-11 or higher filter to exclude mold spores from the environment.
Oscillating Circulation Fans
These are your mold prevention workhorses. Place at least two oscillating fans at different heights — one below the canopy, one above — angled so they create a gentle, non-directed movement across all plant surfaces. Aim for 0.5–1.0 m/s airspeed at the canopy. Too slow and moisture sits; too strong and stems snap and trichomes are damaged. Leaves should gently tremble, not whip around.
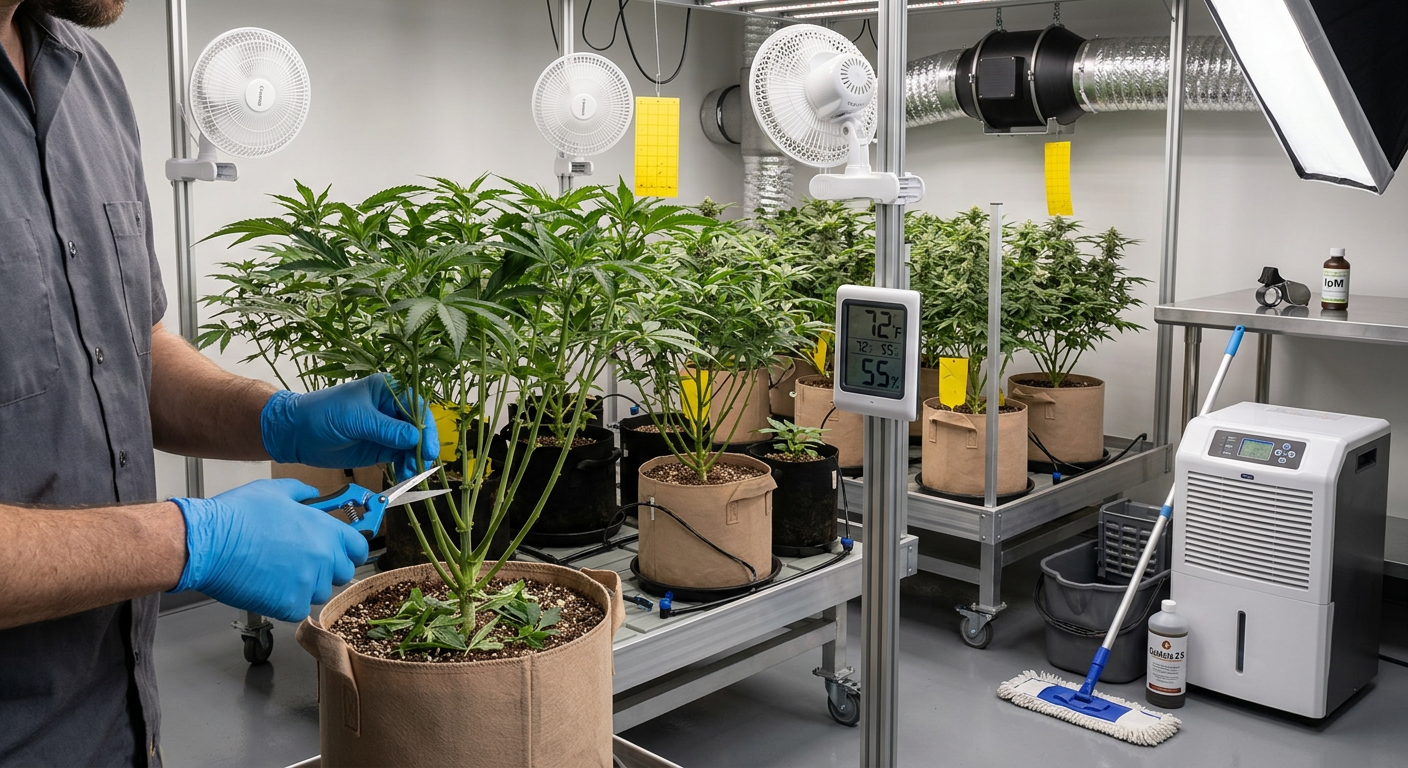
Dehumidifier Placement
A dehumidifier is non-negotiable during late flower in any environment with more than one or two plants. Place it in the return air path — not directly blowing at plants — so it conditions the ambient air before it reaches your canopy. Size it generously: a dehumidifier rated for a space twice your actual grow room size will run less frequently, last longer, and respond faster to humidity spikes.
Pro Tip: Connect your dehumidifier and exhaust fan to an Inkbird or Govee digital humidity controller set to activate at 50% RH during lights-on and 45% RH during lights-off. Automated control catches overnight spikes that manual adjustments always miss — especially during the critical last three weeks before harvest.
Poor crowding is the silent multiplier of every airflow problem. When canopies overlap and leaves press against each other, fans cannot create the turbulent airflow needed to disrupt moisture pockets. Maintain a minimum 15–20cm between major bud sites. Techniques like lollipopping (removing lower growth that receives no light), defoliation passes at weeks 3 and 6 of flower, and strategic tying help enormously.
If you're training your plants to maximise yield while keeping the canopy open and mold-resistant, our ScrOG Growing Guide shows exactly how to create an even, well-ventilated canopy using a screen of green setup.
Early Detection: Catching Mold Before It Spreads
The difference between a minor spot treatment and losing an entire harvest often comes down to 24 hours and whether you were looking carefully enough. Cannabis bud rot humidity levels can spike and produce visible infection faster than most growers expect — which is why systematic inspection is a non-negotiable part of your grow routine.
Inspect your plants every single day during the final four weeks of flower. Use a headlamp to look inside dense colas, not just at their surfaces.
Early signs of powdery mildew cannabis:
- White or grey circular patches on the upper surface of fan leaves
- Powdery texture that doesn't wipe off cleanly (unlike water spots)
- Slightly distorted or cupped leaf margins near infected areas
- Yellow halos around white patches in moderate-to-advanced cases
- Eventual spread to bud calyxes if left untreated past two weeks
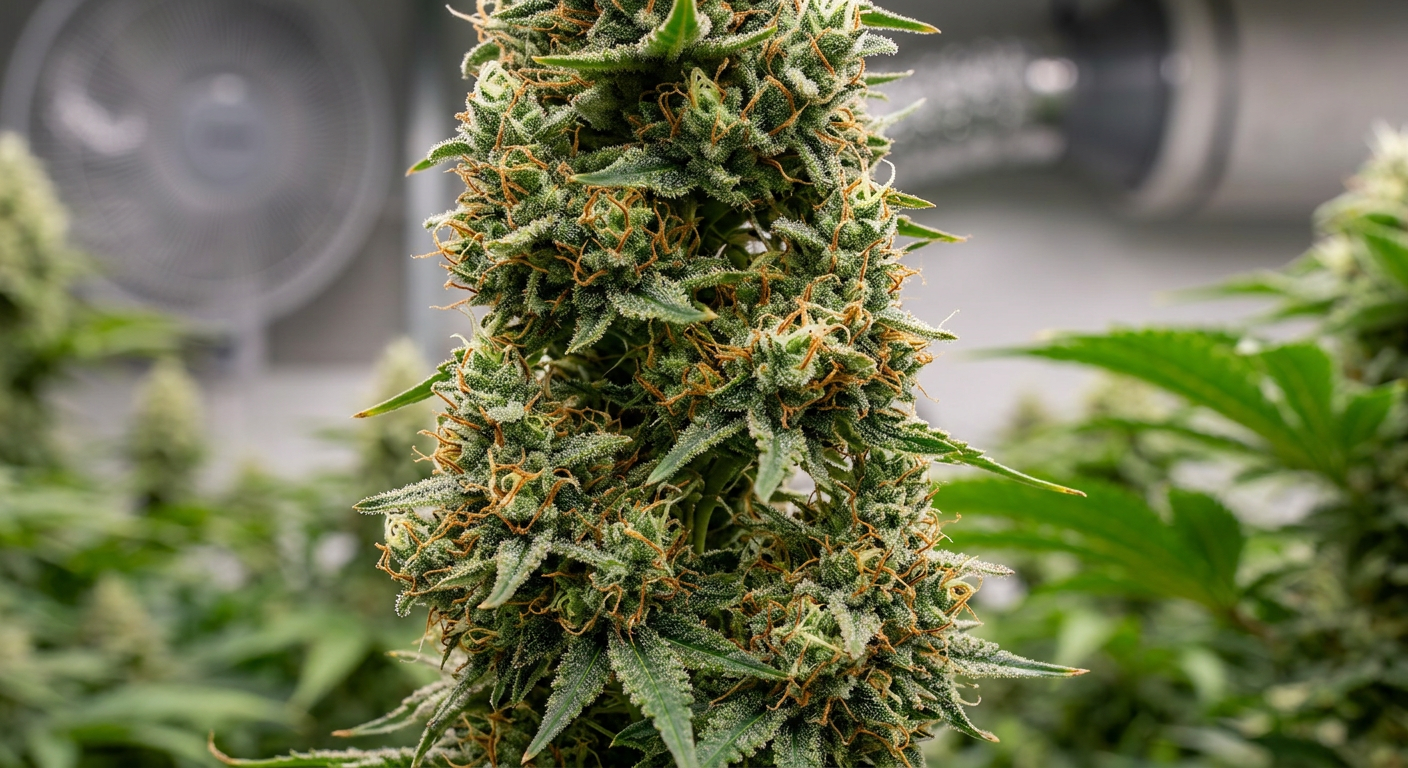
Early signs of cannabis botrytis bud rot:
- Single wilted or water-soaked sugar leaves protruding from an otherwise healthy cola
- Brown or grey discolouration starting from the inside of a dense bud
- Grey, fuzzy mycelium visible when you gently open an infected cola
- Dark brown stem tissue at the base of affected buds
- Distinctive musty or wine-like smell that's different from normal cannabis aroma
Critical Warning: When you find botrytis bud rot, do NOT simply remove the visible grey fluff and leave the rest. The mycelium spreads 2–3cm beyond what's visible to the naked eye. Cut at least 3–5cm below any visible infection with sterile scissors, and immediately place infected material in a sealed bag before removing it from your grow space. Disturbing infected buds in open air releases millions of spores that will land on every healthy plant in the room.
For outdoor growers, weather windows are your biggest detection trigger. Any period of rain followed by warm, humid conditions (above 70% RH for 12+ consecutive hours) should prompt an immediate canopy inspection. Check the densest, most sheltered colas first — those are where cannabis botrytis bud rot establishes its first foothold.
The One-Leaf Rule: A single mysteriously wilting leaf inside a healthy cola is botrytis until proven otherwise. Pull that leaf gently — if it's brown at the base, or if grey fuzz is visible at the attachment point, infection has already started. Act immediately.
Organic Treatments That Actually Work
When prevention fails — or when you inherit a grow space with historical mold pressure — cannabis mold treatment organic options give you effective, plant-safe tools that won't leave chemical residues on your flowers. These treatments work best as early interventions and preventive sprays, not as cures for advanced infections.
Here are the most effective organic cannabis mold treatments, ranked by efficacy and ease of use:
Potassium Bicarbonate (Most Effective for PM)
Potassium bicarbonate is the gold standard for prevent powdery mildew cannabis treatment. It raises the pH on leaf surfaces to a level where powdery mildew cannot survive. Mix 4–8g per litre of water with a small amount of castile soap as an emulsifier. Spray to full coverage on all leaf surfaces during lights-off. Apply every 5–7 days preventively, or every 3 days when active infection is present. Stop applications at least 2–3 weeks before harvest to avoid any taste impact.
Dilute Hydrogen Peroxide (H₂O₂) for Surface Sterilisation
Hydrogen peroxide cannabis mold treatment works by releasing oxygen on contact with organic material, oxidising fungal cell walls. Use food-grade 3% H₂O₂ diluted to a 1:3 ratio with water (roughly 1% final concentration). Spray affected areas lightly, or use it to sterilise your grow room surfaces, pots, and tools between grows. A 35% H₂O₂ solution can be diluted to 1–3ml per litre for foliar use, but measure carefully — too strong will bleach and damage plant tissue.
Sulphur-Based Sprays and Vaporisers
Wettable sulphur has been used in agriculture for centuries because it works. Mix at 2–3g per litre and apply as a foliar spray during vegetative and early flower stages. Sulphur vaporisers (electric burners that heat a sulphur disc) are extremely effective as preventive tools in commercial grows — they release sulphur dioxide gas that creates a permanently hostile environment for powdery mildew spores. Never use sulphur within 3 weeks of harvest, as residues affect flavour and can irritate airways when smoked.
Baking Soda Spray (Budget Option)
Plain baking soda (sodium bicarbonate) at 1 teaspoon per litre of water with a few drops of dish soap provides a low-cost pH-disruption spray for powdery mildew on leaves. It's less effective than potassium bicarbonate because excess sodium can accumulate in soil over time, but it's a viable emergency option. Use it on leaves only, not on buds, and rinse leaves gently with clean water 8 hours after application.
Neem Oil (Vegetative Stage Only)
Cold-pressed neem oil at 5–10ml per litre with an emulsifier is effective against both powdery mildew and certain fungal diseases in vegetative growth. However, neem oil has a strong smell that can taint flower flavour, and it smothers trichomes if applied after week 3 of flower. Restrict neem applications strictly to the vegetative stage. It's more effective as a preventive measure than a treatment for established infections.
Bacillus subtilis (Biological Control)
Products containing the beneficial bacteria Bacillus subtilis (such as Serenade) colonise leaf surfaces and compete directly with powdery mildew and botrytis for nutrients and attachment sites. They're safe to use right up to harvest and leave zero residue. Apply as a foliar spray every 7–10 days from early veg through late flower. This is the only treatment option suitable for the final weeks before harvest when chemical and mineral-based sprays should be stopped.
Pro Tip: Always spray organic treatments during lights-off or in the early morning for outdoor grows. Wet leaves + bright light = light-magnification burn on droplets. Spraying at lights-off also gives the solution maximum dwell time on leaf surfaces before evaporation removes it.
For growers using living soil systems, maintaining a rich and diverse microbial community in your medium actually provides a measurable degree of disease suppression — healthy soil biology competes with and suppresses pathogenic fungi. Read more in our Living Soil Cannabis Growing Guide.
Late-Stage Flowering: The Highest-Risk Window
Weeks 6–10 of flowering represent the most dangerous period for bud rot cannabis. Buds have reached peak density, resin production is at its maximum, and the plant is directing almost all energy into reproduction rather than immune defence. At the same time, nights are getting longer (for outdoor growers), temperatures are dropping, and humidity spikes become more frequent and more severe.
Here's what changes in your protocol during the final four to six weeks:
- Drop RH targets aggressively: Push toward 40–45% RH. Every extra percentage point above 50% is unnecessary risk at this stage.
- Increase extraction fan speed: Run your inline fan at 70–100% capacity during the final three weeks, even if temperatures run slightly cool as a result.
- Stop heavy defoliation: Major leaf removal after week 6 of flower creates wounds that serve as entry points for botrytis. Light lollipopping is fine, but large cuts should be finished by week 5.
- Watch irrigation more carefully: Overwatered medium releases moisture vapour continuously. Let the medium dry out more completely between waterings during late flower — this reduces ambient humidity within the canopy microclimate.
- Consider early harvest on threatened plants: A bud harvested at 90% maturity is infinitely more valuable than one harvested at 100% maturity after botrytis has spread. Check our guide on When to Harvest Cannabis for Maximum Potency to understand what's acceptable to take early.
Outdoor Late-Season Warning: If your local forecast shows more than 3 consecutive days of rain during the final two weeks before your planned harvest, strongly consider harvesting early. Autumn rains combined with dense, near-ripe buds create catastrophic botrytis conditions that can destroy an entire outdoor crop in less than five days. A 90%-ripe harvest you chose to take beats a 100%-ripe harvest that mold chose to take from you.
Science Note: Cannabis botrytis bud rot infections typically begin inside the cola, not on the surface. The fungus gains entry through damaged tissue (insect feeding sites, mechanical damage) or through stomata on leaves trapped within dense bud structures. By the time you can see grey fuzz on the outside of a bud, the infection inside may already be 2–4cm in diameter. This is why surface inspection alone is insufficient — you must gently open colas to inspect the interior tissue during the final four weeks.
The drying and curing phase extends your mold risk window well beyond harvest day. Proper drying at 15–20°C and 55–65% RH for 10–14 days, followed by careful curing at 58–62% RH in glass jars, is the final chapter of mold prevention. For a complete walkthrough, read our Cannabis Drying & Curing Guide.
Mold-Resistant Strain Selection: Start With Genetics That Fight Back
Every prevention strategy in this guide becomes easier when you start with genetics that are inherently less susceptible to mold. Sativa-dominant and Haze-based strains with looser, airier bud structure dry out faster after rainfall and allow better airflow through the canopy. Dense indica varieties and certain high-yield hybrids produce more compact buds that are more vulnerable to bud rot.
If you grow in a humid climate — the Pacific Northwest, UK, Netherlands, or any coastal environment — strain selection is your first and most powerful act of mold prevention.
Lower-Risk Bud Structures (Better for Humid Climates):
- Sour Diesel Feminized (24% THC) — Classic sativa structure with elongated, open bud formation that dries quickly and resists botrytis pressure naturally.
- Super Lemon Haze Feminized (23% THC) — Haze-dominant genetics with loose, airy colas that are far less hospitable to moisture retention than dense indica buds.
- Tangerine Haze Feminized (18% THC) — Haze heritage combined with a slightly shorter flowering time makes this a smart pick for growers in regions with early autumn rains.
- Swazi Feminized (18% THC) — African landrace genetics bred for hot, humid climates with naturally robust resistance to fungal pressure.
- New York Power Diesel Feminized (24% THC) — Diesel genetics carry sativa-dominant structure with resin production that provides some physical barrier to spore penetration.
Higher Yields, Higher Vigilance Required:
- Northern Lights x Big Bud Feminized (20% THC) — Big Bud genetics produce enormous, heavy colas. The yield-to-vigilance ratio is exceptional, but late-flower airflow management is non-negotiable.
- White Widow Feminized (25% THC) — One of the most resin-covered varieties in cultivation. Heavy trichome production actually provides some physical resistance to spore penetration, but dense structure still requires careful RH management.
- OG Kush Feminized (26% THC) — Dense, compact buds with extreme potency. Reward for careful climate control is exceptional; penalty for neglect is significant in humid conditions.
Pro Tip for Autoflower Growers: Autoflowering varieties like Amnesia Haze Autoflower (17% THC) and Skywalker OG Autoflower (23% THC) complete their lifecycle faster than photoperiod plants — often finishing before the most mold-prone periods of late autumn. Their shorter, more compact plant structure also makes canopy management and airflow optimisation easier in small tents.
For high-THC strains that reward careful growers, Purple Kush Feminized (27% THC) and Quantum Kush Feminized (30% THC) both produce exceptional results when humidity is dialled in correctly. These are strains where your climate control skills pay dividends in the jar.
The Complete Cannabis Mold Prevention Checklist
Use this master checklist as your ongoing reference throughout every grow. Print it, bookmark it, or photograph it — but use it. Mold prevention is a system, and systems only work when you run every component consistently.
🌱 Setup & Environment
- ☐ Digital hygrometer/thermometer at canopy level (with min/max logging)
- ☐ Inline extraction fan sized for room volume ÷ 1–3 minutes
- ☐ Carbon filter on extraction fan output
- ☐ Passive or active intake with MERV-11 filter
- ☐ Minimum 2 oscillating circulation fans at different heights
- ☐ Dehumidifier sized for 2× actual room volume
- ☐ Automated humidity controller (45–50% RH trigger during flower)
- ☐ All seams, vents, and entry points sealed against outside humidity ingress
🌿 Vegetative Stage
- ☐ RH maintained at 50–65%
- ☐ Leaf surfaces visually inspected every 3 days for powdery mildew
- ☐ Plants spaced so canopies don't overlap
- ☐ Lower leaves lollipopped to improve sub-canopy airflow
- ☐ Preventive potassium bicarbonate or Bacillus subtilis spray applied every 10–14 days if mold pressure is known
- ☐ Grow room cleaned and sterilised between grows (H₂O₂ solution on all surfaces)
🌸 Flowering Stage (Week 1–5)
- ☐ RH dropped to 45–55%
- ☐ Daily canopy inspection, including opening dense bud sites
- ☐ Defoliation pass completed by week 6 to open canopy
- ☐ Fan leaves touching bud sites removed to improve airflow around colas
- ☐ Watering frequency reduced slightly to limit medium moisture vapour
- ☐ Sulphur treatments stopped after week 5 of flower
🌺 Late Flower (Week 6–Harvest)
- ☐ RH pushed to 40–50%, targeting 40–45% in the final 2 weeks
- ☐ Extraction fan at 70–100% capacity
- ☐ Interior of colas inspected daily with a headlamp
- ☐ Any wilting or discoloured sugar leaves investigated immediately
- ☐ Outdoor plants monitored against weather forecasts — harvest plan ready for early execution
- ☐ Bacillus subtilis spray continued up to harvest if any mold pressure detected
- ☐ Infected material removed in sealed bags, tools sterilised after each use
✂️ Drying & Curing
- ☐ Drying room at 15–20°C, 55–65% RH, with gentle airflow (not directed at buds)
- ☐ Branches spaced with 5–10cm gap between each bud site
- ☐ Dried for minimum 10 days before trimming and jarring
- ☐ Curing jars burped daily for first 2 weeks
- ☐ Digital hygrometer inside each jar during curing phase
- ☐ Boveda 62% humidity packs added if RH exceeds 65% during curing
The Golden Rule of Cannabis Mold Prevention: You cannot undo mold damage once it starts — you can only limit its spread. Every hour of delay between detection and action multiplies the area of infection. Build the habit of daily inspections, and treat a single suspicious leaf as an emergency until you can confirm it isn't.
Want to understand how the flowering stage itself unfolds so you can better anticipate mold risk windows? Our Cannabis Flowering Stage Timeline Guide maps out exactly what's happening in your plant week by week, which helps you predict when to tighten your humidity controls most aggressively.
And if you're just getting started and want to build mold prevention into your grow from day one, our Complete Beginner's Guide to Growing Cannabis Indoors covers environmental setup alongside every other foundational skill you need.
Frequently Asked Questions
What humidity level prevents mold on cannabis buds?
During late flowering (weeks 5 through harvest), maintain relative humidity between 40–50%. Target the lower end of this range — 40–45% RH — in the final two weeks when buds are at peak density and most vulnerable to botrytis. Any spike above 55% RH during lights-off in this stage creates significant mold risk within 24–48 hours. Use an automated humidity controller to prevent overnight spikes rather than relying on manual adjustments.
Can I save cannabis buds that have bud rot?
You can save the unaffected portions of a plant with bud rot, but the infected material cannot be saved. Cut at least 3–5cm below all visible grey or brown discolouration using sterilised scissors. Remove infected material in a sealed bag without disturbing it in open air. The remaining healthy buds can continue to grow if you immediately lower humidity below 45% RH and improve airflow. If more than 30–40% of the plant is infected, early harvest of the healthy remaining buds is the most practical option.
How do I get rid of powdery mildew on cannabis plants?
Potassium bicarbonate solution (4–8g per litre with a few drops of castile soap) is the most effective organic treatment for powdery mildew on cannabis. Spray all affected leaf surfaces during lights-off, covering both upper and lower surfaces completely. Apply every 3–5 days until the infection is controlled, then switch to a 7–10 day preventive schedule. Stop all foliar treatments at least 2–3 weeks before harvest. Never spray buds directly — focus applications on leaves and stems only.
Does hydrogen peroxide kill cannabis mold?
Yes — dilute hydrogen peroxide (H₂O₂) kills cannabis mold spores on contact through oxidation. Use 3% food-grade H₂O₂ diluted 1:3 with water for foliar spraying on affected areas. It is most effective for surface sterilisation of grow room equipment, walls, and pots between grows. For active powdery mildew on leaves, potassium bicarbonate is more effective as a treatment. H₂O₂ can also be used at 1–2ml per litre in irrigation water to suppress root-zone pathogens without harming beneficial mycorrhizal fungi in most circumstances.
What cannabis strains are most resistant to mold and bud rot?
Sativa-dominant and Haze-based strains with open, airy bud structure are most resistant to bud rot because their loose cola architecture dries faster and allows better airflow. Top picks include Sour Diesel, Super Lemon Haze, Tangerine Haze, and landrace varieties like Swazi. African and equatorial landraces evolved in hot, humid conditions and carry natural resistance to fungal pressure. Dense indica and high-yield hybrid strains (like Big Bud crosses) produce more vulnerable compact buds and require stricter humidity management, but are manageable with the right environment setup.


