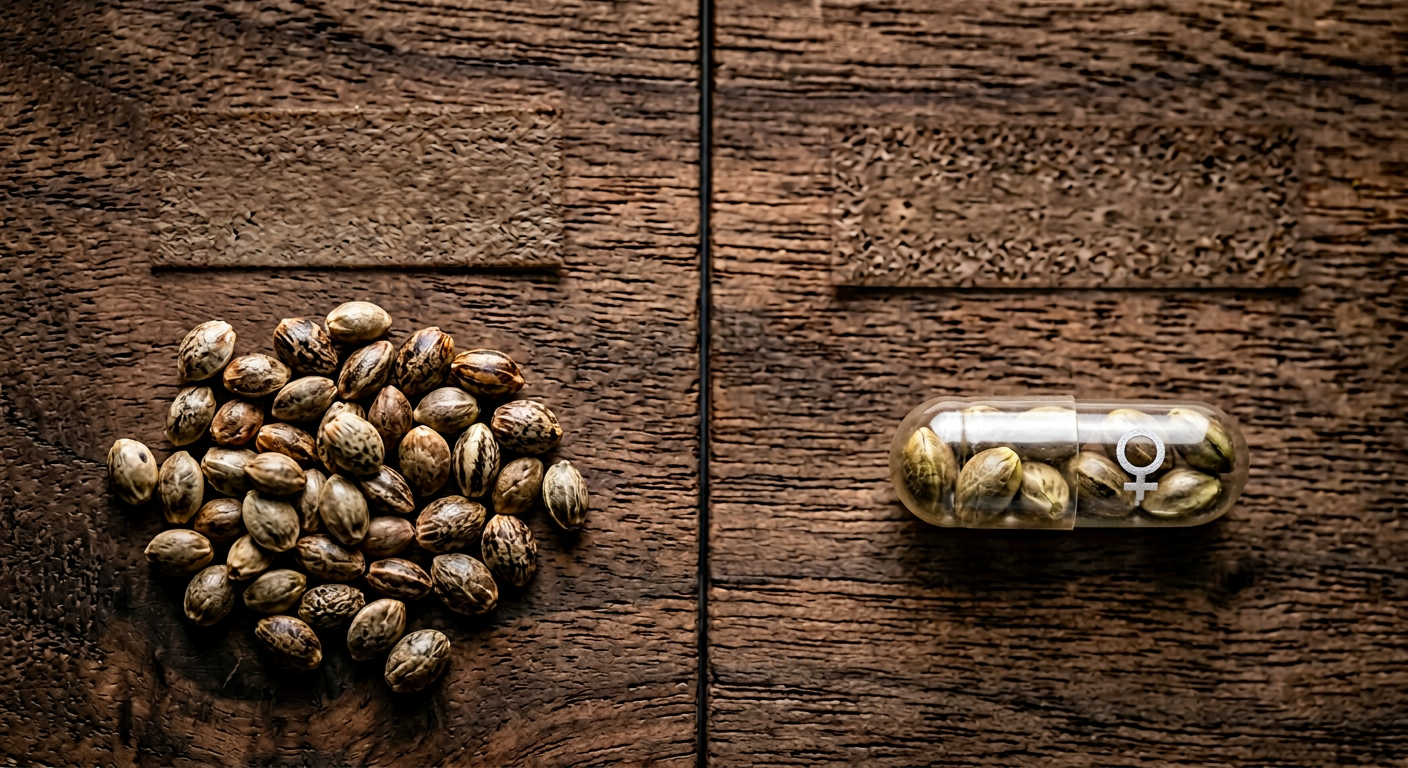
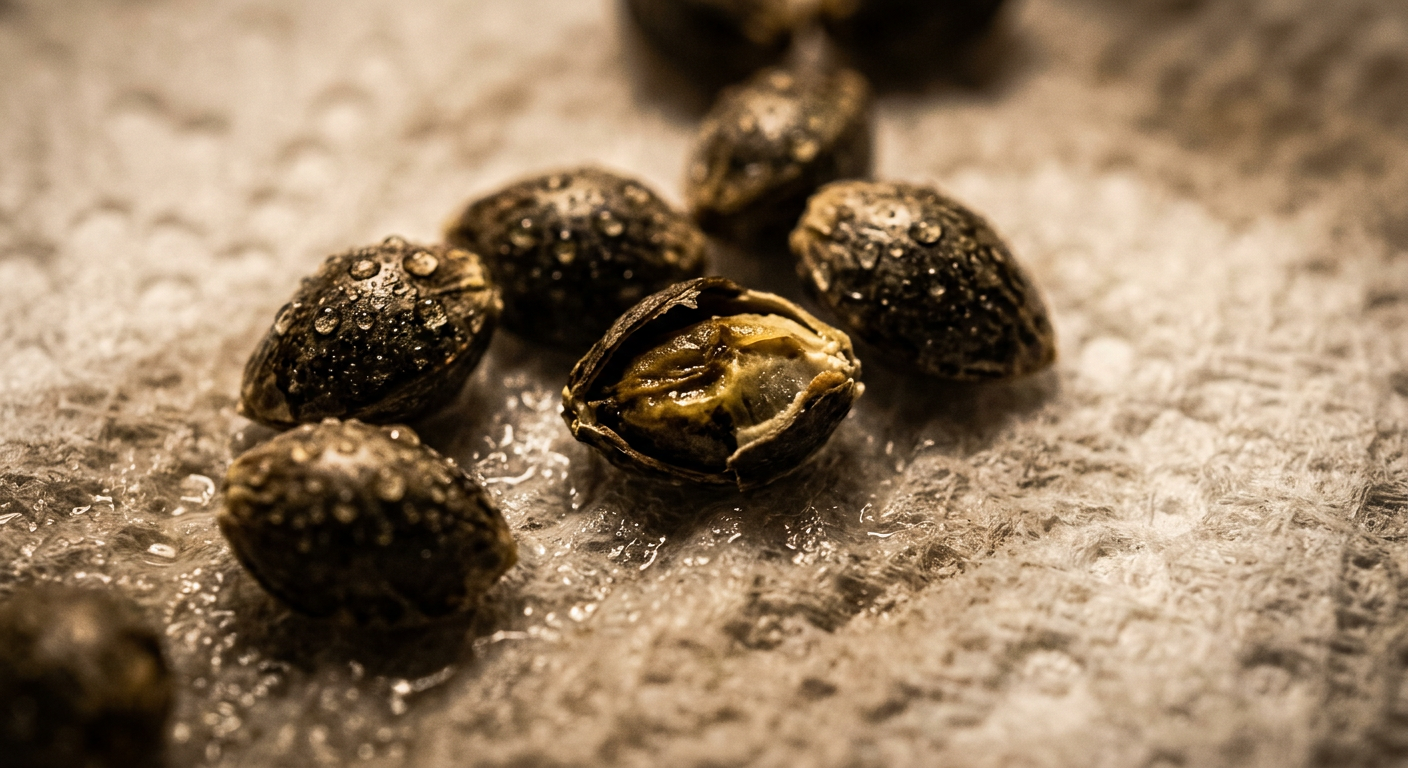
You spent real money on quality genetics. You chose your strains carefully, placed the order, and the seeds arrived looking perfect — dark, firm, with that characteristic tiger-stripe mottling that tells you they're mature. Then life happened. The grow got delayed. Maybe a few weeks turned into a few months. Now you're wondering: how to store cannabis seeds properly so those genetics are still alive when you're ready to plant them.
This guide covers everything the purchase confirmation email never tells you. From the exact temperature and humidity numbers to the fridge-versus-freezer debate that splits growers every time it comes up — you'll find clear, science-backed answers here. We'll also show you how to test old seeds before you waste a full grow cycle finding out the hard way.
Before you germinate a single seed, make sure you've read our complete cannabis germination guide — this article covers the critical pre-germination step that most beginner guides skip entirely.
The Four Enemies of Cannabis Seed Viability
Knowing how to store cannabis seeds correctly starts with understanding exactly what destroys them. Seeds are living organisms in a state of suspended animation. Four environmental factors can end that suspension permanently.
- Humidity: Above 40% RH, seeds activate metabolic processes and begin drawing moisture. Above 60% RH, mold and rot take hold within days.
- Heat: Temperatures above 20°C accelerate enzyme activity inside the seed, burning through stored energy reserves needed for germination.
- Light: UV and visible light trigger hormonal responses in seeds, signalling them to begin germination — even without moisture present.
- Oxygen: Oxidative stress degrades the lipids and proteins seeds need for energy. Sealed, oxygen-reduced environments dramatically slow this process.
Every storage decision you make — container, location, temperature — is about eliminating one or more of these four enemies. Get all four under control and your seeds can remain viable for five years or more.
Cannabis Seed Storage Conditions: The Exact Numbers
Optimal cannabis seed storage conditions mean hitting a specific, narrow window for both temperature and humidity — and holding them there consistently. Fluctuation is almost as damaging as being in the wrong range.
- Temperature: 6–8°C (42–46°F). This is the sweet spot — cold enough to suppress metabolic activity, warm enough to avoid freeze damage without special preparation.
- Relative Humidity: 20–30% RH. Seeds stay dormant, dry, and mold-free in this range.
- Light exposure: Zero. Store seeds in opaque containers or inside a dark compartment — no exceptions.
- Oxygen: Minimised. Airtight containers reduce oxidative degradation significantly.
Seed science research shows that for every 1% reduction in seed moisture content and every 5°C drop in storage temperature, seed longevity approximately doubles. This is known as Harrington's Rule, and it's why temperature precision matters so much in long-term cannabis seed storage.
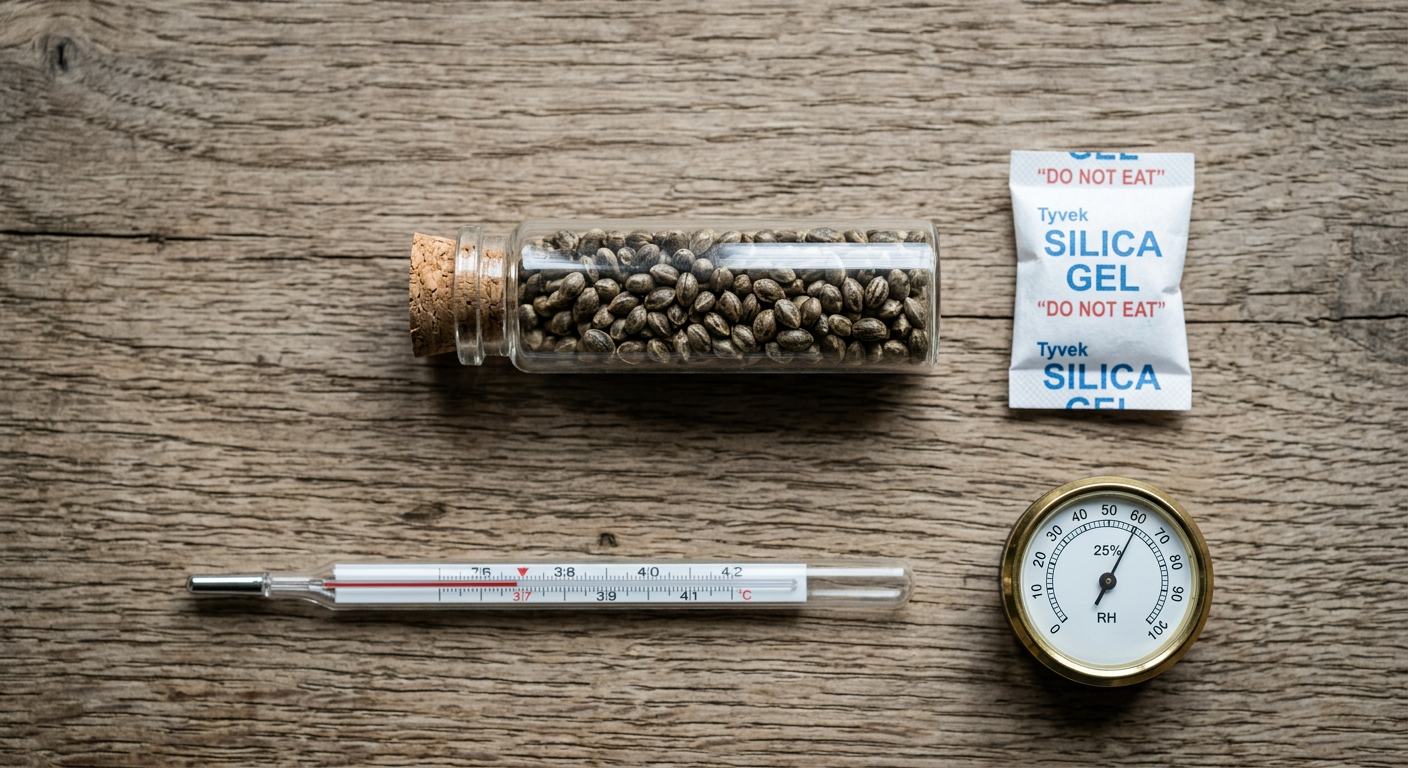
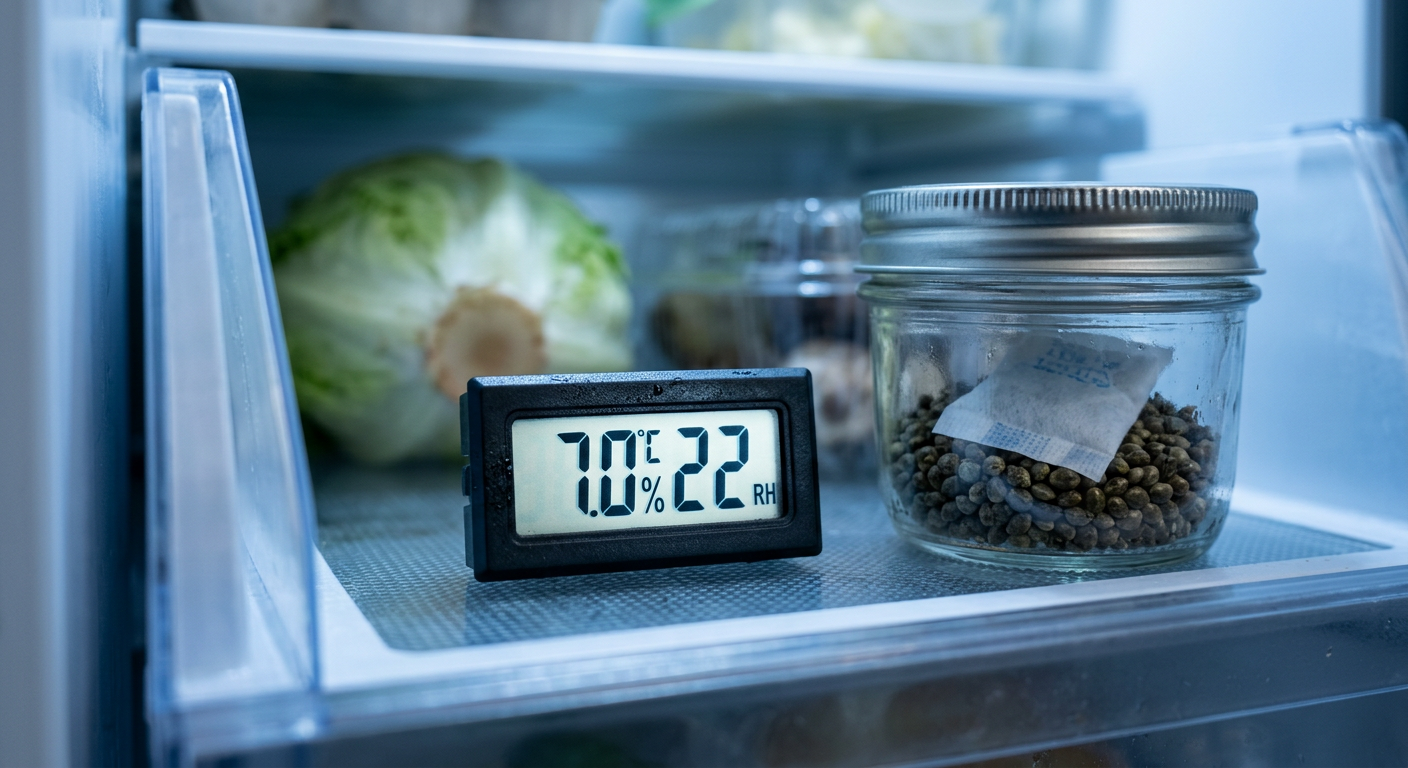
A mini digital hygrometer costs under £10 and can live inside your storage container to give you real-time readings. It is the single most useful piece of equipment in your seed storage kit — more important than the container itself.
Buy a two-in-one temperature and humidity sensor that fits inside a mason jar lid. Check it every two weeks initially to confirm your storage environment is stable before leaving seeds unattended for months.
Choosing the Right Container for Long-Term Seed Storage
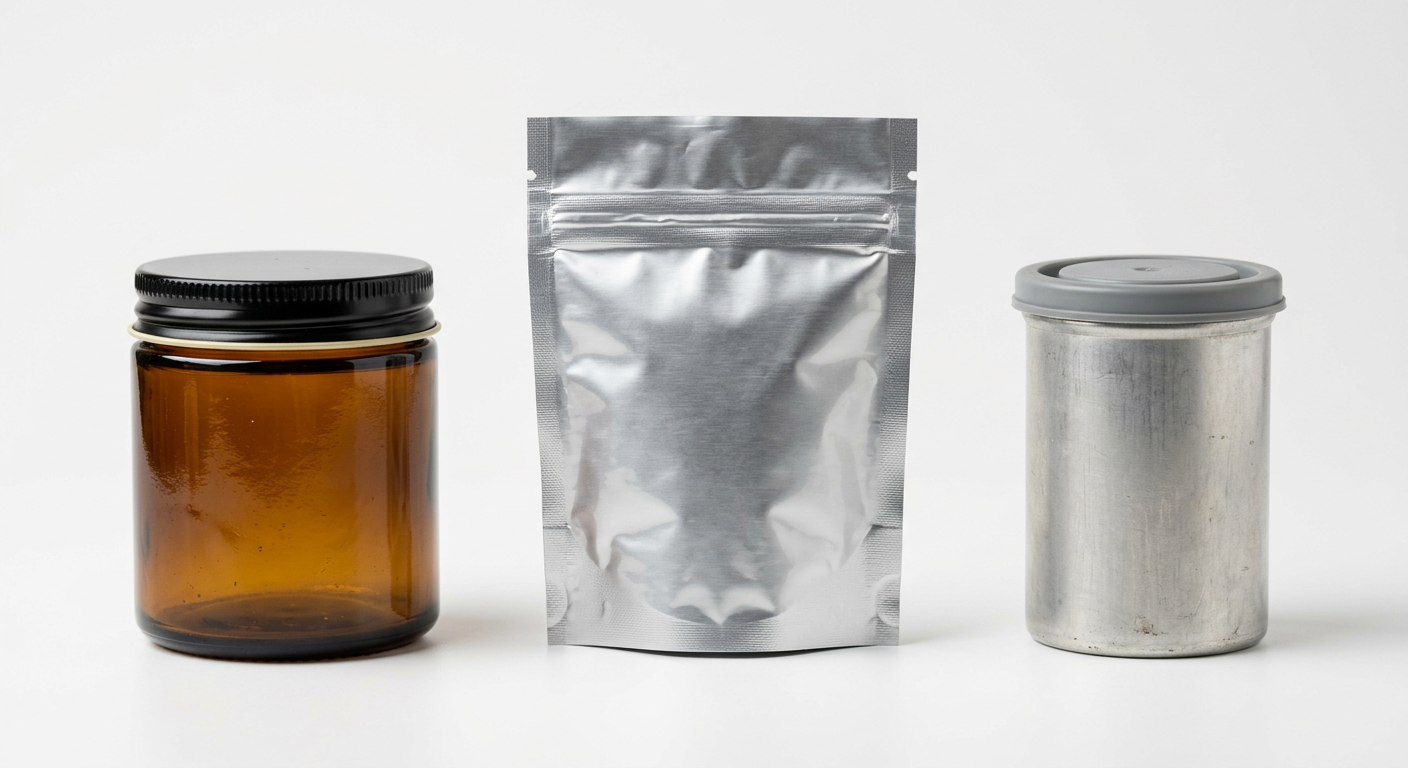
The container you choose determines how well you can control light, oxygen, and humidity simultaneously. Not all storage vessels are equal — and some common choices are surprisingly poor.
Airtight Glass Jars
Small amber or dark glass jars with rubber-sealed lids are the gold standard for seed storage. Glass is completely impermeable to gas and moisture exchange, unlike plastic. The amber tint blocks UV light without needing additional wrapping.
- Best for: 1–5 year storage in a fridge
- Size: 50–100ml jars hold multiple strain packets with room for a desiccant sachet
- Downside: fragile; thermal shock risk if moved from cold storage to warm room too fast
Mylar Pouches
Heat-sealed mylar bags block light completely and have excellent moisture-barrier properties. They are ideal for vacuum-sealing before freezer storage. Many serious collectors use mylar as the inner layer inside a glass or metal outer container.
- Best for: multi-year archival or freezer storage
- Size: small 50×70mm zip-lock mylar bags work perfectly for 5–20 seeds
- Downside: requires a heat sealer for best results; zip-lock versions allow some gas permeability
35mm Film Canisters
Old film canisters are a classic among experienced seed collectors and still work excellently. They are opaque, airtight enough for medium-term storage, and their small size makes organising multiple strains straightforward.
- Best for: 6–18 month storage
- Downside: increasingly hard to source; limited capacity; plastic degrades over years
What NOT to Use
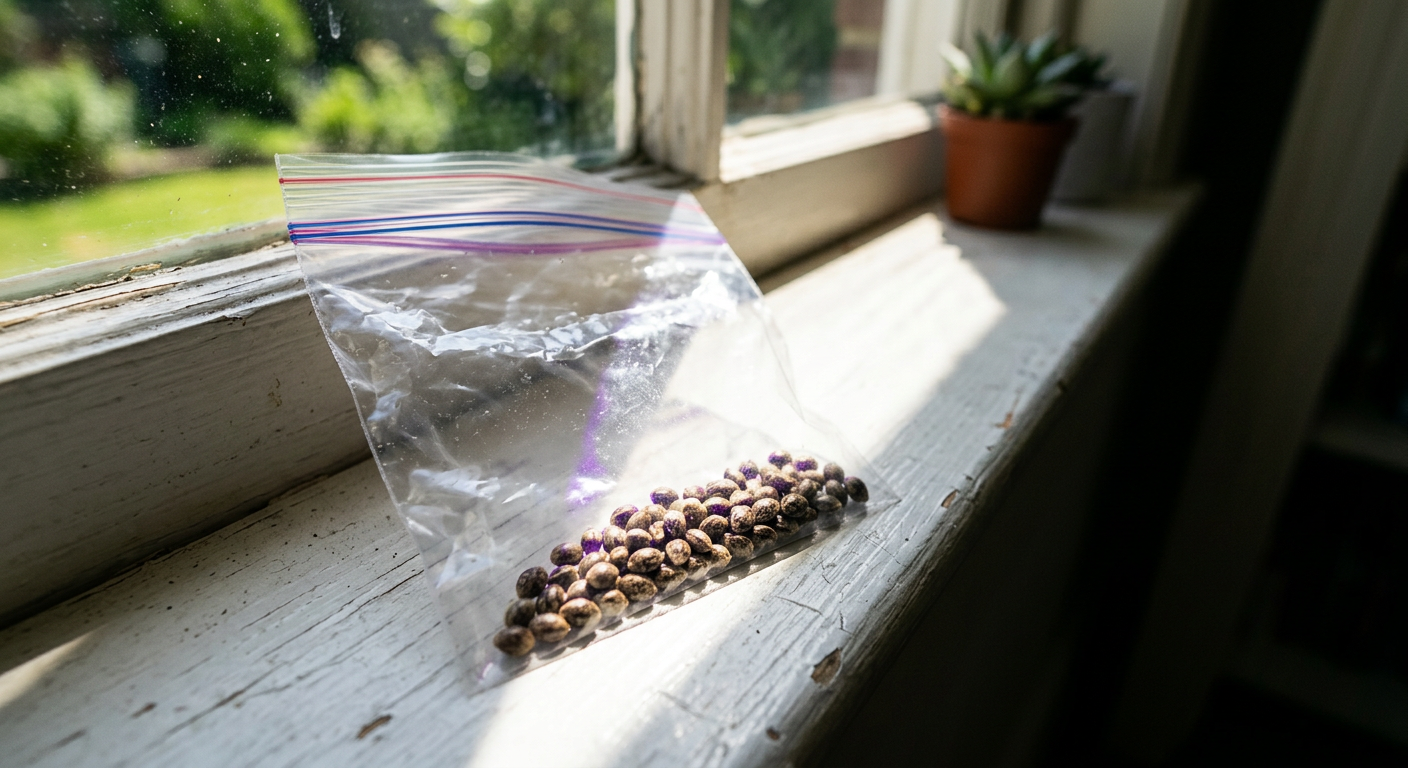
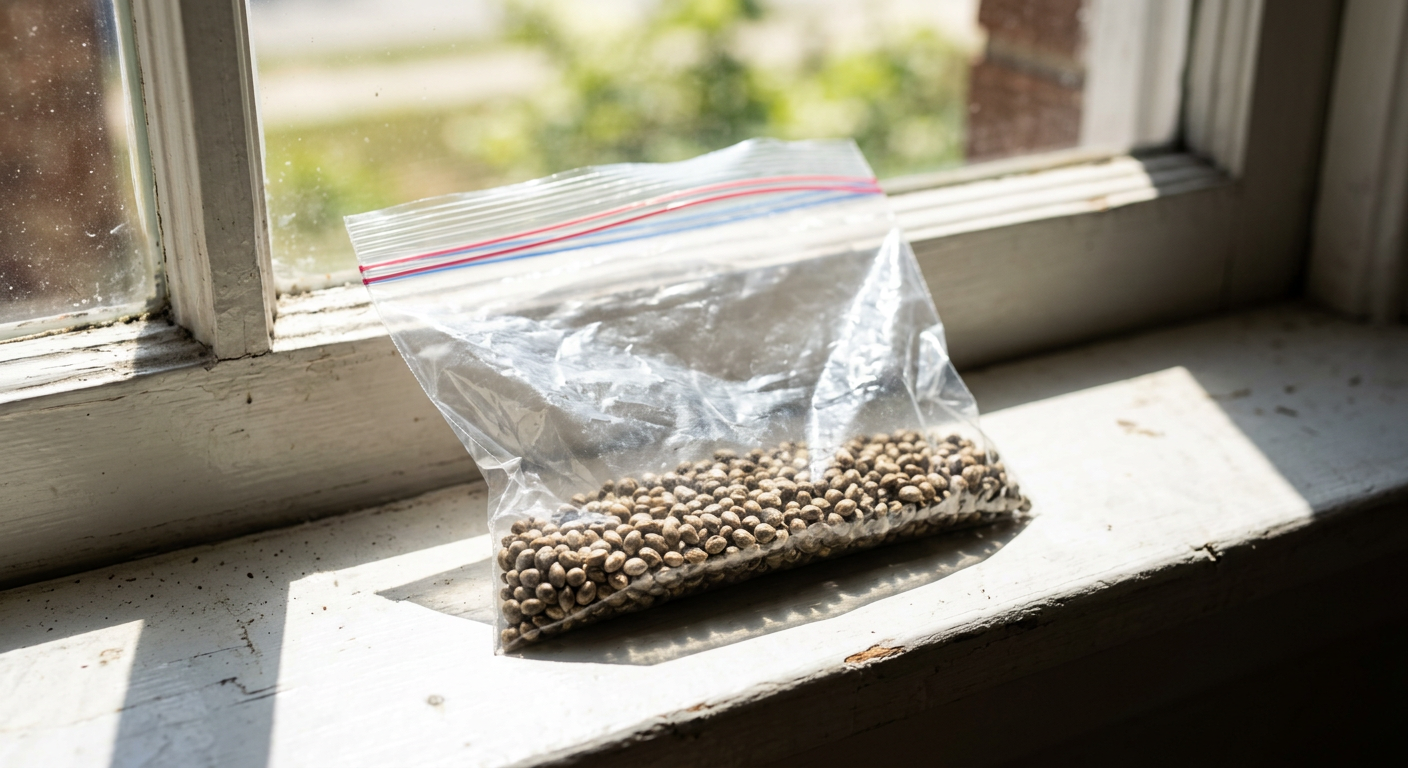
- Standard zip-lock plastic bags — gas-permeable and offer no light protection
- Paper envelopes alone — absorb ambient humidity and offer zero protection
- Clear glass jars without light protection — UV penetrates and triggers hormonal responses
- Pill bottles without desiccant — trap residual air humidity inside
| Container Type | Light Block | Moisture Seal | Best Storage Duration | Ease of Use |
|---|---|---|---|---|
| Amber Glass Jar | Yes (UV) | Excellent | 1–5+ years (fridge) | High |
| Mylar Pouch (heat sealed) | Yes | Excellent | 5+ years (freezer) | Medium |
| Film Canister | Yes | Good | 6–18 months | High |
| Zip-Lock Mylar Bag | Yes | Good | 1–3 years | High |
| Plastic Zip-Lock Bag | No | Poor | Days to weeks | High |
| Clear Glass Jar | No | Excellent | Not recommended | High |
Desiccants: Your Secret Weapon Against Moisture
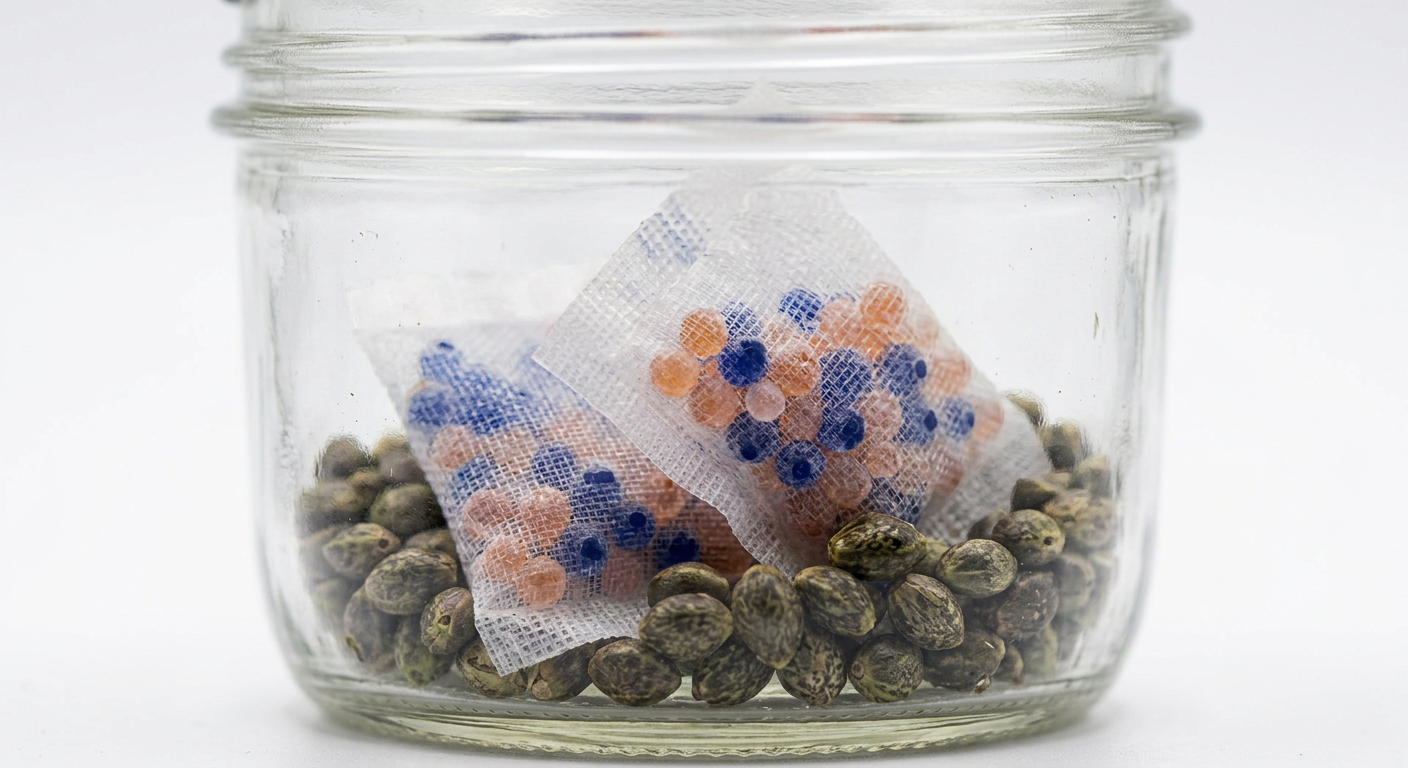
Even a perfectly sealed container traps whatever air — and humidity — was inside when you closed it. Desiccants absorb that residual moisture and keep your seeds bone-dry throughout storage. They are non-negotiable for any storage longer than a few weeks.
Silica Gel Packets
Silica gel is the most widely available and effective desiccant for seed storage. It is chemically inert and will not react with your seeds. Look for food-grade or indicating silica gel packets — the blue-to-pink or orange-to-green colour-change varieties tell you when they are saturated and need replacement or recharging.
- Use one 1g silica gel packet per 50–100ml of container volume
- Recharge saturated packets by placing them in an oven at 120°C for 2 hours
- Indicating packets change from blue/orange (dry) to pink/green (saturated)
Boveda Packs and Two-Way Humidity Control
Boveda packs are two-way humidity controllers — they absorb moisture when RH is high and release it when RH drops too low. The 32% Boveda packs sit at the upper edge of the ideal seed storage range. They are more expensive than silica gel but require no monitoring.
Never use rice as a desiccant for cannabis seed storage. Rice is a grain that can carry mold spores and doesn't provide reliable, measurable humidity control. It is a myth-level solution that has no place in serious seed preservation.
How Much Desiccant Do You Need?
- Small jar (50ml): 1 × 1g silica packet
- Medium jar (200ml): 2 × 1g silica packets
- Large mason jar (500ml): 1 × 5g silica packet
- Check colour indicators every 30–60 days during the first 6 months
Fridge vs Freezer: The Definitive Answer
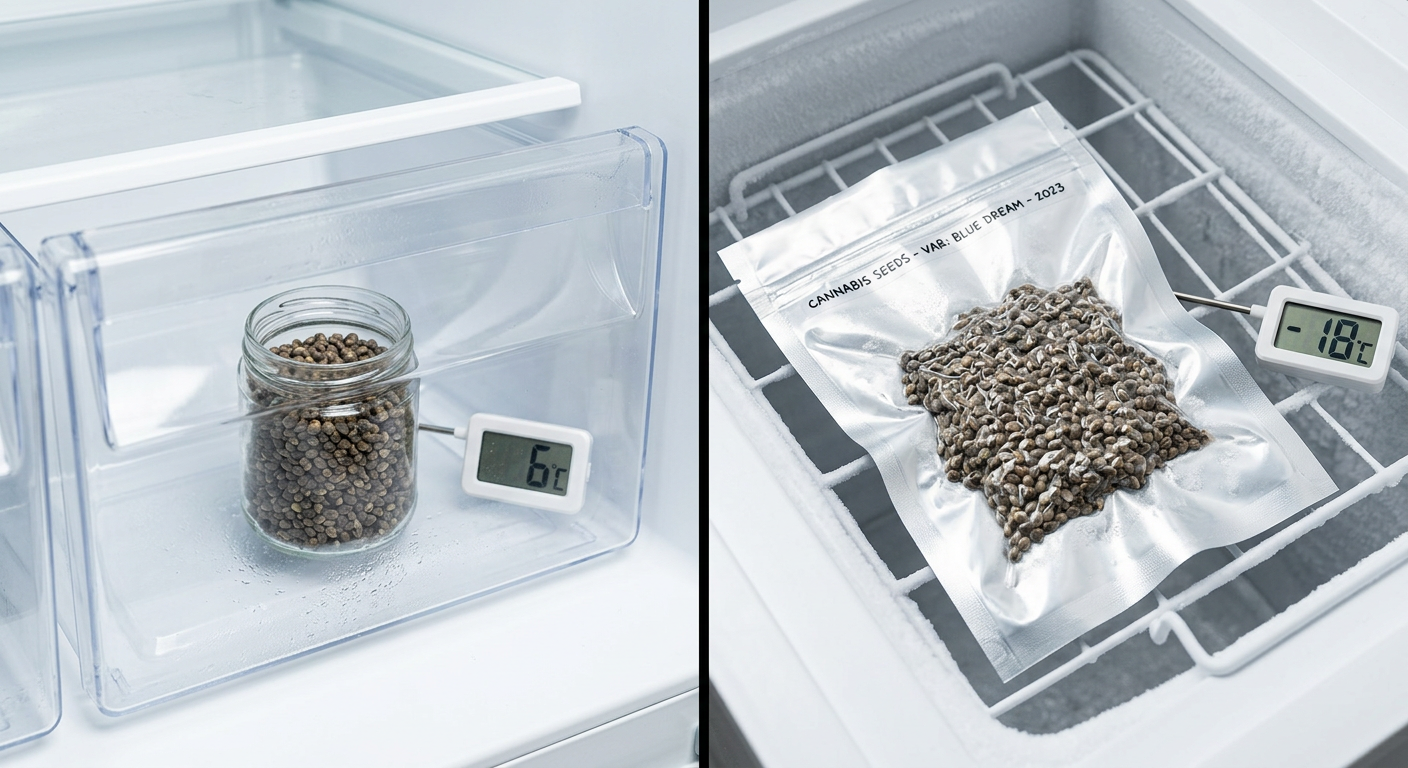
The fridge versus freezer debate is the most hotly contested topic in seed storage — and the answer depends on how long you plan to store seeds and how prepared you are to do it correctly. Here is a direct breakdown.
Refrigerator Storage (6–8°C)
The fridge is the right choice for the overwhelming majority of home growers. At 6–8°C, metabolic activity inside the seed nearly stops, humidity is controllable with desiccants, and seeds can last 2–5 years without sophisticated preparation.
- Use the vegetable crisper drawer — it has the most stable temperature
- Keep seeds away from the door (temperature fluctuates every time it opens)
- Place your sealed container inside a second opaque outer bag or box to prevent light exposure when the fridge door opens
- Always bring seeds to room temperature before opening containers (see below)
Freezer Storage (Below 0°C)
Freezer storage can preserve seeds for 10 years or more — but only when done correctly. Water molecules inside seed tissue expand when frozen. If seeds contain any residual moisture above 6–8%, that expansion ruptures cell walls irreversibly.
- Seeds must be at 6–8% moisture content or lower before freezing — achievable with 24–48 hours of silica gel conditioning
- Vacuum-seal in mylar pouches to eliminate oxygen and prevent frost crystal formation
- Never refreeze seeds once thawed — a single freeze-thaw-refreeze cycle can destroy viability
- Allow seeds to warm gradually to room temperature (still sealed) for 6–12 hours before opening
For seeds you plan to germinate within 1–3 years, the fridge at 6–8°C is the easiest, safest, and most reliable option. Reserve the freezer for genetic archiving — strains you want to preserve for a decade or more.
The Condensation Rule — Critical for Both Fridge and Freezer
When you move a cold container into a warm room, condensation forms on and inside it. This moisture can ruin seeds in minutes. Always let your sealed container reach room temperature before opening it — this takes at least 2–3 hours for fridge storage and 6–12 hours for freezer storage.
Opening a cold, airtight container before it reaches room temperature pulls warm, humid air inside as the container equalises pressure. This is one of the most common and most preventable causes of seed degradation in home storage setups.
Cannabis Seed Viability Timeline: How Long Do Seeds Last?
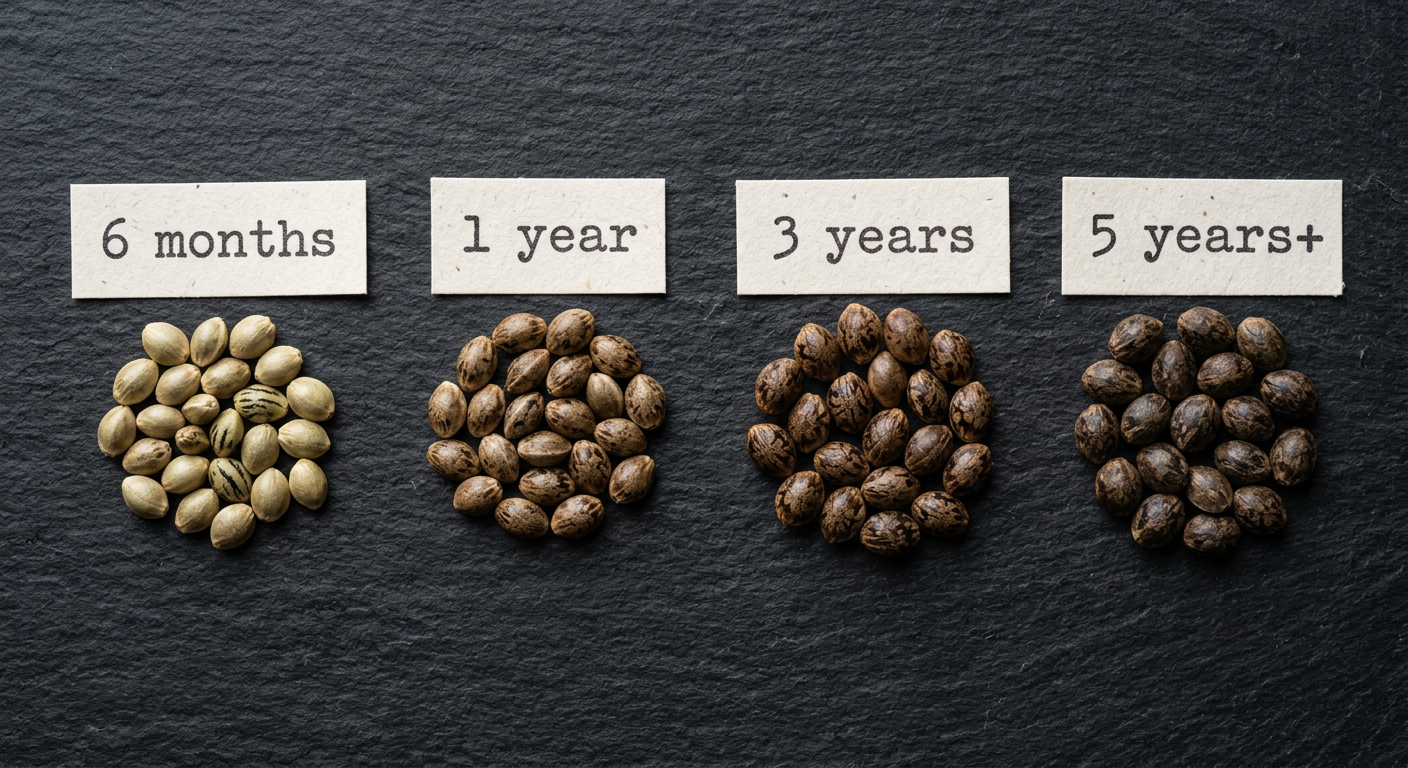
Cannabis seed shelf life varies enormously depending on storage conditions. The table below gives realistic viability expectations based on storage environment — these are germination success rates you can expect from a quality, well-bred seed batch.
| Storage Conditions | Expected Viability | Approx. Germination Rate |
|---|---|---|
| Room temp, no container, exposed | 2–6 months | Drops below 50% fast |
| Dark drawer, room temp, sealed bag | 6–12 months | 60–75% |
| Cool dark cupboard (15–18°C), glass jar + desiccant | 12–24 months | 75–85% |
| Fridge (6–8°C), airtight glass + desiccant | 2–5 years | 85–95% |
| Fridge (6–8°C), vacuum-sealed mylar + desiccant | 5–7 years | 80–90% |
| Freezer, vacuum-sealed mylar, pre-conditioned | 10+ years | 70–85% (if done correctly) |
These figures assume seeds were fresh and high-quality at the time of storage. Poorly bred seeds, seeds with cracks or thin shells, and seeds that experienced stress before storage will degrade faster regardless of conditions.
Seed viability is not binary — it doesn't flip from 100% to 0% on a specific date. Germination rates decline gradually. A batch that was 95% viable at purchase might be 80% viable after 3 years of fridge storage. You simply factor in lower rates and germinate extra seeds to compensate.
If you are planning a full grow from stored seeds, use our grow planner tool to map out your timeline and account for germination rates before you commit to a flowering schedule.
How to Test Old Seed Viability Before You Commit to a Full Grow
Before you set up your entire grow space around seeds that have been sitting in the fridge for two years, run a quick viability test. It costs you nothing but 3–5 days and tells you exactly what germination rate to expect from your stored batch.
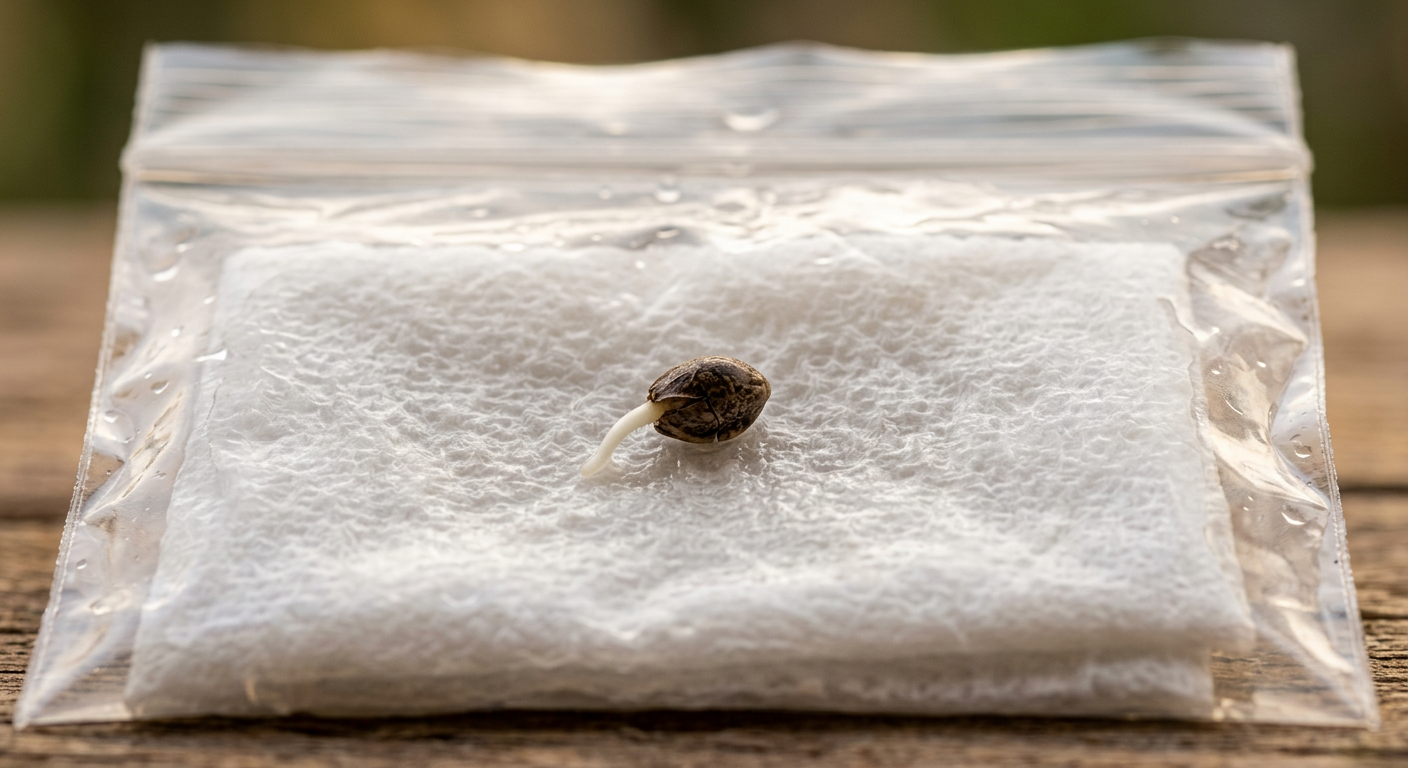
The Paper Towel Germination Test
Bring Seeds to Room Temperature
Remove your sealed container from the fridge and leave it sealed at room temperature for at least 3 hours. Do not skip this — opening cold seeds exposes them to condensation.
Select Your Test Sample
Choose 10 seeds from the batch (or all of them if fewer than 10 remain). Testing 10 makes the maths simple — each sprouted seed equals 10% germination rate.
Prepare the Damp Paper Towel
Dampen a paper towel with plain, room-temperature water. It should be moist but not dripping — squeeze it out if water drips from it. Lay seeds on one half and fold the towel over them.
Seal and Store
Place the folded paper towel inside a clean zip-lock bag, seal it, and keep it somewhere consistently warm — 21–26°C. A heat mat set low works perfectly. Keep it away from direct light.
Check at 48, 72, and 96 Hours
Open the bag daily to check for taproots. Most viable seeds show a 2–5mm white taproot within 48–72 hours. Slow starters may take 96–120 hours. Any seed showing no taproot by day 5 should be considered non-viable.
Interpret Your Results
Count the sprouted seeds and calculate your germination percentage. Use this rate to plan how many seeds to germinate per desired plant. If 7 out of 10 sprouted, you have 70% viability — germinate 15 seeds to reliably achieve 10 plants.
- 70%+ germination rate — batch is in good shape, proceed confidently
- 50–69% germination rate — viable but declining, germinate extras as buffer
- 30–49% germination rate — significantly degraded, consider ordering fresh stock
- Below 30% germination rate — batch is largely non-viable, replace seeds
For seeds that do sprout from your viability test, transfer them carefully to your growing medium — don't waste them. The complete germination guide covers exactly how to handle taproots from the paper towel method without damaging them.
You can also use our plant diagnosis tool once seedlings emerge to catch any early stress signs that might indicate seeds were stored at the edge of viability.
Step-by-Step: Setting Up Your Long-Term Seed Storage System
Here is how to build a complete, reliable storage setup from scratch. Follow these steps in order the day your seeds arrive.
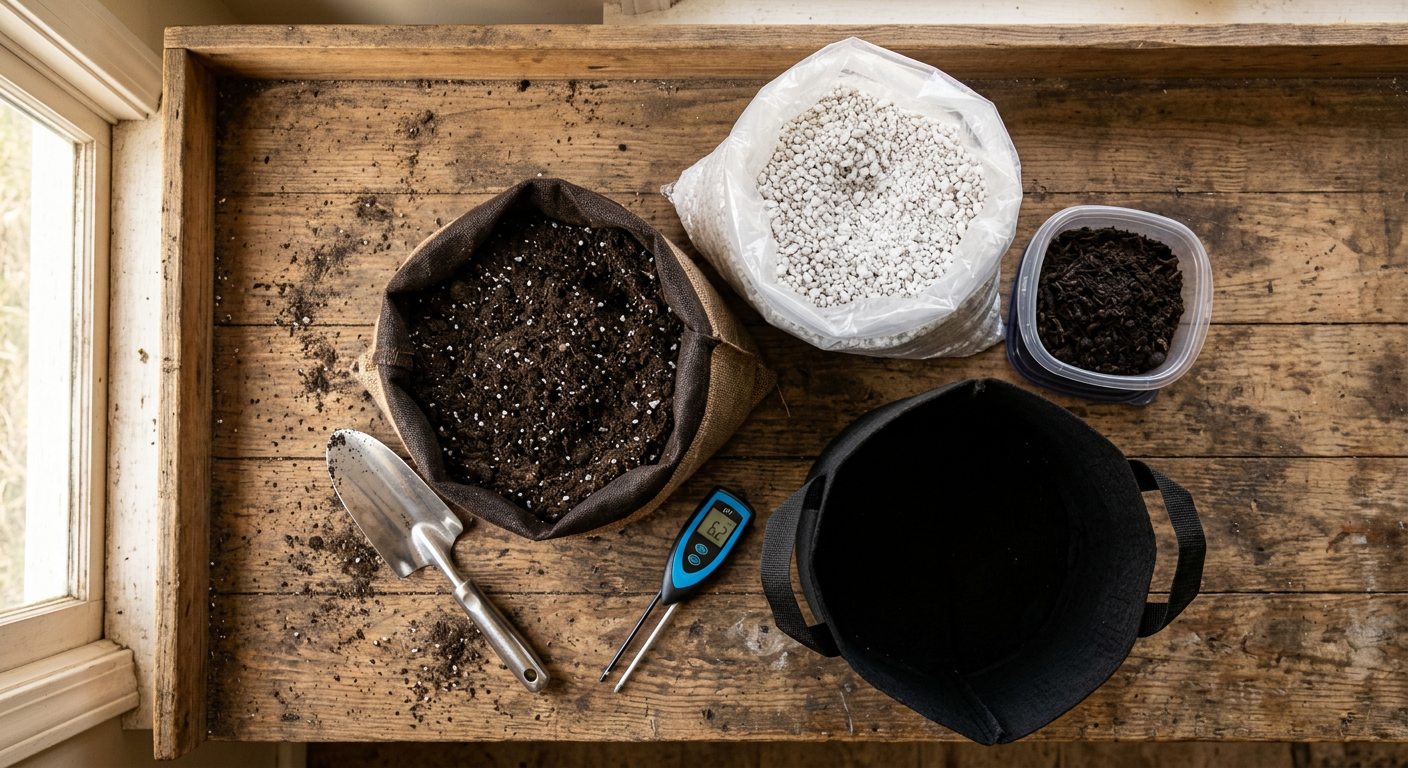
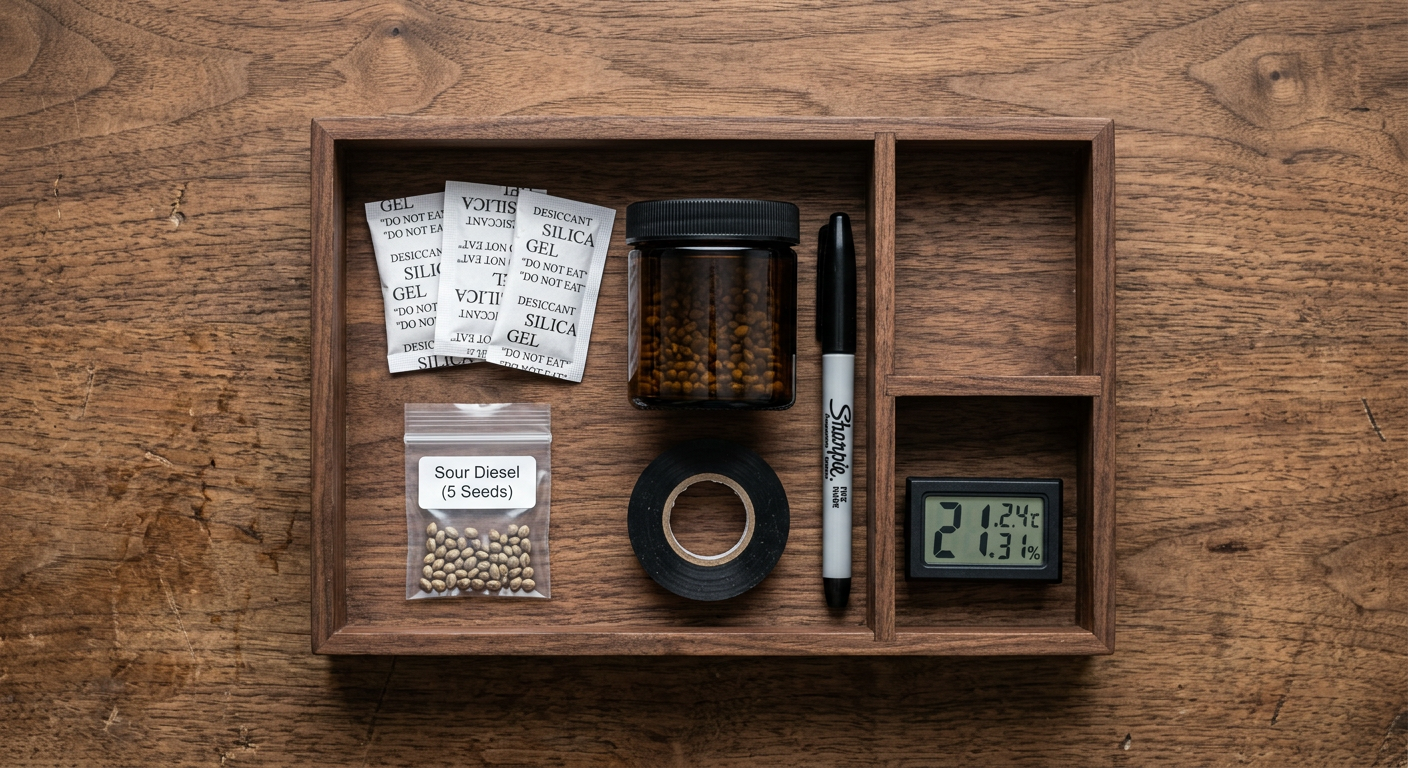
Gather Your Supplies
You need: one small amber glass jar with a rubber-sealed lid, one 1g indicating silica gel packet, a permanent marker, a small piece of paper for labelling, and a mini hygrometer (optional but strongly recommended).
Label Everything Before Sealing
Write the strain name, THC percentage, date received, and seed count on a paper label. Place it inside the jar so it cannot rub off. You will not remember which unmarked jar contains which strain in three years.
Keep Seeds in Their Original Packaging
Many seed breeders use packaging that already offers some moisture and light protection. Keep seeds inside the original envelope or vial and place that inside your glass jar. This adds an extra barrier layer.
Add Your Desiccant and Seal
Drop one silica gel packet into the jar alongside the seeds. Seal the lid firmly. If using a mason jar, add a small strip of black electrical tape over the lid to ensure no light enters through any gap.
Place in the Fridge — Correct Location
Put the sealed jar in the vegetable crisper drawer or the rear middle shelf of your fridge — not the door. Both locations offer stable temperature away from the warm air that rushes in when you open the fridge door.
Monitor and Maintain
Check the desiccant indicator colour every 4–6 weeks for the first three months. Replace or recharge the silica packet if it turns pink or green. After confirming the environment is stable, you can check quarterly.
- Amber glass jar with rubber seal
- 1g indicating silica gel desiccant packet
- Mini digital hygrometer (optional but recommended)
- Permanent marker and paper label
- Black electrical tape
- Consistent fridge location identified
- Seeds in original packaging where possible
- Reminder set to check desiccant in 4 weeks
Store multiple strains in separate labelled jars inside a single larger airtight container, like a 1L glass jar or a metal tin. This creates a second layer of environmental control and keeps your seed collection organised in a single dedicated space in your fridge.
Common Seed Storage Mistakes (And How to Avoid Them)
Even experienced growers make preventable storage errors. These are the most damaging habits to break before they cost you your genetics.
Mistake 1: Storing Seeds at Room Temperature Long-Term
Leaving seeds in a drawer or cupboard at 18–22°C is the most common error. At this temperature, residual metabolic activity continues slowly consuming the seed's energy stores. Viability drops measurably within 12 months and significantly within 18–24 months — compared to 5+ years in a fridge.
Mistake 2: Opening Cold Containers Immediately
As covered above, cold containers pulled from the fridge and opened immediately allow warm, humid air to condense inside. Thirty seconds of condensation exposure can add enough moisture to trigger metabolic activity. Always let containers warm to room temperature sealed.
Mistake 3: Using the Fridge Door for Storage
The fridge door experiences the widest temperature swings — it warms every time the door opens and cools every time it closes. Those repeated fluctuations are almost as damaging as being stored warm. Use the rear of the main shelf or a crisper drawer instead.
Mistake 4: Skipping the Label
Unlabelled seeds are a problem you create for your future self. Dark, mottled seeds from different strains can look nearly identical. Without a label including the strain name and storage date, you have no way to know germination age or expected plant characteristics.
Mistake 5: Putting Cracked or Damaged Seeds Into Long-Term Storage
Seeds with visible cracks, splits, or very pale colouring should be germinated immediately, not stored. Their protective shells are compromised, meaning humidity and oxygen can reach the embryo directly — degradation accelerates dramatically. Check seeds at purchase and germinate any visibly damaged ones first.
The genetics inside a well-stored seed are as good on day one as they are in year five. Storage mistakes don't change the genetics — they just prevent the seed from expressing them. Every mistake above is avoidable with five minutes of setup time at the beginning.
Which Strains Are Worth Long-Term Storage?
Not all seeds warrant the same storage investment. Understanding which genetics deserve a 5-year preservation strategy helps you prioritise your setup.
High-Value Genetics Worth Preserving
Rare, limited-edition, or high-THC photoperiod strains are the best candidates for long-term storage. Strains like Gorilla Glue #4, Wedding Cake, and Gelato have developed legendary reputations — when you find quality versions, protecting them for future grows makes sense. Similarly, any strain you have personally dialled in over multiple grows is worth preserving carefully.
Among feminized strains worth long-term preservation, high-potency varieties command attention. OG Kush Feminized at 26% THC and Purple Kush Feminized at 27% THC represent genetics that reward careful storage. Quantum Kush Feminized at 30% THC is among the highest-potency options available and absolutely worth a dedicated storage setup to protect the investment.
For growers who favour sativa-leaning profiles, New York Power Diesel Feminized at 24% THC and Sour Diesel Feminized at 24% THC have the kind of distinct terpene signatures that make them worth storing for multiple future grows. Read more about genetic stability in our cannabis strain stability guide if you want to understand what makes certain genetics worth preserving across seasons.
Autoflowers and Long-Term Storage
Autoflowering seeds can be stored using identical methods to photoperiod seeds. Their genetic structure doesn't make them more or less susceptible to storage conditions. Skywalker OG Autoflower at 23% THC and Amnesia Haze Autoflower at 17% THC are examples of autoflower genetics worth preserving for growers who value the flexibility of light-schedule-independent growing.
If you're weighing whether to store feminized or autoflowering seeds for future grows, our autoflower vs photoperiod growing guide covers the long-term grow strategy differences in detail.
When you purchase a strain you love, consider buying an extra pack specifically for long-term storage. Set it aside, store it correctly, and treat it as a genetic backup. If the strain ever becomes unavailable, you have insurance. Heirloom preservation thinking applies to modern cultivars too — our heirloom cannabis strains guide covers why this matters.
Strains to Germinate Sooner Rather Than Later
- Seeds with any visible shell damage or cracks — compromised protective coating
- Seeds that feel hollow or very light — likely underdeveloped embryo
- Very pale or solid green seeds — often immature at harvest
- Seeds from unknown storage history — baseline viability unknown
If you're ready to plant now rather than store, head directly to our germination guide for step-by-step instructions from water to taproot. And if you're planning your setup, the complete indoor grow tent setup guide will walk you through everything that comes next.
Tracking Your Seed Collection Over Time
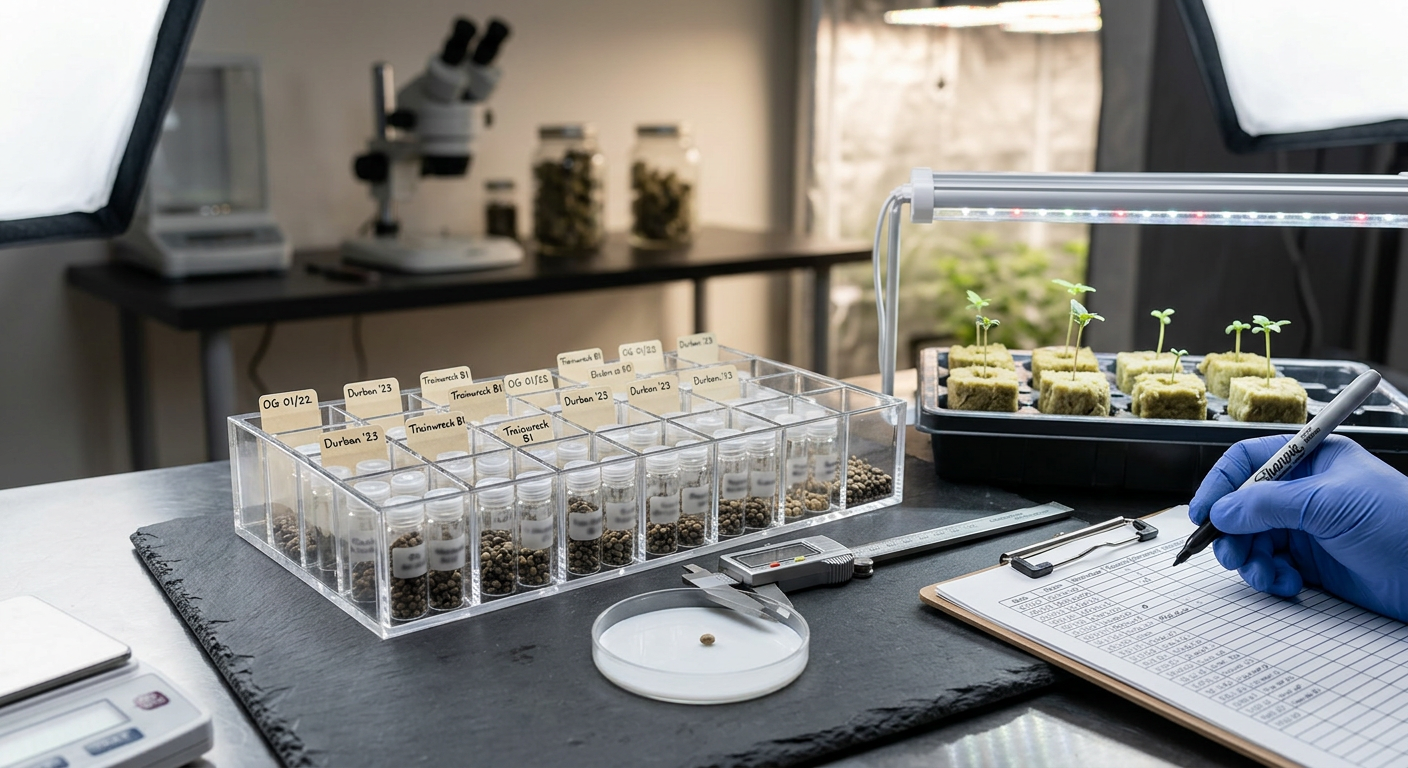
Once you have more than two or three strains in storage, a simple tracking system saves you from confusion and helps you germinate older seeds before newer ones. Seed collections grow faster than most growers expect.
What to Record for Each Seed Batch
- Strain name and type (feminized / autoflower / regular)
- THC percentage and dominant effects
- Date purchased and date placed into storage
- Seed count at storage date
- Any germination test results with dates
- Notes on storage location (which jar, which drawer section)
A simple spreadsheet, a notes app, or even a paper notebook inside your seed storage box all work equally well. The system only fails if you skip updating it.
First in, first out is the rule for seed rotation. Always germinate your oldest stored seeds before opening fresh packs. Even well-stored seeds have a ceiling on viability — using them in order preserves your newest genetics as long as possible.
When you're ready to plan a full grow around seeds you've pulled from storage, use the yield estimator tool and grow cost calculator to build a realistic projection before you commit resources.
Do cannabis seeds go bad?
Yes. Seeds degrade over time when exposed to heat, humidity, light, or oxygen. Under poor conditions, viability drops within months. Stored correctly at 6–8°C with 20–30% RH in a dark, airtight container, quality seeds can remain viable for 5 years or more. Degraded seeds don't vanish — they simply germinate at lower rates or fail to germinate at all.
Can you freeze marijuana seeds?
Yes, but proper preparation is essential. Seeds must be at very low moisture content (6–8%) before freezing, achieved by conditioning with silica gel for 24–48 hours. Then vacuum-seal them in mylar pouches before placing in the freezer. Never refreeze seeds after thawing. For seeds you'll use within 1–2 years, fridge storage at 6–8°C is safer and simpler.
What humidity level is best for storing cannabis seeds?
The ideal relative humidity for cannabis seed storage is 20–30% RH. At this range, seeds stay dormant, dry, and free from mold risk. Above 40% RH, seeds begin activating metabolic processes. Below 8% RH, seeds become brittle. Use an indicating silica gel desiccant packet inside a sealed container to maintain this range without active monitoring.
How do I know if my cannabis seeds are still viable?
Run a paper towel germination test. Place 10 seeds on a damp paper towel, fold it over, seal it in a zip-lock bag, and keep it at 21–26°C. Check after 48–72 hours. A 70% or higher sprout rate means the batch is in good condition. Below 50% indicates significant degradation — consider supplementing with fresh seeds to hit your target plant count.
Can I store cannabis seeds in a plastic bag?
Not for anything beyond a few days. Plastic bags are gas-permeable, allowing moisture to pass through over time. They offer no light protection and no meaningful barrier against humidity fluctuation. Use airtight amber glass jars or heat-sealed mylar pouches for any storage longer than a week. Plastic bags are suitable only for short-term transport, not preservation.