

You spent months dialing in your grow — the perfect VPD, the right light schedule, the ideal nutrients. Then harvest day arrives, and the most common mistake in cannabis cultivation happens: the drying environment gets treated as an afterthought.
A proper cannabis drying room setup is not a luxury. It is the single biggest factor separating hay-smelling, harsh cannabis from smooth, terpene-rich buds that actually reflect the genetics you worked so hard to grow. This guide gives you the exact numbers, the science behind them, and every DIY option — from a spare closet to a dedicated drying box — so you never lose another harvest to bad drying conditions.
The Science of Slow Drying: Why Your Environment Is the Product
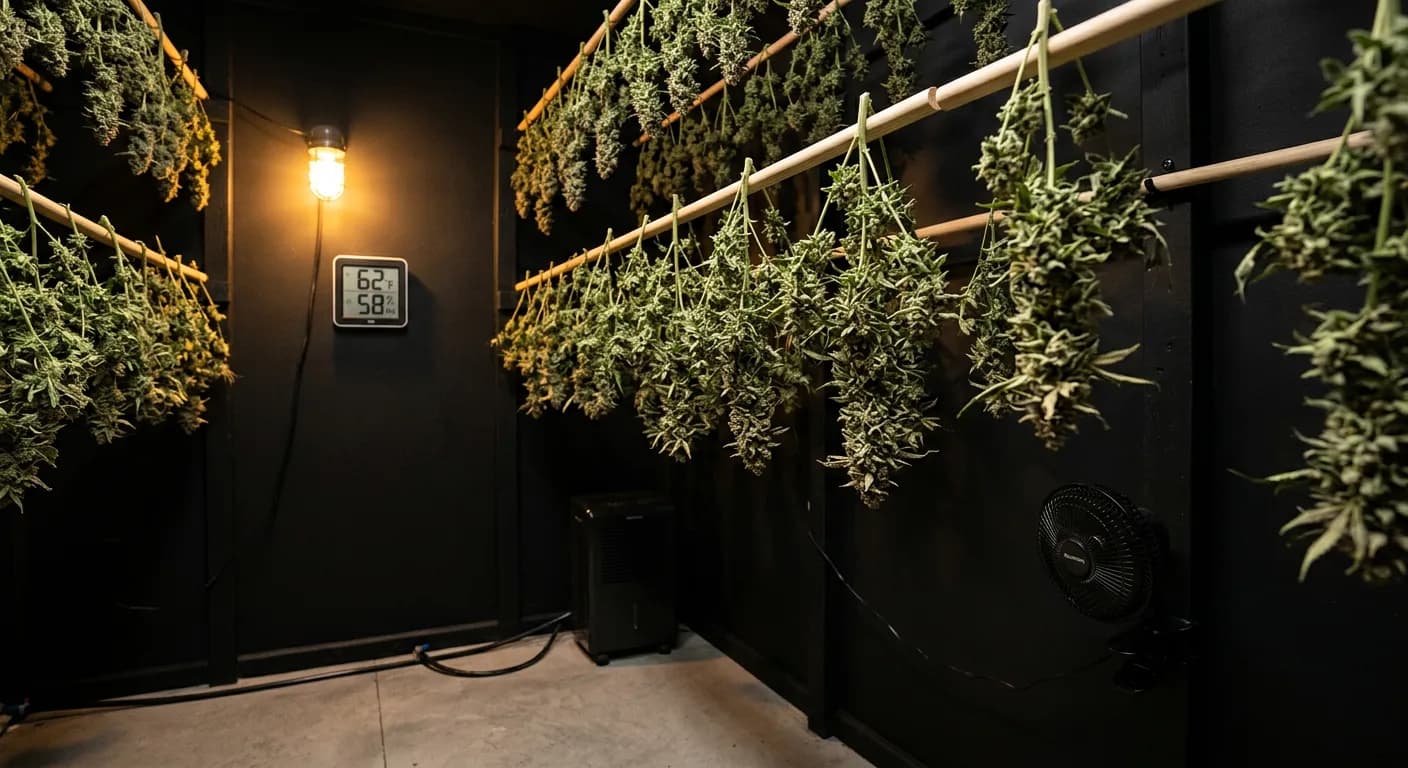
The ideal cannabis drying environment targets 60–65°F (15–18°C) and 55–60% relative humidity, maintained for 10–14 days in complete darkness with indirect, low-speed airflow. These conditions allow chlorophyll to break down naturally, preserve volatile terpenes, and produce buds that cure properly.
Most growers know they should dry slowly. Fewer understand why — and that understanding is what actually changes behavior when you are tempted to crank up the heat and finish in five days.
Chlorophyll Breakdown: The Chemistry Behind Hay Smell
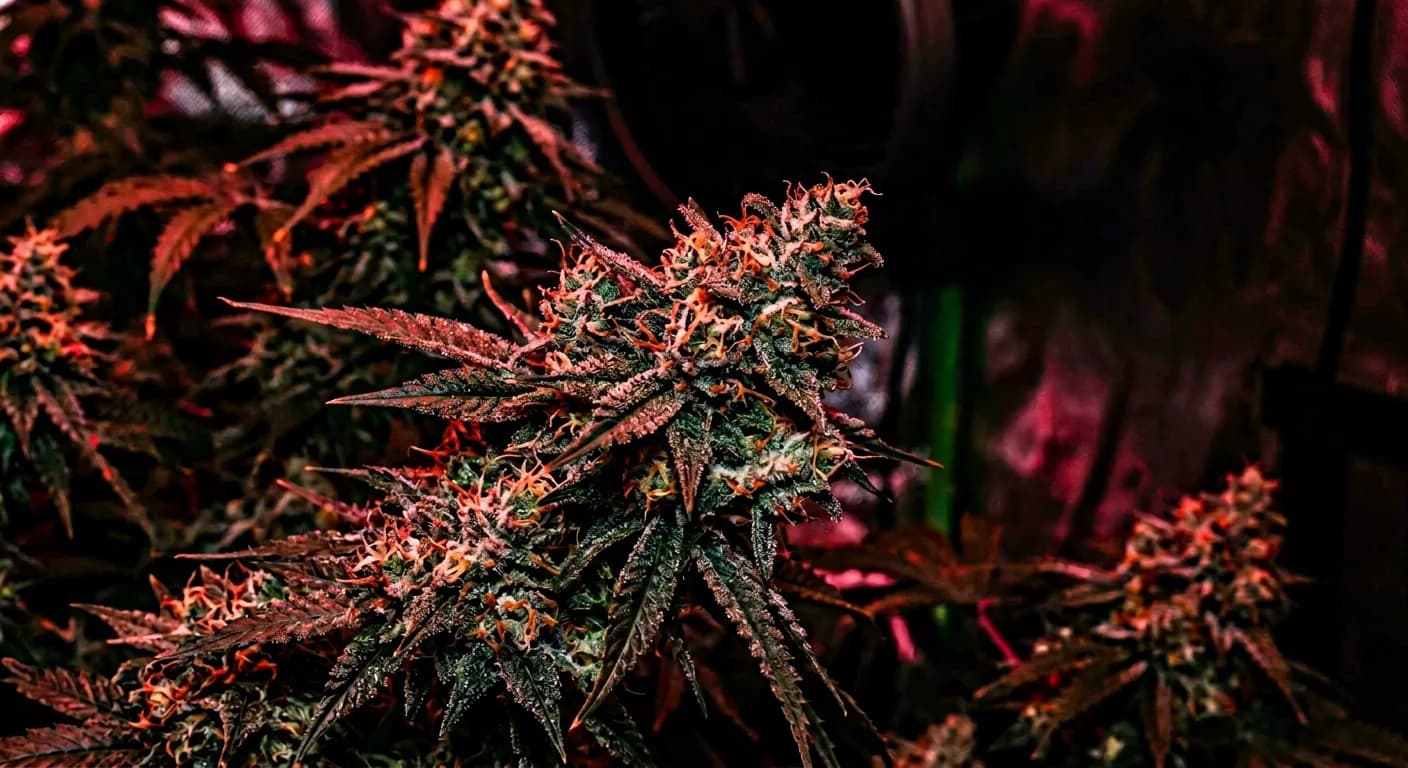
Fresh-harvested cannabis contains high concentrations of chlorophyll — the same green pigment responsible for photosynthesis. Chlorophyll has a sharp, grassy, hay-like smell. In living plants, this smell is masked by the abundance of terpenes. After harvest, the terpene-to-chlorophyll ratio changes dramatically as volatile terpenes begin to evaporate.
When buds dry slowly at moderate humidity (55–60% RH), enzymatic and microbial activity continues inside the plant tissue. Chlorophyllase enzymes break chlorophyll down into colorless, odorless byproducts called pheophytins and pheophorbides. This process takes time — roughly 10–14 days at the right temperature.
The chemistry behind hay smell: Fast drying at high temperatures (above 70°F) or very low humidity (below 45% RH) desiccates the outer bud surface before chlorophyllase enzymes can finish their work. The outer cells die too fast, locking chlorophyll inside a dry shell. The result is a bud that smells and tastes like a freshly cut lawn — no matter how good the genetics. Slow drying gives enzymes time to finish the job.
Terpene Preservation: Why Temperature Is Everything
Terpenes are volatile organic compounds — they evaporate readily, especially under heat. The most fragile terpenes, including myrcene, linalool, and the lighter monoterpenes like terpinolene, begin evaporating at temperatures well below the boiling point of water.
Research on essential oil volatility shows that at 70°F (21°C), monoterpene evaporation rates increase roughly 2–3x compared to 60°F (15°C). At 80°F, you can lose 15–25% of your light terpene fraction within the first three days of drying. This is not theoretical — it is why buds dried in a hot garage smell flat even after a full cure.
- Below 60°F: Enzymatic breakdown slows significantly, extending drying to 16+ days and increasing mold risk
- 60–65°F: Sweet spot — slow enough for chlorophyll breakdown, cool enough to retain volatile terpenes
- 65–70°F: Acceptable but increases terpene loss, especially for light, citrus-forward strains
- Above 70°F: Terpene evaporation accelerates sharply, hay smell risk rises, drying becomes uneven
Every degree above 65°F during drying costs you terpenes you spent an entire grow cycle producing. The drying environment is where genetics either shine or get erased.
The Ideal Cannabis Drying Room Environment: Exact Numbers
The perfect cannabis drying environment runs at 60–65°F and 55–60% relative humidity with zero direct light, indirect low-speed airflow achieving 0.3–0.5 air changes per minute, and enough space between branches that buds do not touch each other.
Temperature: The 60–65°F Target
This range is not arbitrary. At 60–65°F, the drying process takes long enough (10–14 days) for complete chlorophyll breakdown while keeping evaporation rates low enough to preserve terpene profiles. If your space runs cooler than 60°F, aim to stay above 55°F — below that, enzymatic activity drops sharply and mold risk increases as moisture stays in the bud longer.
Humidity: The 55–60% RH Sweet Spot
Humidity is your primary speed control for drying. Higher humidity slows the surface evaporation rate, pulling moisture from deep inside the bud more evenly. Lower humidity speeds the outer drying and creates the classic problem: crispy outside, wet inside.
- Below 45% RH: Buds dry too fast (5–7 days), chlorophyll survives, hay smell almost guaranteed
- 45–54% RH: Acceptable in warm conditions, watch closely for uneven drying
- 55–60% RH: Ideal — even moisture migration, full chlorophyll breakdown, best terpene retention
- 61–65% RH: Acceptable in cool rooms (60–62°F), slight mold risk increase
- Above 65% RH: Significant mold risk, especially for dense indica buds — use a dehumidifier immediately
High-humidity regions: If you live in a humid climate — the Pacific Northwest, Southeast USA, most of the UK — your drying space will naturally trend above 60% RH. Do not try to compensate by raising temperature. Instead, add a small dehumidifier rated for the room size. Running at 65% RH is far safer than running at 65% RH and 75°F.
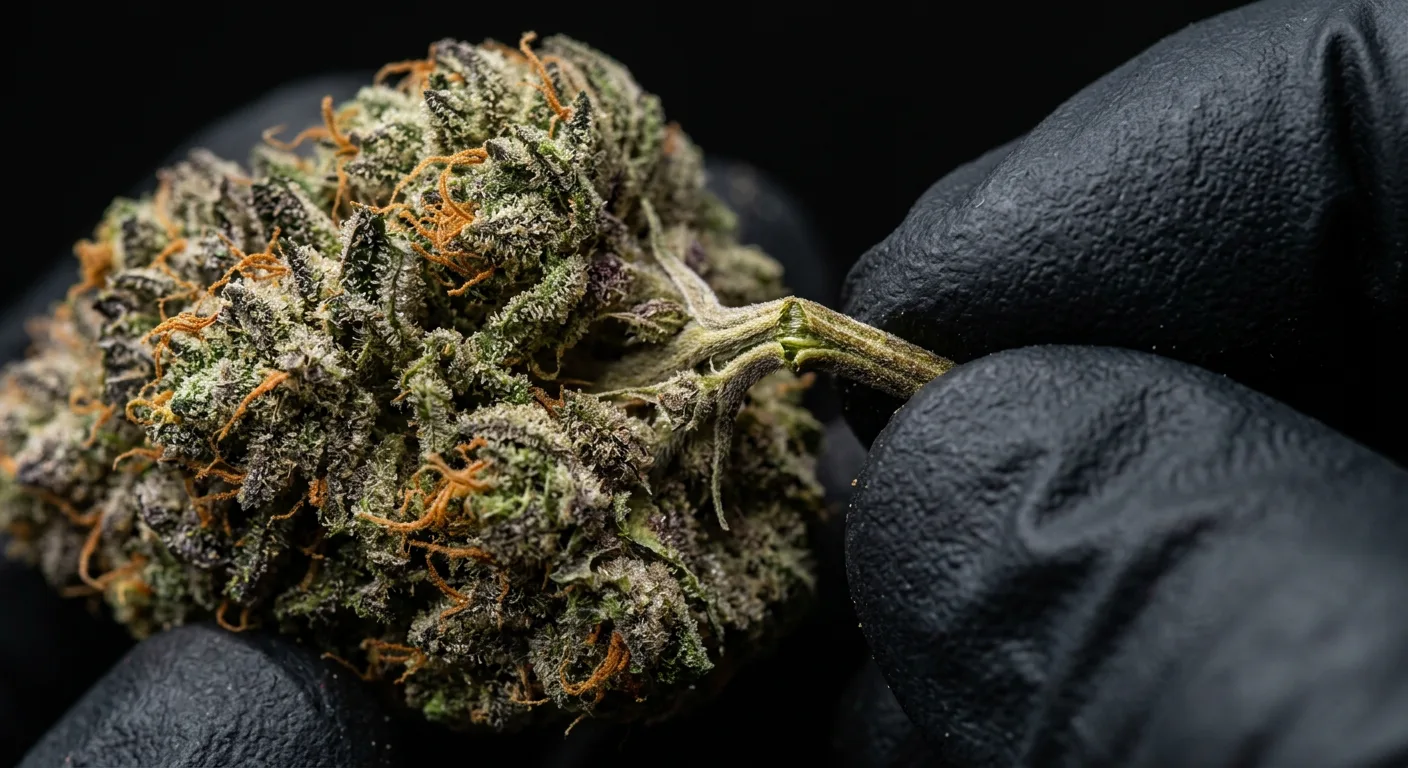
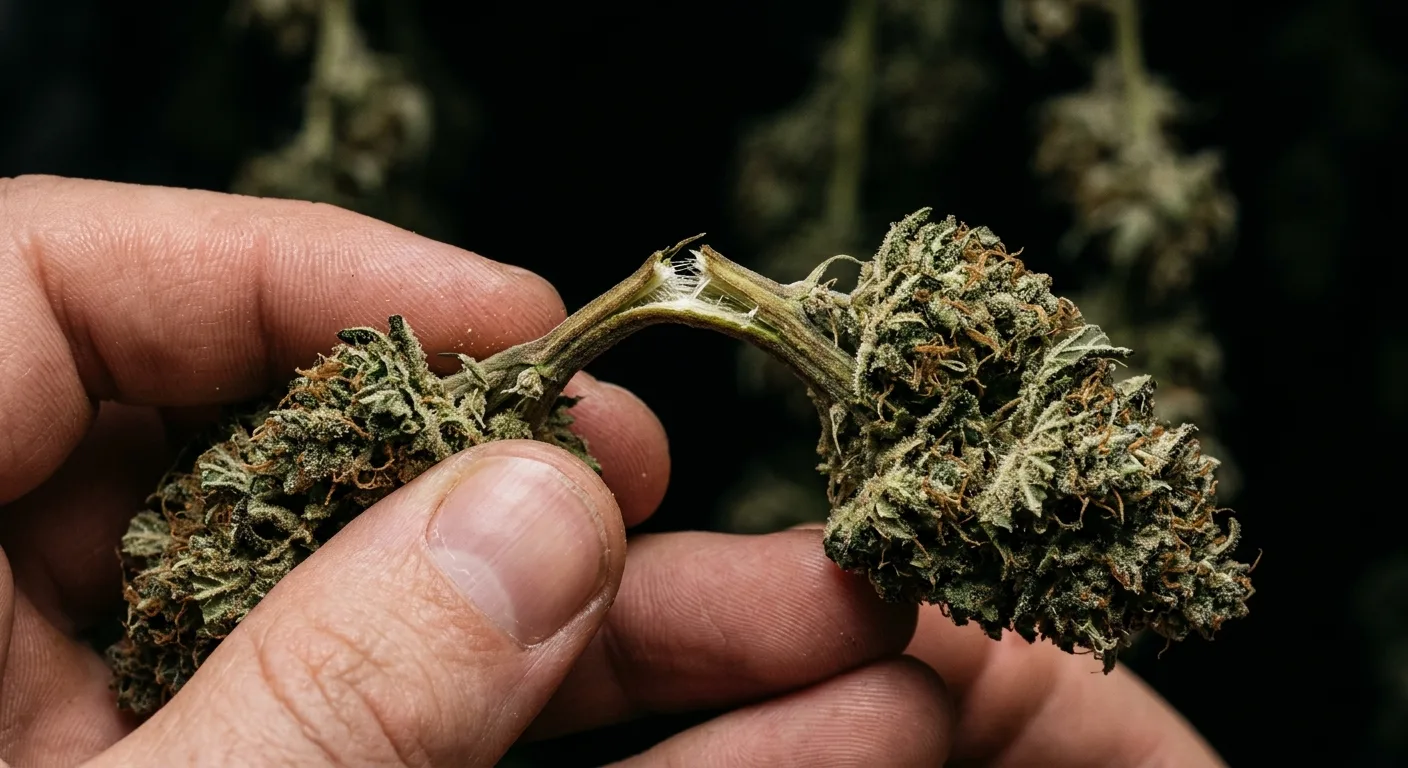
The Stem Snap Test: Your Built-In Hygrometer
Equipment fails. The stem snap test does not. When small stems (pencil-diameter or thinner) snap cleanly instead of bending, the outer bud structure has reached the correct moisture level for jarring. Larger stems should still have some flexibility — they finish drying during the cure.

Do not skip this check even if your timer says day 10. Humidity fluctuations, bud density, and room size all affect actual drying time. The snap test catches what numbers miss.
Airflow in the Drying Room: The Indirect Airflow Principle

Airflow in a drying room should move air gently around the room, not blow directly at hanging buds. Use an oscillating fan on the lowest speed setting aimed at a wall or floor, achieving a slight air movement you can feel with your hand at 3 feet but that does not visibly move the hanging branches.
Why Indirect Airflow Beats Direct Fan-on-Buds
Blowing a fan directly at hanging cannabis does two damaging things. First, it dramatically accelerates surface evaporation on the fan-facing side of each bud, creating the crispy-outside-wet-inside problem that ruins the cure. Second, it causes terpenes on the windward surface to volatilize faster than those on the sheltered side, creating uneven aroma and flavor development.
Indirect airflow — fan aimed at a wall, oscillating across the room — accomplishes the real goal: preventing the stagnant, humid air pockets that form around densely hanging buds and create mold hotspots. The buds experience gentle, variable air movement from all directions rather than a constant blast from one side.
Pro tip — The hand test: Set up your fan, then walk to the hanging buds and hold your hand 6 inches from them. You should feel a subtle air movement — like the draft you feel near a slightly open window — not a noticeable breeze. If the branches are swaying, the fan speed is too high. If the air feels completely still and warm, increase speed one notch.
Exhaust-Only vs Oscillating Fan Setups
Many growers in tents rely on their existing exhaust fan to create airflow during drying. This works as a backup but creates a directional pull of air that can dry unevenly depending on where buds hang relative to the intake and exhaust ports.
| Airflow Method | Pros | Cons | Best For |
|---|---|---|---|
| Oscillating floor fan (low) | Even coverage, gentle, adjustable | Requires extra equipment | Any setup — best all-around |
| Exhaust fan only (low speed) | Uses existing equipment | Directional pull, uneven drying | Tent setups as secondary airflow |
| Clip fan on wall aimed away | Cheap, easy to position | Fixed direction, not oscillating | Small closets, cardboard boxes |
| No active airflow | None | Stagnant air, mold risk | Never — even a crack-open door helps |
The ideal setup combines a low-speed oscillating fan for gentle air circulation with a passive or low-speed exhaust to maintain fresh air exchange. In a 4x4 tent, your inline fan on the lowest speed plus a small oscillating fan aimed at the tent wall covers both requirements perfectly.
Why Darkness Matters: Light Is the Enemy of Terpenes

Cannabis buds must dry in complete darkness because UV and visible light — especially wavelengths below 400nm — accelerate the oxidative degradation of both THC (converting it to CBN) and terpenes. Even indirect window light over 10–14 days causes measurable potency and aroma loss.
The UV Degradation Problem
THC is converted to the mildly psychoactive but sedating cannabinoid CBN through a two-stage process: oxidation followed by UV photodegradation. During drying, when buds are no longer protected by living plant tissue, this process accelerates. A study published in the Journal of Pharmacy and Pharmacology identified light exposure as one of the four primary factors causing cannabinoid degradation in stored cannabis — alongside temperature, humidity, and oxygen.
Terpenes face the same issue. Limonene, pinene, and other light monoterpenes are particularly vulnerable to photodegradation. Even fluorescent room lighting can cause surface-level terpene oxidation over a 10-day drying period.
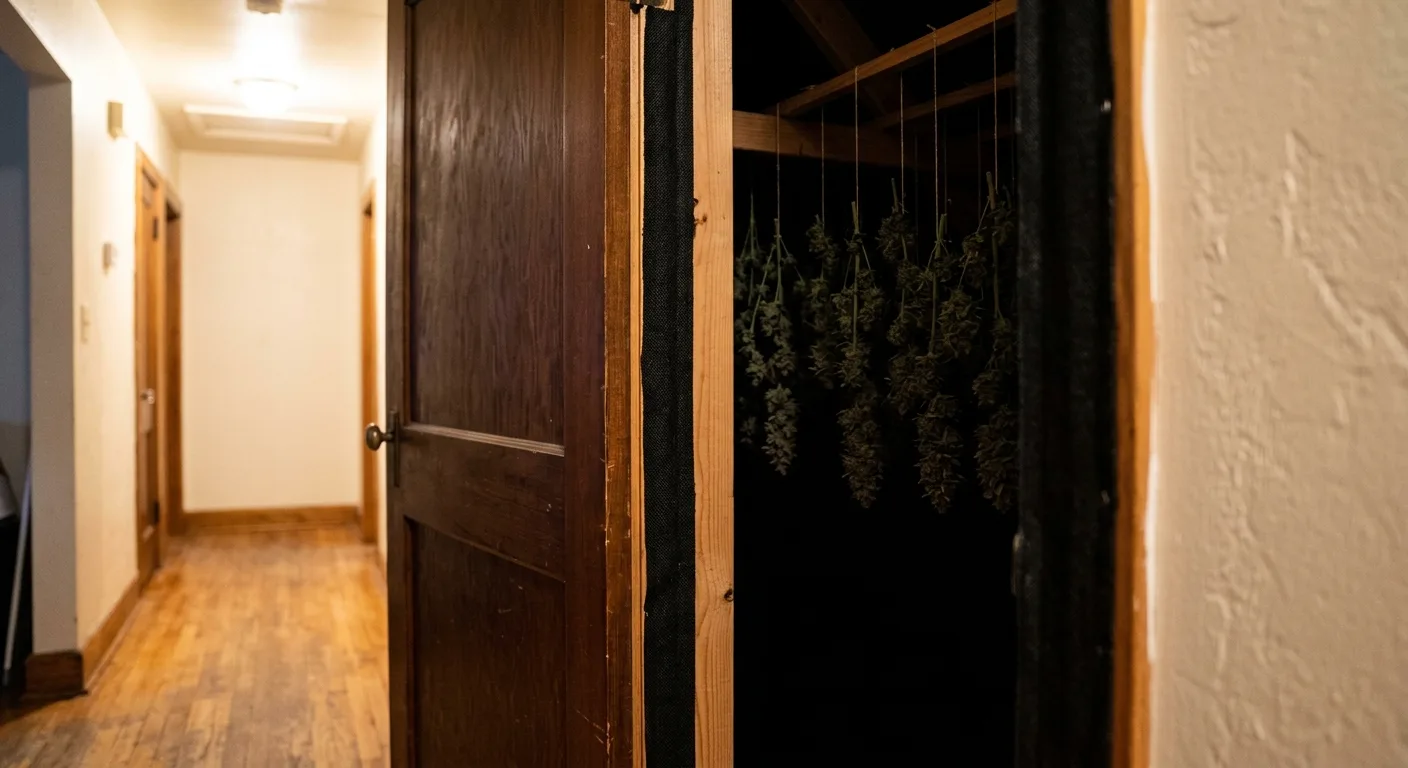
Drying in the dark is not optional. A drying closet with the door shut, a tent with the ports closed, or a dedicated dark room all work. A garage with a skylight, a room with uncovered windows, or a space with grow lights left on do not — regardless of how good everything else is.
What About the Pre-Harvest Dark Period?
If you practiced a pre-harvest dark period before cutting your plants, you already gave trichomes a head start on maximum development. The drying dark period continues that protection by preventing any post-harvest degradation from reversing those gains.
DIY Cannabis Drying Locations: Pros, Cons & Real Setup Costs
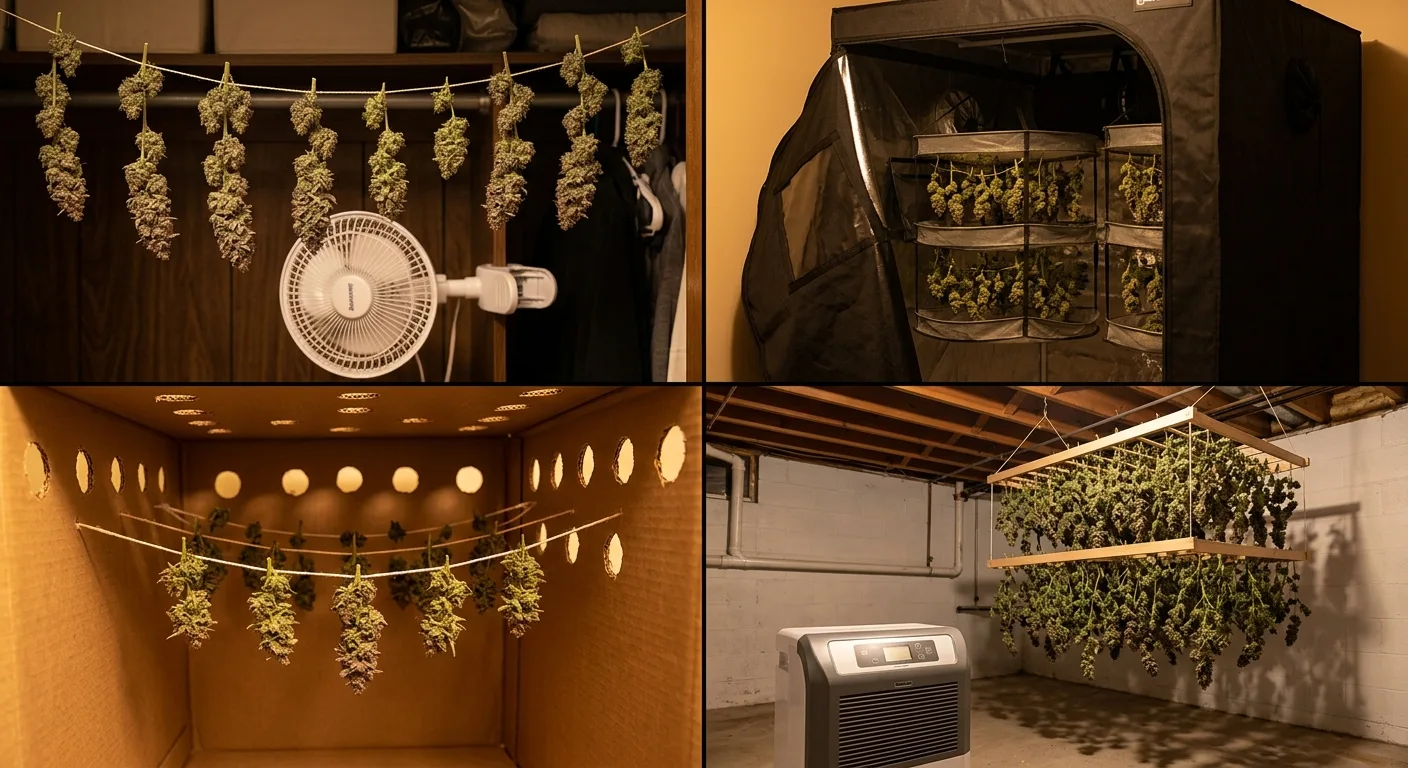
The five most practical DIY drying locations for home growers are: a spare closet, a grow tent between runs, a dedicated drying box, a basement, and a cardboard box setup. Each has specific strengths and weaknesses depending on your climate, available space, and harvest size.
Option 1: Spare Bedroom Closet
A standard bedroom closet is the most common home drying location — and for good reason. Closets are naturally dark, have limited air volume that is easy to control with a small fan, and maintain more stable temperatures than open rooms.
- Pros: Already built in, naturally dark, easy to hang a wooden dowel across the width, stable microclimate
- Cons: Small harvests only (typically 1–4 plants), humidity hard to control in humid climates, smell will permeate adjacent rooms without a carbon filter
- Setup cost: $0–$40 (wooden dowel + hygrometer + small clip fan)
- Recommended add-ons: A small USB fan aimed at the back wall, a hygrometer/thermometer combo, a mini carbon filter hung inside if odor is a concern
Closet hack: Hang a wooden curtain rod or tension rod at shoulder height. Attach S-hooks every 4–6 inches. Each branch needs at least 2 inches of clearance from neighbors. A standard 6-foot closet can handle 8–12 large branches without crowding.
Option 2: Grow Tent Between Runs
Using your existing grow tent as a drying space between harvest and the next seedling stage is one of the smartest efficiency moves available to home growers. The tent already has hanging points, intake/exhaust ports, and a sealed environment.
- Pros: Purpose-built sealed environment, existing hanging infrastructure, easy to add a dehumidifier or small AC, inline fan already installed
- Cons: Delays starting next run by 10–14 days, residual fertilizer smell from growing media can compete with bud aroma if not cleaned first
- Setup cost: $0 extra (uses existing equipment) — add a $15–$25 hygrometer if you do not already have one
- Key adjustment: Turn off grow lights completely, reduce inline fan to lowest setting, add a small oscillating fan aimed at the tent wall
In a 4x4 grow tent, you can comfortably hang 4–6 full plants worth of branches. A 2x4 tent handles 2–3 plants. Do not overcrowd — airflow between branches matters as much as total fan speed.
Option 3: Dedicated Drying Box (DIY Build)
A DIY drying box is the gold standard for growers who harvest regularly and want consistent results without waiting for their tent to be free. Build it from a plywood box, an old wardrobe, or even a large IKEA cabinet.
- Pros: Harvest any time without interrupting the grow cycle, can be purpose-built to ideal dimensions, easy to add carbon filtration and climate control
- Cons: Upfront build time and cost, requires a separate space in your grow room or home
- Setup cost: $50–$200 depending on size and materials
- Essential features: Sealed door with weather stripping, internal hanging rails, passive intake holes covered with mesh at the bottom, a 4-inch inline fan with carbon filter at the top, and a digital hygrometer/thermometer inside
Option 4: Basement or Utility Room
A cool, naturally humid basement is often a near-perfect drying environment without any modification. Many basements in temperate climates run naturally at 60–65°F and 55–65% RH — exactly the target range.
- Pros: Large space for big harvests, naturally stable temperature and humidity, darkness is easy to achieve
- Cons: Humidity can be too high in wet seasons (needs dehumidifier), difficult to control odor in a large open space, potential pest issues if basement is not sealed
- Setup cost: $20–$150 (hanging rack + hygrometer + dehumidifier if needed)
Option 5: Cardboard Box (Emergency/Small Harvest)
For micro-growers, a large cardboard box with ventilation holes cut in opposite sides works for drying small quantities — up to 2 ounces of dry weight. It is not a long-term solution, but it is genuinely functional for a single-plant harvest.
- Pros: Free, naturally buffers humidity slightly due to cardboard absorption, completely dark
- Cons: Zero climate control, limited airflow, cardboard can absorb moisture and develop mold in humid conditions, not scalable
- Setup: Cut 4–6 two-inch holes on each short side, lay a wooden skewer across the top inside for hanging, place a small clip fan outside one hole set to lowest speed, check daily
Never use a cardboard box in humid climates (above 65% ambient RH). The cardboard absorbs moisture, stops buffering, and becomes a mold risk itself within 3–4 days. Stick to a closet or tent if your environment is naturally humid.
Equipment Guide: What You Actually Need vs What's Optional
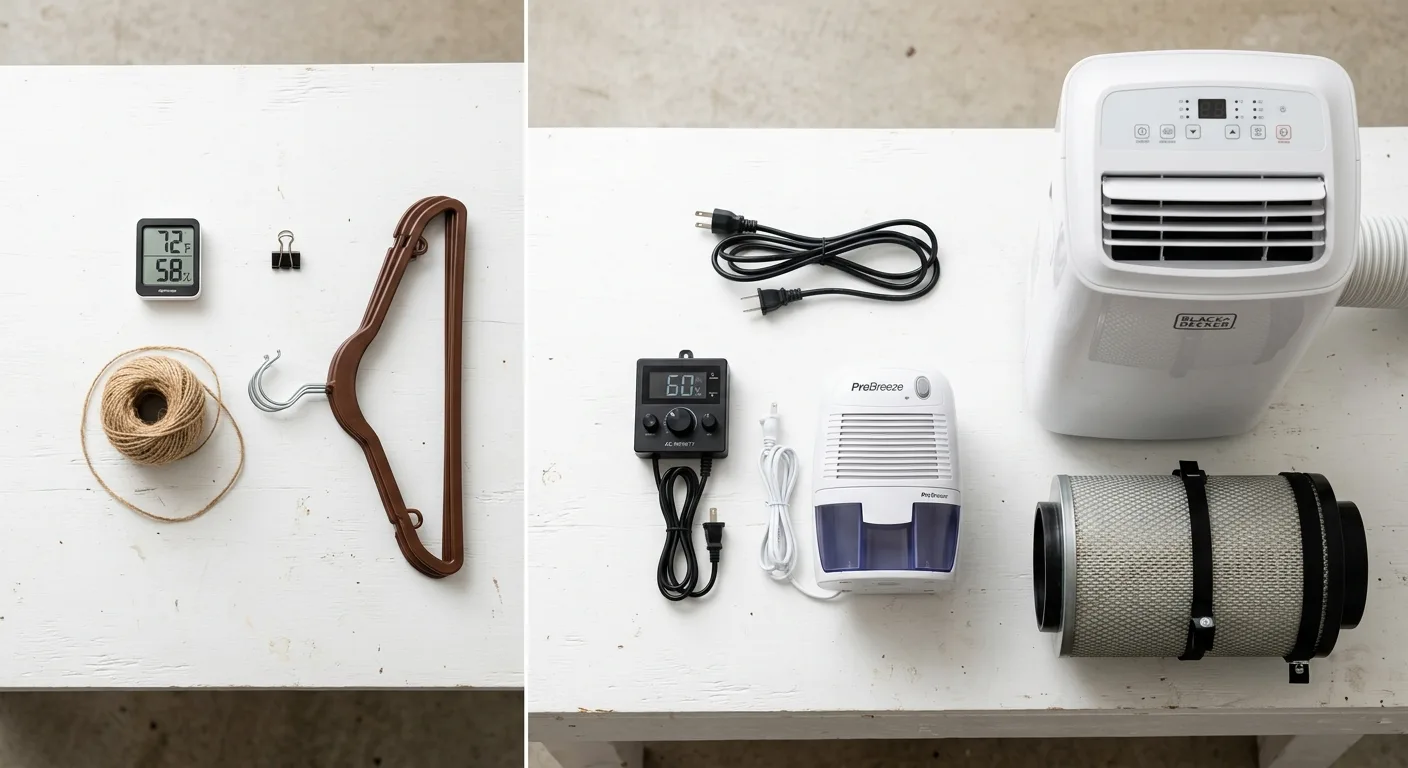
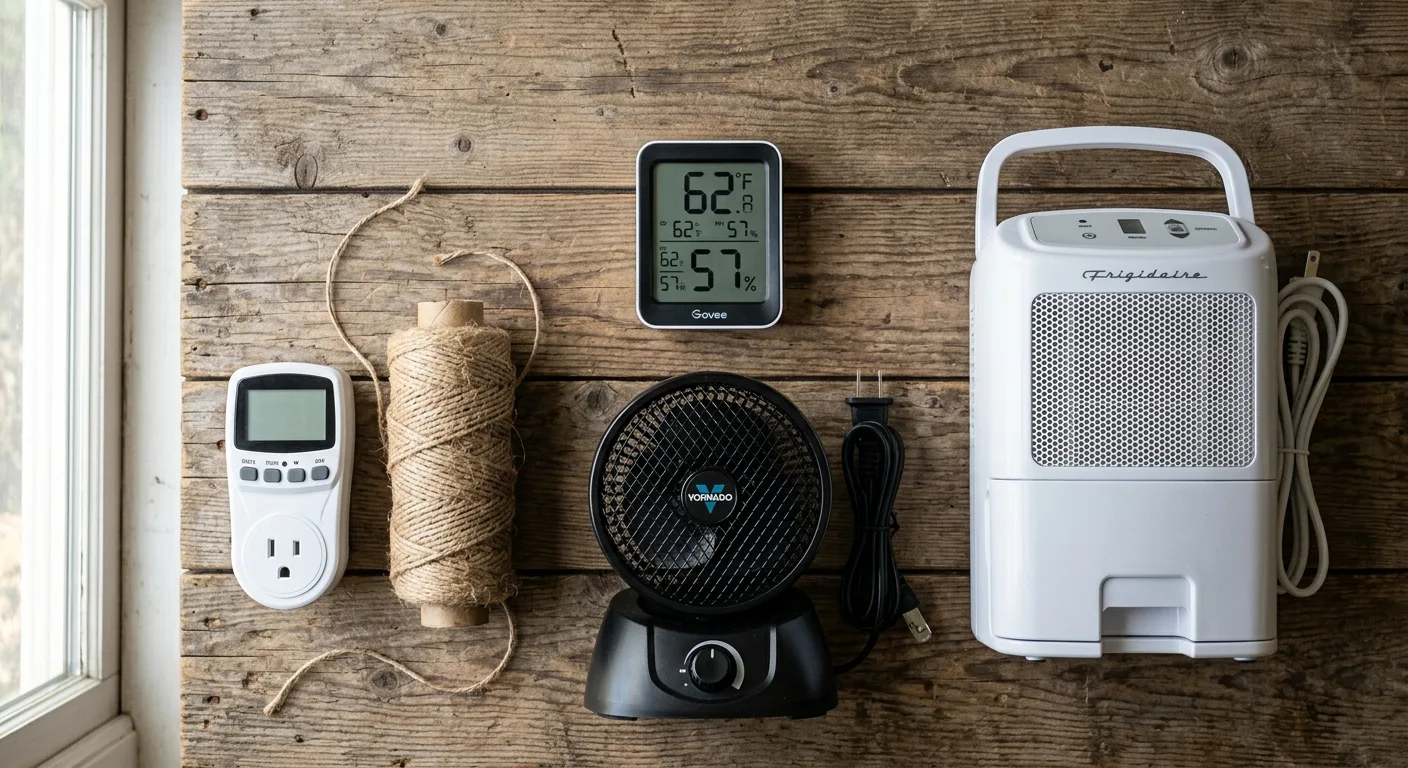
The only truly essential equipment for a cannabis drying room is a combined digital hygrometer and thermometer. Every other piece of equipment — dehumidifiers, humidistat controllers, AC units — is optional depending on whether your baseline environment needs correction.
Essential Equipment (No Exceptions)
Digital Hygrometer/Thermometer Combo
This is non-negotiable. You cannot manage an environment you cannot measure. A basic unit costs $8–$15 and gives you real-time temperature and humidity readings. Place it at bud height — not on the floor or ceiling — for accurate readings. The AcuRite and Govee models are widely trusted in the growing community and cost under $15.
Hanging System
Wooden dowels, tension rods, or wire racking hung from ceiling hooks. S-hooks or simple string loops hold individual branches. Allow 2–3 inches of clearance between each branch. Never pile buds on a flat screen as your only drying method — contact points dry unevenly and can develop mold at the contact surface.
Low-Speed Oscillating Fan
A 6-inch or 9-inch oscillating fan set to its lowest speed aimed away from the buds. This is your primary mold prevention tool — stagnant air in humid environments will cause surface mold on dense buds within 4–5 days. Budget $15–$30 for a decent unit.
Darkness Solution
Whatever it takes to achieve zero ambient light exposure. Heavy curtains, a tent with ports closed, a solid closet door, or flat black paint on the inside of a DIY box. Light is degrading your terpenes and cannabinoids for every hour it reaches the drying buds.
Optional Equipment (Situation-Dependent)
| Equipment | When You Need It | Cost Range | Priority |
|---|---|---|---|
| Dehumidifier | Ambient RH consistently above 60% | $35–$120 | High — humid climates |
| Portable AC unit | Ambient temp above 70°F | $150–$400 | High — hot climates |
| Humidistat controller | You want automated dehumidifier cycling | $20–$50 | Medium — convenience |
| Carbon filter + inline fan | Odor control is a concern | $40–$100 | Medium — depends on situation |
| Drying rack/net | Trimming single buds instead of hanging branches | $15–$30 | Low — branches preferred |
| Data-logging hygrometer | You want 24hr humidity/temp records | $20–$40 | Low — useful for dialing in |
Dehumidifier vs. AC unit: A dehumidifier generates heat as a byproduct of removing moisture — typically adding 3–5°F to the room. If your drying room is already at 65°F, a dehumidifier might push you to 70°F, which defeats the purpose. In those cases, a small portable AC unit that cools AND dehumidifies is the better investment. Mini-split AC units are ideal for dedicated drying rooms but cost $500+. A 5,000 BTU window unit handles a 10x10 room for around $150 and manages both temperature and humidity simultaneously.
Strain-Specific Drying Times: Dense Indicas vs Airy Sativas
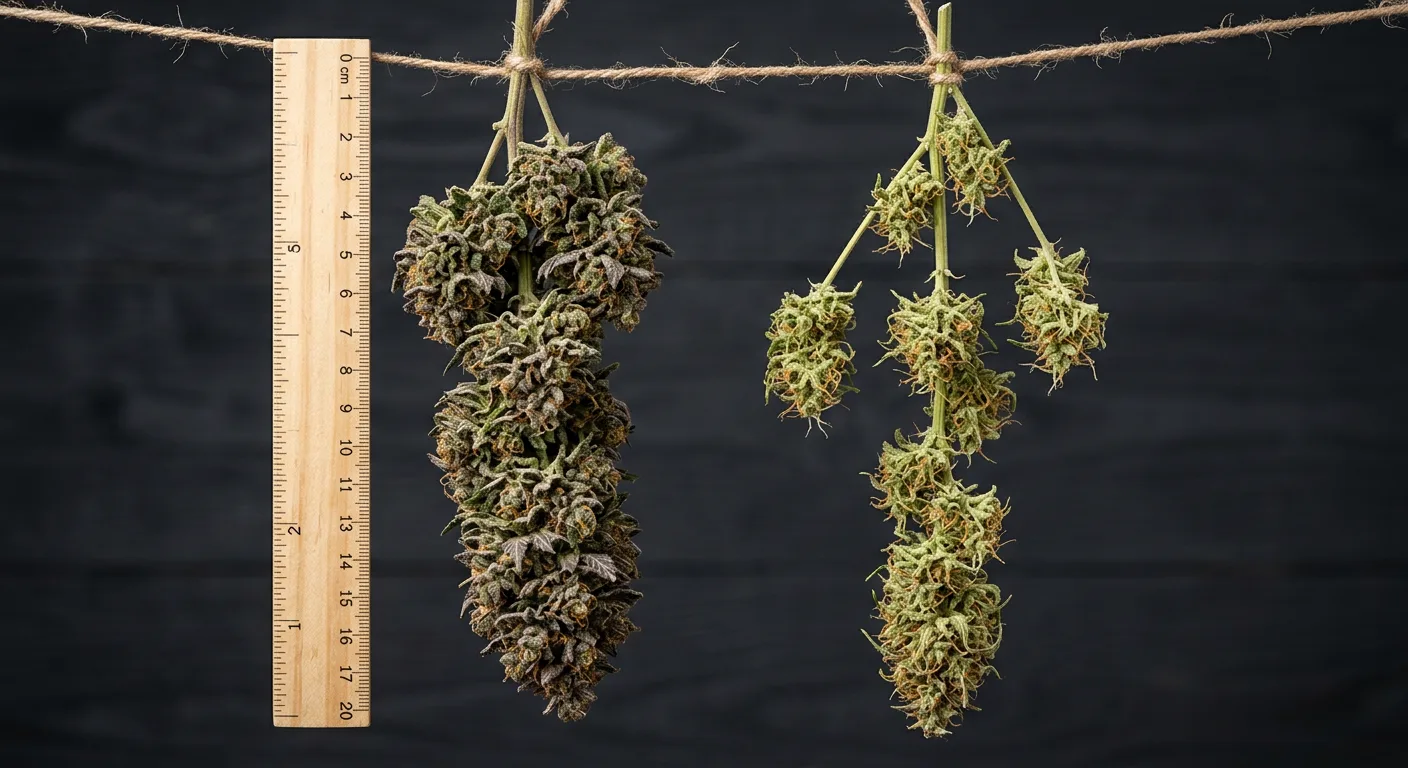
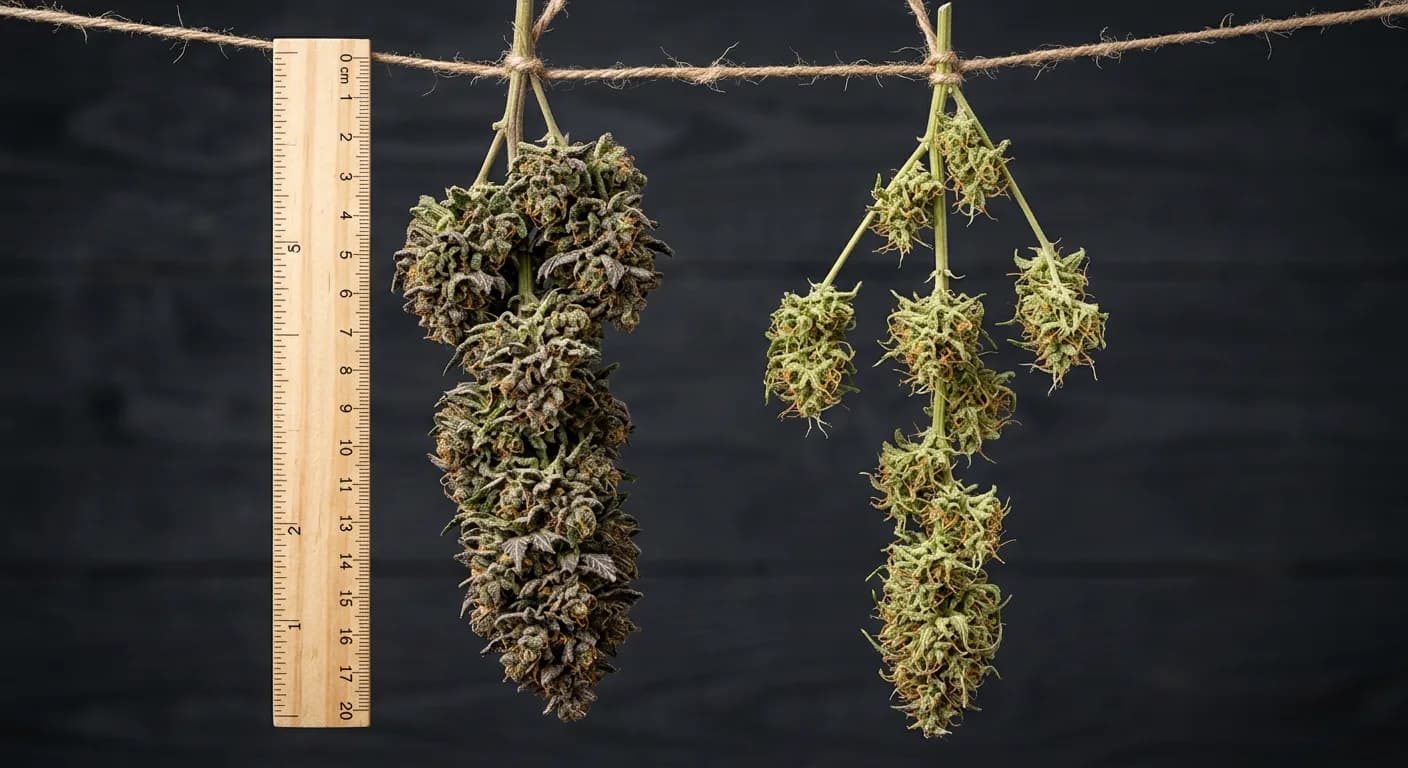
Dense, resin-heavy indica and indica-dominant hybrid strains typically require 12–16 days to dry at optimal conditions, while airy sativa-dominant strains with loose bud structure often finish in 8–11 days. This difference is structural — moisture migrates outward faster through less dense plant tissue.
Why Genetics Change Your Drying Timeline
A cannabis bud is essentially a water transport problem. Moisture inside the bud needs to migrate outward through cell walls and tissue layers before it can evaporate at the surface. Dense, compact buds — think classic indica morphology — have many more cell layers between the interior and the surface. Each layer slows moisture migration.
Sativa-dominant varieties typically produce more elongated, airy buds with less compact calyxes and more surface area relative to their mass. Moisture migrates and evaporates faster, meaning the same environmental conditions produce a faster dry.
Indica and Hybrid Strains: Expect 12–16 Days
Dense indicas and heavy hybrids are the strains most at risk for the crispy-outside-wet-inside problem when dried too aggressively. Strains like OG Kush (26% THC), Purple Kush (27% THC), and Northern Lights x Big Bud (20% THC) produce the kind of golf-ball-dense colas that can appear dry on day 8 while hiding significant moisture in their cores.
Similarly, resin-forward varieties like Quantum Kush (30% THC), Black Widow (26% THC), and Papaya (25% THC) benefit from the full 12–14 day dry to allow the heavy trichome layer to release moisture gradually without cracking or off-gassing terpenes too fast.
Gorilla Glue, Wedding Cake, Gelato, and Zkittlez — all known for exceptionally dense, resin-coated buds — should also be given the full drying window. Never rush these strains. The terpene profiles that make them valuable are the first thing lost to aggressive drying.
Sativa-Dominant Strains: 8–11 Days Is Typical
Sativa-dominant genetics from equatorial and highland lineages produce lighter, more open bud structures that dry more quickly and more evenly. Strains like Sour Diesel (24% THC), Super Lemon Haze (23% THC), and Tangerine Haze (18% THC) typically reach the stem snap stage within 8–10 days.
Landrace-adjacent sativas like Swazi (18% THC) and Willie Nelson (22% THC) often show fast initial drying due to their naturally airy structure. Check these strains from day 7 onward — in dry conditions (below 55% RH) they can over-dry and become brittle before you notice.
Learn more about how indica and sativa genetics shape growth traits including bud structure and density.
Mixed-harvest tip: If you are drying multiple strains simultaneously with different structures, hang the denser indicas on one side of the drying space and the airier sativas on the other. Check the sativas first — they may be ready 3–5 days before the dense indicas. Remove finished buds and jar them while letting the others continue.
Drying Room Troubleshooting: Fixing the Three Most Common Problems
The three most common cannabis drying failures — buds drying too fast, buds drying too slow, and hay smell — each have specific environmental causes and specific fixes. Diagnosing which problem you have requires a good hygrometer and a stem snap test.
Problem 1: Buds Drying Too Fast (Crispy Outside, Wet Inside)
This is the most common drying failure on r/microgrowery, and it happens when the outside of the bud desiccates faster than moisture can migrate from the interior. You get a bud that passes the stem snap test on day 6 or 7, goes into jars, and then sweats dramatically when jarred — or worse, develops mold during the cure.
Symptoms:
- Buds feel crispy or crunchy when squeezed after less than 8 days
- Bud opens up and looks damp inside when broken apart
- Hygrometer in jars spikes to above 75% within hours of sealing
- Hay smell even after full drying period
Causes: Temperature above 70°F, RH below 45%, direct fan airflow on buds, or all three simultaneously.
Fix:
- Immediately open any jars and return buds to the drying space
- Reduce temperature to 60–65°F — add AC or relocate the drying space
- Raise humidity to 55–60% — use a small humidifier or place a damp (not wet) towel in a corner of the room away from buds
- Redirect fan away from buds to an adjacent wall
- Allow buds to finish drying slowly — this can rescue a fast-dried batch if caught early
Do not re-wet dried cannabis with water. If a batch dried too fast, extended curing with Boveda 62% RH packs can slowly reintroduce moisture and improve texture, but it will not fully recover lost terpenes. Prevention is the only real fix.
Problem 2: Buds Drying Too Slow (Mold Risk)
When your drying environment is too humid or too cool, surface moisture stays on the buds longer than safe. After day 5–6 at above 65% RH, surface mold becomes a genuine threat — especially on dense buds where airflow between calyxes is minimal.
Symptoms:
- Stems still bending (not snapping) after 14+ days
- White or grey powdery patches appearing on outer buds
- Musty or ammonia-like smell developing during drying
- Buds feel soft and slightly slimy when squeezed
Causes: Ambient RH consistently above 65%, insufficient airflow, temperature below 58°F, or overcrowded hanging with buds touching.
Fix:
- Introduce a small dehumidifier — target 58–60% RH, not 45% (a sudden drop is also harmful)
- Increase fan speed slightly — still indirect, but more air movement
- Spread out hanging branches — add a second hanging rod if needed
- Raise temperature slightly to 63–65°F to improve moisture evaporation without overheating
- If mold spots appear on individual buds, remove those buds immediately — do not let them contaminate the rest of the harvest
Problem 3: Hay Smell (The Chlorophyll Problem)
Hay smell is the most searched drying problem on Reddit for good reason — it is heartbreaking after a successful grow, and most growers do not understand why it happened or whether it can be fixed.
Root cause: Buds dried too fast at too high a temperature or too low a humidity, preventing chlorophyllase enzymes from breaking down chlorophyll into odorless compounds. The result is chlorophyll locked inside dry plant tissue, releasing its characteristic hay smell with every squeeze.
Can hay smell be fixed? Sometimes, yes — if caught early enough. Place dried buds in sealed mason jars and cure them at 62% RH (using Boveda packs) for 4–8 weeks with daily burping. The curing process continues enzymatic activity at a much slower rate, and residual chlorophyll can continue to break down. Many growers report significant improvement after a 4-week cure even on hay-smelling batches. However, terpenes that evaporated during fast drying are gone permanently — you can remove the hay smell but not recover lost aroma complexity.
Prevention checklist for hay smell:
- Temperature at or below 65°F during entire dry
- Humidity at 55–60% RH throughout
- Drying takes at least 10 days before jarring
- No direct fan airflow on buds
- Stems snap cleanly before jarring
- Buds hung whole on branches, not loose on drying racks (where possible)
- Room is completely dark throughout drying period
The Complete Cannabis Drying Room Environment Checklist
Use this checklist to verify your drying room setup before hanging your first branch. A setup that checks all of these boxes will consistently produce properly dried cannabis ready for curing.
A drying room does not need to be expensive or elaborate. It needs to be dark, cool, moderately humid, and gently ventilated — consistently, for 10–14 days. The checklist below covers every variable that matters.
- Temperature measured at bud height: 60–65°F
- Relative humidity: 55–60% RH
- Zero ambient light reaching buds (0 lux)
- Oscillating fan on lowest speed aimed at wall, not at buds
- Branches spaced at least 2 inches apart, not touching
- Digital hygrometer/thermometer placed at bud height
- Daily visual checks for mold, especially days 5–9
- Stem snap test performed daily from day 8 onward
- Dense indicas allowed full 12–14 days before jarring
- Sativa-dominant strains checked from day 7 onward
- Mold protocol ready: isolation container for any affected buds
- Mason jars and hygrometer packs ready before the first bud finishes
- Harvest date and target jar date written down and tracked
From Dry Room to Cure: The Bridge to Perfect Cannabis
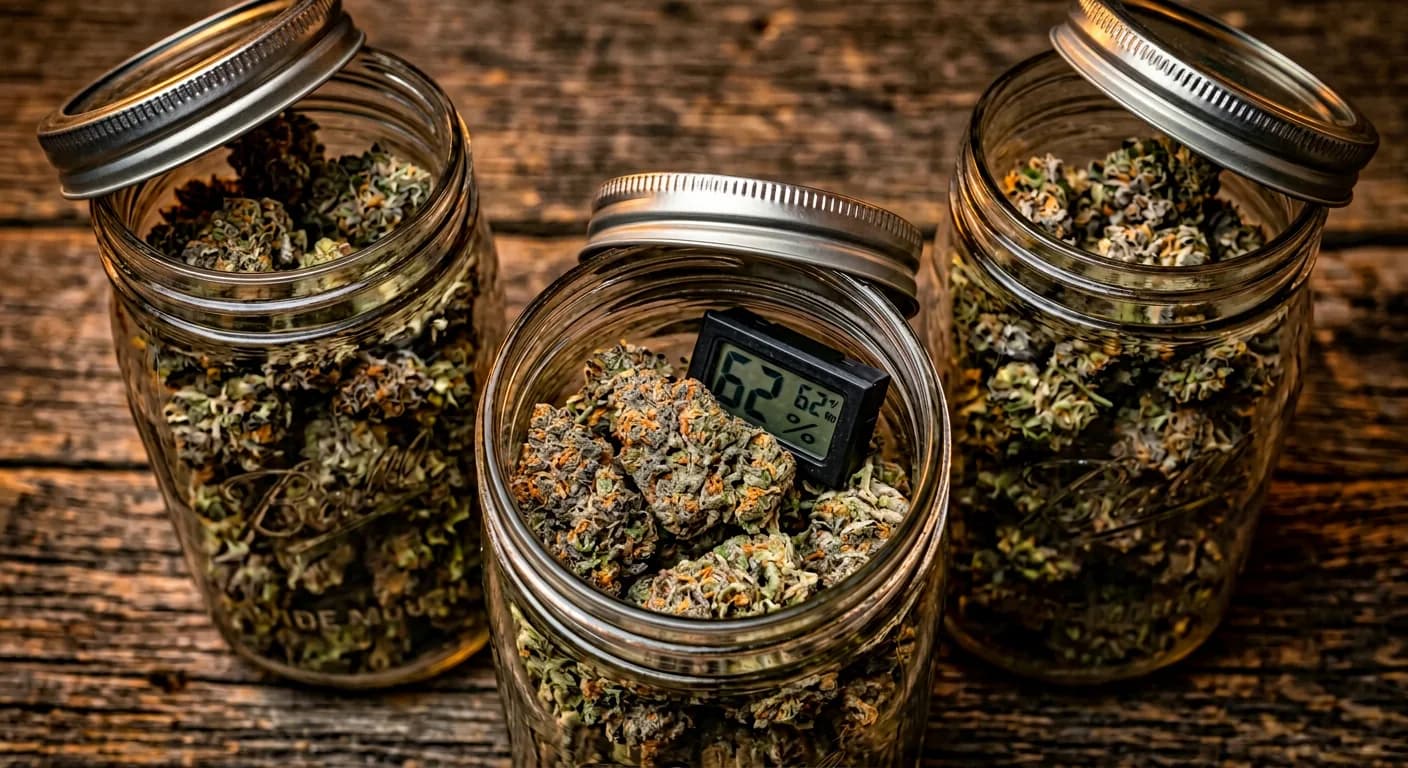
Drying removes the bulk of surface moisture and breaks down chlorophyll. Curing — sealing dried buds in airtight jars at 62% RH for 2–8 weeks — completes the enzymatic breakdown of remaining plant compounds and allows terpene profiles to fully develop and stabilize.
When Is Drying Done and Curing Ready to Begin?
The transition point from drying to curing is one of the most misunderstood moments in post-harvest cannabis. Jarring too early — before the stem snap is consistent — brings too much moisture into the jars and causes mold or ammonia smell within days. Jarring too late desiccates the buds beyond recovery.
The exact readiness indicators:
- Small stems (pencil-width or thinner) snap cleanly with no bending
- Larger branch stems bend but do not snap — this is correct and expected
- Outer bud surface feels dry to the touch but not crunchy
- Buds spring back slightly when squeezed rather than collapsing
- A faint but distinct cannabis aroma (not hay) is present
Once these indicators are met, trim any remaining sugar leaves if doing a dry trim, weigh your yield, and transfer to wide-mouth mason jars at roughly 75% full. Our complete guide to curing cannabis in mason jars with a full burping schedule covers everything from that point forward.
What Curing Finishes That Drying Started
Drying removes roughly 75–80% of the plant's original moisture content. Curing manages the remaining 15–20% through slow, controlled moisture equilibration inside sealed jars. During this period, enzymatic activity continues to break down any remaining chlorophyll, and terpene complexes that were too bound up in plant matrix to express themselves during drying begin to volatilize and recombine into the final aroma profile.
This is why a properly dried batch that smells somewhat flat on day 14 can smell extraordinary after a 4-week cure — the terpene profile was there all along, just locked in plant tissue. Understanding the science of terpene preservation during this period connects directly to our guides on individual terpenes like caryophyllene, pinene, and linalool — the compounds your drying environment either preserved or destroyed.
Track your VPD during the cure as well as the dry. Our VPD calculator is designed for growing, but understanding vapor pressure deficit helps explain why your jar conditions — temperature, humidity, and air exchange — affect terpene volatilization during curing the same way they do during drying. The physics are identical.
If you are planning your next grow while this harvest dries, use our grow planner to schedule your next run so the tent is free when drying ends — or factor in a dedicated drying space so you can start the next cycle without delay.
Frequently Asked Questions
What is the best temperature and humidity to dry cannabis buds?
The best temperature to dry cannabis is 60–65°F (15–18°C) with relative humidity maintained at 55–60%. These conditions slow the drying process to 10–14 days, which is long enough for chlorophyll to break down fully and short enough to prevent mold. Avoid temperatures above 70°F or humidity below 45% — both cause fast drying that results in hay smell and uneven moisture distribution.
Why does my cannabis smell like hay after drying?
Hay smell comes from chlorophyll that was not fully broken down by enzymatic activity during drying. This happens when buds dry too fast — usually above 70°F, below 45% RH, or both. Chlorophyllase enzymes need 10–14 days at moderate temperature and humidity to convert chlorophyll into odorless compounds. Extended curing at 62% RH can partially recover hay-smelling batches, but terpenes lost to fast evaporation cannot be recovered.
Can I dry cannabis in my grow tent between runs?
Yes — your grow tent makes an excellent drying space between harvest and the next seedling run. Turn off all grow lights completely, reduce your inline fan to the lowest speed setting, add a small oscillating fan aimed at the tent wall for indirect airflow, and monitor with a hygrometer placed at bud height. Clean out growing media first to avoid competing smells. A 4x4 tent handles 4–6 full plants worth of branches comfortably.
How long does it take to dry cannabis properly?
A proper slow dry takes 10–14 days at 60–65°F and 55–60% RH. Dense indica strains and heavy hybrids like OG Kush, Purple Kush, or Northern Lights x Big Bud often need the full 14–16 days due to their compact structure slowing interior moisture migration. Airy sativa-dominant strains like Sour Diesel or Super Lemon Haze may finish in 8–10 days. Always use the stem snap test as the final confirmation — timelines are guidelines, not rules.
Do I need a dehumidifier to dry cannabis at home?
It depends entirely on your baseline environment. In dry climates where ambient RH naturally stays at 50–60%, no dehumidifier is needed — just monitor with a hygrometer. In humid climates where ambient RH exceeds 65%, a small dehumidifier is essential for mold prevention. Note that dehumidifiers generate heat — if your room is already at 65°F, a dehumidifier may push it to 70°F. In that case, a portable AC unit that cools and dehumidifies simultaneously is the better choice.