Here's the situation thousands of first-time growers face: you buy photoperiod feminized seeds, spend six weeks in vegetative growth, then accidentally give the plant 14 hours of light instead of 12 — and it re-vegs. Game over. Autoflower seeds for beginners exist precisely to eliminate that failure mode. This guide will tell you exactly why autos are the smarter starting point, which mistakes actually ruin first grows (based on what floods Reddit every week), and which strains give you the highest probability of a successful harvest.
This isn't cheerleading. It's a decision guide built around the real problems beginners hit — overwatering, nutrient burn, stunted plants, and misguided training — with specific fixes for each one.
Autoflowers flower based on age, not light. That single difference removes the #1 source of beginner errors: managing light schedules. Everything else in this guide helps you protect the 8–10 weeks you get.
What Makes Autoflower Seeds Easier for Beginners
Autoflower seeds are easier for beginners because they remove light-schedule management entirely, stay compact, and finish in 8–10 weeks — cutting the learning cycle nearly in half compared to photoperiod grows.
Most beginner guides list the advantages of autoflowers without explaining the mechanism. Understanding why they work the way they do helps you make smarter decisions throughout your grow. Here are the five structural advantages that matter most in your first season.
No Light Schedule to Manage
Photoperiod plants flower only when they receive 12 or fewer hours of light per day. Miss that window — a light leak, a timer failure, an accidental light-on moment — and your plant reverts to vegetative growth or hermaphrodites. Autoflowers bypass this entirely. They flower based on internal age, not external light cues. You run 18/6 (18 hours light, 6 hours dark) from seed to harvest and never touch the timer.
Compact Footprint
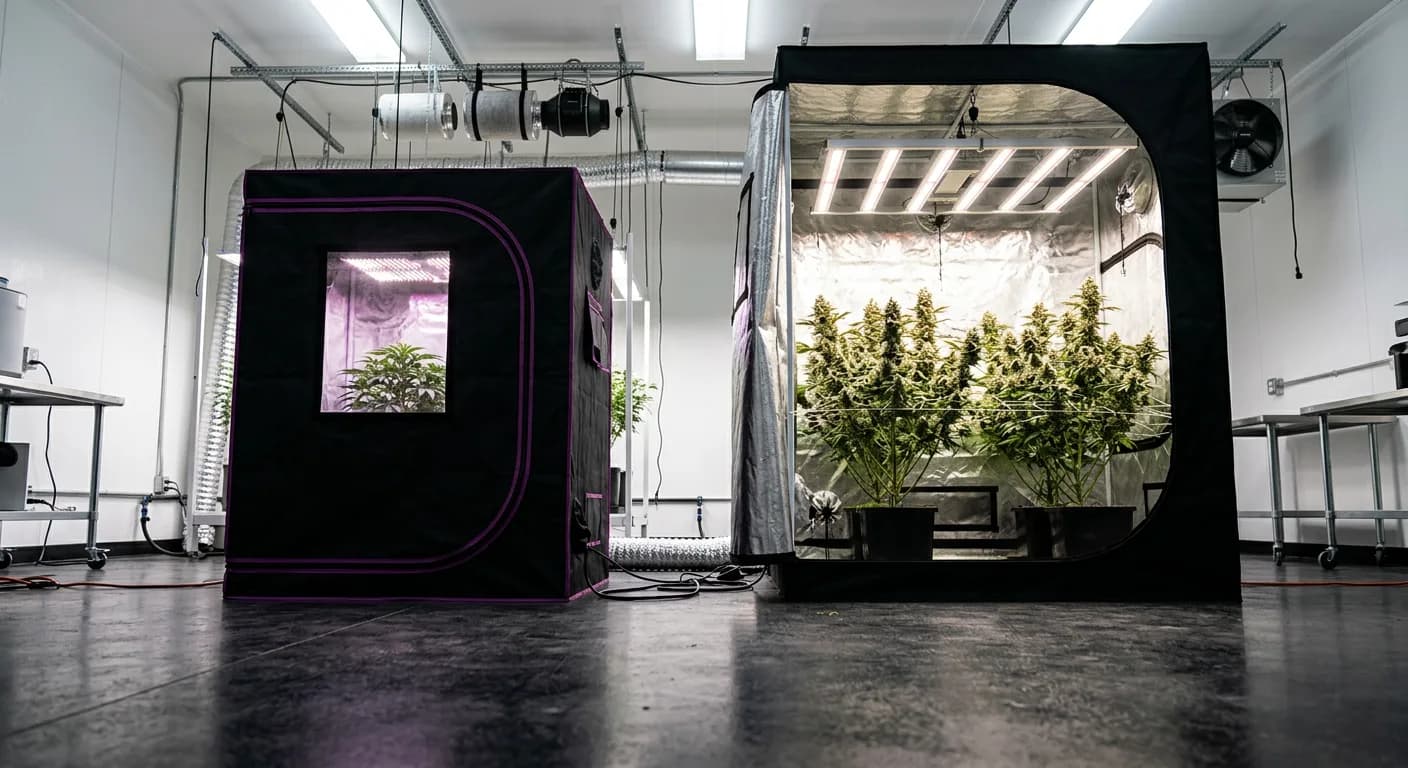
Most autoflower strains finish at 40–80cm indoors. That fits inside a 2×2 or 3×3 grow tent, a wardrobe, or a spare closet. You don't need a dedicated grow room. Smaller canopy also means smaller environmental fluctuations — easier humidity control, easier VPD management, lower electricity costs. (Check our free VPD calculator to dial in your environment before you even germinate.)
Faster Seed-to-Harvest
A typical autoflower moves from seed to harvest in 63–77 days. That's 9–11 weeks versus the 16–24 weeks a photoperiod plant needs from seed to harvest indoors. Faster cycles mean faster feedback — you learn what you did wrong and correct it on the next grow while the lesson is still fresh.
Higher Resilience to Environmental Variance
Ruderalis genetics — the subspecies that gives autos their auto-flowering trait — evolved in harsh northern climates with unpredictable weather. This heritage gives modern autoflower hybrids a natural resilience to temperature swings, shorter seasons, and humidity fluctuations that would stress a pure indica or sativa significantly more.
Smaller Resource Investment Per Grow
Fewer weeks in the tent means lower electricity, water, and nutrient costs per harvest. Your first grow is essentially a tuition payment. Autoflowers make that tuition cheaper while delivering a real, smokeable result you can evaluate and learn from. Use our grow cost calculator to see the difference before you commit to a setup.
The Ruderalis Clock: Why You Don't Manage the Light Schedule
The ruderalis clock is an internal genetic timer derived from Cannabis ruderalis — a subspecies native to Central Asia and Eastern Europe — that triggers flowering based on the plant's age (typically 3–5 weeks from germination) rather than photoperiod light reduction.
This is the most important piece of autoflower biology a beginner needs to understand. Cannabis ruderalis evolved at latitudes above 50°N, where summers are short and light hours vary wildly. To survive and reproduce, it developed the ability to flower regardless of daylength, triggered purely by maturity.
Modern autoflower hybrids are typically crosses of ruderalis genetics with indica or sativa strains. Breeders have spent decades improving yield and THC levels while retaining the auto-flowering trait. Today's autos are nothing like the small, low-potency ruderalis plants of the early 2000s — strains like Skywalker OG Autoflower regularly hit 20%+ THC.
What this means practically: your plant will enter pre-flower around week 3–4 regardless of what you do with the lights. It doesn't need a trigger from you. This makes the entire "light leak" category of mistakes irrelevant. A crack of light under your tent door that would ruin a photoperiod grow has zero impact on an autoflower.
The trade-off is that the clock runs continuously. The plant won't pause and wait for you to fix a problem. Every week of stress is a week of potential yield lost permanently. That's why preventing the 7 key mistakes (covered below) matters so much more with autoflowers than with photoperiod plants.
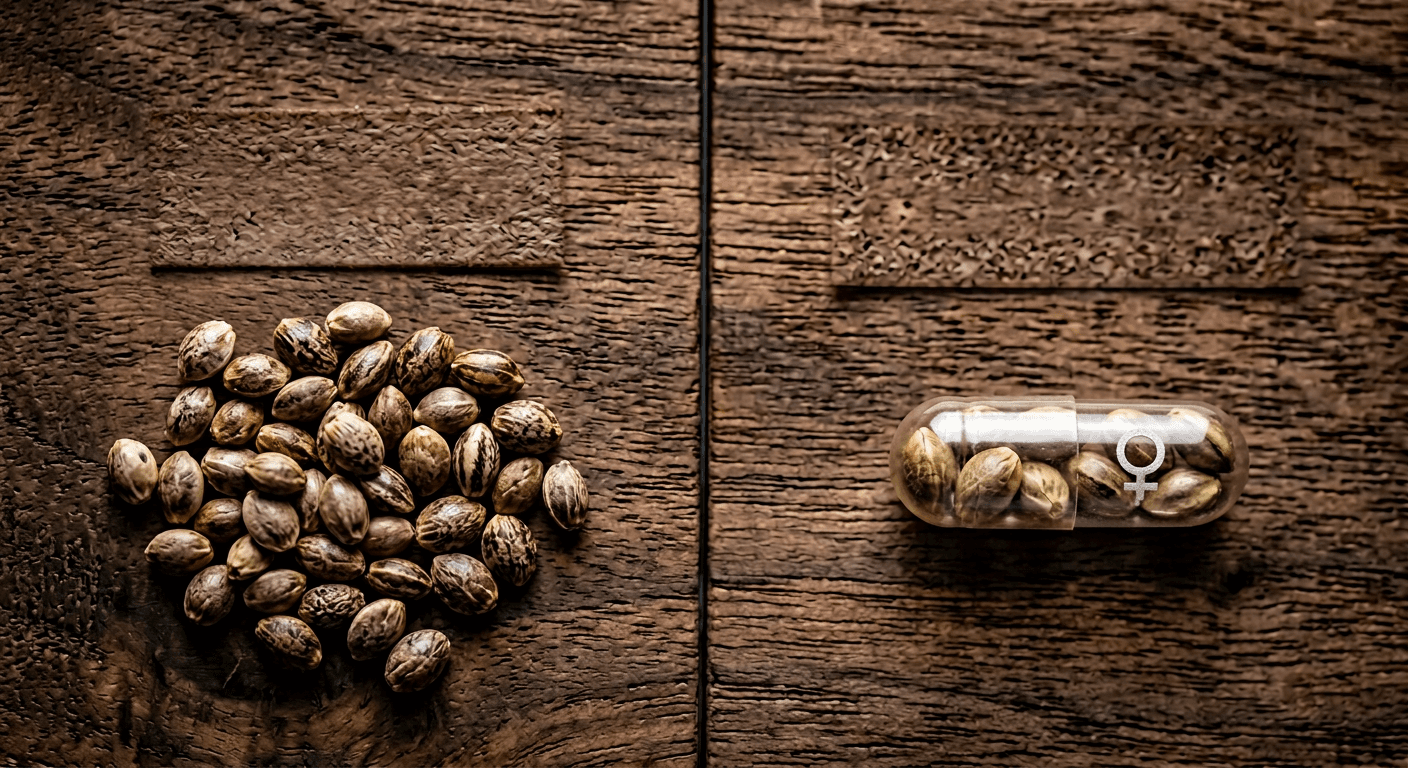
Autoflower vs Feminized Seeds: Which Should a First-Time Grower Choose?
For most first-time growers, autoflower seeds are the better starting point than feminized photoperiod seeds. Feminized seeds offer higher yield ceilings and more training flexibility, but they require light schedule management and longer grow times that add risk for beginners.
| Factor | Autoflower Seeds | Feminized Seeds |
|---|---|---|
| Flowering Trigger | Age (automatic) | Light schedule (12/12) |
| Seed-to-Harvest Time | 8–10 weeks | 16–24 weeks |
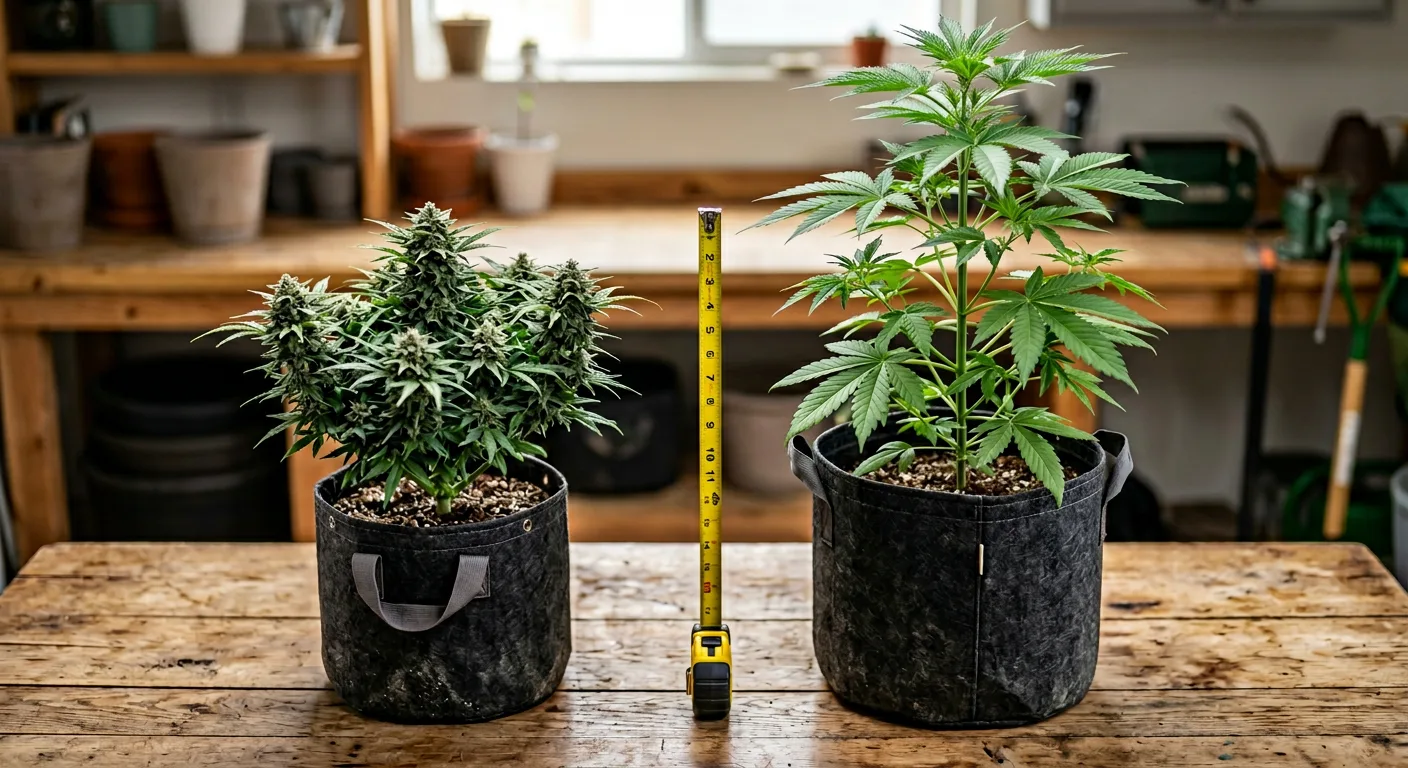
| Average Indoor Height | 40–80cm | 80–200cm |
| Transplanting | Not recommended | Standard practice |
| Training Tolerance | Low–Medium (LST only) | High (topping, FIM, scrog) |
| Yield per Plant | Moderate (30–100g) | High (100–500g+) |
| Light Leak Risk | None | High |
| Beginner Error Forgiveness | High | Medium |
| Grow Cycles Per Year | 4–5 | 2–3 |
The key insight from this table: autoflowers let you run 4–5 cycles per year versus 2–3 for photoperiod plants. Each cycle is a learning loop. By the time a photoperiod grower finishes their second grow, an autoflower grower may have completed four — and improved dramatically on each one.
That said, there are scenarios where feminized seeds make sense for beginners: if you want to practice heavy training techniques (ScrOG, topping, manifolding) or if maximizing yield per plant is a priority from day one. Our guide on autoflower vs photoperiod cannabis covers those scenarios in detail.
Start your first grow with autoflowers in a small 2×2 or 3×3 tent. Get one full cycle under your belt — nail watering, feeding, and harvest timing — then move to photoperiod feminized seeds if you want to scale up or train aggressively.
The 7 Beginner Mistakes That Stunt Autoflowers (And How to Avoid Every One)
The seven most common beginner mistakes with autoflowers are: transplanting late, overwatering, topping too early, over-fertilizing, choosing dense soil, skipping pH management, and harvesting based on calendar rather than trichome color.
These aren't hypothetical. They're drawn from the most repeated threads in cannabis growing communities, filtered down to the mistakes that specifically and disproportionately affect autoflowers. Work through each one before you pop your first seed.
Transplanting Too Late (or At All)
Autoflowers have a fixed internal clock. Transplanting at week 3 or 4 — when the root system is established and pre-flower has started — causes transplant shock that the plant cannot recover from. The vegetative window is already closing. Always germinate directly in your final pot. For most indoor autoflower grows, a 3–5 gallon fabric pot is the right final container. Germinate in it. Never move the plant.
Overwatering — The #1 Killer
Overwatering kills autoflowers faster than almost any other mistake because autos are small, root systems are compact, and they dry out slower in their final pots during the seedling stage. Waterlogged roots can't absorb oxygen, which triggers drooping, yellowing, and root rot within days. The fix: water only when the top 1 inch of soil is dry. Lift the pot — a light pot needs water, a heavy pot does not. Water until 10–20% runoff, then wait.
Topping in Weeks 1–3
Topping — removing the apical tip to encourage two main colas — is a powerful technique for photoperiod plants with months of veg time to recover. On an autoflower, topping before week 4 removes the plant's primary growth point during the window it needs most to develop its structure. You're not gaining two colas; you're creating a recovery crisis. If you want to increase canopy spread, use low-stress training (LST): gently tie branches sideways with soft plant ties after week 3. See our full guide on topping cannabis plants for timing details.
Over-Fertilizing (Nutrient Burn)
Autoflowers are nutrient-sensitive. Their smaller root mass and faster lifecycle mean they process nutrients at a lower rate than large photoperiod plants. Feeding at full-strength nutrient schedules written for photoperiods causes tip burn, leaf curl, and lockout within one feeding. Start at 25–50% of the recommended dose on any nutrient label. Increase only if you see clear deficiency signs after 5–7 days. Use our nutrient calculator to calibrate dosing before mixing your first feed.
Using Dense, Heavy Soil
Heavy garden soil or cheap potting mix compacts around small autoflower roots and holds too much moisture. The result: anaerobic soil conditions, slow root development, and a plant that never reaches its size potential. Use a light, airy cannabis-specific medium — coco/perlite blends or a quality potting mix with 30% perlite added. Our guide on best soil for cannabis beginners breaks down exactly what to buy and what to avoid.
Skipping pH Management
pH determines what nutrients your plant can actually absorb from the soil. Even if you're feeding correctly, a pH outside the 6.0–7.0 range (soil) or 5.5–6.5 range (coco/hydro) locks out key nutrients at the root level — creating deficiency symptoms in an otherwise well-fed plant. Buy a digital pH pen before your first grow. Check feed water every time. This is the single cheapest fix that saves the most grows.
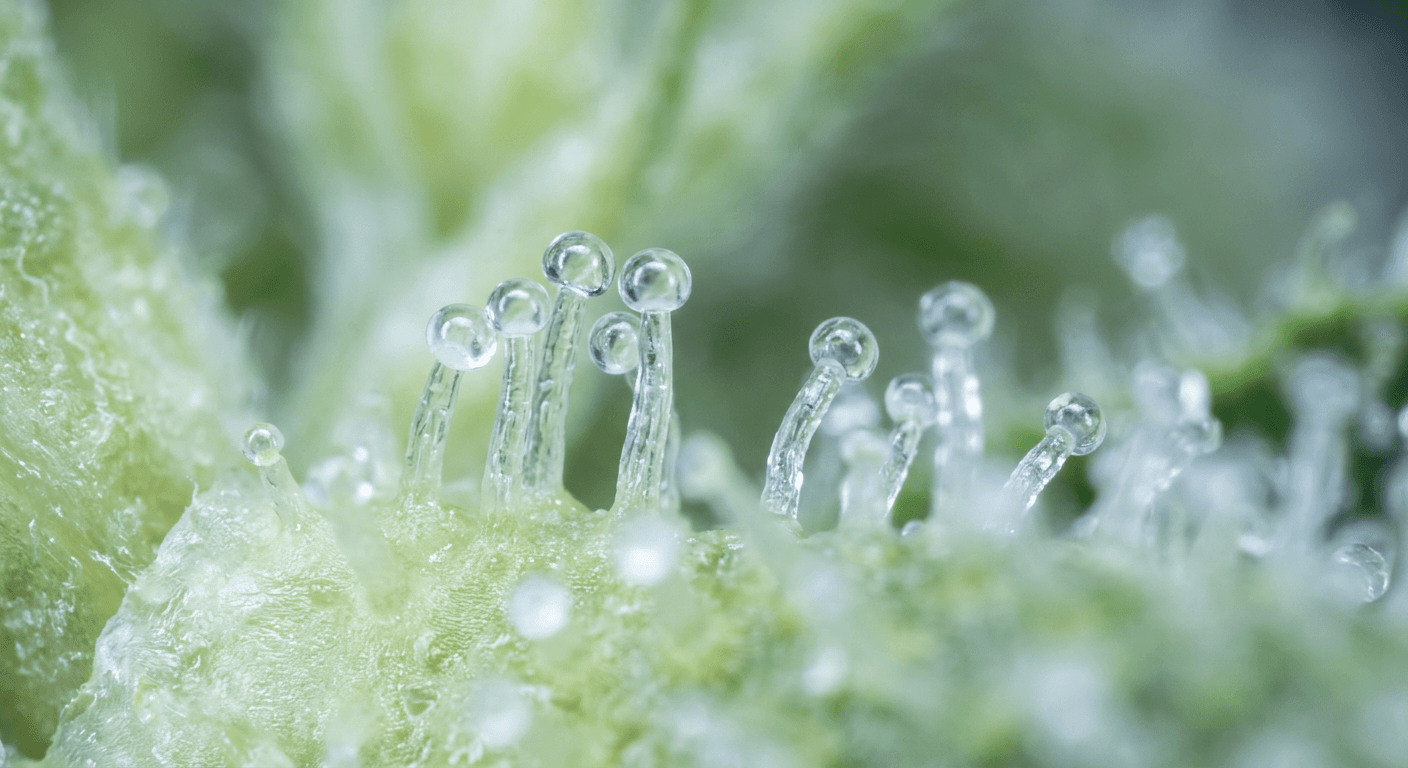
Harvesting by Calendar, Not Trichomes
Seed bank harvest windows (like '63 days from seed') are averages, not guarantees. Harvesting too early — before trichomes shift from clear to milky-white — dramatically reduces potency and yield. Use a 60x jeweler's loupe or digital microscope to check trichome color in the final two weeks. Harvest when 70–90% of trichomes are milky-white with a small percentage turning amber. Our guide on harvesting cannabis too early explains exactly what you lose if you jump the gun.
The most dangerous window for autoflowers is weeks 1–3. Overwatering, transplanting, or aggressive training during this window compounds — you can trigger two or three of these mistakes simultaneously and permanently cap your plant's yield potential before it even reaches pre-flower.
Why Your Autoflower Looks Stunted (The Reddit Problem Explained)
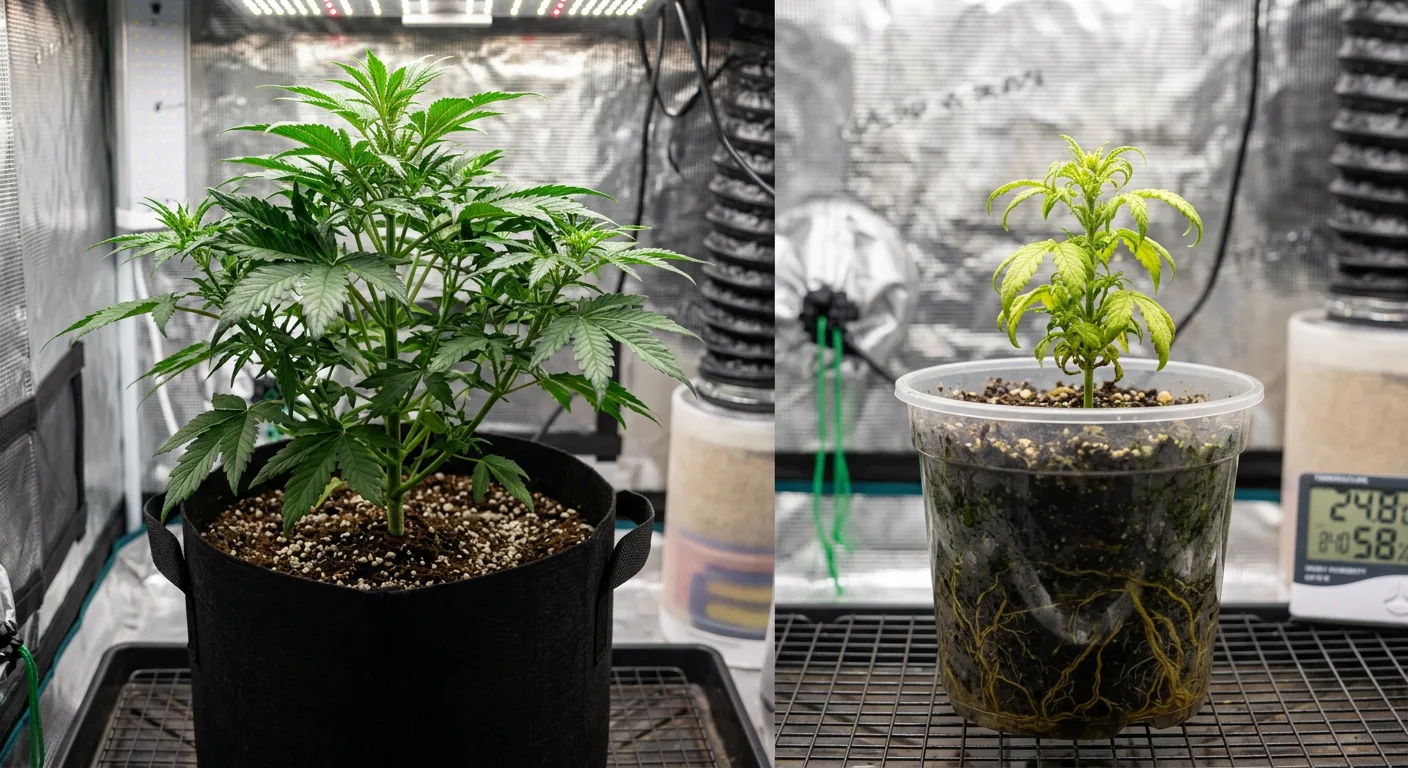
A stunted autoflower is almost always the result of root stress in weeks 1–4, most commonly caused by overwatering, transplant shock, or compacted soil that prevents proper root development during the plant's only vegetative window.
Search 'stunted autoflower' on any cannabis growing forum and you'll find the same pattern: a plant at week 4 or 5 that looks like it belongs at week 2. Tiny, dark green or pale yellow, barely growing. The grower is usually confused because they've been watering regularly and feeding on schedule.
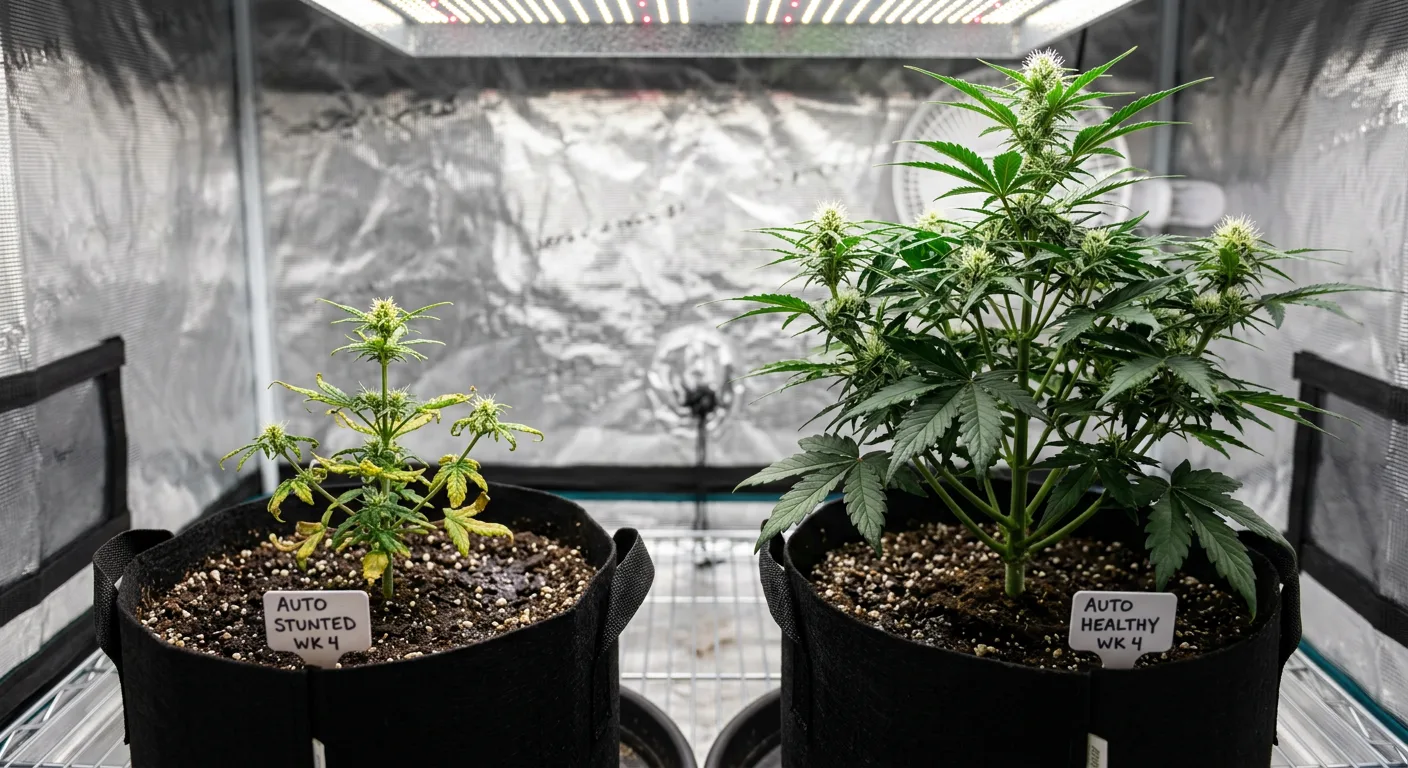
Here's the mechanism: the autoflower clock started at germination and it hasn't paused. When root stress — from overwatering, transplant shock, or compaction — prevents the plant from developing its root zone in weeks 1–4, it enters the flowering stage underdeveloped. A photoperiod plant in the same situation would just stay in veg longer until you corrected the problem. An autoflower starts budding on a 30cm plant with a root ball the size of a tennis ball.
How to Diagnose a Stunted Autoflower
Use these markers to identify the cause before you try to fix it:
- Dark green, clawed leaves + slow growth: overwatering (most common cause)
- Pale yellow new growth + small leaves: root bound or nutrient lockout from pH imbalance
- Brown leaf tips + curling: nutrient burn from overfeeding
- Wilting in well-watered soil: transplant shock or root rot
- Very slow growth with no other symptoms: compacted soil restricting root expansion
If your autoflower is already stunted at week 4+, the path forward is damage control, not reversal. Improve conditions — correct watering, check pH, ensure adequate airflow — and let it finish. A small but healthy autoflower will still produce usable buds. Using our plant diagnosis tool can help you identify and address symptoms faster before they compound.
You cannot restart an autoflower's vegetative stage. Every day of root stress is a permanent yield reduction. Prevention in weeks 1–3 is worth ten times more than any correction in week 5.
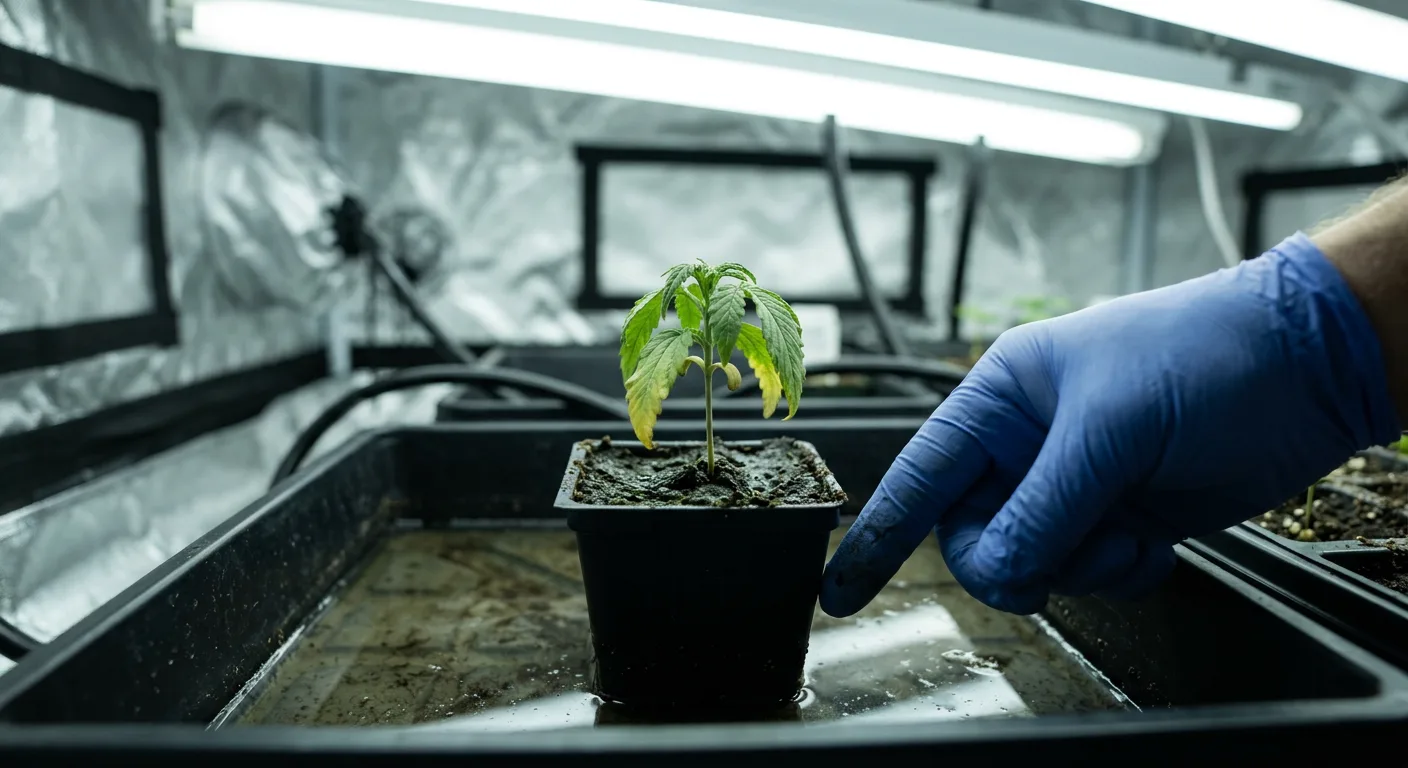
The Watering Finger Test (Do This Every Time)
Push your index finger 1–2 inches into the soil. If it comes out damp or with soil clinging to it, the plant doesn't need water. If it comes out dry and clean, water now. This simple test prevents 80% of overwatering incidents. Combine it with the pot-lift method — a properly dry pot feels noticeably lighter than a well-watered one.
Top 5 Beginner Autoflower Strains to Grow First

The best beginner autoflower strains combine forgiving growth patterns, moderate nutrient sensitivity, and reliable genetics — giving first-time growers the highest probability of a successful, satisfying first harvest.
These five picks balance beginner-friendliness with real quality. We've included a mix of strains available here and widely respected industry options — not just our catalog. The goal is an honest recommendation list, not a sales brochure.
1. Great White Shark Autoflower — Best for Low-Maintenance Grows
Great White Shark Auto is one of the most forgiving autoflower genetics available. Its indica-dominant structure keeps height under 70cm, it responds well to minor environmental inconsistencies without showing stress, and it delivers resinous buds with a complex earthy-sweet profile. At 16% THC, it's not overwhelming for a first-time consumer either — which matters when you're evaluating your own grow.
- THC: 16%
- Height: 50–70cm
- Harvest: 9–10 weeks from seed
- Why it's beginner-friendly: Compact structure, tolerates minor overwatering better than most, strong lateral branching without training
View Great White Shark Autoflower Seeds →
2. Blue Moonshine Autoflower — Best for Forgiving Feeding Schedules
Blue Moonshine Auto is deliberately easy. Its blueberry-forward genetics produce a relaxed indica effect and the plant shows exceptional tolerance to minor nutrient variance — making it a natural fit for beginners who haven't dialed in their feeding schedule yet. At 13% THC, it's a calming first harvest rather than an overwhelming one.
- THC: 13%
- Height: 40–60cm
- Harvest: 8–9 weeks from seed
- Why it's beginner-friendly: Very low nutrient sensitivity, compact size, minimal training needed, consistent structure
View Blue Moonshine Autoflower Seeds →
3. Gorilla Glue Auto (Industry Staple) — Best for Potency Without Complexity
Gorilla Glue Auto (GG4-derived) is one of the most widely grown autoflowers in the world for good reason. Modern GG Auto genetics deliver 20–24% THC in 9–10 weeks, with a dense resinous canopy that looks impressive for a first grow. The plant is stocky, manageable in size, and more nutrient-tolerant than many high-THC autos. It's available from multiple breeders and is a legitimate benchmark strain for first-time growers who want to understand what a well-grown autoflower can produce.
- THC: 20–24%
- Height: 60–90cm
- Harvest: 9–10 weeks from seed
- Why it's beginner-friendly: Resilient structure, heavy resin production rewards patience, widely documented grow data available
4. Swiss Cheese Autoflower — Best for Smell Management + Easy Grows
Swiss Cheese Auto combines the classic Skunk aroma profile with a manageable auto structure. It's one of the more aromatic autos available, so a carbon filter is non-negotiable — but the plant itself is easy to manage, stays compact, and produces well for its size. The 17% THC delivers a balanced, classic effect that's satisfying without being disorienting for new growers evaluating their first batch.
- THC: 17%
- Height: 50–75cm
- Harvest: 9–10 weeks from seed
- Why it's beginner-friendly: Reliable genetics, balanced indica-sativa growth pattern, strong lateral branching
View Swiss Cheese Autoflower Seeds →
5. Northern Lights Auto (Industry Staple) — Best Classic for Indoor Beginners
Northern Lights Auto is possibly the most recommended beginner autoflower of all time and for good reason — it was bred for indoor growing, stays short and bushy, produces dense resinous buds, and tolerates the kind of minor environmental inconsistency that every first-time grower produces. Look for NL Auto from reputable breeders in the 18–20% THC range. It finishes in 8–9 weeks and rarely shows stress responses that can confuse beginners.
- THC: 18–20%
- Height: 50–80cm
- Harvest: 8–9 weeks from seed
- Why it's beginner-friendly: Decades of stable indoor genetics, compact, extremely tolerant of minor errors
Before choosing your first strain, use our yield estimator to understand realistic harvest expectations based on your light, pot size, and grow space. It helps calibrate expectations and prevents disappointment when your first crop yields 30g instead of 100g.
Your Week-by-Week Autoflower Beginner Grow Timeline
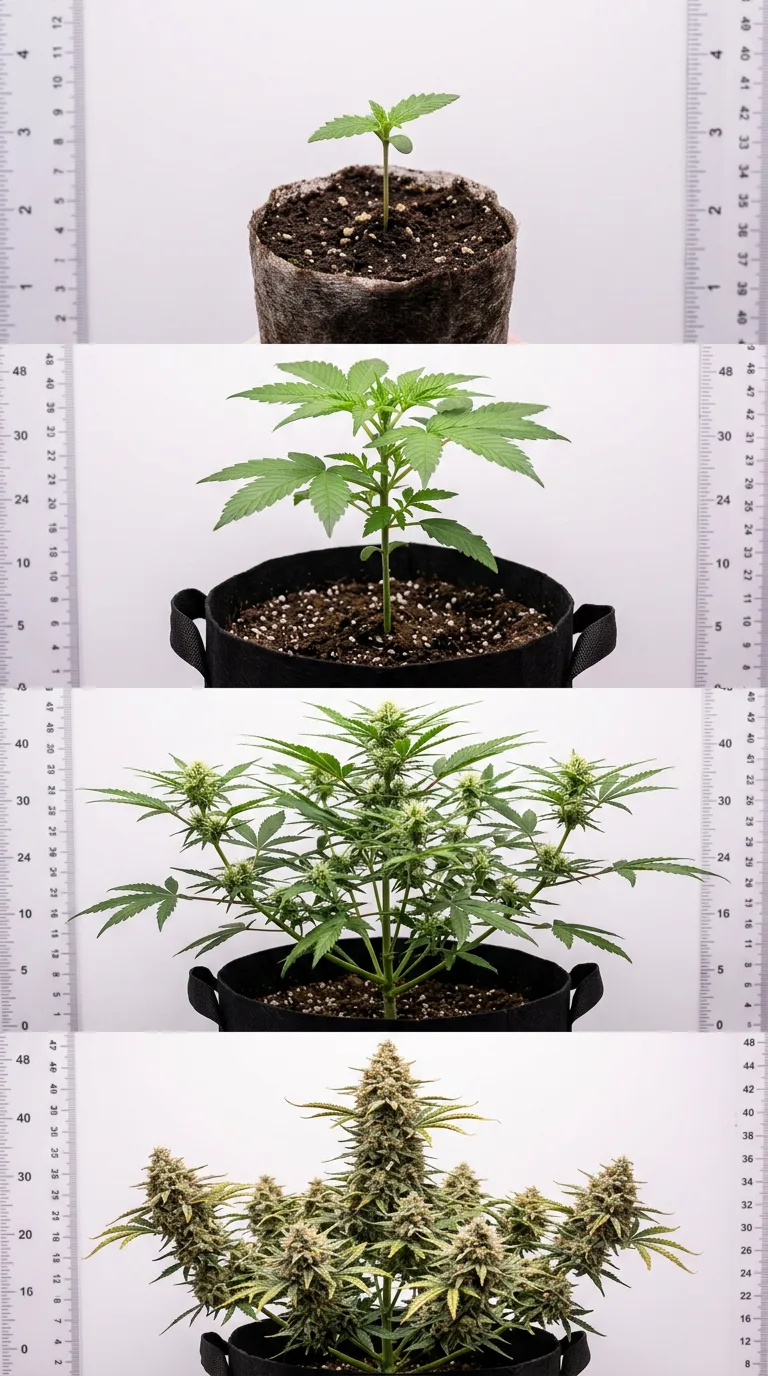
A beginner autoflower grow moves through five distinct phases across 9–10 weeks: germination, seedling, early vegetative, pre-flower and flowering, and late flowering before harvest.
Here's a realistic timeline so you know exactly what to expect — and what to watch for — at each stage. For a full germination walkthrough, see our cannabis germination guide before you start.
Days 1–5: Germination
Germinate using the paper towel method or direct-to-soil planting. Tap root should appear within 24–72 hours. Plant root-down, 1cm deep in your final fabric pot. Keep soil surface moist (not wet) using a spray bottle only. Target 22–26°C, 65–70% humidity. Do not add nutrients yet — seedlings live off the seed's stored energy for the first 5–7 days.
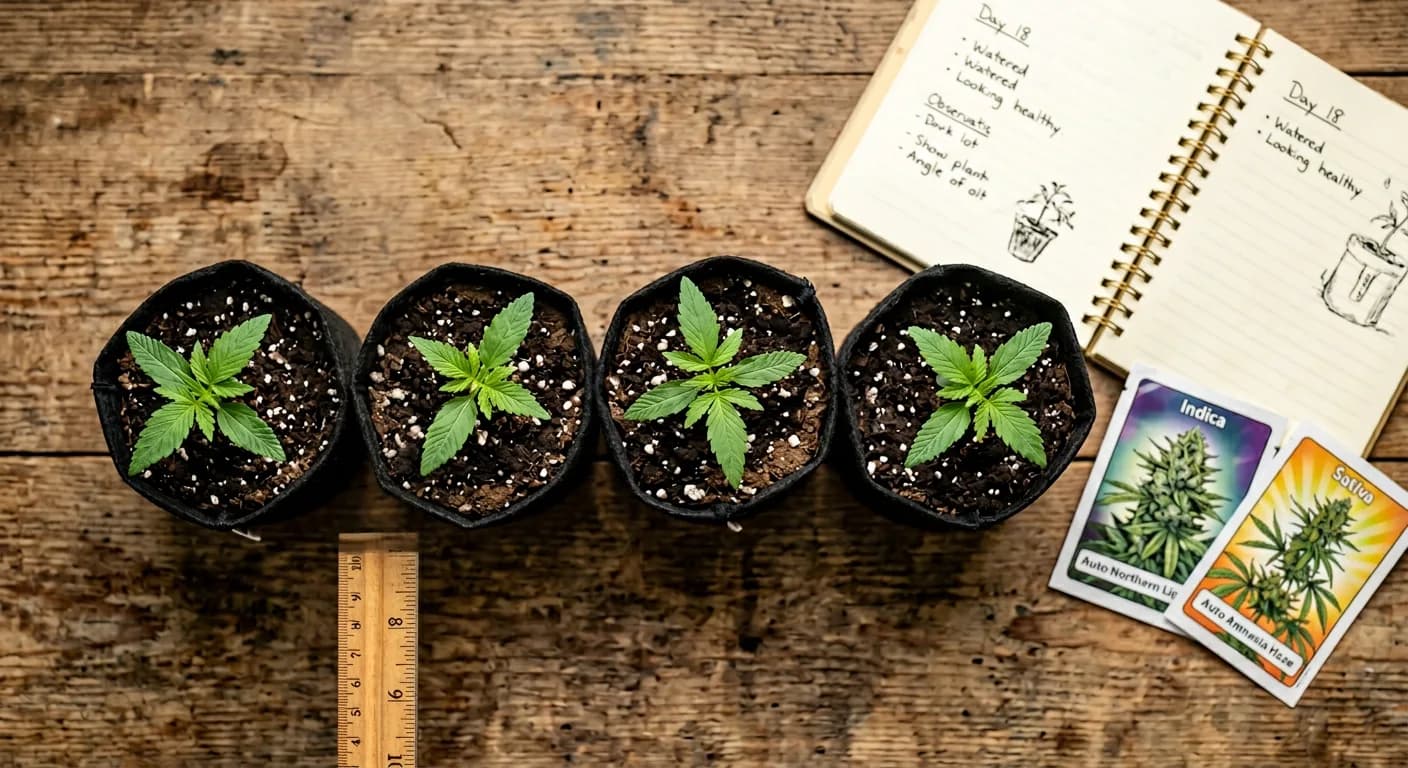
Days 5–21: Seedling Stage
First set of true serrated leaves appears around day 7–10. Keep light at 18/6. Do not feed nutrients until the seedling has 3–4 nodes (usually around day 14–18). Water with pH-corrected water only, tiny amounts, just around the stem — not flooding the whole pot. The root system is still tiny and needs to chase moisture outward to develop properly.
Days 21–35: Early Vegetative
This is your growth window — the most important phase for yield potential. Plant should be adding a node every 2–3 days if healthy. Begin light nutrient feeding at 25–50% strength with a grow-phase formula. You can begin LST now: gently bend the main stem sideways and secure with a soft tie to open the canopy. This is the correct training technique for autos — not topping. Monitor for pre-flower signs (small white pistils at node junctions) from day 21 onward.
Days 35–63: Flowering
Pre-flowers develop into full bud sites. Transition nutrient feeding from nitrogen-heavy grow formula to phosphorus/potassium-heavy bloom formula around day 35–42. Buds stack and swell through this phase. Humidity should drop from 60–70% to 45–55% to prevent bud rot — see our mold prevention guide for airflow strategy. Increase checking frequency on pH and trichome development.
Days 63–77: Late Flower and Harvest
Stop nutrients 10–14 days before harvest and flush with pH-corrected water to clear residual salts from the medium. Check trichomes daily under magnification from day 60 onward. Harvest when 70–90% of trichomes are milky-white and 5–15% have turned amber. Cut, trim, and begin a slow dry at 15–20°C and 55–60% humidity. See our complete drying and curing guide for the post-harvest process.
Nutrients, Watering, and Soil: The Sensitivity Triangle
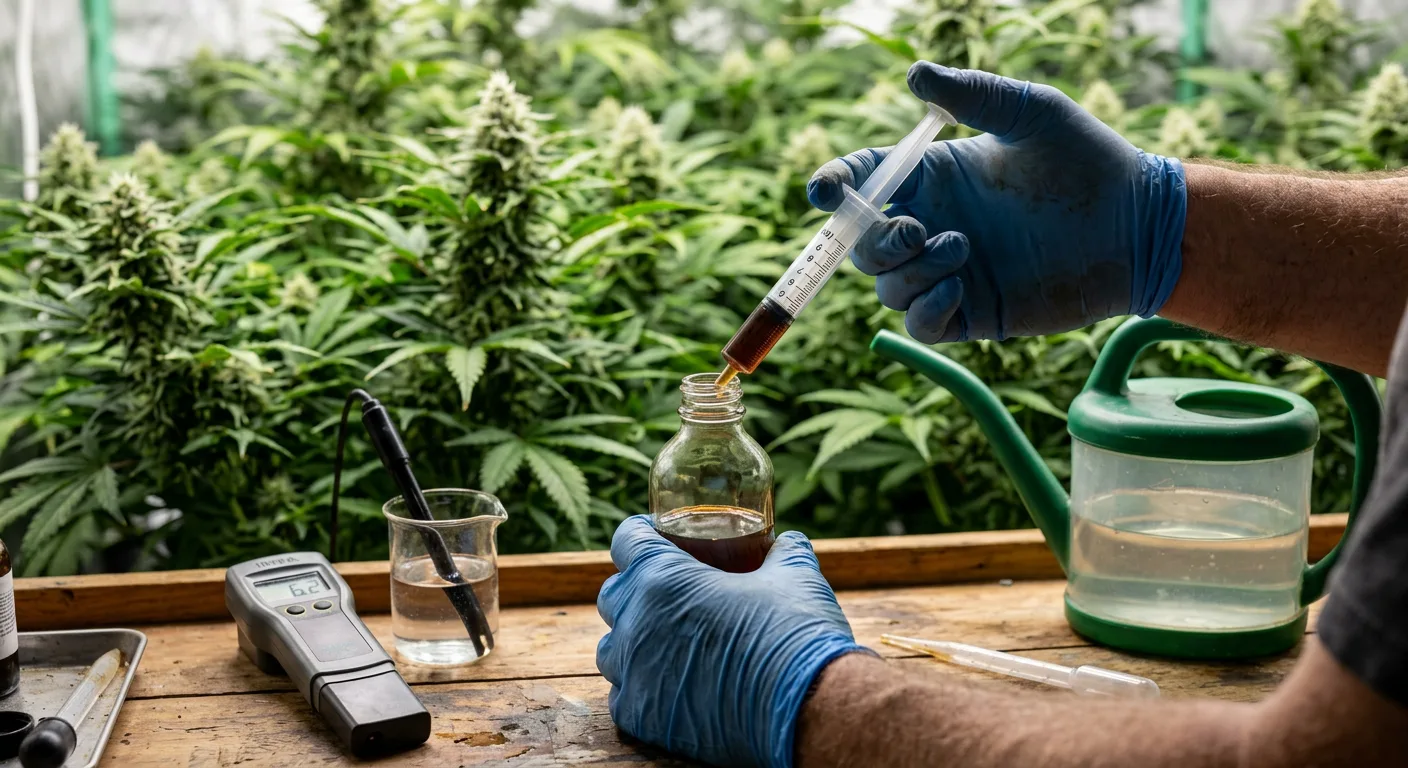
Autoflowers are more sensitive to nutrient concentration, watering frequency, and soil density than photoperiod plants. Getting all three right simultaneously is the key to healthy growth — get any one wrong and the other two can't compensate.
Think of these three factors as a triangle. They're interconnected. Dense soil stays wet too long, which leads to overwatering risk. Overwatered soil prevents nutrient uptake, which looks like a deficiency. You add more nutrients to fix the apparent deficiency. Now you have wet, nutrient-saturated soil and a struggling plant. This exact sequence is behind most nutrient-burn complaints from beginners growing autoflowers.
Soil: Build Drainage In From the Start
The best growing medium for beginner autoflowers is a light potting mix with 30% perlite by volume. This creates adequate drainage without going full hydro. Commercial options like Fox Farm Ocean Forest (lightly amended), Canna Terra Professional, or similar cannabis-specific mixes work well out of the bag with added perlite. Avoid garden soil, heavy compost mixes, or anything marketed for moisture retention.
Watering: The 'Wet-Dry Cycle' Method
The most effective watering technique for autoflowers is the wet-dry cycle: water thoroughly until runoff, then allow the medium to dry to about 30–40% of its wet weight before watering again. This creates the oxygen-moisture balance roots need. New growers almost always water too frequently in weeks 1–2 — a seedling needs dramatically less water than a mature plant in the same-sized pot.
- Seedling (weeks 1–2): 30–60ml around the stem, every 2–3 days
- Early veg (weeks 3–4): 150–300ml across the pot surface, every 2 days
- Flowering (weeks 5–9): Full watering to runoff, every 2–3 days based on pot weight
Nutrients: The 25% Rule for Autos
Start every new nutrient product at 25% of the manufacturer's recommended dose. Observe the plant for 5–7 days. If growth is healthy and leaves are dark green, increase to 50%. Only move to full-strength feeding if you have weeks of healthy growth at 50% with no tip burn. Most beginner autoflower grows succeed at 50–75% of recommended doses throughout the entire cycle. Full-strength nutrient schedules are written for photoperiod plants in large containers — they're almost always too strong for autos.
Coco coir grows require more frequent feeding than soil because coco holds almost no nutrients itself. If you grow autos in coco, you'll feed every watering (once or twice daily in late flower) at the same low concentrations. Coco pH range is 5.5–6.1 — tighter than soil. Beginners may find soil more forgiving for their first grow despite coco's higher yield ceiling.
Never add CalMag, bloom boosters, and base nutrients all at full strength in the same watering for autoflowers. Stack supplements one at a time, at low doses. Beginners who follow advanced photoperiod feeding schedules without adjusting for auto sensitivity hit nutrient lockout within 2–3 feedings.
Beginner Autoflower Grow Setup Checklist
A complete beginner autoflower setup requires a grow tent, appropriate LED lighting, fabric pots, quality soil, pH management tools, and basic environmental controls — all achievable for under $300 for a 2×2 tent grow.
Use this checklist to verify you have everything before germinating. Missing items during the grow — especially pH meters and the right containers — are among the top reasons beginner grows fail in weeks 1–2. See our complete indoor grow tent setup guide for detailed product selection advice.
- 2×2 or 3×3 grow tent (reflective interior)
- LED grow light (100–200W for 2×2; 200–300W for 3×3)
- 3–5 gallon fabric pots (one per plant, final container)
- Light airy cannabis soil + 30% perlite
- Digital pH pen + calibration solution
- EC/TDS meter for nutrient strength checking
- Oscillating fan (for airflow and stem strengthening)
- Inline fan + carbon filter (odor and humidity control)
- Thermometer/hygrometer combo
- pH-adjusting solutions (pH Up and pH Down)
- Seedling-safe grow nutrients (3-part or cannabis-specific)
- Bloom nutrients (phosphorus/potassium focused)
- Soft plant ties or LST wire
- 60x jeweler's loupe or digital microscope
- Timer for lights (set to 18 on / 6 off, leave it alone)
Before you calculate your total startup cost, use our grow cost calculator to itemize everything including electricity and nutrients. Many beginners are surprised how affordable a small autoflower setup actually is compared to what they imagined.
Buy two extra fabric pots and a small bag of backup soil. If a seedling shows serious problems in week 1–2, you can germinate a replacement seed immediately rather than losing 3–4 weeks waiting for a new pot and medium to arrive.
From Seed Selection to First Harvest: Putting It All Together
A successful beginner autoflower grow comes down to three decisions made before germination — the right strain, the right container, and the right medium — followed by disciplined restraint during weeks 1–4.
Most beginner grow failures aren't caused by lack of knowledge. They're caused by overaction: too much water, too many nutrients, too much training, too much intervention. Autoflowers reward growers who set up the environment correctly and then mostly leave the plant alone to work through its fixed cycle.
Here's the mindset that separates successful first-time autoflower growers from those who post stunted plant photos on forums:
- Do this: Germinate in the final pot. Water by pot weight. Start nutrients at 25% strength. Check pH every feed. Use LST after week 3 only.
- Not that: Transplant at week 3. Water on a calendar schedule. Follow the full nutrient label. Top in week 1 because you saw it on YouTube. Harvest at exactly 63 days regardless of trichomes.
The complete germination process — moisture levels, temperature, and timing — is covered in our cannabis germination guide. Start there before you open your first seed pack, and you'll avoid the most common week-1 failures before they happen.
Plan your grow timeline in advance using our grow planner tool. Enter your start date and expected strain finish time, and it maps out your week-by-week milestones — feeding transitions, training windows, flush timing, and estimated harvest date. Having the schedule visible removes the guesswork that leads to timing mistakes.
Autoflowers give you the most forgiving path to your first successful cannabis harvest — but they don't forgive bad fundamentals in weeks 1–4. Get the setup right before germination, water by pot weight, start nutrients at quarter-strength, and resist the urge to train aggressively. Do those four things and your first autoflower grow will almost certainly succeed.
Frequently Asked Questions
Are autoflower seeds good for beginners?
Yes. Autoflower seeds are ideal for beginners because they flower automatically based on age, not light schedule. This removes the need to manage 12/12 light cycles, reduces stress errors, and delivers a harvest in 8–10 weeks from seed — giving beginners faster feedback loops and more grow cycles per year to improve their skills.
Why do autoflowers get stunted?
The most common cause of stunted autoflowers is overwatering combined with dense soil. Because autos have a fixed life clock, any stress in weeks 1–4 directly shortens their vegetative window with no recovery time. Transplant shock, pH imbalance causing nutrient lockout, and excess nutrients at full photoperiod-strength doses also stunt growth. Use the pot-lift and finger-test method to avoid overwatering, and germinate in your final container to eliminate transplant shock entirely.
Can you top autoflower plants as a beginner?
Topping is not recommended for beginners growing autoflowers, especially in weeks 1–3. Autoflowers don't have the extended vegetative recovery time that photoperiod plants have. Removing the apical tip before week 4 creates a recovery crisis during the plant's most critical development window. Use low-stress training (LST) with soft plant ties after week 3 instead — it opens the canopy and improves light penetration without the recovery cost of topping.
What is the easiest autoflower strain for a first grow?
Great White Shark Autoflower and Blue Moonshine Autoflower are two of the most beginner-friendly options available — both stay compact, show high tolerance to minor environmental inconsistency, and have lower nutrient sensitivity than high-THC strains. Northern Lights Auto is the most widely recommended industry option for first-time indoor growers. All three finish in under 10 weeks and don't require aggressive training to produce satisfying results.
How often should you water autoflower seedlings?
Water autoflower seedlings only when the top inch of soil is dry to the touch — typically every 2–3 days during the seedling stage. Use only 30–60ml around the immediate stem area, not across the whole pot. Lift the pot before watering: a light pot needs water, a heavy pot does not. Never let autoflower seedlings sit in standing water or in soil that stays wet for more than 2 days at a time.