Most first-time growers fail before their seeds even crack — not because of bad genetics or bad luck, but because they skipped the planning phase. This first cannabis grow checklist breaks everything down into four manageable phases so you buy the right things in the right order, spend only what you need to, and walk into germination day fully prepared.
This is not a setup tutorial. It's a decision and procurement guide — the shopping list, the budget breakdown, and the pre-flight checklist every beginner actually needs. If you want the physical tent assembly steps, see our Complete Indoor Grow Tent Setup visual guide. This guide covers everything that happens before that.
Use the progress tracker below to move through each phase. Check items off as you go. By the time you hit Week 3, you'll be ready to germinate with confidence.
Key takeaway: Plan your grow in 3 purchasing weeks — Seeds + Structure (Week 1), Medium + Nutrients (Week 2), Environment + Monitoring (Week 3) — then run a full checklist the day before you drop your first seed.
How to Use This Checklist (Read This First)
A complete beginner cannabis grow checklist is organized into four phases: Week 1 covers foundational decisions (seeds, tent, light), Week 2 covers the root zone (medium, pots, nutrients), Week 3 covers environmental control (fans, meters, timers), and a final day-before walkthrough confirms everything is ready. Each phase has budget-tier options so you know exactly what to buy at your price point.
Here's how to use this guide effectively:
- Read each phase in full before purchasing anything in that phase
- Choose your budget tier first — then buy only within that tier
- Order seeds in Week 1 even if they arrive in Week 2 or 3
- Use the Grow Cost Calculator to estimate your total spend before you commit
- Bookmark this page and return to each checklist as you complete purchases
Pro tip: Before buying anything, use the free Grow Planner to map out your timeline. Enter your target harvest date and it works backward to tell you exactly when to germinate, flip to flower, and start flushing.
Choosing Your Grow Scale First
Before Week 1 shopping begins, decide on your grow scale. This single decision determines almost every other purchase on this list.
| Tent Size | Plants | Light Needed | Expected Yield | Best For |
|---|---|---|---|---|
| 2×2 ft (60×60 cm) | 1–2 | 100–150W LED | 1–2 oz | Micro grows, very tight spaces |
| 2×4 ft (60×120 cm) | 2–4 | 200–300W LED | 3–6 oz | Best for first-time growers |
| 3×3 ft (90×90 cm) | 2–4 | 250–350W LED | 4–8 oz | Slightly more ambitious beginners |
| 4×4 ft (120×120 cm) | 4–9 | 400–600W LED | 6–14 oz | Scale-up after first grow |
For this guide, all budget estimates and recommendations are based on a 2×4 ft tent — the near-universal recommendation for first-time indoor growers. Scale up or down from there.
Week 1 Checklist: Seeds, Tent & Lights
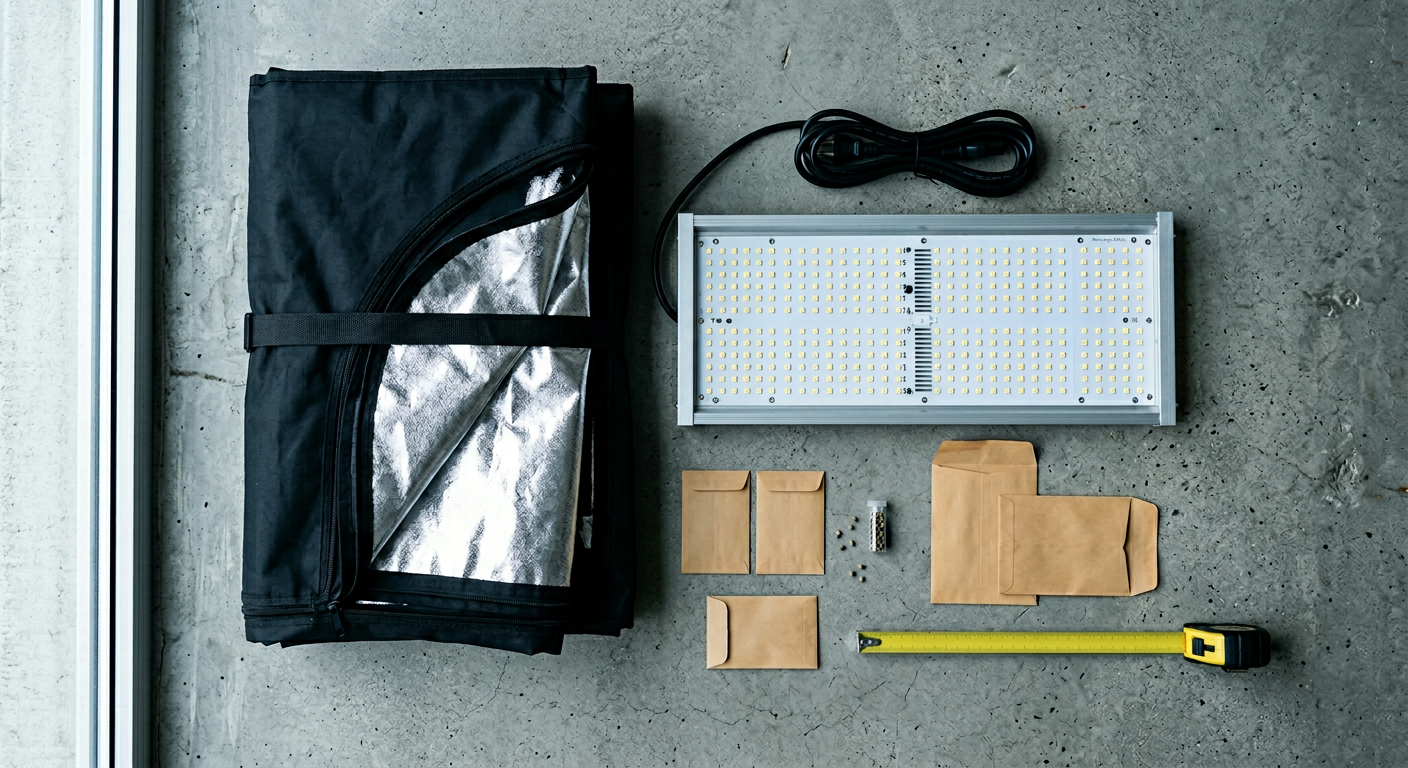
Week 1 of your first cannabis grow checklist covers the three biggest structural decisions: what genetics to grow, what environment to grow them in, and what light to power that environment. These items have the longest lead times and the widest price range, so tackle them first.
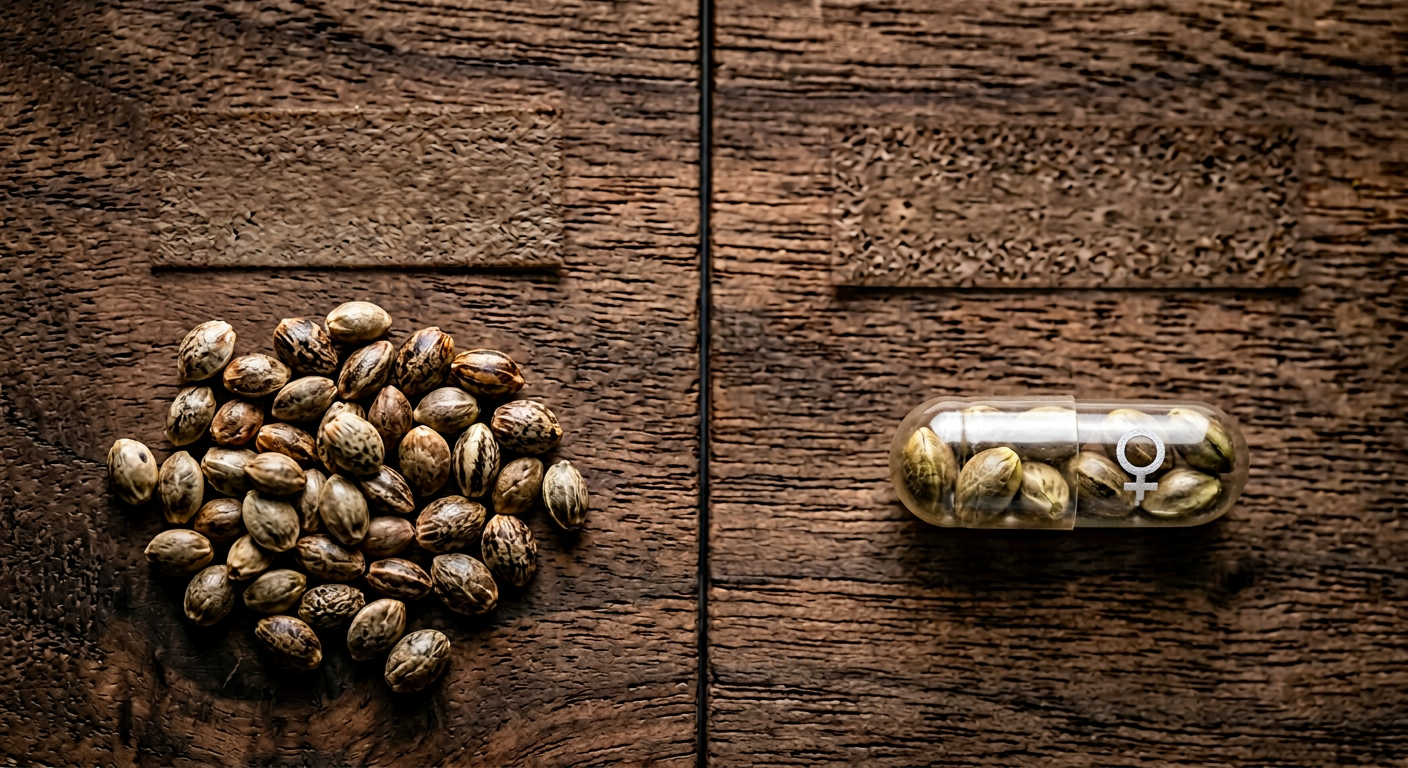
✅ Seeds
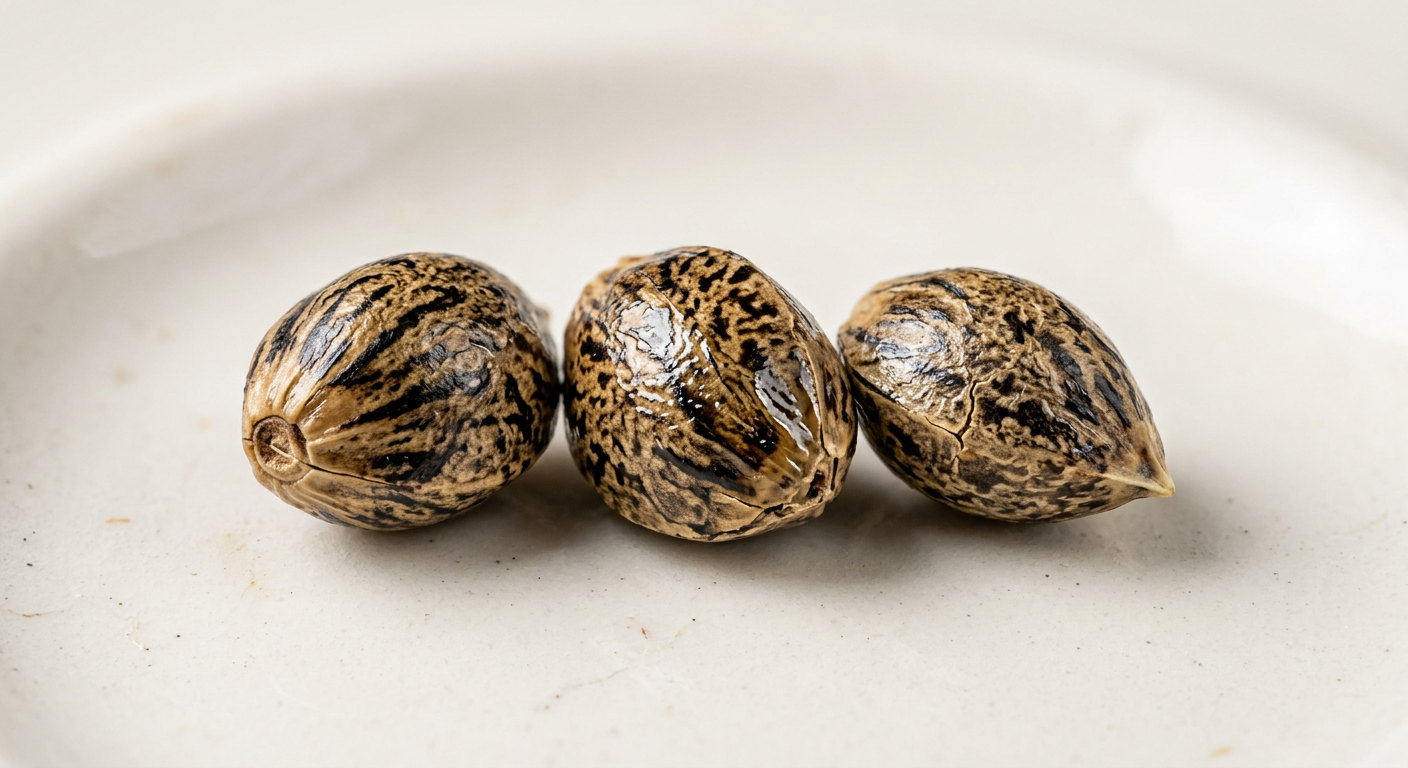
Your seed choice sets the genetic ceiling for your entire grow. No amount of technique or equipment upgrades what the genetics allow. For a first grow, the two key decisions are: autoflower vs. feminized photoperiod, and strain difficulty.
- Decide: autoflower (easier) or feminized photoperiod (more control)
- Choose a beginner-appropriate strain (see seed recommendations below)
- Buy 3–5 seeds minimum — not just 1 or 2
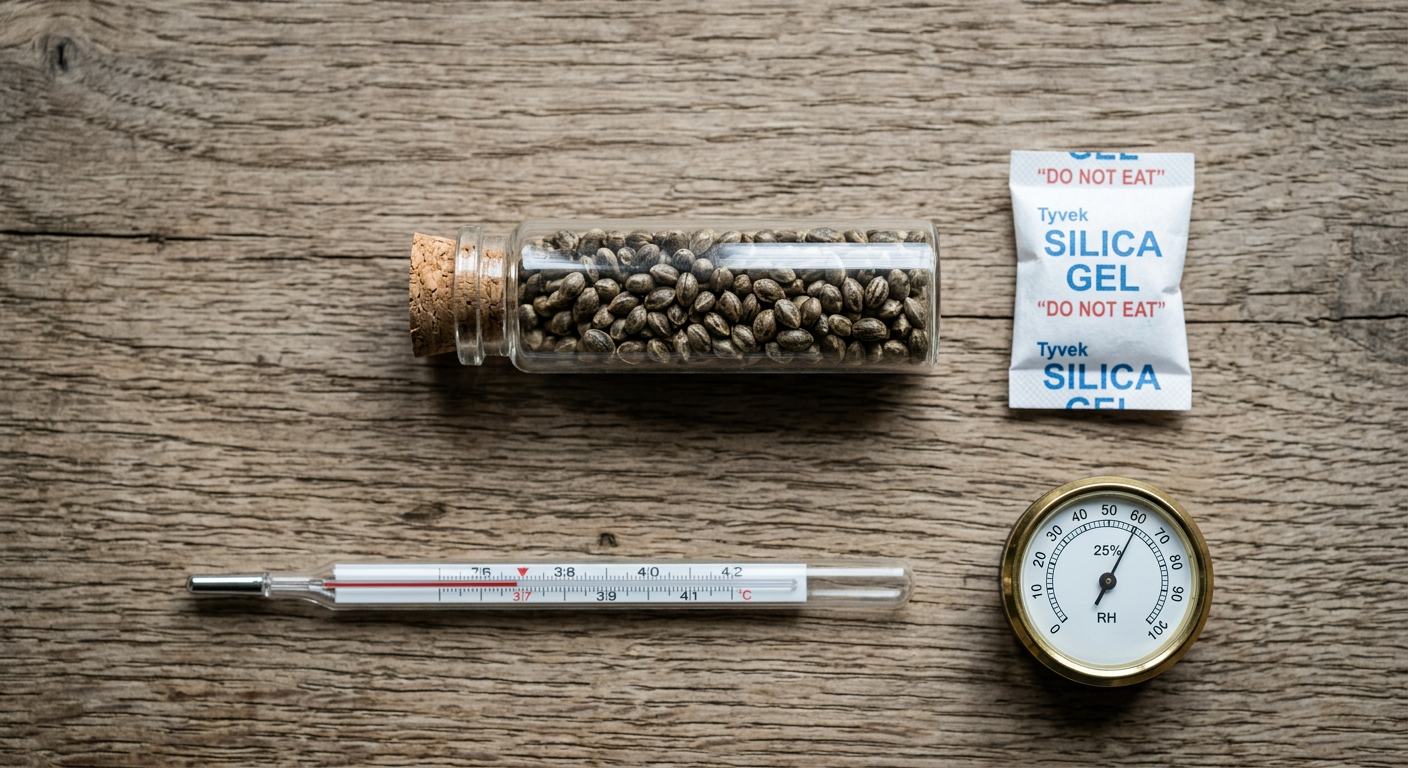
- Confirm your shipping address and expected delivery window
- Store seeds in a cool, dark, dry place upon arrival
Pro tip: If you're unsure whether to go auto or photo for your first grow, read our full Autoflower vs Photoperiod guide — it covers exactly how the two types differ in management, timing, and yield.
Budget Tier — Seeds
- 🟢 Budget: 3 autoflower seeds — look for hardy, fast-finishing genetics. Swiss Cheese Autoflower (THC: 17%) is compact, fast, and very tolerant.
- 🔵 Mid-range: 5 feminized seeds from a proven strain. Northern Lights x Big Bud (THC: 20%) delivers heavy yields and grows short and stocky — ideal for small tents.
- 🟣 Premium: 5–10 seeds with genetic variety. Consider Skywalker OG Autoflower (THC: 23%) or White Widow Feminized (THC: 25%) — both are widely regarded as benchmark beginner strains in the broader industry.
For a curated shortlist with grow difficulty ratings, see our guide to the Best Cannabis Strains for Beginners.
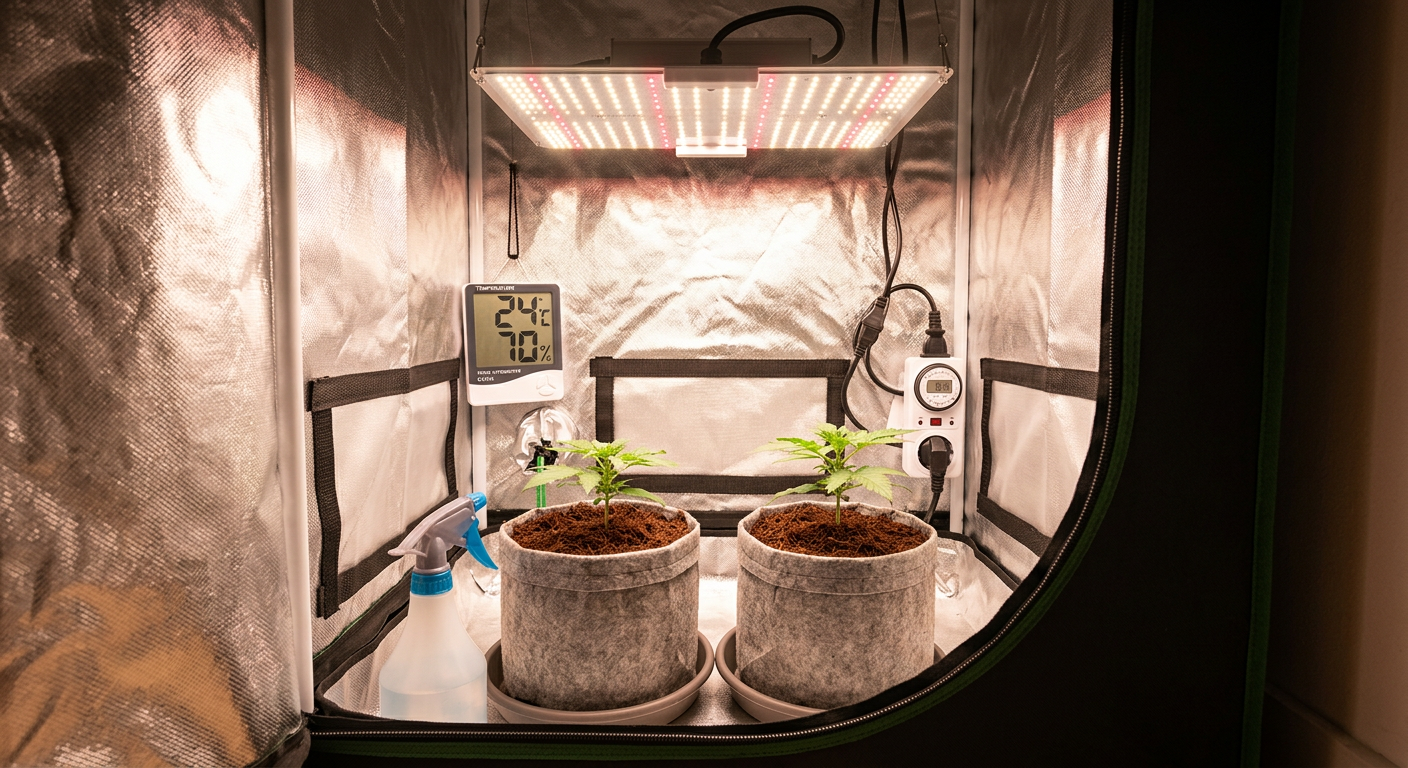
✅ Grow Tent
- Choose tent size (2×4 ft recommended for first grow)
- Confirm tent has double-stitched corners and thick canvas (600D minimum)
- Check that all ducting ports are the right diameter for your fan
- Verify the tent has tool/cable ports and observation windows
- Order with enough lead time to assemble before Week 3
Budget Tier — Grow Tent
- 🟢 Budget ($50–$80): Basic 2×4 ft tent from entry-level brands. Works fine — prioritize canvas thickness over brand name.
- 🔵 Mid-range ($90–$130): Well-known tent brands with better zipper quality and light-proof seams. Worth the extra cost if you can swing it.
- 🟣 Premium ($150–$250+): Heavy-duty 2×4 or upgrade to 3×3 with stronger frame, better light seal, and access ports on multiple sides.
✅ Grow Light
- Choose LED (recommended for beginners — lower heat, better efficiency)
- Target 200–300W true wattage for a 2×4 ft tent
- Confirm the light covers your full tent footprint at the manufacturer's recommended height
- Check that it has dimming capability (important for seedling stage)
- Verify hanging hardware is included
Warning: Avoid blurple (red/blue LED) budget lights — they dramatically underperform modern full-spectrum white LEDs using Samsung LM301B or LM301H diodes. The efficiency difference is 30–50%, meaning real cost savings at harvest.
Budget Tier — Grow Light
- 🟢 Budget ($80–$140): QB-style 200W full-spectrum LED with Samsung diodes. Gets the job done for a first grow.
- 🔵 Mid-range ($150–$280): Reputable QB or bar-style LED, 240–300W, with dimmer. Noticeably better canopy penetration and bud density.
- 🟣 Premium ($300–$600): Commercial-grade bar light at 300–400W with UV/IR supplemental spectrum and app-based dimming. Overkill for a first grow but future-proof.
Use the free Light Calculator to verify your chosen fixture delivers enough PPFD across your tent footprint at your target hanging height.
Week 1 spending summary: Budget tier total ~$180–$260. Mid-range ~$310–$490. Premium ~$500–$900+. The light is your biggest single cost — don't cut corners here.
Week 2 Checklist: Growing Medium, Nutrients & Pots
Week 2 of your cannabis grow starter checklist focuses on the root zone — the growing medium, pot size and type, and the nutrient program you'll follow from seedling to harvest. These decisions are more interdependent than they look: your medium choice dictates your nutrient approach, and your pot size affects how often you water and when you transplant.
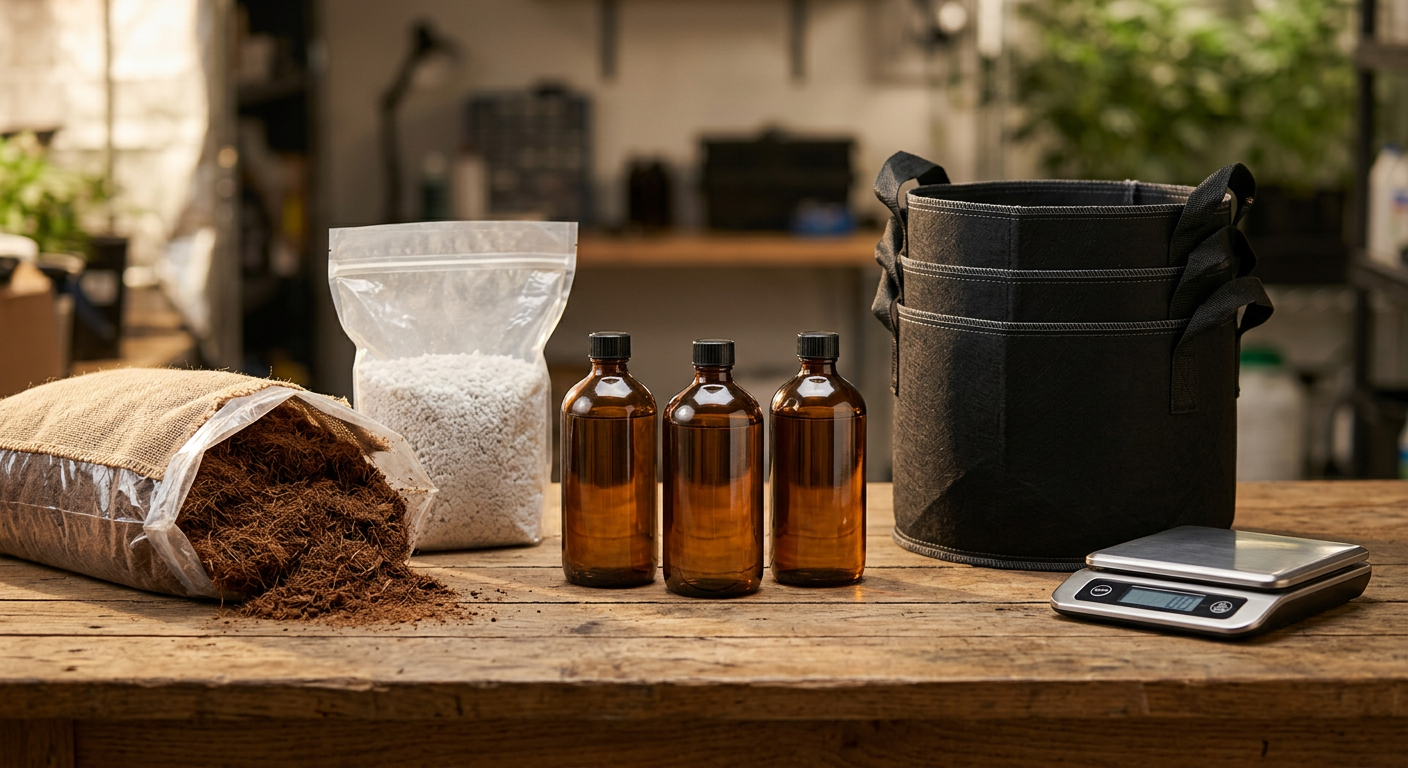
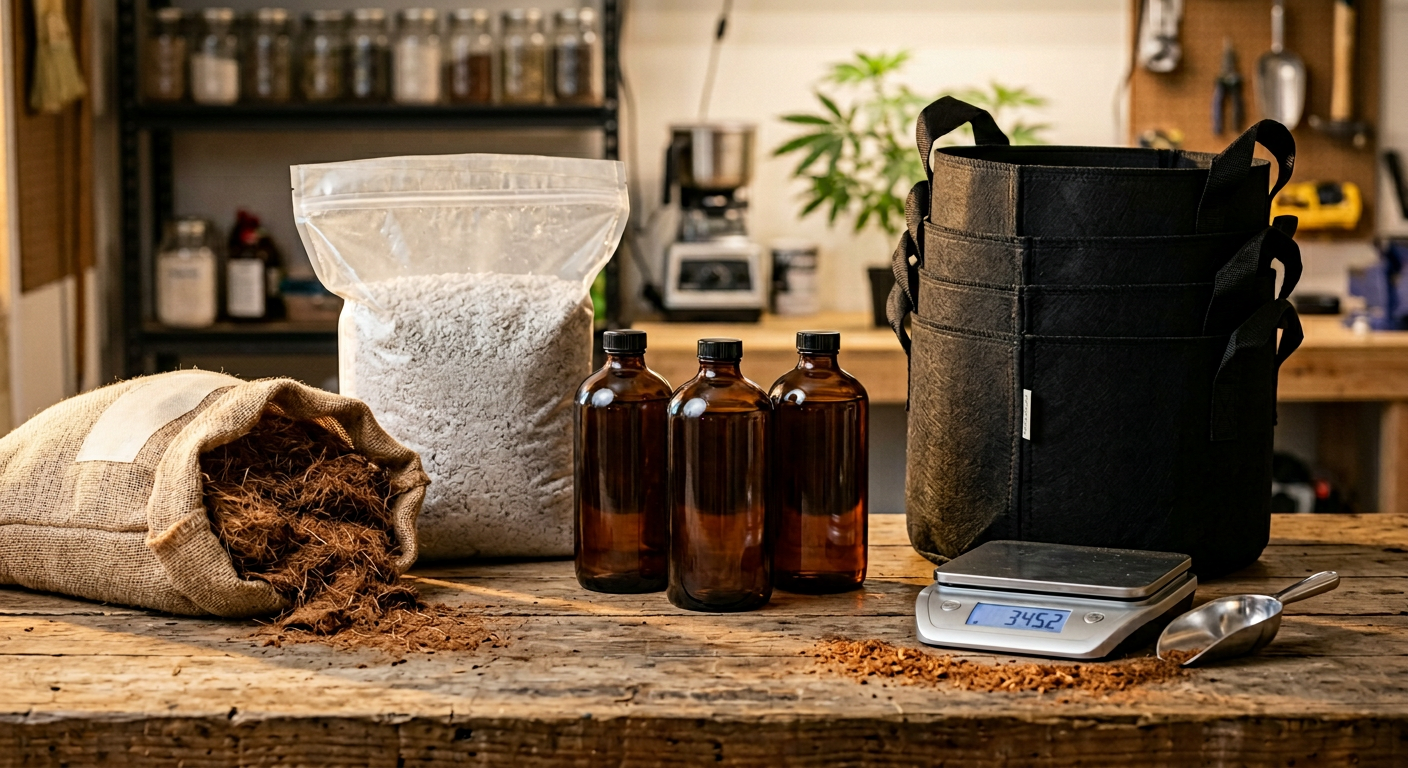
✅ Growing Medium
- Choose your medium: soil, coco coir, or hydroponics
- For soil: buy a quality cannabis-specific potting mix or amend a standard mix
- For coco: buy coco coir bricks or pre-buffered loose coco + perlite (30% ratio)
- Avoid heavily pre-fertilized soils for seedlings — they can cause nutrient burn
- Purchase enough medium to fill all pots with 10–20% extra
Medium Options Compared
| Medium | Difficulty | Nutrient Control | Cost | Best For |
|---|---|---|---|---|
| Cannabis potting soil | Easy | Low (medium handles it) | Low | True beginners |
| Coco coir + perlite | Medium | High (you control everything) | Low–Medium | Faster growth, more control |
| Hydro (DWC) | Hard | Very high | Medium–High | After first soil/coco grow |
Expert note: Coco coir is technically inert, meaning it contains zero nutrients on its own. This makes it extremely predictable — you control 100% of what the plant receives. It also drains freely, making overwatering nearly impossible. Many experienced growers consider it the best medium for learning cannabis nutrition fundamentals.
✅ Pots
- Buy fabric pots (preferred over plastic — better air pruning, less overwatering risk)
- Start seedlings in small containers: solo cups or 0.5L pots
- Have final pot size ready: 3-gallon for autoflowers, 5-gallon for photoperiod feminized
- Ensure pots have drainage holes or permeable fabric base
- Buy saucers or a catch tray to protect your tent floor
Budget Tier — Medium + Pots
- 🟢 Budget ($25–$45): 1 bag cannabis soil, 2× 3-gallon plastic pots with drainage holes. Simple and functional.
- 🔵 Mid-range ($45–$80): 20L coco coir + large bag of perlite, 2× 3-gallon fabric pots. Better aeration and growth rate.
- 🟣 Premium ($70–$120): Pre-buffered coco, 5-gallon fabric pots, seedling trays, and a bag of quality amendments or mycorrhizae inoculant.
✅ Nutrients
- Choose a beginner-friendly 3-part nutrient line (Grow, Bloom, Micro) or an all-in-one formula
- Buy a dedicated cannabis Cal-Mag supplement (essential for coco and LED grows)
- Get a seedling-safe starter nutrient or ensure your main line has dilution guidance
- Avoid buying every additive marketed to you — start with base nutrients only
- Keep nutrient feeding charts from the manufacturer printed or bookmarked
Pro tip: Less is more with first-grow nutrients. Start at 25–50% of the recommended dose and increase only if you see deficiency signs. Overfeeding causes more problems for beginners than underfeeding. Use our free Nutrient Calculator to dial in your feed schedule by growth stage.
Budget Tier — Nutrients
- 🟢 Budget ($30–$50): Basic 3-part liquid nutrient set. Covers veg and bloom. Add a cheap Cal-Mag supplement.
- 🔵 Mid-range ($60–$100): Quality 3-part set with Cal-Mag and a pH Up/Down kit included. More predictable results.
- 🟣 Premium ($100–$180): Full nutrient system including base, bloom booster, silica, Cal-Mag, and a flush agent. More variables to manage — only worth it after your first grow.
Week 2 spending summary: Budget tier ~$55–$95. Mid-range ~$105–$180. Premium ~$170–$300. Medium and pots are cheap — don't over-invest here on your first run.
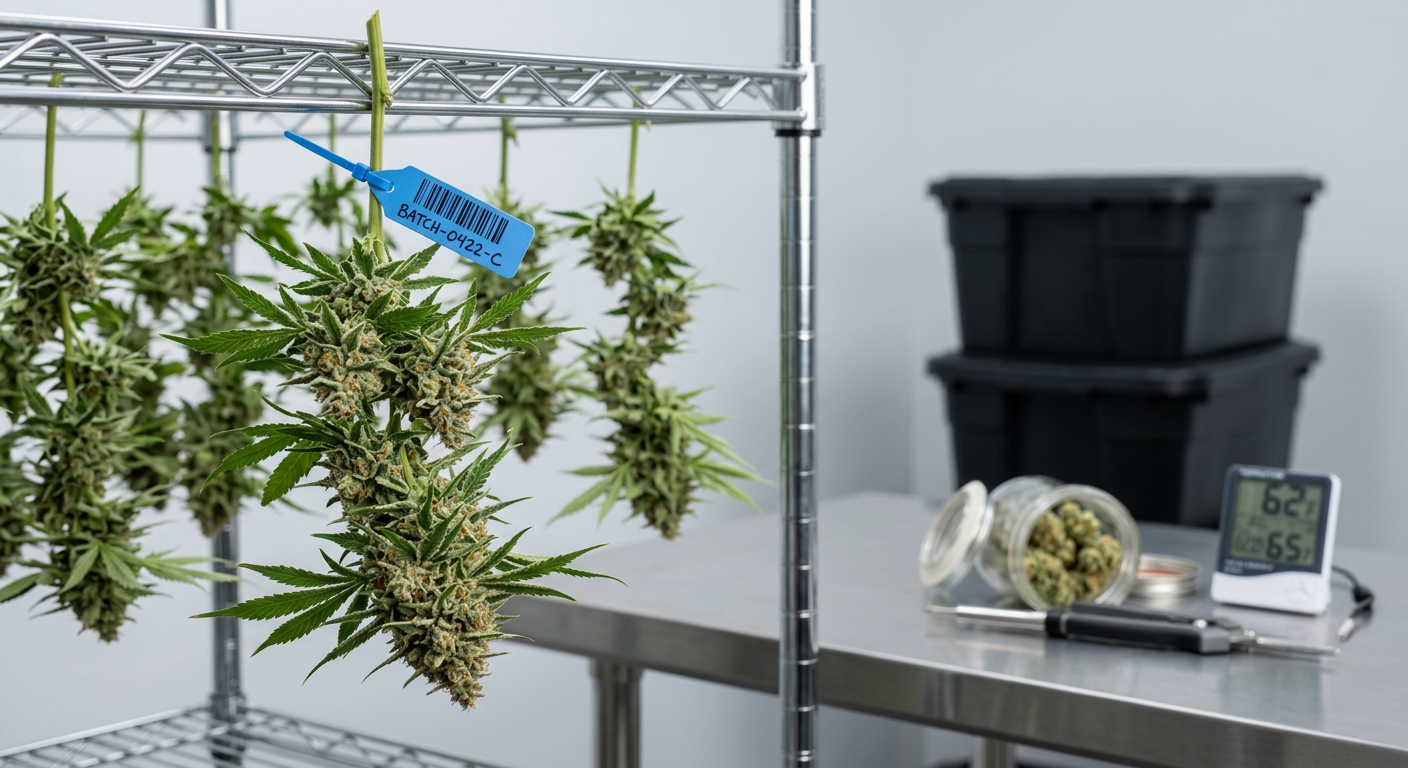
Week 3 Checklist: Environmental Controls, pH/EC Meters & Timers
Week 3 of your indoor cannabis grow essentials list covers everything that keeps your environment stable and measurable. Beginners consistently underestimate this phase — but environmental failures (wrong pH, wrong temperature, poor airflow) cause more crop loss than any other single factor.
✅ Ventilation System
- Buy an inline fan sized to your tent: 4-inch for 2×4 ft, 6-inch for 4×4 ft
- Pair with a matching carbon filter (same diameter, same CFM rating)
- Buy flexible ducting to connect fan, filter, and tent port
- Add a small oscillating clip fan for internal air circulation
- Check that your fan has a speed controller or buy one separately
Budget Tier — Ventilation
- 🟢 Budget ($60–$90): Basic 4-inch inline fan + carbon filter combo kit. Handles odor and air exchange adequately for 2×4 ft.
- 🔵 Mid-range ($90–$150): Quiet 4-inch fan with speed controller + quality activated carbon filter. Noticeably quieter and more adjustable.
- 🟣 Premium ($150–$260): EC fan with digital controller, premium carbon filter, and separate clip fans with oscillation settings.
✅ pH Meter
pH is the single most important measurement in cannabis cultivation. When pH is outside the optimal range — 6.0–7.0 for soil, 5.5–6.5 for coco/hydro — your plant can't absorb nutrients regardless of how much you feed it.
- Buy a digital pH pen (not liquid drop test kits — not accurate enough)
- Buy pH calibration solution (7.0 and 4.0 buffer solutions)
- Buy pH Up and pH Down solutions for water adjustment
- Test your tap water pH before germination day
- Calibrate your meter before first use
Warning: Don't skip the pH meter to save $20. Every nutrient lockout problem, every mystery yellowing, every stunted plant in a first grow can almost always be traced to unchecked pH. It is non-negotiable equipment.
✅ EC/TDS Meter
- Buy a digital EC (electrical conductivity) or TDS meter
- Use EC to measure nutrient concentration in your feed water
- Target EC of 0.4–0.8 for seedlings, 1.0–1.6 for veg, 1.4–2.0 for flower
- Test plain tap water EC before first use (baseline reading)
Budget Tier — pH + EC Meters
- 🟢 Budget ($35–$55): Combo pH/EC pen. Lower accuracy but functional for a first grow.
- 🔵 Mid-range ($60–$100): Separate dedicated pH pen and EC pen. More accurate and easier to calibrate individually.
- 🟣 Premium ($100–$200+): Apera or BlueLab instruments with ATC (automatic temperature compensation) and multi-point calibration. Accurate to ±0.01 pH.
✅ Timer
- Buy a mechanical or digital outlet timer for your grow light
- Set 18 hours on / 6 hours off for vegetative stage (photoperiod plants)
- Autoflower growers: set 18/6 from seed to harvest — no change needed
- Confirm timer handles your light's wattage (check amp rating on timer vs. light)
Unsure about light schedules? Our Cannabis Light Schedule guide explains the 18/6, 20/4, and 12/12 options with the science behind each decision.
✅ Thermometer / Hygrometer
- Buy a digital combo thermometer/hygrometer with min/max memory
- Target: 70–77°F (21–25°C) during seedling and veg
- Target: 65–75°F (18–24°C) during flower
- Target humidity: 65–70% RH for seedling, 40–60% RH for veg, 40–50% RH for flower
- Place sensor at canopy level — not at tent floor or ceiling
For a deep dive into temperature ranges by growth stage, see our Cannabis Temperature Control guide. For humidity, VPD targets, and dehumidification strategies, see the Cannabis Humidity Control guide.
Week 3 spending summary: Budget tier ~$95–$145. Mid-range ~$150–$250. Premium ~$250–$460. Ventilation is the biggest cost here — it's also one of the most impactful investments you'll make.
Budget Tier Comparison: What You Actually Need vs. What's Nice to Have
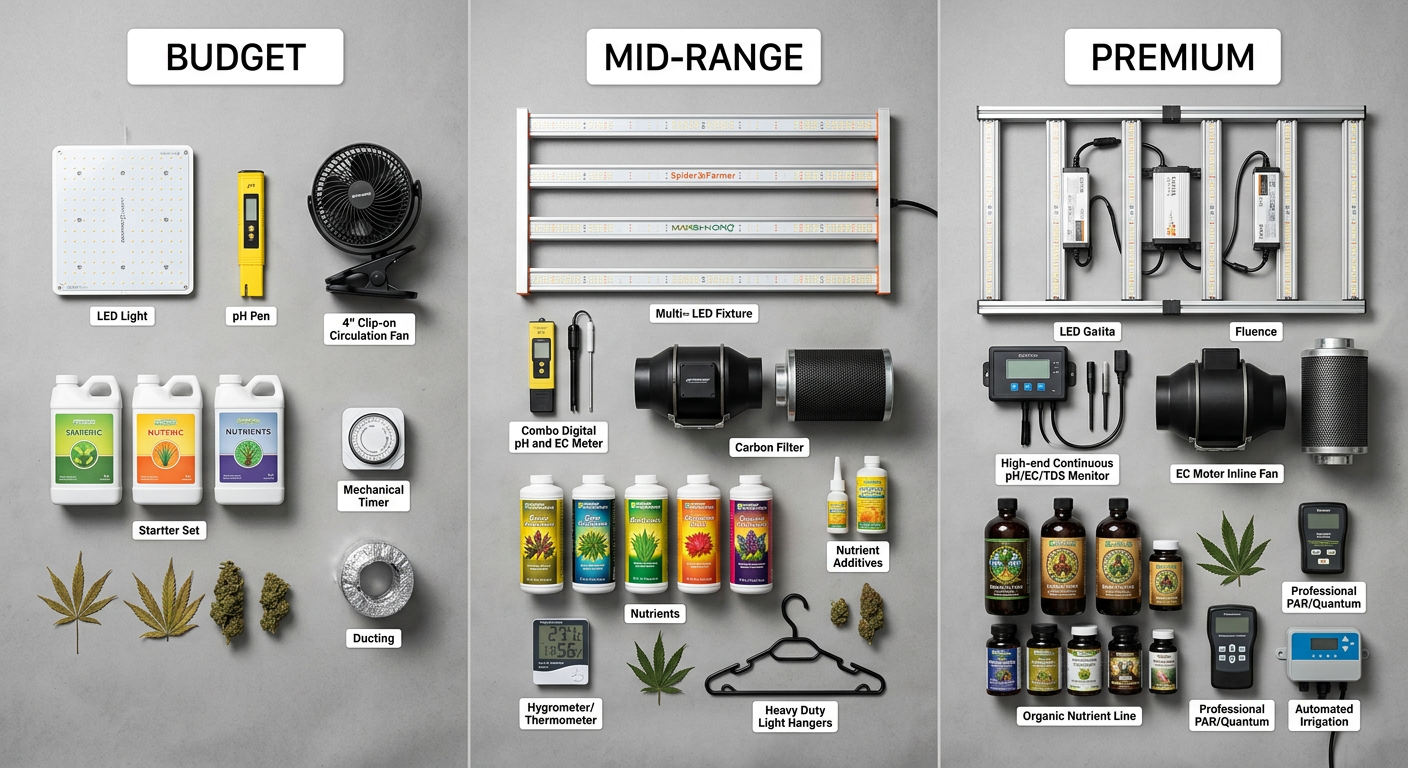
A beginner cannabis grow shopping list should separate must-have items from nice-to-have upgrades. The budget tier covers everything required to complete a functional first grow. Mid-range adds meaningful quality improvements. Premium is for growers who want to start close to where they'll eventually land after several grows.
| Item | 🟢 Budget | 🔵 Mid-Range | 🟣 Premium |
|---|---|---|---|
| Seeds (5 seeds) | $30–$50 | $50–$80 | $80–$120 |
| Grow tent (2×4) | $50–$80 | $90–$130 | $150–$250 |
| Grow light | $80–$140 | $150–$280 | $300–$600 |
| Inline fan + filter | $60–$90 | $90–$150 | $150–$260 |
| Growing medium + pots | $25–$45 | $45–$80 | $70–$120 |
| Nutrients + Cal-Mag | $30–$50 | $60–$100 | $100–$180 |
| pH meter + Up/Down | $25–$40 | $40–$70 | $80–$150 |
| EC/TDS meter | $10–$20 | $20–$40 | $40–$80 |
| Timer | $8–$15 | $15–$25 | $25–$50 |
| Thermometer/Hygrometer | $10–$20 | $20–$35 | $35–$70 |
| Miscellaneous (clips, ties, spray bottle, tray) | $15–$25 | $25–$40 | $40–$70 |
| TOTAL ESTIMATE | $343–$575 | $605–$1,030 | $1,070–$1,950 |
Expert note: The jump from budget to mid-range is almost entirely justified by a better grow light. A higher-quality LED at the same true wattage can deliver 20–40% more usable photons at the canopy, translating directly into denser, heavier buds. If you can only upgrade one item from the budget tier, upgrade the light.
The Day-Before Germination Walkthrough Checklist
The day before your first germination is the most important checklist moment in your entire first grow. Every single item below should be confirmed before your seed touches moisture. This complete checklist for first-time cannabis growers ensures you catch any missing piece before it matters.
Tent Assembled and Light Mounted
Your grow tent should be fully assembled with no gaps at zippers or ports. Your light should be hung at the manufacturer's recommended height — typically 24–36 inches above where your seedling will sit. Confirm the hanging hardware is secure.
Light Timer Programmed
Plug your grow light into the timer. Set the on/off cycle to your chosen schedule (18/6 for most first grows). Run through one full cycle manually to confirm it switches correctly. Verify the timer can handle the full amperage of your fixture.
Ventilation Running and Ducting Sealed
Turn on your inline fan and confirm air is exhausting from the tent. Check all ducting connections — use metal duct tape or hose clamps, not just friction fits. Run your fan at 50–70% speed for the seedling stage. Verify your carbon filter is installed in the correct direction (air flows through the filter, not around it).
Environment Stable: Temp and Humidity in Range
With lights on and fan running, let the tent stabilize for 2–3 hours, then check your thermometer/hygrometer. You're looking for 70–77°F (21–25°C) and 65–70% RH for seedling week. If humidity is low, a small ultrasonic humidifier inside the tent solves it quickly.
Water pH Tested and Adjusted
Fill your watering vessel with room-temperature water. Measure pH with your calibrated pen. Adjust to 6.2–6.8 for soil or 5.8–6.2 for coco using pH Up or Down. This is the water you'll use for germination — get it right now, not after the seed cracks.
Growing Medium Prepared and Pots Ready
If using soil: pre-moisten your soil before filling pots — it should clump slightly but not drip when squeezed. If using coco: pre-soak with pH-adjusted water and a light Cal-Mag feed. Fill your seedling containers (solo cups or small pots), poke a 0.5 cm deep hole in the center.
Germination Method Selected and Ready
Choose your method: paper towel (fastest visible crack), direct soil (least transplant stress), or water glass soak (24 hours then into soil). Have everything for your method laid out and ready. Visit our complete Germination Guide if you haven't confirmed your method yet — it covers success rates and timing for each approach.
Final Supply Count
Do a physical count against the full checklist. Confirm you have: seeds, pH water, pots with medium, light on timer, fan running, thermometer reading in range, nutrients measured out, and spray bottle filled. If anything is missing, you have until tomorrow to fix it.
- Tent assembled and light-proof ✓
- Light hung at correct height ✓
- Timer programmed and tested ✓
- Inline fan exhausting correctly ✓
- Carbon filter installed correctly ✓
- Clip fan providing internal circulation ✓
- Temp: 70–77°F confirmed ✓
- Humidity: 65–70% RH confirmed ✓
- pH meter calibrated ✓
- Water pH adjusted and confirmed ✓
- Medium pre-moistened and pots filled ✓
- Seedling holes pre-poked ✓
- Germination method ready ✓
- Seeds located and accessible ✓
- Spray bottle filled with pH water ✓
Choosing the Right Seeds for Your First Grow
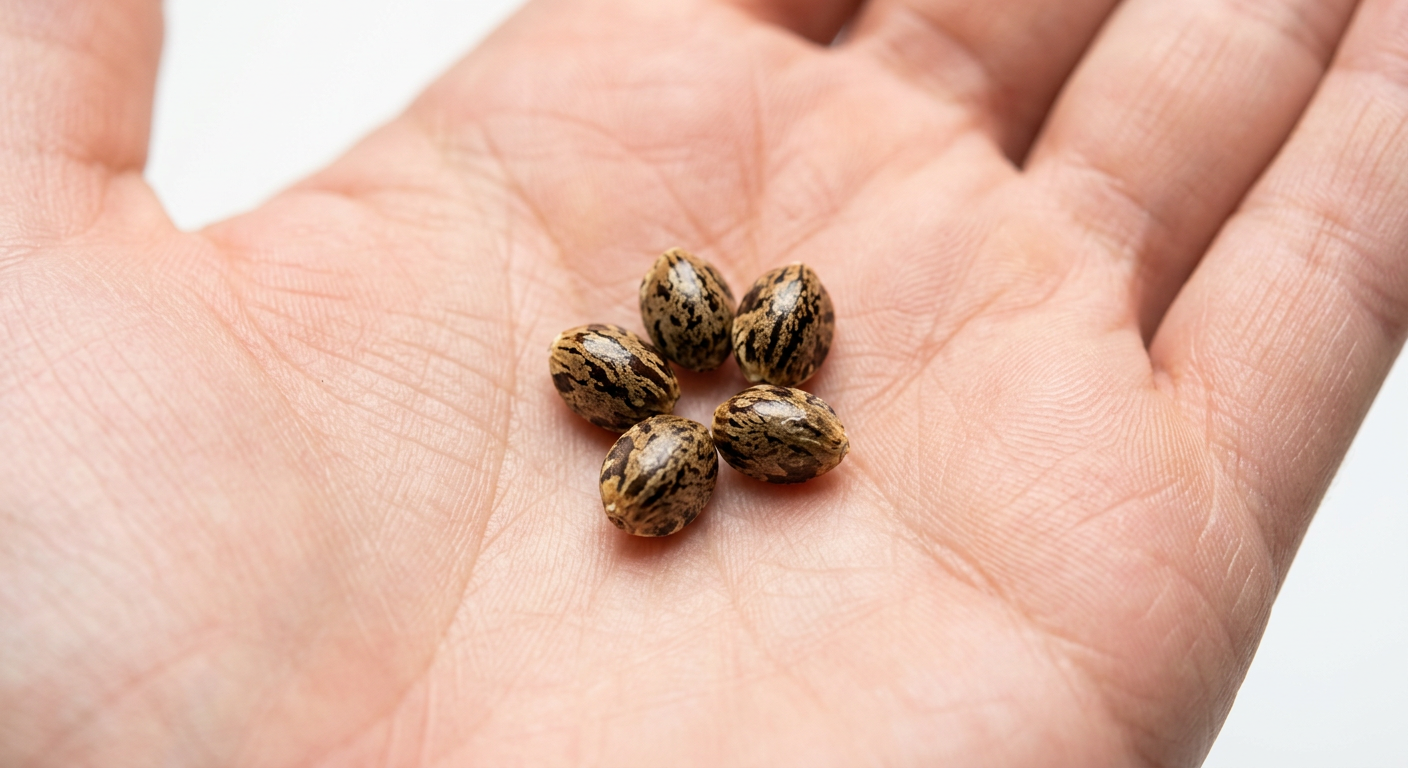
Your seed selection is the most personally meaningful decision on this entire beginner cannabis grow shopping list. The right choice depends on three factors: your grow space size, your experience level, and what kind of effect you're hoping to produce.
Best Autoflower Seeds for Beginners
Autoflowers flower automatically based on age, not light cycle. They're the most forgiving choice for a first grow — faster, more compact, and less sensitive to environmental swings.
- Swiss Cheese Autoflower (THC: 17%) — Compact, fast, and very resistant to stress. One of the easiest autoflowers to grow.
- Amnesia Haze Autoflower (THC: 17%) — Auto version of a legendary strain. Uplifting, cerebral effect. Finishes in about 75–80 days.
- Skywalker OG Autoflower (THC: 23%) — Heavier-hitting auto with relaxing indica-leaning effects. Grows short and dense.
- Banana Kush Autoflower (THC: 18%) — Fruity, easy-to-manage plant. Stays under 80 cm in most setups.
- Gorilla Glue Auto — An industry-standard autoflower widely available from multiple breeders. Extremely resinous, forgiving, and high-yielding for an auto.
Best Feminized Seeds for Beginners
Feminized photoperiod seeds give you full control over plant size — you veg until you're happy with the size, then flip to 12/12 to trigger flowering. More rewarding once you understand the basics.
- Northern Lights x Big Bud Feminized (THC: 20%) — Short, compact, huge yields, and extremely tolerant of beginner mistakes. Near-ideal first photoperiod strain.
- White Widow Feminized (THC: 25%) — One of the most grown strains in the world for a reason. Resilient, reliable, and delivers consistently in imperfect environments.
- Super Skunk Feminized (THC: 20%) — Fast-flowering, high-yielding, and practically bulletproof. Great for growers learning feeding schedules.
- OG Kush — A flagship beginner-recommended strain in the broader market. Medium difficulty, iconic aroma, strong effect. Available from many breeders including our own OG Kush Feminized at THC: 26%.
- Blue Dream — Extremely popular beginner strain (not sold here, but widely available). Sativa-dominant, high-yielding, and very forgiving of feeding errors.
For help deciding which type is right for you before you buy, use our free Grow Planner — it walks you through grow type, timeline, and strain selection in one flow.
Common First-Grow Mistakes You Can Avoid Right Now
The most common first-grow failures are almost entirely preventable with the right prep. Here are the mistakes that kill the most first-time grows — and how your checklist protects you from each one.
Overwatering
Overwatering is the #1 beginner mistake by a wide margin. Cannabis roots need both water and oxygen — soggy medium suffocates roots and opens the door to root rot and fungus gnats. The fix: water only when the top inch of medium is dry, or lift the pot — a light pot means it's time to water, a heavy pot means wait.
Skipping pH Checks
Unbalanced pH causes nutrient lockout — the plant can't absorb minerals even when they're present in the medium. This presents as mystery deficiencies that don't respond to more feeding. Check and adjust your water pH every single feed without exception, especially in your first grow when you're still learning what normal looks like.
If you see unusual leaf symptoms in the first two weeks, use our Plant Diagnosis tool to identify the issue before reaching for more nutrients.
Wrong Light Height
Too close = light stress and bleaching. Too far = stretchy, weak stems and airy buds. Follow your manufacturer's recommended height chart and adjust as the plant grows. Seedlings need the light further away — most growers start at 24–30 inches for the first two weeks, then move the light down as the plant establishes.
Buying Too Many Additives
The nutrient supplement industry is aggressively marketed to beginners. Buying 8 different bottles for your first grow creates confusion, not quality. Start with base nutrients, Cal-Mag, and pH adjustment products only. Add one supplement at a time in future grows once you understand how the plant baseline responds.
Choosing the Wrong Strain for the Space
A sativa-dominant strain in a 2×2 tent is a recipe for a plant that outgrows your space by week 4 of flower. Research the expected height of any strain before buying — look for compact indicas or autoflowers for small tents, and check our Best Strains for Indoor Growing guide for height-appropriate recommendations.
Warning: Don't start your first grow with clones if you've never grown before. Clones require an established mother plant or purchasing from a dispensary (where legal), are more susceptible to root shock, and may carry pests or pathogens. Seeds are cleaner, more reliable, and provide better learning opportunities for beginners.
Tools That Make Your First Grow Easier
Beyond the physical equipment checklist, a set of free planning tools can dramatically improve your decision-making before and during your first grow. These aren't upsells — they're calculation tools that replace guesswork with numbers.
- Grow Planner — Plan your full grow timeline from germination to harvest
- VPD Calculator — Find your optimal temperature and humidity combination by growth stage
- Nutrient Calculator — Build a feeding schedule based on your medium and nutrient line
- Yield Estimator — Estimate harvest weight based on light, strain, and grow method
- Grow Cost Calculator — Total your setup costs before purchasing anything
- Light Calculator — Verify your light delivers adequate PPFD for your tent size
- Plant Diagnosis Tool — Identify symptoms during your grow before they escalate
Pro tip: Run the VPD Calculator before germination day and save the target ranges for seedling, veg, and flower stages in a notebook next to your tent. VPD is the relationship between temperature and humidity — keeping it in range prevents most environmental stress issues before they start. Our VPD for Cannabis guide explains it fully if you want to go deeper.
What Happens After Your Checklist Is Complete
Once every item on your first time indoor cannabis grow supply list is checked off and your environment is dialed in, you're ready to germinate. From germination, your grow moves through four main phases: seedling (weeks 1–2), vegetative growth (weeks 3–8 for photos, included in auto timeline), flowering (weeks 8–16 depending on strain), and harvest prep.
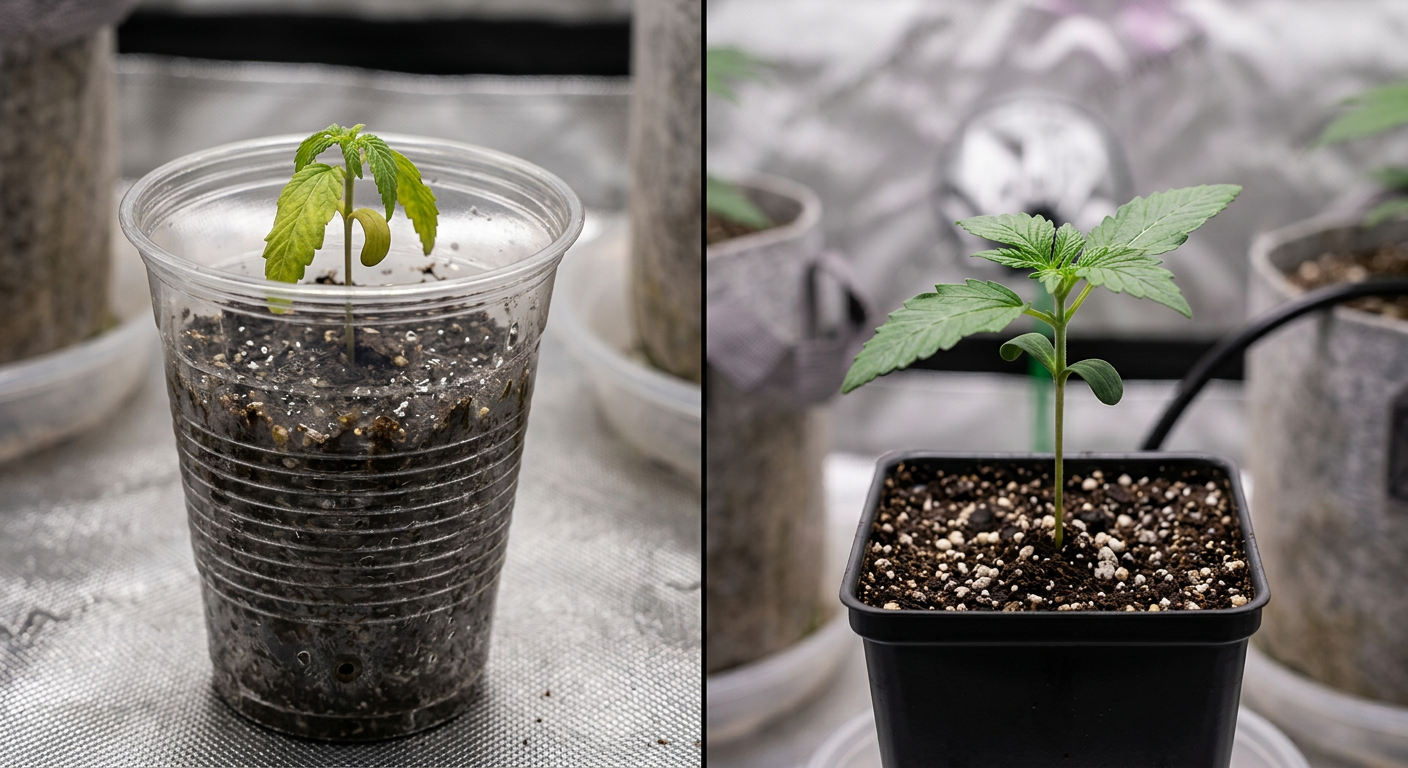
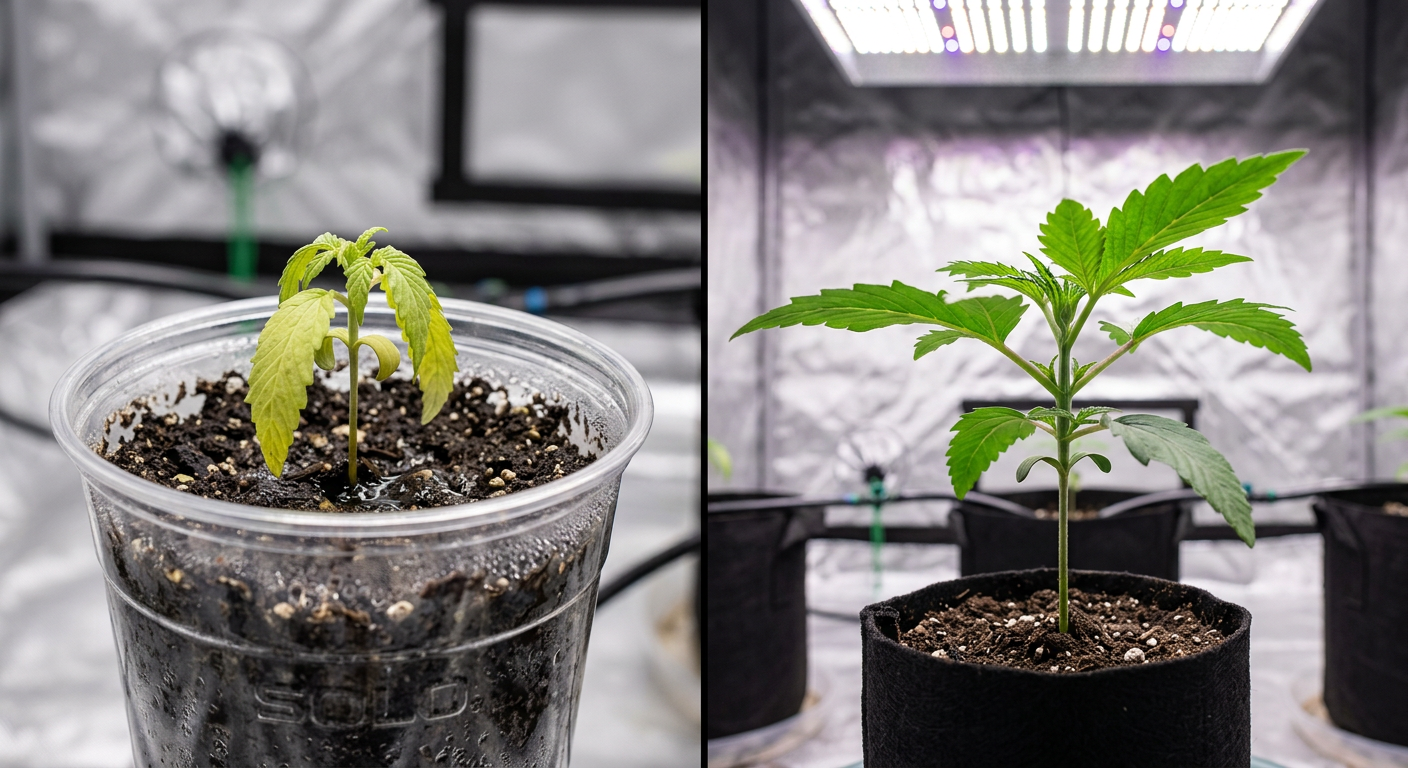
After Germination: Seedling Phase
The seedling phase is the most fragile window of the entire grow. Keep humidity high (65–70%), light dim (or at maximum hanging height), and watering conservative — small amounts of pH-adjusted water around the seedling, not soaking the entire pot. Our Cannabis Seedling Care Guide covers this phase in full detail.
If you see unusual symptoms in weeks 1–2, check our Cannabis Seedling Problems visual diagnosis guide before changing anything in your setup.
Planning Your Training and Harvest Windows
Once your seedling is established (typically day 10–14), start thinking about training techniques. Beginners do well with low-stress training (LST) — gently bending stems to open the canopy. More advanced techniques like topping can dramatically increase yield; our Topping Cannabis guide covers timing and execution.
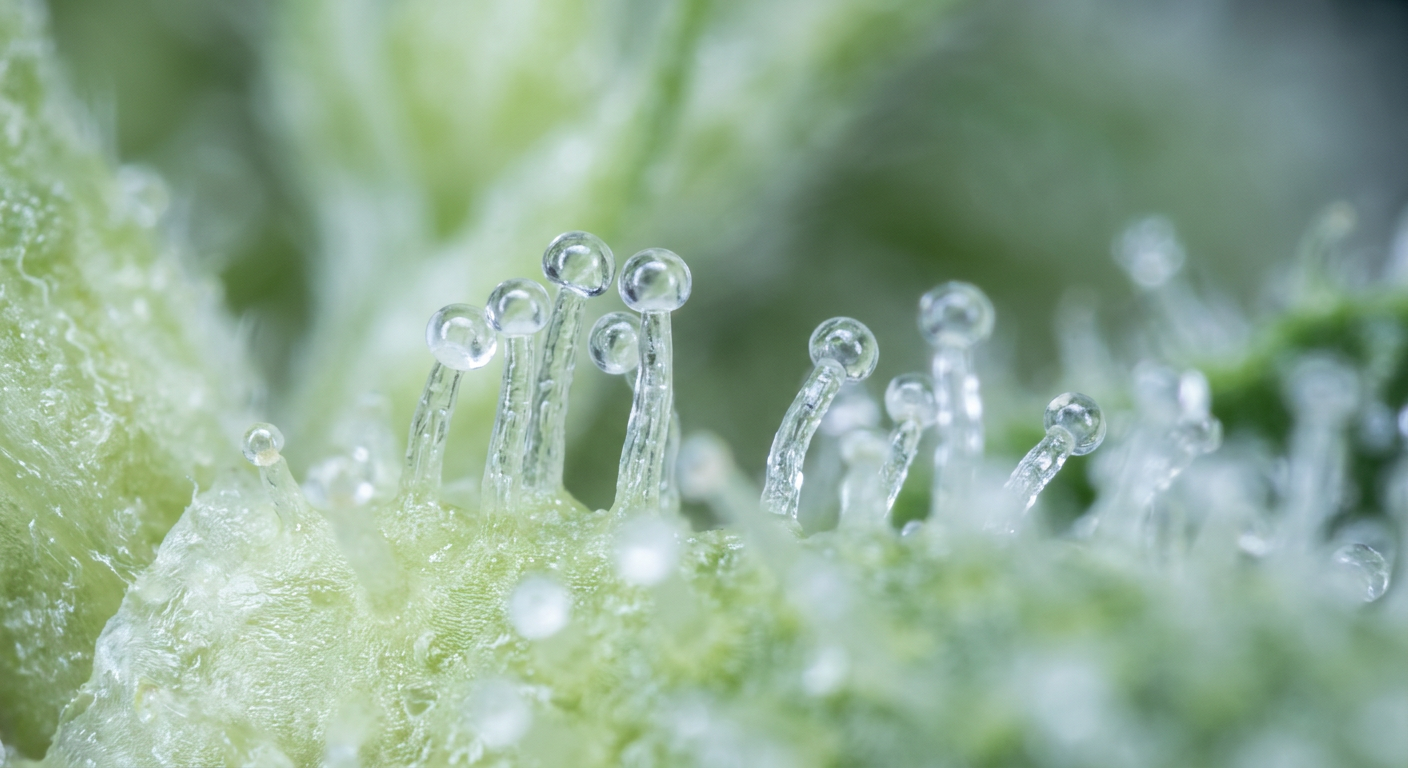
When it comes to harvest, don't guess — use trichome color to determine peak potency. Our When to Harvest guide walks you through clear milky/amber trichome stages with photos of exactly what to look for.
Final takeaway: A completed first cannabis grow checklist gives you one thing money can't buy — confidence. When you germinate knowing your environment is stable, your pH is dialed, your genetics are right for your space, and your equipment is all present and functional, you're already ahead of 80% of first-time growers.
Frequently Asked Questions
What do I need for my first cannabis grow?
For your first indoor cannabis grow you need: seeds, a grow tent, a grow light, an inline fan and carbon filter, growing medium, nutrients, pots, a pH meter, an EC/TDS meter, a timer, a thermometer/hygrometer, and a watering can. Budget around $300–$500 for a functional setup using the budget tier in this checklist. Use the free Grow Cost Calculator to total your exact spend before purchasing.
How much does a beginner cannabis grow setup cost?
A budget beginner setup costs $300–$575. A mid-range setup runs $600–$1,030. A premium first-grow setup can reach $1,070–$1,950. The grow light accounts for the largest single cost variable — choosing a quality full-spectrum LED is the upgrade with the highest impact on yield quality at every budget tier.
Should a first-time grower use autoflower or feminized seeds?
Autoflower seeds are the easiest starting point for most beginners. They don't need a light schedule change to trigger flowering, finish in 70–90 days from seed, and tolerate beginner mistakes better than photoperiod plants. Feminized photoperiod seeds offer more control over plant size and tend to produce heavier yields — they're worth choosing once you've completed one autoflower grow and understand the basics.
What size grow tent is best for a first-time grower?
A 2×4 ft (60×120 cm) tent is the near-universal recommendation for first-time indoor growers. It fits 2–4 plants comfortably, accepts standard 200–300W LED fixtures, and keeps costs manageable while producing a meaningful harvest. A 2×2 ft tent works in very tight spaces but restricts both plant count and yield significantly.
When should I order my seeds relative to setting up my grow?
Order your seeds in Week 1 — the same week you order your tent and light. Seeds can take 3–14 days to arrive depending on location and shipping method, so ordering them early ensures they arrive before your environment is fully ready, not after. Store seeds in a sealed container in a cool, dark, dry location until germination day.